

Have you ever looked at an ordinary household object and wished you could give it a completely different look without spending money on something new? Decoupage is a wonderful way to do exactly that. Using decorative paper, napkins, fabric scraps, and a little adhesive, you can turn simple everyday items into beautiful handmade decorations. From old glass jars and wooden trays to flower pots and picture frames, there are countless ways to experiment with patterns and colors. Whether you’re a beginner or already enjoy crafting, these 25 decoupage ideas will give you plenty of inspiration for your next creative afternoon.
1. Floral Decoupage Wooden Tray

An ordinary wooden tray can become a beautiful decorative accessory with a little floral paper and decoupage glue. Choose a tray with a flat surface and lightly sand away rough areas before painting it with white, cream, or pale sage acrylic paint. Once dry, select a decorative napkin featuring roses, wildflowers, or leafy botanical patterns.
Separate the printed napkin layer and arrange the design across the tray. Apply a thin layer of decoupage adhesive, gently position the paper, and smooth it with a soft brush. Allow everything to dry before applying a protective topcoat suitable for the intended use.
You can leave the edges in a natural wood finish or paint them a coordinating color. Small brass handles also add a lovely finishing detail. Use your decorated tray to display candles, hold coffee cups, or organize small accessories. If you plan to serve food directly on it, use a food-safe surface rather than assuming ordinary decoupage sealer is suitable.
2. Vintage Decoupage Glass Jars

Before throwing away empty glass jars, think about how useful they could become with a little decoration. Decoupage gives plain jars an entirely different appearance and turns them into attractive storage containers for craft supplies, cotton pads, or decorative accessories.
Start by washing the jars thoroughly and removing any labels or sticky residue. Dry the glass completely before applying your chosen napkin or thin decorative paper. Vintage illustrations, small flowers, and old-fashioned botanical patterns work especially well for this project.
Apply decoupage medium to the outside of the jar and gently position your paper design. Smooth away wrinkles with a soft brush, taking extra care around curved areas. Once dry, seal the decoration with a compatible clear finish.
For an extra decorative touch, wrap jute twine around the neck or attach a small wooden bead. You can also combine several jars in different sizes to create a coordinated storage collection. Keep decorated jars for dry storage or display rather than placing them in water or a dishwasher.
3. Decorative Decoupage Flower Pots

Plain terracotta pots are affordable, but their simple appearance doesn’t always match the style of your home. Decoupage can turn them into charming decorative planters with very little effort.
Choose lightweight napkins with floral, butterfly, or leafy patterns. Before decorating, clean the outside of each pot and remove loose dust. A thin coat of white acrylic paint can create a brighter background for your paper design, especially when working with light-colored napkins.
Cut small sections of the printed design and arrange them around the pot. Apply decoupage adhesive and carefully smooth the paper over the curved surface. Smaller pieces are usually easier to handle than one large sheet, particularly around the rim.
After drying, apply a compatible protective finish to the outside. You can decorate several pots using different sections of the same napkin collection for a coordinated windowsill display. Keep the drainage holes clear, and avoid placing ordinary paper decorations inside the pot where they will come into contact with wet soil.
4. Upcycled Decoupage Picture Frames

An old picture frame can become a lovely decorative feature instead of sitting forgotten in a drawer. Decoupage is especially suitable for wooden frames because their flat borders provide plenty of room for small decorative patterns.
Begin by removing the glass and backing. Lightly sand the frame if the surface is rough, then apply a base coat of acrylic paint. Cream, dusty blue, pale pink, and sage green are beautiful choices for vintage-inspired designs.
Cut your decorative paper into narrow strips or individual floral shapes. Apply adhesive to one section at a time and position the paper carefully around the frame. Use smaller pieces around corners and narrow edges to avoid excessive wrinkles.
Once dry, seal the frame with a compatible clear coating. You can add a small ribbon or painted details to the corners for extra character. Display a favorite photograph inside or create a matching collection of frames for a gallery wall. Different patterns can look beautiful together when they share a similar color palette.
5. Decoupage Decorative Wooden Coasters

Wooden coasters are small enough to decorate in a short crafting session, making them a lovely beginner project. Their compact surfaces also give you an opportunity to experiment with different napkin patterns without committing to a large design.
Start with unfinished wooden coaster blanks. Sand the surfaces lightly and apply a thin coat of white acrylic paint. Once dry, cut out decorative flowers, leaves, or geometric patterns from your chosen napkins.
Apply the printed paper using decoupage medium and smooth it gently with a soft brush. Let the design dry completely before applying several thin protective coats of a finish suitable for occasional surface contact.
You can make a matching set using one napkin design or give each coaster a different pattern. For a coordinated appearance, repeat the same background color throughout the collection.
Add small felt pads underneath to help protect your furniture from scratches. Keep in mind that ordinary decoupage coatings may not withstand hot mugs or standing water, so choose a suitable protective finish and avoid prolonged exposure to moisture.
6. Floral Decoupage Jewelry Box
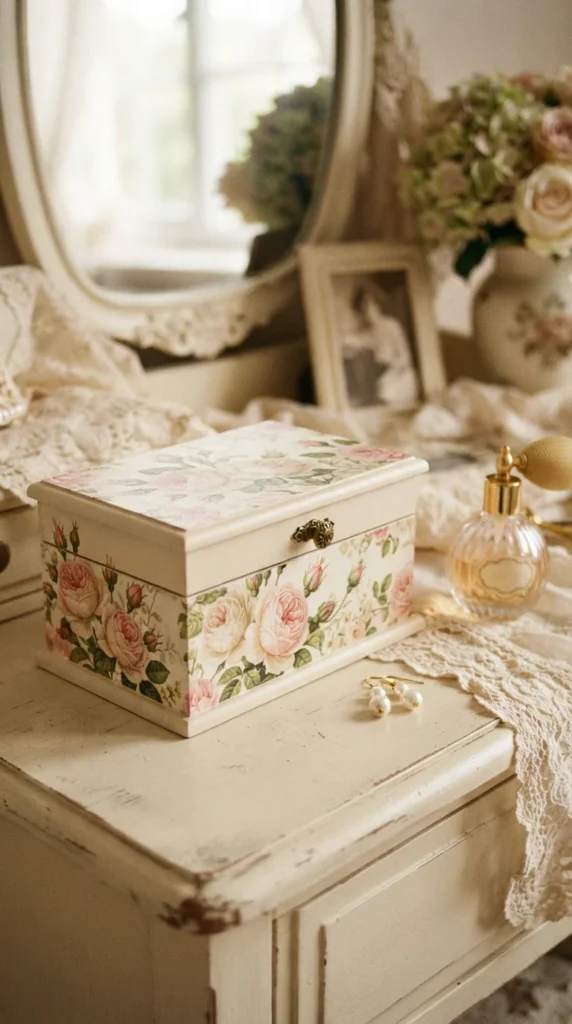
A plain wooden jewelry box can become a beautiful keepsake with decorative napkins and a little patience. Floral designs are especially pretty because they create a delicate appearance without requiring complicated painting skills.
Begin by removing the hardware if possible. Lightly sand the wooden surface and apply a coat of acrylic paint in a coordinating shade. Once the paint is dry, choose a napkin featuring roses, small wildflowers, or vintage botanical illustrations.
Cut the paper into sections that fit the lid and sides. Apply decoupage adhesive and gently smooth the printed layer into position. Pay attention to the corners and edges, where extra paper can create unwanted folds.
After the decoration dries, apply a protective clear finish. You can replace the original knob with a small decorative handle for a more polished appearance.
For the inside, use soft fabric or velvet-style lining to create a pretty place for rings, necklaces, and earrings. This project also makes a thoughtful handmade birthday or holiday gift.
7. Decoupage Candle Holders

Glass candle holders are another simple item that can benefit from decorative paper designs. Small botanical illustrations, soft pastel flowers, and vintage patterns can turn inexpensive holders into attractive decorative pieces.
Clean the outside of your glass holders and allow them to dry completely. Cut out small sections of thin decorative paper and arrange them around the exterior. Apply a compatible glass decoupage medium and smooth the paper gently.
Once dry, add a suitable clear protective coating if the product instructions allow it. Keep the decoration on the outside and away from areas exposed to heat or an open flame.
For safety, use battery-operated LED candles with decorated holders rather than placing a burning candle close to paper or adhesive. This gives you the cozy appearance of candlelight without exposing the decorative materials to a flame.
Arrange several holders together on a dining table, shelf, or mantel. Using different heights and coordinating patterns creates an attractive display that works throughout the year.
8. Decoupage Serving and Display Plates

A plain glass plate can become an attractive decorative accent with a patterned paper design. This project is especially lovely when you want to create a seasonal display or decorate a dining room shelf.
For a decorative plate, consider applying the paper to the underside of a clear glass plate. This allows the design to show through the glass while remaining separate from the upper display surface. Clean the glass thoroughly and make sure it is completely dry before beginning.
Arrange your chosen napkin pattern, then follow the instructions for a glass-compatible decoupage medium. Apply the printed paper carefully, smoothing it as you work. Once dry, protect the decorated underside with an appropriate finish.
Vintage flowers, delicate blue patterns, and gold-inspired botanical illustrations are beautiful choices. Display your finished plate on a stand or use it as a decorative centerpiece.
This is a decorative craft, not a food-serving project. Keep the decorated surface away from direct food contact and washing water.
9. Patterned Decoupage Storage Boxes

Storage boxes are useful in almost every room, but plain cardboard containers can look a little dull. Decorative paper gives them a more personal appearance while allowing you to reuse boxes you already own.
Choose sturdy cardboard, wooden, or paper-mache boxes. Clean the surface and apply a suitable adhesive before positioning your decorative paper. For larger boxes, work one side at a time to keep the paper smooth.
Floral napkins, geometric prints, vintage maps, and colorful illustrations are all suitable options. If you’re decorating several boxes, use related patterns to create a coordinated collection.
Once the adhesive has dried, seal the exterior with a compatible protective coating. You can also add small ribbon handles or decorative knobs to wooden boxes.
Use the finished containers for stationery, sewing supplies, photographs, craft tools, or small household accessories. Different sizes can be stacked together on shelves to create an organized and attractive display.
10. Decoupage Wooden Spoons for Kitchen Display

Old wooden spoons with worn handles can become pretty decorative accessories through a simple decoupage project. This idea works best with spoons intended for display rather than cooking.
Clean and dry the spoons thoroughly. Lightly sand the handles and apply a suitable base coat if you want a lighter background. Select small decorative paper patterns that fit neatly around the handle without covering the working end.
Cut the design into narrow strips or small floral shapes. Apply decoupage adhesive to the handle and carefully position the paper. Use a soft brush to smooth it without stretching or tearing the material.
Once dry, apply a compatible protective coating to the decorated handle. You can also add painted dots or a coordinating ribbon around the top.
Display the spoons inside a ceramic jar or hang them from decorative kitchen hooks. Avoid using paper-covered spoons for food preparation, washing, or direct food contact. They work best as decorative pieces in a farmhouse-inspired kitchen.
11. Decoupage Notebook Covers

A plain notebook can become a personalized stationery accessory with a little decorative paper. This is a lovely project for students, journal lovers, and anyone who enjoys collecting pretty notebooks.
Start with a notebook that has a firm cover. Choose thin decorative paper, floral napkins, or lightweight printed tissue. If the cover is glossy, lightly prepare the surface according to the adhesive manufacturer’s instructions.
Apply a thin coat of suitable decoupage medium and position the paper carefully. Smooth it from the center outward, paying attention to the corners and spine. Let the cover dry completely before adding a protective coating.
You can decorate the entire cover or create a small floral arrangement in one corner. A contrasting ribbon bookmark or decorative elastic band can complete the look.
Try making a matching set with different patterns from the same paper collection. These notebooks are also lovely handmade gifts for birthdays, teachers, and friends who enjoy journaling.
12. Decoupage Terracotta Candle Jars
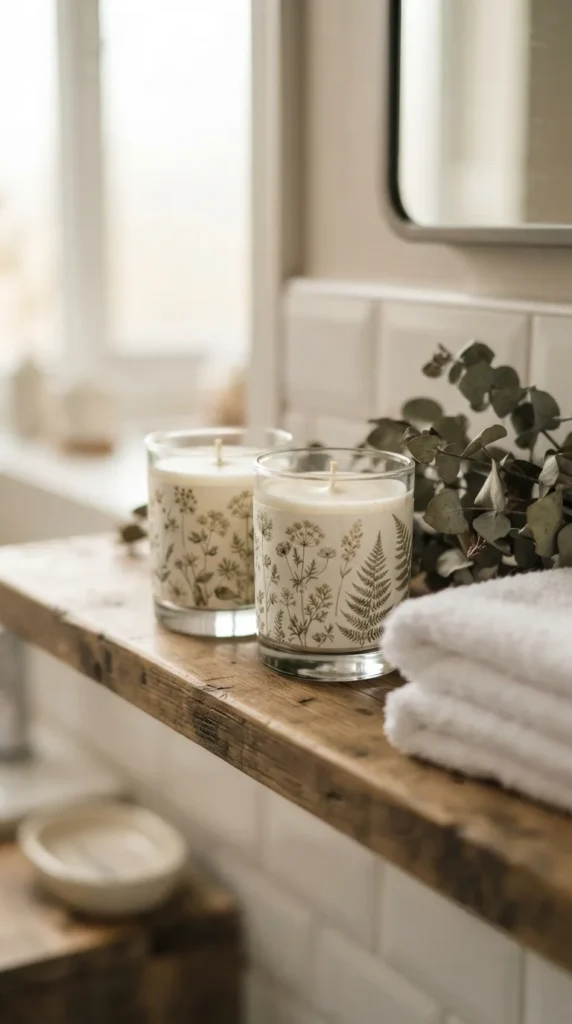
Empty candle jars often have attractive shapes that make them worth keeping. Instead of discarding them, you can decorate the exterior with delicate paper patterns and use them as decorative containers.
Remove leftover wax and labels, then clean the glass thoroughly. Make sure the jars are completely dry before applying any decorative material.
Choose small botanical illustrations, vintage floral napkins, or simple neutral patterns. Apply a thin coat of glass-compatible decoupage adhesive and position the paper on the outside. Smooth gently and allow the adhesive to dry.
Once complete, seal the decoration with a suitable clear finish. You can add a narrow jute ribbon or a small decorative charm around the rim.
Use the jars to hold makeup brushes, cotton pads, hair accessories, or craft supplies. If you want to reuse them as candle containers, keep all paper and adhesive away from heat and flame. Decorative storage is the simplest way to enjoy this project.
13. Decoupage Wooden Wall Letters

Wooden letters are popular for bedroom decor, nursery styling, and personalized gifts. Decorating them with decoupage paper gives them color and pattern without requiring detailed hand painting.
Choose unfinished wooden letters in the size you prefer. Sand rough edges and apply a light acrylic base coat. Allow the paint to dry before selecting decorative paper.
For a neat result, cut the paper slightly larger than the front of each letter. Apply decoupage adhesive, position the paper, and gently smooth it across the surface. Once dry, use fine sandpaper carefully along the edges to remove excess paper.
You can use the same pattern for every letter or combine several coordinating prints. Floral designs look pretty for bedroom decor, while stars, geometric patterns, and colorful illustrations work well for children’s rooms.
Finish with a compatible clear coating and display the letters on a shelf or attach suitable hanging hardware. This is also a fun way to personalize a handmade gift.
14. Decoupage Mason Jar Organizers

Mason jars are useful for organizing small objects, but they can also become part of your room decor. With decoupage, you can turn plain jars into coordinated organizers for your desk, craft room, or dressing table.
Start by cleaning the jars and removing any labels. Select lightweight decorative napkins that match your workspace. Small flowers, pastel geometric prints, and botanical illustrations are good options.
Apply decoupage medium to the exterior and position your chosen paper design. You can cover the entire jar or decorate only a small section. Allow the adhesive to dry before applying a compatible protective coating.
For an extra detail, paint the metal lids in a coordinating color or add a narrow ribbon around the jar opening.
Use one jar for pens, another for paintbrushes, and a third for scissors or other small supplies. Grouping them together creates a coordinated storage area while keeping frequently used tools within reach.
15. Decoupage Wooden Serving Boards

A wooden serving board can make a beautiful decorative kitchen accessory when decorated with a paper design. This project is particularly attractive with botanical illustrations, vintage fruit prints, or delicate floral patterns.
Choose a board with a smooth handle or border area. Clean it thoroughly and lightly sand any rough spots. Decide where you want the decorative paper to appear before applying adhesive.
For a decorative display board, apply your selected pattern to the handle or outer edges. Keep the central food-contact area free from paper and ordinary decoupage products. Apply the adhesive carefully, smooth the design, and allow it to dry completely.
Once dry, use a compatible protective finish for the decorated areas. You can also paint the handle in a coordinating shade for a more finished appearance.
Display the board against a kitchen backsplash or hang it on a decorative hook. If the board is intended for food use, keep it separate from food preparation and choose materials specifically rated for that purpose.
16. Decoupage Ceramic Flower Vases

A simple ceramic vase can become a beautiful focal point with floral decoupage. Even an inexpensive vase from a home store can look more personal when decorated with a pattern that suits your room.
Clean the exterior and remove any dust or oily residue. If the surface is very glossy, prepare it according to the instructions for your chosen adhesive. Apply a compatible base coat if you want the paper colors to appear brighter.
Cut out individual flowers, leaves, or small decorative sections. Arrange them around the vase before applying adhesive. This helps you decide where each part belongs and prevents unnecessary handling while the glue is wet.
Use a soft brush to attach the paper, working slowly around the curved surface. Smaller sections are easier to apply than one large sheet.
After drying, seal the design with a suitable clear coating. Since ordinary decoupage finishes are not waterproof, use the vase with dried or artificial flowers unless the product is specifically rated for water exposure. It looks lovely on a shelf or entryway table.
17. Decoupage Wooden Drawer Knobs
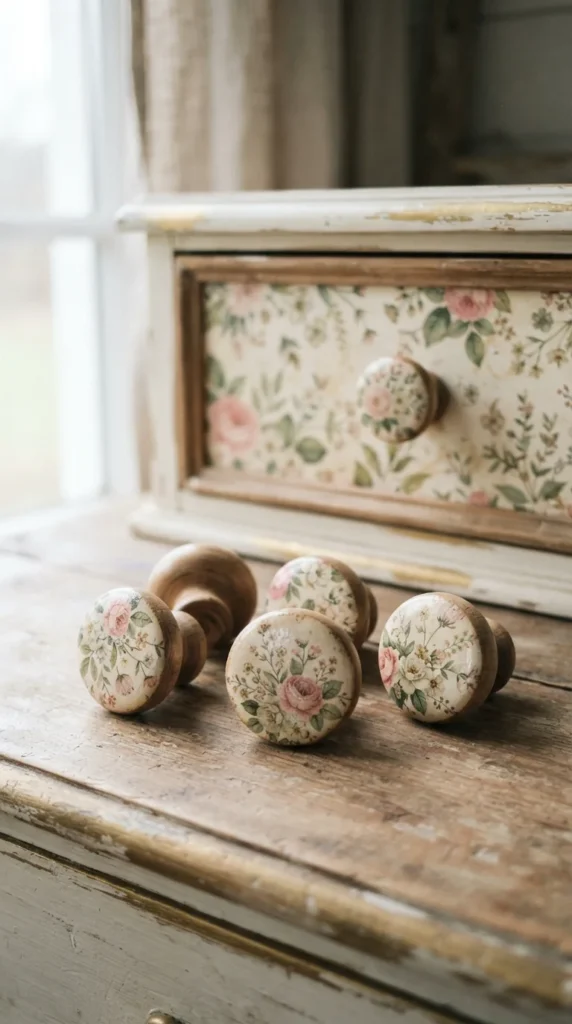
Small wooden drawer knobs offer an easy way to introduce decorative patterns into a bedroom or craft room. Because they have compact surfaces, they are a good choice for using leftover pieces of decorative napkins.
Remove the knobs from the drawer before decorating. Lightly sand the front surface and apply a thin coat of white acrylic paint. Once dry, cut small circles or floral shapes from your chosen paper.
Apply decoupage adhesive and carefully position each design on the front of the knob. Use a small soft brush to smooth the paper around the curved surface. Allow everything to dry before adding a compatible protective coating.
You can use identical patterns across all the knobs or choose different flowers from the same napkin design. For a coordinated furniture makeover, match the colors to the dresser’s painted finish.
Reattach the knobs once the finish has fully cured. This small project can give an old dresser, bedside cabinet, or craft cupboard a completely different appearance without replacing the furniture.
18. Decoupage Plant Markers

If you enjoy growing herbs or keeping small indoor plants, decorative plant markers are a fun craft project. Instead of using plain wooden sticks, you can create attractive markers with small paper illustrations.
Start with unfinished wooden markers or craft sticks. Paint them with a light acrylic color and allow them to dry. Choose small botanical images, flowers, or leaf patterns from decorative napkins.
Apply decoupage adhesive to the upper section of each marker and position the paper carefully. Smooth it with a small brush, taking care around the narrow edges. After drying, apply a compatible protective finish.
Keep the lower section undecorated so it can be placed in the soil without exposing the paper design to moisture. If the markers will be used outdoors, ordinary decoupage finishes may not withstand weather conditions, so use an appropriate exterior-rated coating.
Arrange the markers in herb pots on a kitchen windowsill or create a small collection for a decorative indoor garden. You can add handwritten plant names to a separate blank area if desired.
19. Decoupage Clipboard Makeover
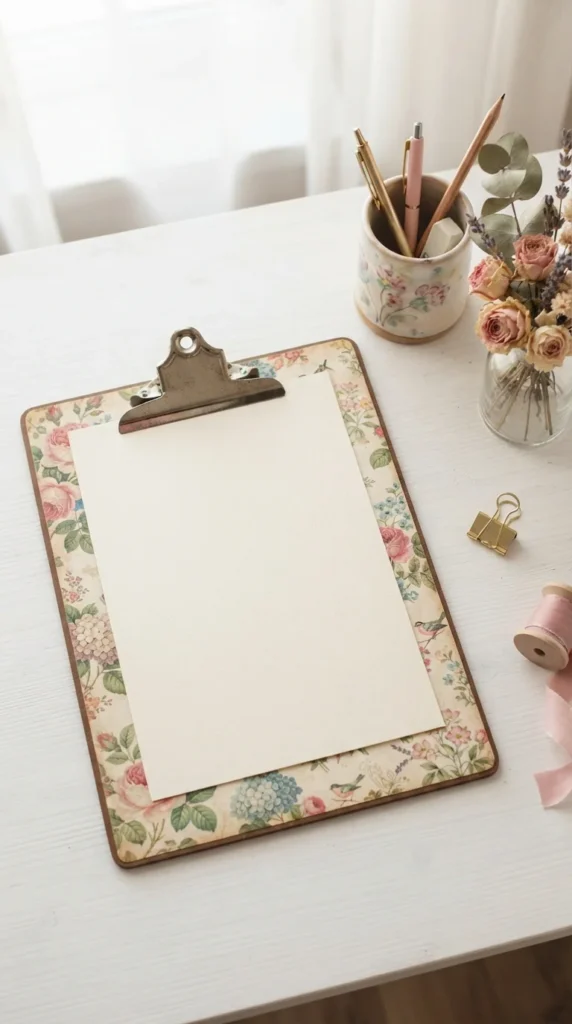
A basic clipboard doesn’t have to look like an ordinary office accessory. Decorating its wooden backing with patterned paper creates a pretty workspace item that is both useful and personal.
Begin by removing the metal clip if it can be detached easily. Clean and lightly sand the backing board, then apply a thin coat of acrylic paint. Cream, pale pink, and muted blue make lovely backgrounds for floral prints.
Cut your decorative paper to fit the board, leaving a little room around the edges. Apply decoupage adhesive and smooth the paper from the center toward the corners. Allow it to dry completely before sealing.
Reattach the metal clip once the coating has cured. You can also add a ribbon loop at the top for hanging.
Use the finished clipboard for shopping lists, daily notes, recipes, or study materials. A coordinated design can also make several clipboards look attractive when displayed together in a home office or craft room.
20. Decoupage Decorative Wooden Clocks

A plain wooden clock can become a decorative wall accessory with a patterned paper makeover. This idea works particularly well with floral illustrations, muted botanical prints, and vintage-inspired designs.
Choose a wooden clock blank with a removable clock mechanism. Remove the hands and mechanism before decorating so you can work safely around the central opening.
Apply a suitable base coat to the wooden face and allow it to dry. Arrange your selected napkin pattern around the clock, leaving enough space for the numbers and hands. You can use small decorative sections rather than covering the entire surface.
Attach the paper with decoupage adhesive and smooth it gently. Once dry, apply a compatible protective coating. Reinstall the mechanism and hands after the finish has fully cured.
For a balanced appearance, keep the pattern around the outer edge and use simple clock numbers. Floral patterns can make the clock look like a handmade vintage decoration that suits a bedroom, kitchen, or reading corner.
21. Decoupage Tissue Box Covers
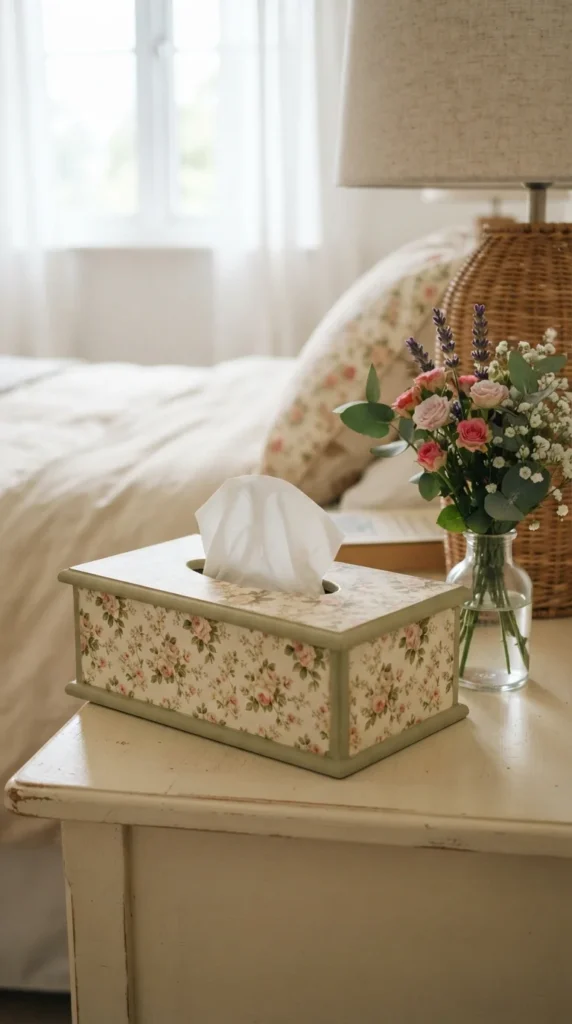
A tissue box is something most households use every day, but its ordinary cardboard packaging may not match your interior decor. A wooden tissue box cover decorated with decoupage can turn it into a pretty room accessory.
Choose a wooden cover that fits your tissue box. Lightly sand the surface and apply a base coat of acrylic paint. Select decorative napkins with a pattern that matches your bedroom, bathroom, or living room.
Cut the paper into sections for the top and sides. Pay special attention to the opening, where you may need to trim the paper neatly around the edges. Apply decoupage adhesive and smooth each section carefully.
Once dry, seal the entire exterior with a compatible clear finish. You can paint the bottom edges in a coordinating color or add a small decorative border.
Place the cover over a standard tissue box and display it on a bedside table, bathroom shelf, or living room console. Making two matching covers is a lovely way to create a coordinated look across different rooms.
22. Decoupage Wooden Birdhouses
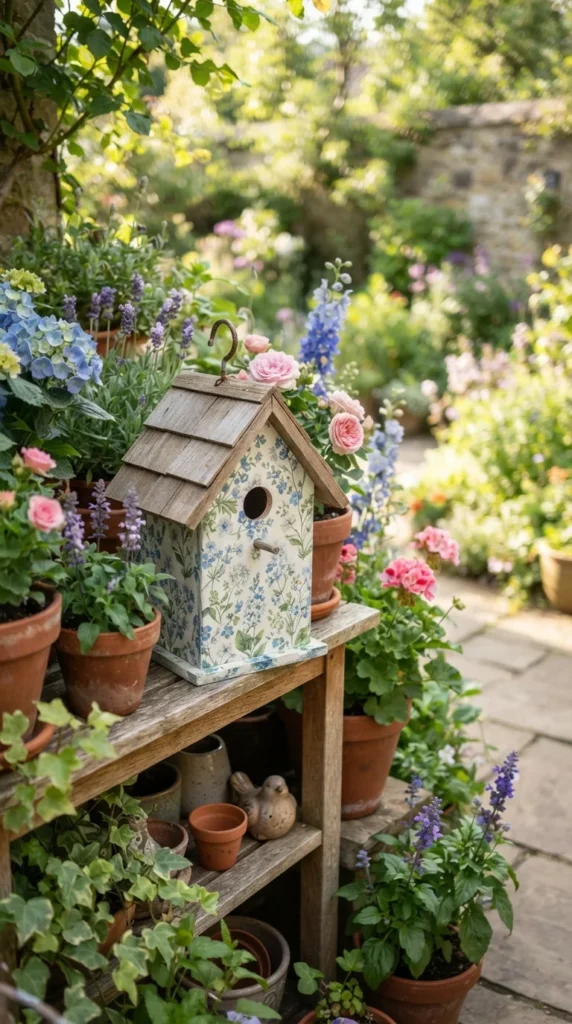
A small wooden birdhouse can become an attractive garden decoration with floral napkins and a little paint. This project is especially pretty when you use soft colors that complement outdoor plants.
Start with an unfinished decorative birdhouse. Clean the wood and sand any rough areas. Apply a base coat to the sections you plan to decorate, leaving the roof and some natural wood details exposed if you prefer a rustic appearance.
Cut small sections of decorative paper and arrange them around the sides. Use floral napkins, tiny leaves, butterflies, or botanical illustrations. Apply adhesive carefully and smooth the paper around the corners.
Once the design is dry, protect it with a suitable exterior-rated finish if the birdhouse will be displayed outdoors. Regular indoor decoupage products may not withstand rain or direct sunlight.
For an actual birdhouse, keep the entrance and interior free from decorative materials, paint residues, and unsuitable coatings. You can also use it as a purely decorative shelf accessory indoors, where the paper design will remain protected for longer.
23. Decoupage Photo Storage Albums
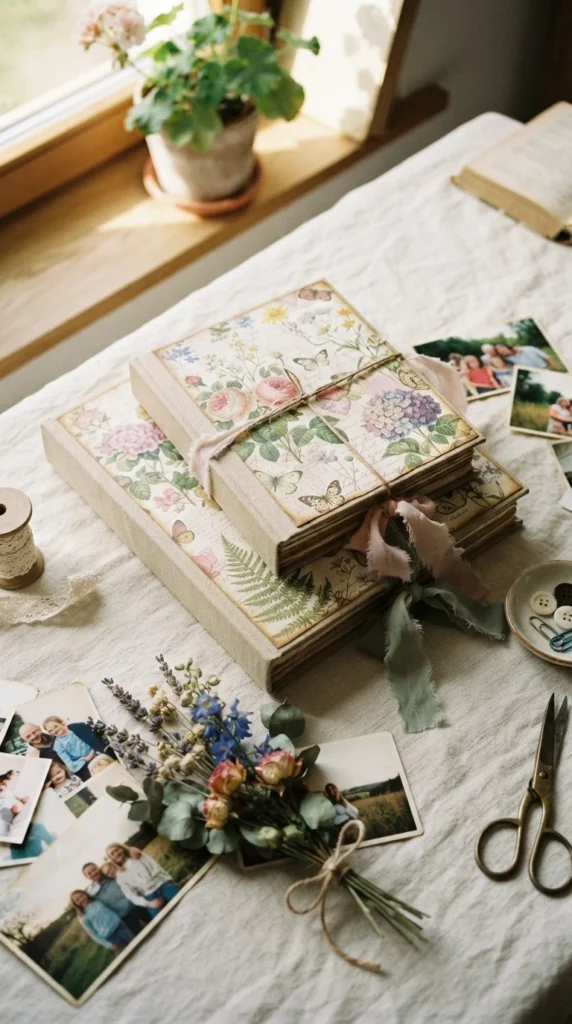
Old photo albums and plain scrapbook covers can become beautiful memory keepsakes with a little decorative paper. This project is a lovely choice when you want to personalize family albums or create a handmade gift.
Choose an album with a sturdy hard cover. If the original cover is glossy, prepare it according to the instructions for your adhesive. Select a napkin or decorative paper that reflects the theme of your photographs.
Vintage flowers work beautifully for wedding albums, while pastel patterns and botanical illustrations suit family memories. Apply the adhesive in a thin layer and position the paper carefully. Smooth it from the center outward, paying special attention to the spine and corners.
Once dry, add a compatible clear protective finish. You can also attach a narrow satin ribbon, a small fabric bow, or decorative corner details.
Use the finished album for holiday photographs, travel memories, family celebrations, or everyday snapshots. Making a matching set of albums can create a beautiful display on a bookshelf while keeping your favorite photographs organized.
24. Decoupage Decorative Light Switch Covers
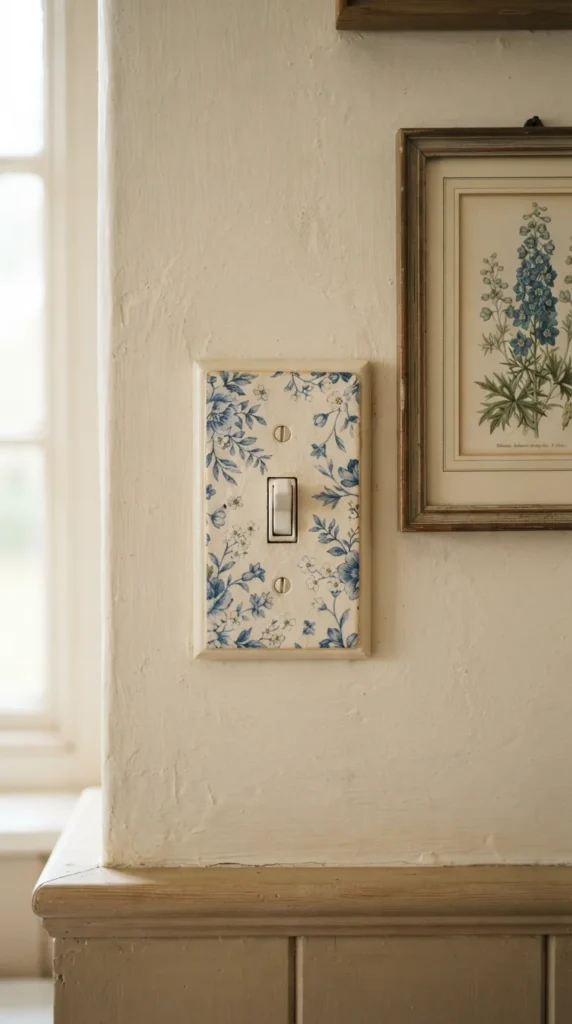
Small decorative details can make a room feel more coordinated, and a patterned switch cover is one way to introduce a little handmade style. This project works best with removable wooden or decorative covers designed specifically for crafting.
Always remove the cover from the wall before decorating. Never apply paper, glue, or paint directly to an installed electrical switch or outlet. If you are unsure how to remove the cover safely, ask a qualified person for help.
Clean the detached cover and lightly sand its surface if necessary. Apply a suitable base coat, then cut your chosen floral or geometric paper to fit the front. Use decoupage adhesive and a small brush to smooth the design around the edges.
Keep all paper, adhesive, and decorative materials away from screw holes, electrical openings, and areas that could interfere with fitting. Once fully dry, use an appropriate protective coating and reinstall the cover safely.
A coordinated design can look lovely alongside matching picture frames or wall decorations.
25. Decoupage Decorative Wooden Signs

Wooden signs are a wonderful way to bring a handmade touch to your walls, shelves, and entryway. Decoupage allows you to decorate them with detailed patterns without painting every little flower or illustration by hand.
Choose a small unfinished wooden board and sand the surface until smooth. Apply a base coat of acrylic paint in a color that complements your decorative paper. Cream, sage green, dusty blue, and pale pink are all lovely choices.
Select a napkin featuring vintage roses, botanical illustrations, birds, or small wildflowers. Cut out the design and arrange it across the board. Apply decoupage adhesive, gently smooth the paper, and allow the surface to dry.
For a distressed farmhouse look, lightly sand the painted edges after the paper has been secured. Finish with a compatible protective coating and attach suitable hanging hardware if you want to display the sign on a wall.
You can also create a matching pair using different sections of the same napkin. Display them on a shelf, entryway table, or craft room wall for a coordinated handmade decoration.
Final Thoughts
Decoupage is a wonderful way to give ordinary household objects a more personal appearance without buying expensive decorations. From floral wooden trays and glass jars to picture frames, storage boxes, and handmade wall signs, these 25 projects offer plenty of ways to experiment with decorative paper and simple craft supplies. Start with one small project, use patterns you already love, and gradually try different surfaces as your confidence grows. Save this list to your Pinterest DIY board and choose your favorite decoupage project for your next crafting afternoon!

Lily Summers is a digital artist and creative storyteller who loves bringing colorful characters to life. With a passion for cartoons, fan art, and playful sketches, she inspires others to explore their imagination through art. When she’s not sketching, you’ll find her dreaming up new ideas for CraftedWizard.com to spark creativity in every artist. 🌈✨