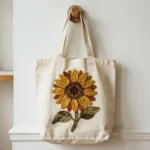
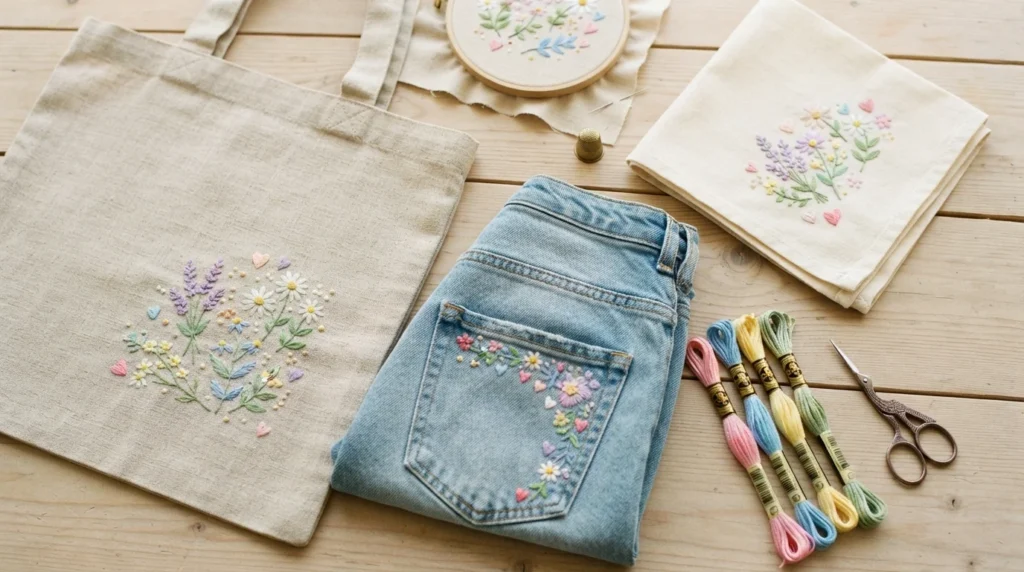

A plain tote, a denim pocket, or a set of napkins turns into something personal with just a few well-placed stitches. You don’t need to draw well or own a drawer full of supplies to get started. These 27 designs use basic stitches like the backstitch, French knot, and satin stitch, and most take under an hour. Pick one that suits your fabric, mark it lightly, and stitch a little each evening.
1. Tiny Daisy Cluster

Daisies are the friendliest place to start. Each petal is a lazy daisy stitch, which is a small loop of thread held down with a tiny anchor stitch. Work six to eight petals in a circle, then fill the middle with two or three French knots in yellow.
Group three daisies at slightly different sizes so the cluster looks natural. Leave a little space between them and add a few short green straight stitches as leaves. Use two strands of floss for petals and three for the center so the knots stand up nicely.
This design works on napkins, pillowcase corners, and tote bags. If you stitch on a stretchy shirt, press a piece of iron-on stabilizer to the back first. It keeps the fabric from puckering and makes the petals sit flat.
2. Wildflower Stem Sprig
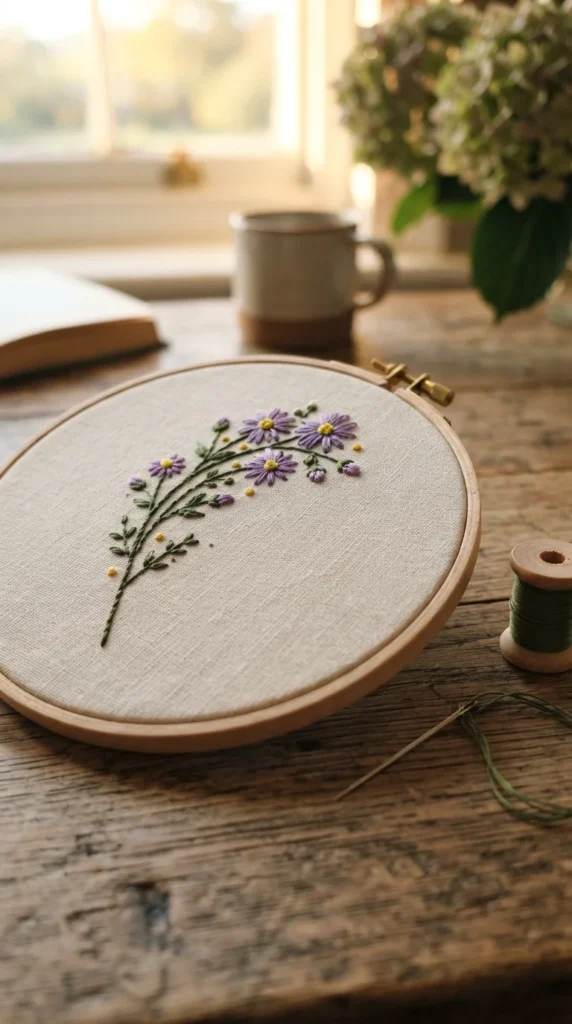
A single sprig has a quiet, elegant look. Start with the stem, using a stem stitch in medium green to draw a gentle curve. This stitch twists slightly as it goes, which gives the line a natural, plant-like texture.
Add small blooms along the stem with lazy daisy stitches in lavender or soft pink. Place them in pairs on alternating sides and make the buds near the top smaller. A few tiny leaves made from single straight stitches finish the look.
Sprigs are perfect for the cuff of a sleeve, the hem of a linen skirt, or the edge of a handkerchief. Draw your stem with a water-soluble pen, then stitch right over the line. A quick dab of water erases any marks that peek through.
3. Initial Monogram in Backstitch
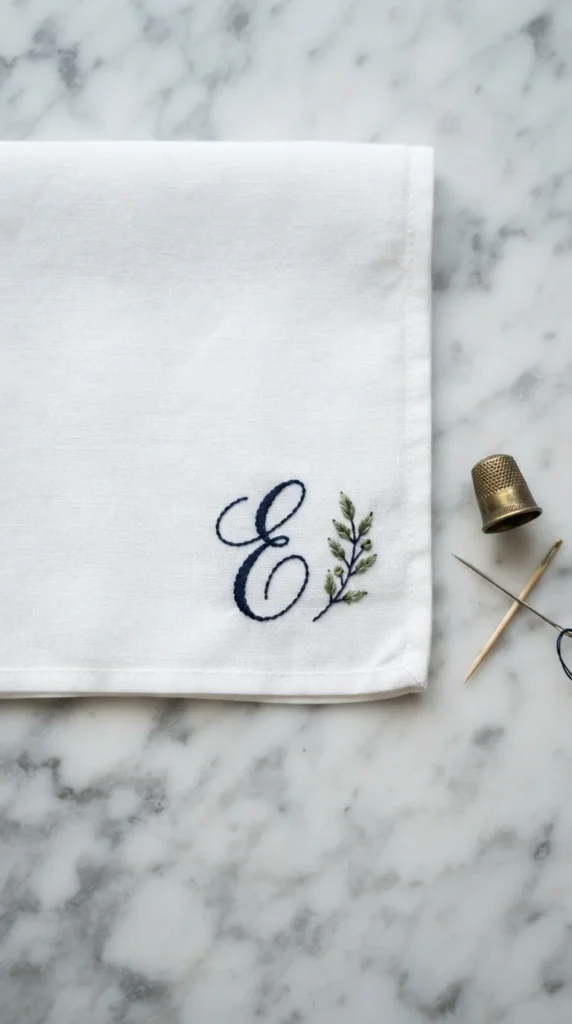
A single initial makes plain fabric feel custom-made. Choose a simple script or block letter, print it at the size you want, and trace it onto your fabric with a light pencil or transfer pen. Keep the shape bold enough that your stitches can follow it easily.
Use a backstitch with two strands of floss, and keep each stitch short, around an eighth of an inch. Shorter stitches follow curves smoothly, while long ones make letters look jagged. Stitch the curved parts first, then fill in the straight lines.
For extra charm, add a tiny leaf or heart next to the letter. Monograms look lovely on towels, tote bags, pajama pockets, and baby blankets. White thread on navy fabric or navy thread on white always reads clean and classic.
4. Single Line Leaf Branch

This design is as simple as it sounds. Draw one long branch with a gentle curve and add eight to twelve leaves along it. Stitch the branch in backstitch, then make each leaf with a single straight stitch or a small detached chain stitch.
Alternate the leaves from side to side, and keep them slightly different in length. Perfect symmetry looks stiff, but small variations look like real foliage. One color of thread is enough, though two shades of green add a bit of depth.
A branch looks beautiful running diagonally across a tote bag or curving along the front of a sweatshirt. Because the design uses so little thread, it’s a great way to use up leftover floss. Tie off neatly on the back so the tails never show through lighter fabrics.
5. Mini Strawberry Patch

Strawberries are a joy to stitch because the shape is so forgiving. Outline a rounded heart shape and fill it with satin stitch in red, working from one side to the other so the threads lie smooth and parallel.
Add the seeds after the fill is done. Use single tiny stitches in yellow or cream, spaced evenly across the berry. For the top, make three or four small green leaves with straight stitches that fan out from a center point.
Make a trio of berries in different sizes for a pretty little patch. They look wonderful on kitchen towels, aprons, and lunch bags. If your satin stitch looks uneven, outline the shape first with a split stitch. It creates a raised edge that keeps the fill neat and gives the berry a slightly rounded look.
6. Scalloped Collar Border
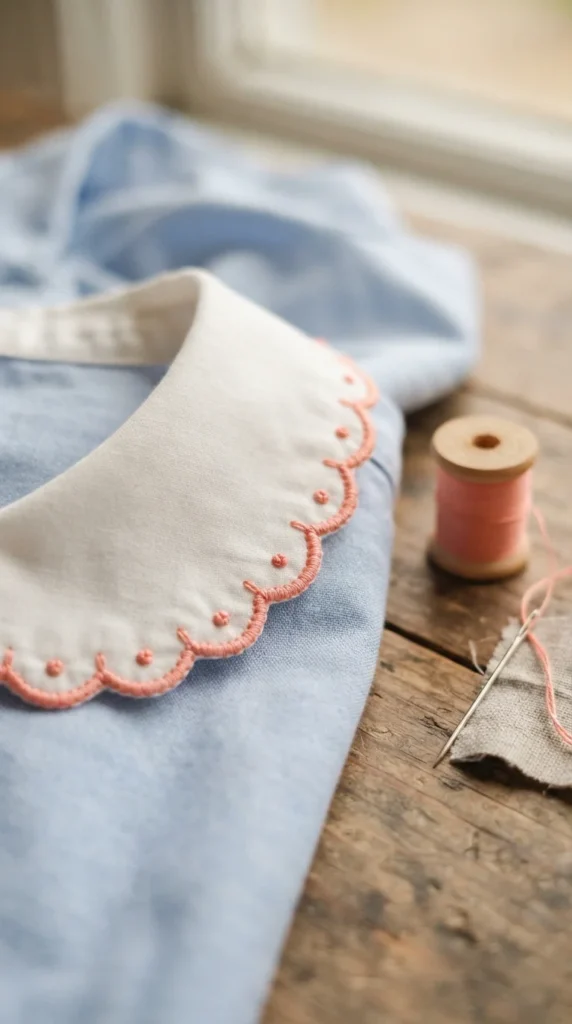
A scalloped border adds a sweet finishing touch to collars, sleeves, and hems. The blanket stitch is the easiest way to get that wavy edge, and it works well along a folded or finished fabric edge.
Bring your needle up just inside the edge, then loop the thread so each stitch hooks over the fabric border. For a true scallop look, make each stitch a slightly different length so the arches rise and fall. Keep your spacing even for a tidy rhythm.
Try it in a contrasting color, like coral on white or mustard on denim. You can add a tiny French knot inside each scallop for extra charm. This border is also lovely on pillowcases, linen napkins, and baby bibs, where the soft curve softens a straight edge.
7. Tiny Hearts in Satin Stitch

Little hearts are one of the quickest designs to finish. Draw a heart about half an inch wide, then fill it with satin stitch. Start in the center of the heart and work toward each side so the stitches angle naturally with the shape.
Take your time at the top dip of the heart. Pull the thread gently so it doesn’t pucker the fabric. If the shape looks lopsided, a backstitch outline underneath will tidy up the edges before you fill it in.
Stitch a row of hearts along a pocket, scatter a few across a sleeve, or place one on the chest of a baby onesie. Mix shades in the same color family for a soft, layered look. Each heart uses very little floss, so you can finish several in one sitting.
8. Sun and Rays

A sunshine design lifts the mood of any fabric. Start with a small circle in satin stitch, using golden yellow thread. Then add rays around the circle using straight stitches, alternating long and short for a lively starburst.
Keep the rays evenly spaced by marking them first, like the numbers on a clock. Place long rays at 12, 3, 6, and 9, then fill the gaps with shorter ones. Using two shades, such as yellow and orange, adds warmth.
This works well on kids’ clothes, canvas pouches, and beach bags. A bold sun looks great on dark fabric, where the bright thread really stands out. For a mini version, shrink the circle to the size of a button and use only eight rays. Even a small sun reads clearly from across the room.
9. Crescent Moon and Stars
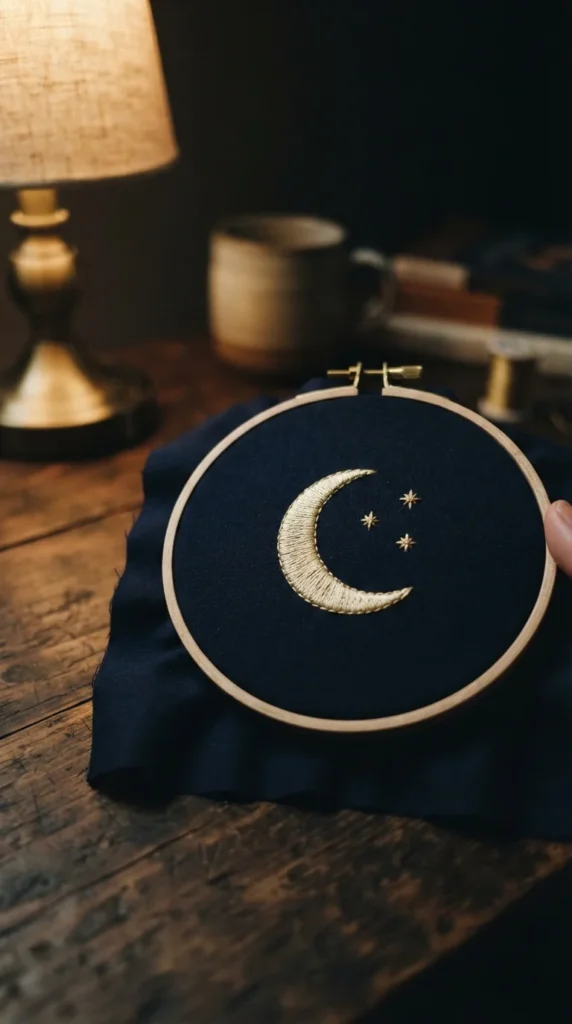
Moon and star designs look dramatic on dark fabric. Draw a crescent shape and fill it with satin stitch, stitching across the width of the curve so the thread follows its shape. Use cream, gold, or silver floss for a gentle glow.
Scatter three to five stars nearby. Make them with two crossed straight stitches, or add a third crossing stitch for an eight-point sparkle. A few French knots in between work as faraway stars.
This design looks beautiful on a black or navy tote, a sleep mask, or a pillowcase. Use a metallic thread if you want some shimmer, but stitch with shorter lengths because metallic floss tangles easily. A needle with a slightly larger eye also makes it easier to pull through.
10. Cross-Stitch Row Border

Cross-stitch borders bring a tidy, traditional charm to household linens. Each stitch is a small X made of two diagonal stitches, and a row of them forms a clean decorative band.
For even stitches on plain fabric, mark a pair of parallel lines with a ruler and a water-soluble pen, spaced about a quarter inch apart. Stitch every X between the lines so they all stay the same size. Make sure every top stitch slants the same direction.
Try alternating two colors for a simple pattern, such as red and navy. You can also skip a space between each cross for a lighter, airy look. These borders suit tea towels, table runners, and the hems of aprons. They are also a gentle way to practice tension, because any uneven stitch shows up clearly.
11. Pet Silhouette Outline

A pet outline is a thoughtful gift and a lovely keepsake. Pick a simple photo of a cat or dog in profile, trace the outline, and transfer it to your fabric. Keep the shape clean, without too much interior detail.
Stitch the outline in backstitch using two strands of black or dark gray thread. Go slowly around the ears, tail, and paws, taking shorter stitches on tight curves. A single French knot makes a great eye, and a few tiny straight stitches can mark whiskers.
This design suits pillow covers, tote bags, and small framed hoops. If you want a softer look, use a thread color that matches your pet’s fur instead of black. Light tan on cream, for example, creates a gentle, modern portrait that fits nearly any home.
12. Cactus in a Pot

A cactus is a cheerful design that doesn’t take much skill. Fill the body with satin stitch in medium green, making an upright oval with two small arms. The shape stays simple, and the stitches all run in the same direction.
Add texture with tiny cream straight stitches for spines, scattered here and there across the cactus. A small pink French knot on top gives it a flower. For the pot, use satin stitch in terracotta, and add a thin line of darker thread across the rim.
Try three cacti of different heights in a row for a little windowsill garden. This design looks great on pouches, pillows, and denim jackets. Choose a slightly heavier fabric for the base, since several filled areas can pull on thin cotton.
13. Rainbow Arc

A rainbow is simple to stitch and fun to customize. Mark three to five curved lines, one inside the other, and stitch each in a different color. Chain stitch gives a thick, rounded look, while stem stitch gives a slimmer line.
Work from the outer arc inward so you always know where the next band should go. Keep each arc snug against the one before it, so no fabric peeks through. Pastels feel soft and baby-friendly, while bold primaries feel playful.
Finish with two small clouds at either end, using white satin stitch or a few clustered French knots. Rainbows look adorable on baby bibs, kids’ shirts, and blankets. If you’re stitching on something that will be washed often, pick a colorfast cotton floss and wash it gently the first few times.
14. Lavender Sprig
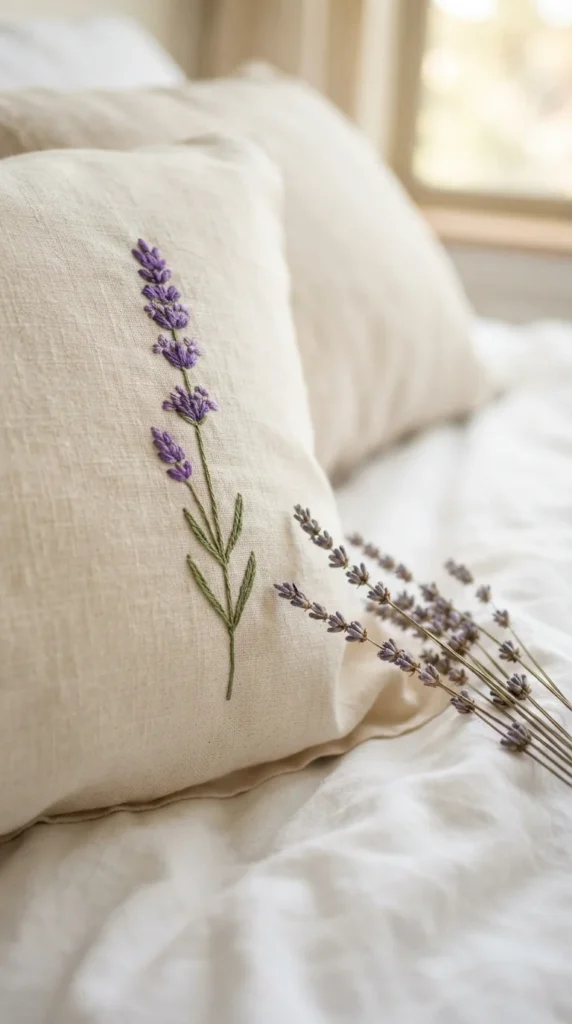
Lavender is stitched with a few simple moves. Draw a straight or slightly curved stem and sew it with a backstitch in sage green. Then add small purple buds along the upper half of the stem, using short straight stitches or tiny detached chain stitches.
Place the buds in pairs, one on each side, and make them smaller as you reach the top. Using two shades of purple gives the sprig some depth. A few leaves near the base finish the plant.
A lavender sprig looks calming on a pillowcase, a sleep mask, or a small sachet. Try stitching three sprigs of different heights for a fuller bunch. Keep your stitches loose enough that the fabric lies flat, because pulling too tight can curve the stem and distort the buds.
15. Mushroom Cluster

Mushrooms add a storybook feel to jackets and bags. Make each cap in red satin stitch, shaped like a half circle, and sew the stem in cream, using vertical satin stitch below the cap.
Dot the cap with white French knots or tiny satin stitch circles. Vary the sizes of the three mushrooms so the cluster looks natural, with one tall, one medium, and one small. Add a few short green stitches at the base to suggest grass.
These work well on felt, denim, and canvas, where the thread colors really pop. Stitch them on a patch, then sew or iron the patch onto a backpack or jacket. It’s a smart way to add detail without stitching directly on a garment you’re afraid of ruining.
16. Bumblebee

A bee is a cute, quick motif with a lot of personality. Stitch the body as a small oval in alternating bands of yellow and black satin stitch. Work each band across the width of the oval so the stripes look crisp.
For the wings, use two small teardrop shapes in white or light gray, made with chain stitch or fill stitches. Leave a little space between wings and body so they look like they’re hovering. A thin dotted line in running stitch can show the bee’s flight path.
Bees look sweet on garden-themed napkins, tote bags, and kids’ shirts. Use black floss for the stripes, but keep an extra strand of yellow handy, since bright colors can look patchy if the fabric shows through. Two layers of stitches usually solve it.
17. Wheat Stalk

Wheat gives fabric a warm, rustic look. Begin with a long, straight stem in backstitch. Then add pairs of small leaf-shaped stitches along the top third of the stem, angled slightly outward like grain heads.
Each grain can be a detached chain stitch, also called a lazy daisy loop, in gold or tan thread. Keep the pairs close together near the top and a little farther apart as you move down. Finish the very top with a single straight stitch.
Wheat looks wonderful on aprons, table runners, and tea towels, especially in autumn colors. Use golden yellow on dark fabrics and warm brown on light ones to get the best contrast. If your loops come out uneven, shorten them slightly. Small, tidy grains look better than large floppy ones.
18. Coffee Cup with Steam
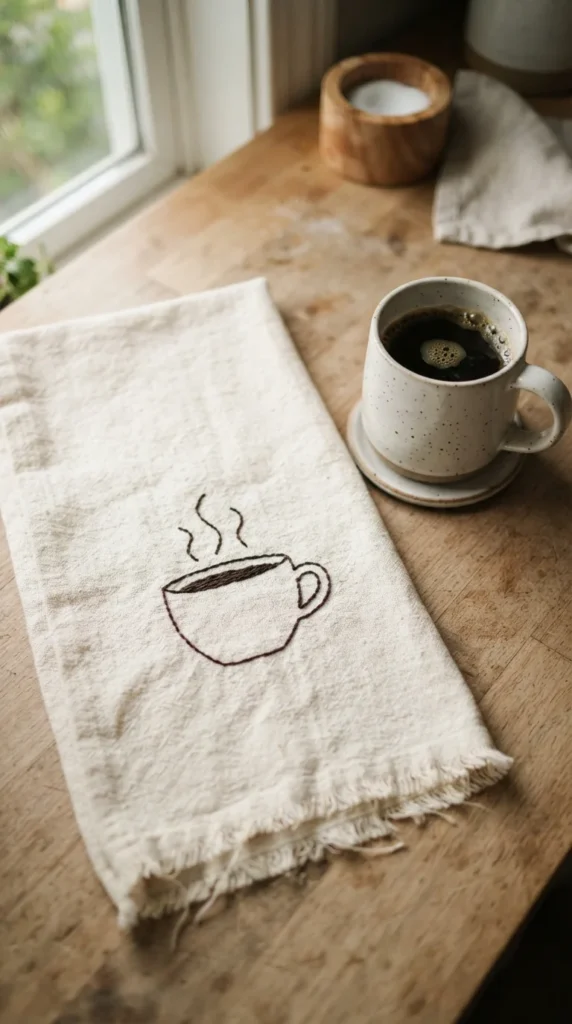
A cup design is perfect for kitchen linens. Draw a simple mug with a curved handle and stitch the outline in backstitch using dark brown or black thread. Keep the lines clean, and use short stitches around the handle curve.
Add steam above the cup with two or three wavy lines in stem stitch or backstitch. Make them different lengths so they look like they’re curling up naturally. A little heart in the steam turns it into a sweet gift.
You can fill the cup with satin stitch in a pastel color, or leave it as an outline for a modern, minimal feel. Both versions look great on tea towels and coasters. For coasters, stabilize the felt or fabric with a backing so the stitches don’t distort when you press a hot mug on top.
19. Simple Mountain Landscape

Mountains are made from a few triangles, which makes them very beginner-friendly. Sketch two or three peaks of different heights, then fill each one with long and short stitches, working in rows so the thread follows the slopes.
Use darker shades for the front peaks and lighter ones for the back, so the range appears to recede into the distance. Add small white stitches near the tops of the highest peaks for snow. A tiny sun or moon above completes the scene.
This design looks great on a tote, a hoop, or the back of a jacket. Keep the stitches lying in the same direction on each peak for a smooth, graphic look. If your fill looks patchy, add a second layer of stitches in between the first. It gives the mountain a full, solid surface.
20. Cherry Pair
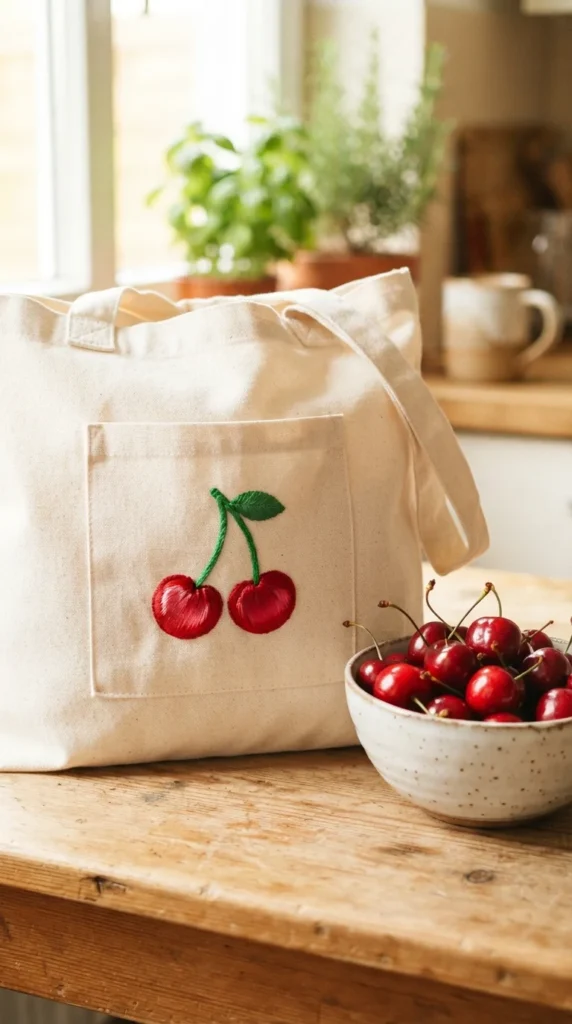
Two cherries on a curved stem make a classic motif. Draw two circles about the size of a coin, joined by thin stems that meet at the top. Fill each circle with satin stitch in deep red, working from one edge to the other.
Add a small highlight to each cherry with a short stitch of lighter pink or white. This tiny detail makes the fruit look glossy. Stitch the stems in green using stem stitch, and finish with a single leaf made from satin stitch.
Cherries are cute on pockets, aprons, and summer dresses. Repeating them across a hem creates a charming pattern. When filling the circles, bring the needle up and down right at the outline so the edge stays crisp. A thin backstitch border underneath will help keep the shape round.
21. Handwritten Word in Backstitch
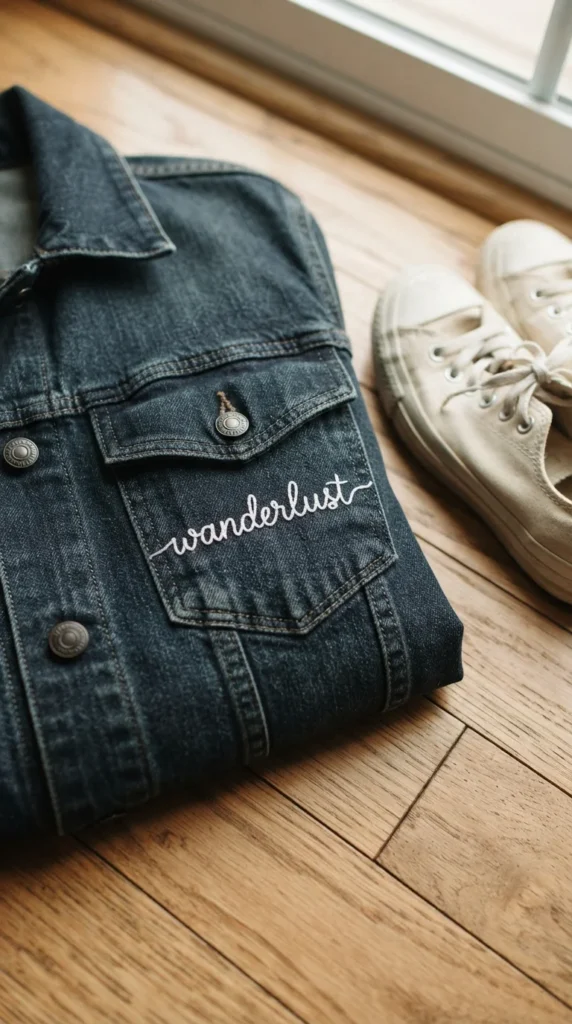
A single word in your own handwriting is a lovely way to personalize clothes. Write the word on paper in your natural script, then trace it onto the fabric with a water-soluble pen or a transfer sheet. Choose something short, like a name or a favorite phrase.
Stitch the lines in backstitch with two strands of floss. Keep stitches small around curves and loops, and make sure each one meets the next. Thin, even lines look best for cursive, so avoid pulling the thread too tight.
White thread on denim, black on cream, or gold on navy all look sharp. This design works on jacket pockets, sweatshirt collars, and pillow covers. If you make a mistake, use a seam ripper to remove only the last few stitches, then re-stitch. Cursive lines are forgiving when done in small pieces.
22. Pocket Corner Flowers

A tiny flower bunch in the corner of a pocket gives a plain shirt a sweet, personal touch. Place the design so it grows from the bottom edge, with stems curving upward and a few blooms sitting at different heights.
Use French knots for small round flowers and lazy daisy stitches for petal flowers. Stitch the stems in stem stitch and add two or three straight stitch leaves. Keep the whole motif about two inches wide so it fits the pocket well.
Because shirt fabric is thin, add a layer of lightweight stabilizer behind the area while you stitch. It prevents puckering and makes your stitches sit evenly. After you finish, trim any extra stabilizer carefully. Chambray, denim, and flannel all take this design nicely, and the colors stand out well against blue.
23. Tulip Trio
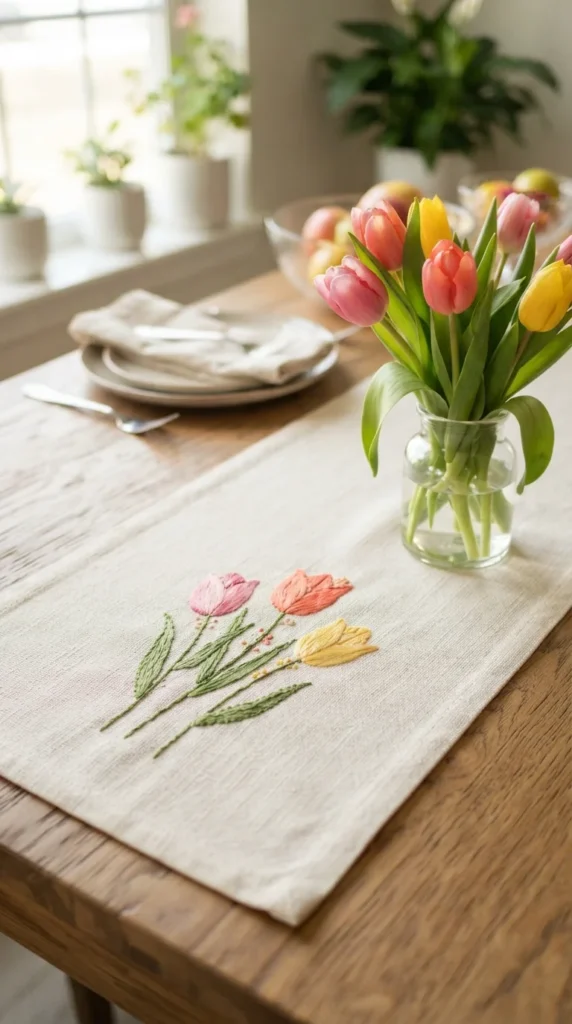
Tulips have a clean shape that suits embroidery well. Each bloom is a cup-shaped satin stitch with a pointed top, or you can make it from three petal shapes side by side. Fill each petal in the same direction for a neat look.
Stitch long green stems with stem stitch and add one or two tall leaves that curve outward. Place the three flowers at slightly different heights, with the center tulip tallest. Using three colors makes the bunch feel lively.
A row of tulips works well along the edge of a table runner or the hem of a spring dress. For a softer effect, shade each petal by using two nearby shades, such as pink and coral, in separate sections. Work the lighter color first and tuck the darker color along the edges where the petals overlap.
24. Fern Leaf in Fishbone Stitch

The fishbone stitch makes leaves that look almost lifelike. Draw a long, narrow leaf shape with a center line. Start at the top, then make a small straight stitch down the center and angle the next stitches alternately from each side to cross over the middle.
The stitches overlap slightly at the center, forming a braided spine. Keep them close together so the leaf looks full. Longer leaves need more stitches, but each one is quick to make.
Try stitching three fern leaves of different sizes in a small grouping. Use deep green for the biggest and lighter green for smaller ones. Fern leaves look great on napkins, pillowcases, and linen bags. If your stitches look messy, shorten them and keep the angle consistent. Practice on scrap fabric first to get the feel for the crossing pattern.
25. Tiny Constellation

A constellation is a delicate design made of dots and lines. Pick a star pattern you like, such as the Big Dipper, and mark the points on your fabric. Each star becomes a French knot in gold, silver, or white thread.
Connect the stars with thin backstitch lines using a single strand of floss. Keep the lines straight and light so the knots remain the focus. Vary the knot sizes by wrapping the thread one or two times for bigger or smaller stars.
Constellations make thoughtful gifts when you choose someone’s birth month or favorite sky pattern. They look elegant on dark fabrics, cosmetic pouches, and sleep masks. Take care to knot the back neatly, because dark fabric shows loose tails. Trim them short, and avoid carrying thread across large gaps between stars.
26. Running Stitch Wave Pattern

This pattern uses the simplest stitch there is. Mark several curved wave lines in a row, then stitch along each with an even running stitch. Keep every stitch and every gap the same length for a clean, rhythmic look.
Space the wave lines evenly, around half an inch apart. Use one thread color for a calm, modern effect, or alternate two colors for more movement. A slightly thicker thread, such as three or four strands, gives the lines more presence.
The pattern fits napkins, cushion covers, and bag panels. Because the stitch is so simple, you can work on it while watching a show or riding in a car. For straighter waves, stitch a small section at a time and check your spacing as you go. The pattern looks best when the rows echo one another.
27. Lemon Slice Duo

Lemon slices bring instant sunshine to kitchen linens. Draw two circles, then stitch a thin outer ring in yellow. Divide the inside into six or eight wedge shapes using white or pale yellow straight stitches radiating from the center.
Fill the wedges with satin stitch in bright yellow, leaving a tiny gap between each so the white lines show. This gives the slice its segmented look. Finish with a small green leaf or two tucked behind one of the slices.
Work the outer ring first, since it makes the circle easier to fill neatly. Keep your stitches short in the wedges, because long satin stitches can sag. Lemons look cheerful on tea towels, aprons, and market totes. For a fun variation, add one lime or orange slice next to them in matching style.
Final Thoughts
Small embroidery designs make everyday fabric feel personal, and each of these 27 ideas relies on a short list of basic stitches. Start with the one that suits your next project, whether that’s a napkin, a pocket, or a tote bag. Mark your design lightly, use two or three strands of floss, and keep your stitches gentle. Pick one design from this list today and stitch it this week.

Lily Summers is a digital artist and creative storyteller who loves bringing colorful characters to life. With a passion for cartoons, fan art, and playful sketches, she inspires others to explore their imagination through art. When she’s not sketching, you’ll find her dreaming up new ideas for CraftedWizard.com to spark creativity in every artist. 🌈✨