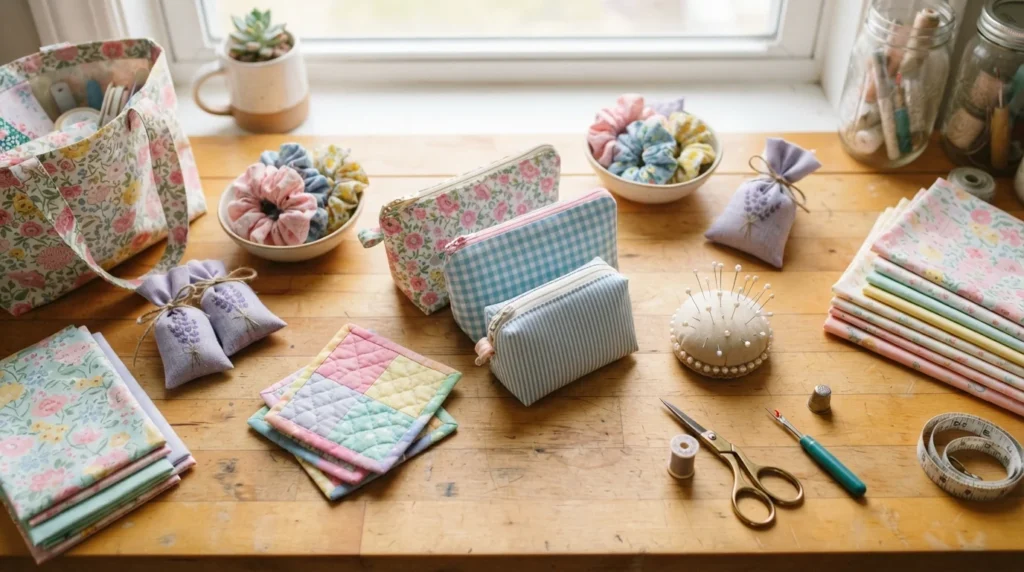

Small sewing projects are a great way to make something useful without spending weeks at your sewing machine. Whether you have leftover fabric from an older project or a few new cotton prints waiting in your craft room, a weekend is enough time to create several lovely handmade items. These 29 easy sewing projects include practical accessories, simple home decorations, thoughtful gifts, and beginner-friendly ideas. Most use basic supplies and straightforward stitching, so you can enjoy making something beautiful while building your sewing skills.
1. Simple Fabric Scrunchies

Fabric scrunchies are among the easiest accessories to sew, making them a lovely first project for beginners. You only need a small fabric rectangle, elastic, matching thread, and basic sewing tools. Cotton, satin, and lightweight linen all work well. Cut a rectangle around 4 inches wide and 18–22 inches long, depending on how full you want the finished scrunchie to look.
Fold the fabric lengthwise with the printed sides facing inward and stitch along the long edge. Turn the tube right side out, thread elastic through it, and join the elastic ends securely. Fold one open fabric edge inside the other and stitch the opening closed. Make a matching set in different colors for everyday wear or holiday gifts. Scrunchies are also a great way to use narrow fabric leftovers that might otherwise go to waste.
2. Reusable Fabric Gift Bags

Reusable fabric gift bags are practical, attractive, and easy to customize for birthdays, weddings, and seasonal celebrations. Choose cotton fabric in colors that suit the occasion. Small bags work well for jewelry, candles, and chocolates, while larger versions can hold books, clothing, or handmade treats.
Cut two matching rectangles, place them with the printed sides together, and sew around the sides and bottom, leaving the top open. Fold the upper edge inward to form a casing for a ribbon or fabric drawstring. Stitch the casing, leaving a small opening to thread the cord through. Turn the bag right side out and press the seams flat.
You can make several sizes in one afternoon. Add a contrasting fabric band, a small loop, or a decorative bow if you want a more personal finish. These bags can be reused for years, making them a thoughtful alternative to disposable gift wrapping.
3. Quilted Fabric Coasters

Quilted fabric coasters are a useful way to practice straight stitching while creating something for your home. They also make excellent gifts for coffee lovers and people who enjoy handmade kitchen accessories. Choose two coordinating cotton prints and a layer of cotton batting for a padded finish.
Cut fabric and batting into equal squares, usually around 5 inches each. Stack the pieces with the batting in the middle and the printed sides facing outward. Sew around the edges, then add straight lines or a simple diagonal grid across the surface to hold the layers together. Finish the edges with bias binding or a neat line of topstitching.
Try making a set of four or six using different prints from the same color family. For a coordinated look, use one print on the front and another on the back. Washable cotton makes these coasters easy to care for, especially when they are used daily.
4. Zippered Fabric Pouches
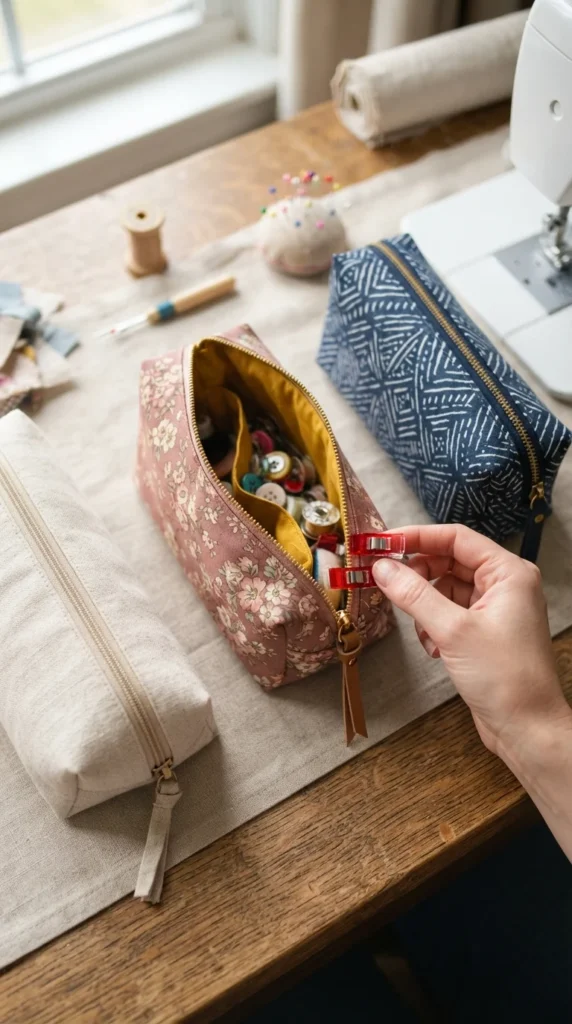
A zippered pouch is a handy little project for organizing makeup, stationery, charging cables, or travel accessories. Although installing a zipper may seem difficult at first, a small pouch is a manageable way to practice the technique without working with a large garment.
Cut two outer fabric rectangles and two lining rectangles in your preferred size. Place the zipper between one outer piece and one lining piece, with the printed sides facing the zipper tape. Stitch along the zipper edge using a zipper foot. Repeat on the other side, then open the zipper halfway before sewing the pouch pieces together around the remaining edges. Turn everything through the zipper opening.
Choose a bold outer print and a contrasting lining for a polished appearance. You can also add a small fabric loop at one corner. Make a few different sizes so you have somewhere to keep loose items at home or while traveling.
5. Handmade Lavender Sachets
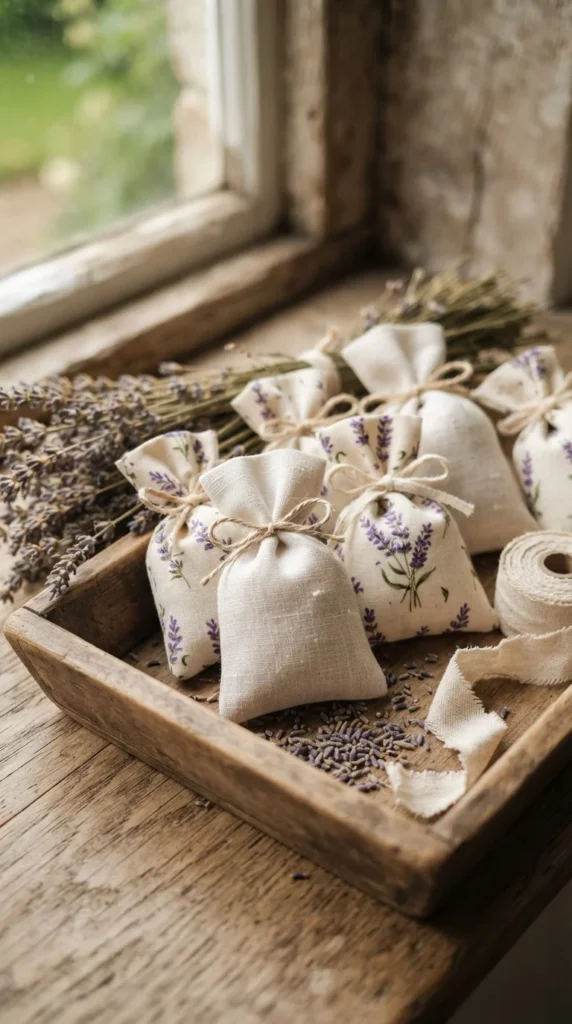
Lavender sachets are small fabric pouches filled with dried lavender buds. They are lovely for placing inside wardrobes, drawers, linen cupboards, or luggage. Their compact size makes them suitable for beginners who want to finish several pieces in a short sewing session.
Cut two matching fabric squares or rectangles, approximately 4–5 inches wide. Place them together with the printed sides facing inward and stitch around three sides. Turn the pouch right side out, fill it with dried lavender, and fold the remaining raw edges inward. Sew the opening closed with a neat hand stitch or machine stitching.
Lightweight cotton and linen are good fabric choices because they allow the lavender scent to pass through. Add a narrow ribbon loop if you want to hang the sachet from a closet hook. You can also make a coordinated set using different floral fabrics. Store the sachets away from moisture to keep the dried filling in good condition.
6. Fabric Bookmarks
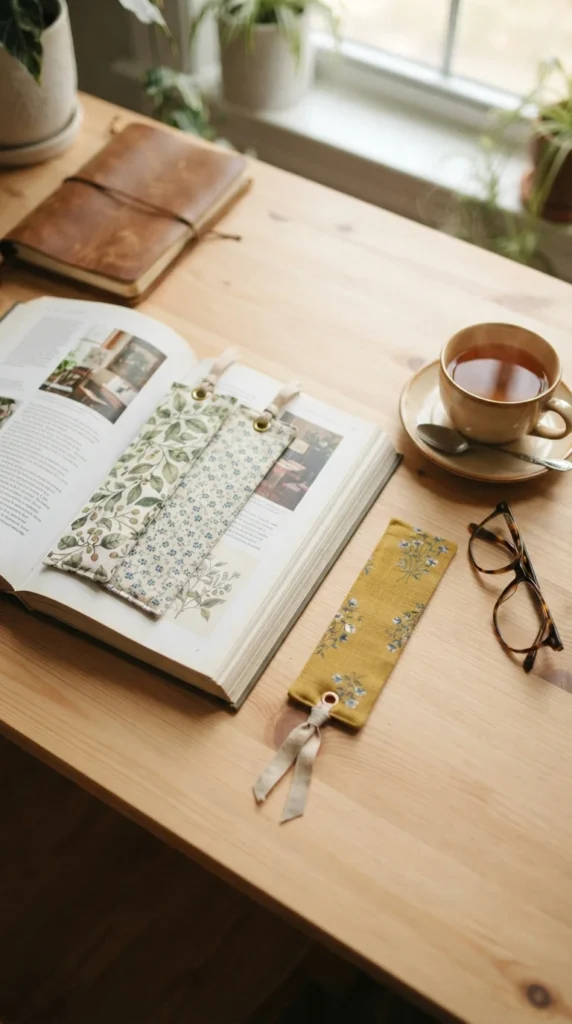
Fabric bookmarks are simple sewing projects that make lovely gifts for readers, students, and teachers. They require very little material, and you can create several designs from the same fabric collection. A thin layer of interfacing gives the bookmark enough structure to stay flat between book pages.
Cut two long fabric rectangles, around 2 by 7 inches. Add interfacing to one piece if your cotton is lightweight. Place the printed sides together and stitch around the edges, leaving a small gap for turning. Trim the corners, turn the bookmark right side out, and press it carefully before stitching the opening closed.
Add a short ribbon or a small fabric tassel at one end for decoration. You can also make padded bookmarks with a thin layer of batting for a softer finish. Try using floral prints, tiny geometric patterns, or favorite colors to create a small collection for your bookshelf.
7. Simple Drawstring Storage Bags
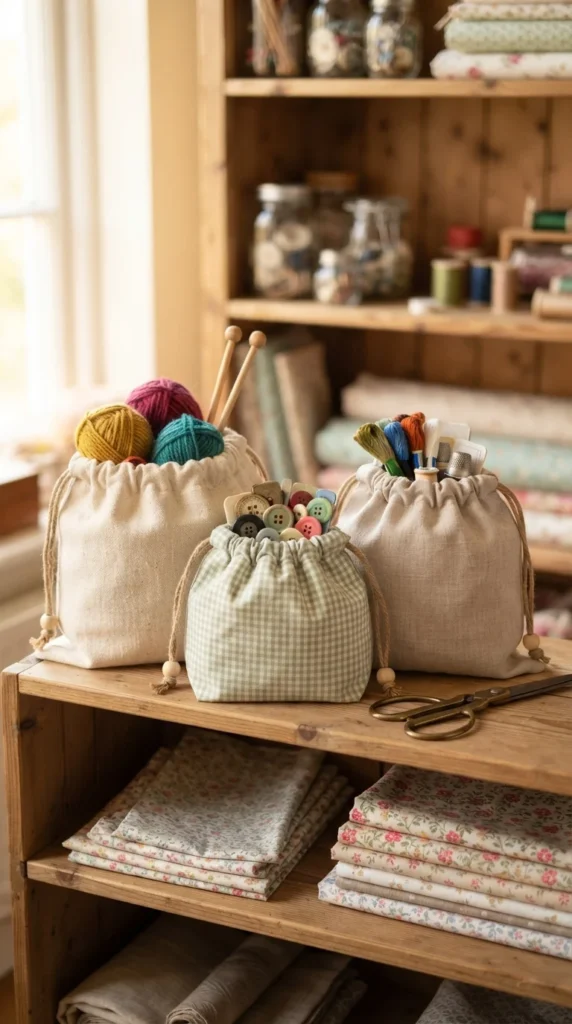
Drawstring bags can organize almost anything around the house. Use them for knitting supplies, children’s toys, toiletries, shoes, or small travel essentials. Unlike complicated storage organizers, these bags have a simple shape that beginners can sew with basic straight stitches.
Cut two matching rectangles based on the size of the items you plan to store. Sew the side and bottom seams with the printed sides facing inward, leaving enough space near the top for a drawstring casing. Fold the upper edge over twice, stitch it down, and leave a small opening for the cord. Thread ribbon or cotton cord through the casing using a safety pin.
You can make the bags tall and narrow for bottles or wide and shallow for toys and accessories. Add a contrasting bottom panel if you want a decorative finish. Use washable cotton for bags that will hold everyday items, and make a few matching sizes to keep cupboards tidy.
8. Fabric Headbands
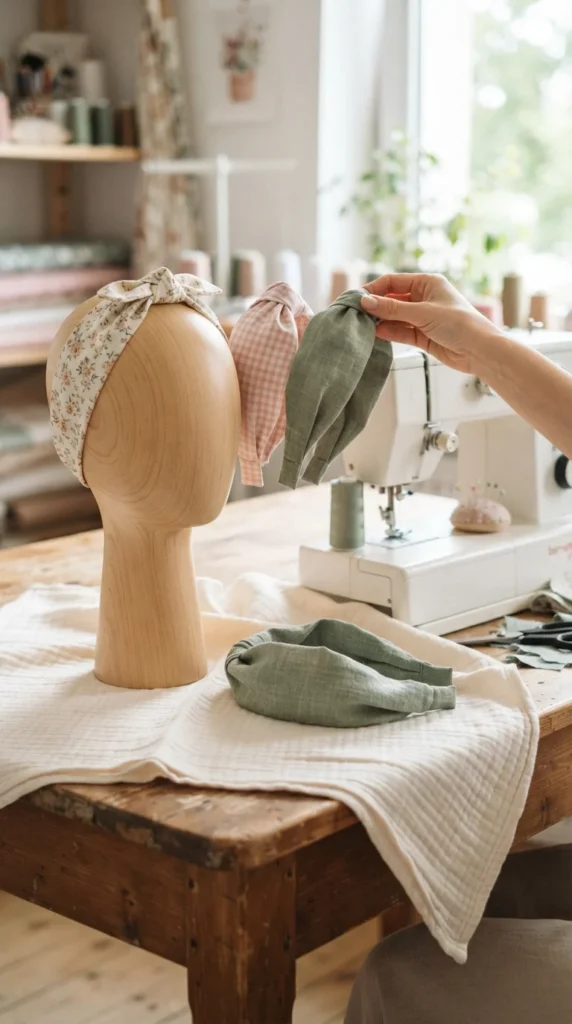
A handmade fabric headband is a stylish accessory that can be customized to match different outfits. You can make a simple narrow band, a gathered version, or a wider twisted headband. Lightweight cotton is a good choice for beginners because it is easy to cut, fold, and sew.
For a basic headband, measure around the head or use an existing comfortable band as a guide. Cut a long fabric strip, fold it lengthwise with the printed side inward, and stitch along the edge. Turn the tube right side out and press it flat. Attach a short piece of elastic at the back so the headband fits comfortably without slipping.
For a gathered design, use a wider strip and sew a narrow elastic section into the back. Try floral prints for a soft everyday style or solid colors for a cleaner appearance. These headbands are also lovely handmade gifts when paired with a matching scrunchie.
9. Reusable Fabric Bowl Covers

Reusable fabric bowl covers are useful for covering serving bowls during meals, picnics, and food preparation. They can be made in different sizes to fit common household bowls. Choose tightly woven cotton and food-contact-safe materials, and use the covers for dry or room-temperature items rather than as a substitute for safe food storage.
Place a bowl upside down on your fabric and trace around it, adding several inches for the sides and elastic casing. Cut two fabric circles or one fabric circle with a suitable lining. Place the layers together and sew around the edge, leaving an opening. Turn the cover, press it, and stitch a narrow casing around the perimeter.
Thread elastic through the casing and adjust it until the cover grips the bowl securely. Close the elastic ends and finish the opening. Make several sizes in coordinating kitchen prints. Wash and dry the covers thoroughly between uses, and avoid using them for raw meat or other foods that require sealed refrigeration.
10. Padded Fabric Glasses Case

A padded glasses case protects everyday eyewear from scratches when carried inside a handbag or stored on a desk. Its small shape makes it a suitable weekend sewing project, and you can experiment with different closures and fabric combinations.
Cut two outer fabric pieces, two lining pieces, and two matching batting pieces. Use your glasses as a size guide, leaving extra room for the seams and a comfortable fit. Layer the outer fabric with batting, then quilt a few straight lines through the layers. Place the outer pieces together and sew around the sides and bottom. Repeat with the lining, leaving a small opening for turning.
Insert the lining into the outer case, align the upper edges, and stitch around the opening. Turn the case through the lining gap and close it with a hand stitch. Add a snap fastener or a small button loop if you want a secure closure. Choose soft fabric prints that match your everyday accessories.
11. Fabric Keychains

Fabric keychains are quick to sew and make excellent small gifts for friends, family members, or teachers. Their compact shape gives you a chance to use leftover material from other projects. You can create simple rectangular tabs, small padded hearts, or rounded fabric charms.
For a basic keychain, cut two small fabric strips and fold each one lengthwise with the printed sides inward. Stitch along the long edge, turn the tube right side out, and press it flat. Fold the strip around a metal key ring and secure the ends with several rows of stitching. For a padded charm, cut two matching shapes, add a little batting, and stitch around the edge before attaching the ring.
Use contrasting thread to add decorative stitching along the edges. Small floral prints create a delicate appearance, while bright geometric patterns look playful. Make a matching set in different colors and attach one to your handbag, backpack, or house keys.
12. Simple Fabric Tote Bag
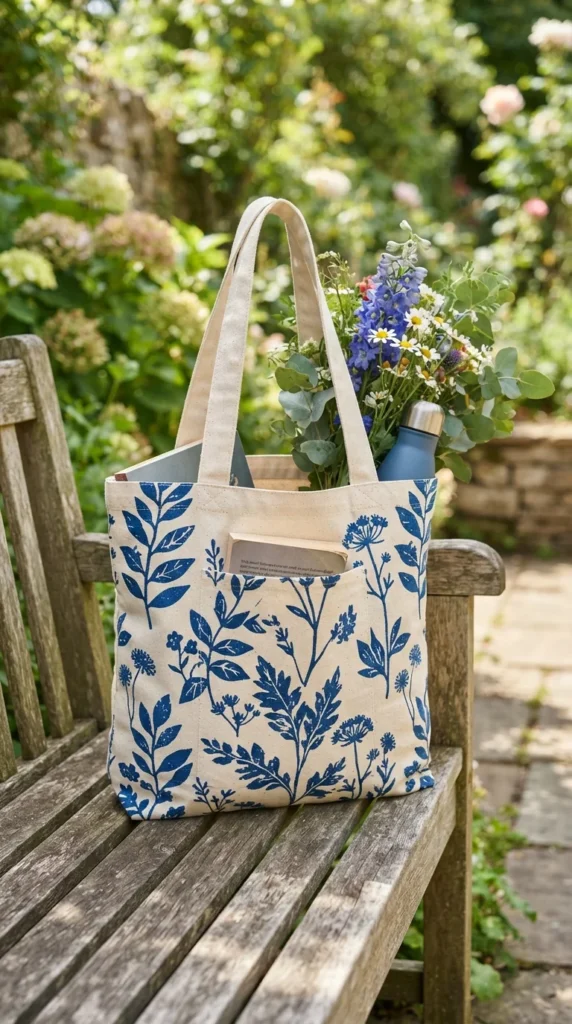
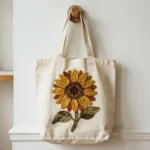
A simple tote bag is a practical project for anyone who wants to sew something they can use every day. It works for grocery shopping, carrying books, visiting the market, or organizing craft supplies. Medium-weight cotton or canvas is a good option because it provides more structure than lightweight fabric.
Cut two large rectangles for the bag body and two long strips for the handles. Place the body pieces together with the printed sides facing inward and stitch the side and bottom seams. Create boxed corners by folding each bottom corner into a triangle and sewing across it. Turn the bag right side out, fold the upper edge inward, and stitch it down.
Fold the handle strips lengthwise, stitch along the edges, and attach them securely to the inside of the bag. Reinforce the handle attachment points with extra stitching. You can add an inner pocket for keys or a phone. Choose a neutral fabric for everyday use or a bright print for a weekend market bag.
13. Fabric Pincushion

Cut two squares of cotton fabric, usually around 5 inches wide. Place them together with the printed sides facing inward and stitch around the edges, leaving a small opening. Turn the fabric right side out, fill it with polyester stuffing or another suitable cushion filling, and close the opening with hand stitching. Avoid overfilling so the cushion remains comfortable to use.
For a decorative finish, wrap embroidery thread around the finished cushion to create four or eight padded sections. Add a small covered button in the center if you like. You can also make a tiny wrist pincushion by attaching an elastic band to a smaller padded design. Keep pins stored securely when the cushion is not in use.
14. Simple Fabric Napkins
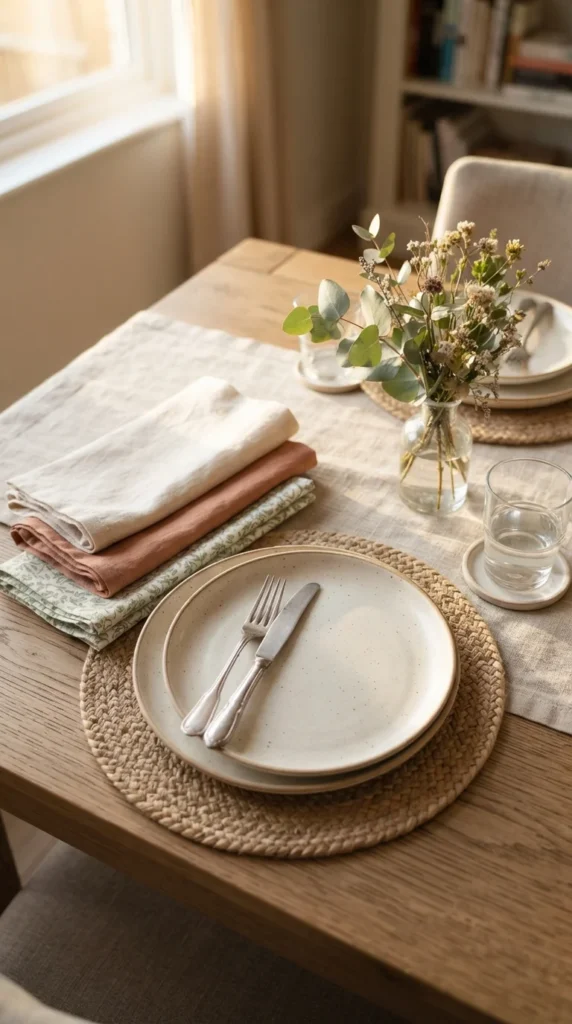
Fabric napkins are an easy way to add handmade details to your dining table. They are also useful for everyday meals, family gatherings, and small dinner parties. Cotton and linen are popular choices because they are washable, absorbent, and comfortable to handle.
Cut square pieces of fabric in your preferred size. A 16-inch square is a convenient starting point for everyday napkins. Fold each raw edge inward twice to create a narrow hem, press the folds, and stitch around the perimeter. Use a neat straight stitch or a decorative edge stitch for extra detail.
Choose four coordinating fabrics for a colorful set or make every napkin from the same print for a uniform appearance. You can also add a small fabric loop in one corner if you want to hang them in the kitchen. Wash the fabric before cutting to reduce shrinkage later. A finished set makes a practical housewarming gift.
15. Mini Fabric Baskets

Mini fabric baskets help organize small items without taking up much shelf space. They are useful for holding hair accessories, sewing tools, stationery, cosmetics, or children’s craft supplies. A layer of interfacing or batting helps the sides stand upright.
Cut two matching outer rectangles and two lining rectangles, along with suitable interfacing. Fuse the interfacing to the outer fabric according to its product instructions. Sew the side and bottom seams of the outer pieces, then repeat with the lining. Box the corners to create a flat base. Place the lining inside the outer basket with the printed sides facing each other and stitch around the upper edge, leaving a small turning gap.
Turn the basket right side out and close the opening. Fold the top edge down to create a cuff. Make a set in different heights to organize a dressing table, craft room, or bathroom shelf. Use a contrasting lining to give the basket an attractive finish when the cuff is folded outward.
16. Fabric Cord Organizers

Loose charging cables can quickly turn a desk drawer or travel bag into a tangled mess. Fabric cord organizers are a simple sewing solution that keeps small cables neatly wrapped. Their tiny size makes them ideal for using fabric leftovers from larger projects.
Cut two matching small rectangles or rounded strips of fabric. Add a layer of interfacing between them to give the organizer some structure. Place the pieces together with the printed sides facing inward and stitch around the edge, leaving a small turning gap. Turn the fabric right side out, press it, and close the opening.
Attach a snap fastener to both ends so the organizer can wrap around a coiled cable. You can also use a small button and fabric loop as a closure. Make different colors for phone chargers, headphones, computer cables, and travel accessories. Keep the finished organizers in a small pouch so they are easy to find when packing.
17. Simple Fabric Wallet
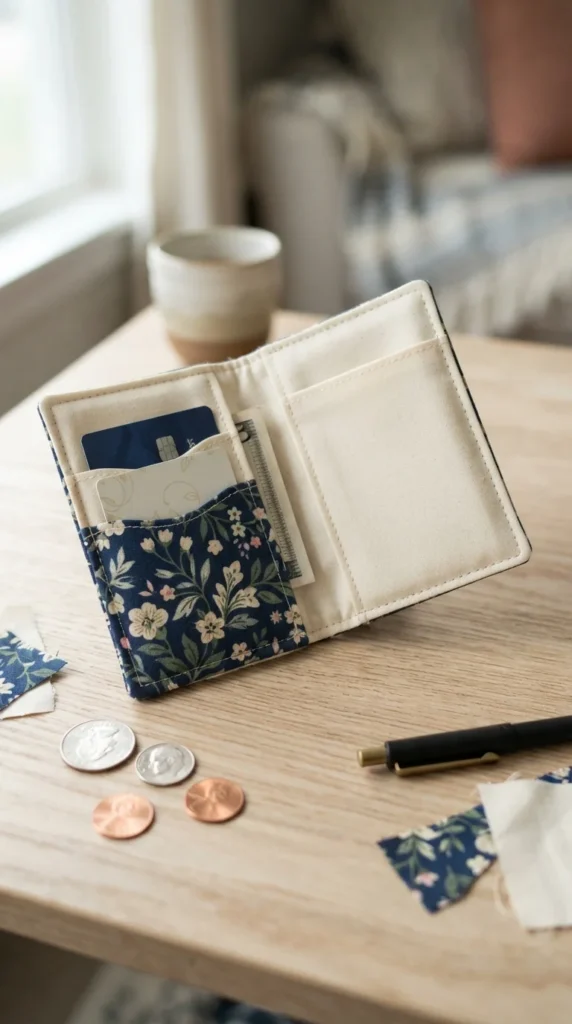
A simple fabric wallet is a satisfying project that lets you practice sewing layers, pockets, and folds. It is useful for storing cards, folded notes, receipts, and small everyday items. Choose medium-weight cotton with interfacing to give the wallet a firm shape.
Cut one large outer rectangle and matching lining pieces for the inner pockets. Add interfacing to the outer fabric, then fold and stitch the pocket sections to create separate compartments. Position the pockets on the lining and secure their lower edges. Fold the wallet body into the desired shape and stitch around the outer perimeter, leaving enough space for a neat finish.
You can add a small snap closure, a button loop, or a short fabric tab. Keep the first version simple by using only two card pockets and one larger compartment. Once you are comfortable with the construction, experiment with additional slots or a zippered coin pocket. A compact wallet also makes a thoughtful handmade present.
18. Fabric Doorstop
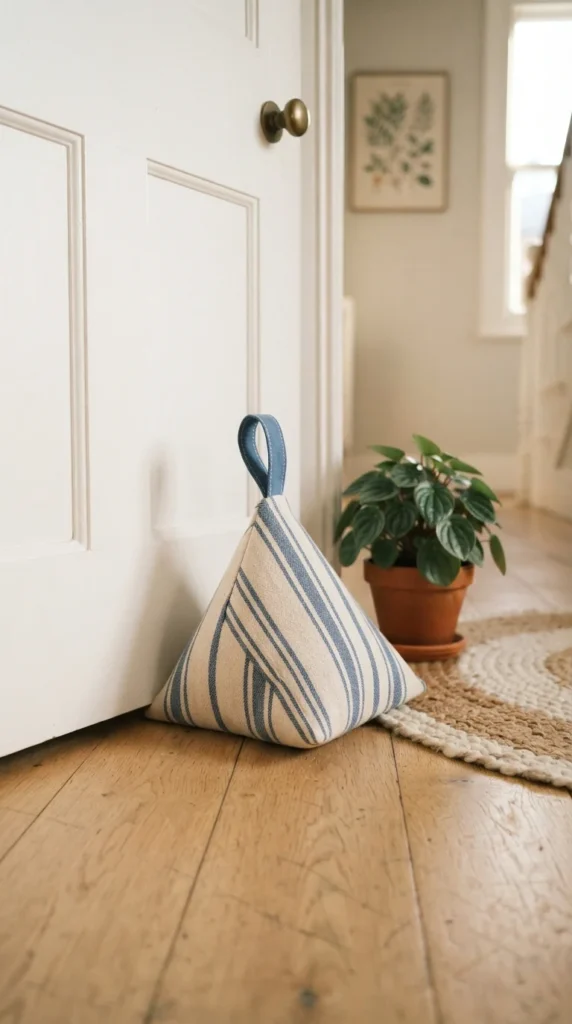
A fabric doorstop is a useful home project that can be completed with basic sewing skills. It is especially handy in rooms where doors tend to close on their own. A triangular design is easy to construct and can be made from sturdy cotton or canvas.
Cut two matching triangular fabric pieces and one rectangular base piece. Place the triangle pieces together with the printed sides inward and stitch along the two sloping edges. Attach the base piece to the bottom, leaving a small opening for filling. Turn the fabric right side out and add a securely enclosed weighted insert or suitable filling.
A removable inner pouch filled with sand or another safe weighting material can make cleaning easier. Close the opening with strong hand stitching. Add a small fabric loop at the top for carrying. Choose a fabric that matches your room decor, such as neutral stripes, botanical prints, or classic checks. Keep the weighted filling securely enclosed, especially in homes with small children or pets.
19. Simple Fabric Hair Bows
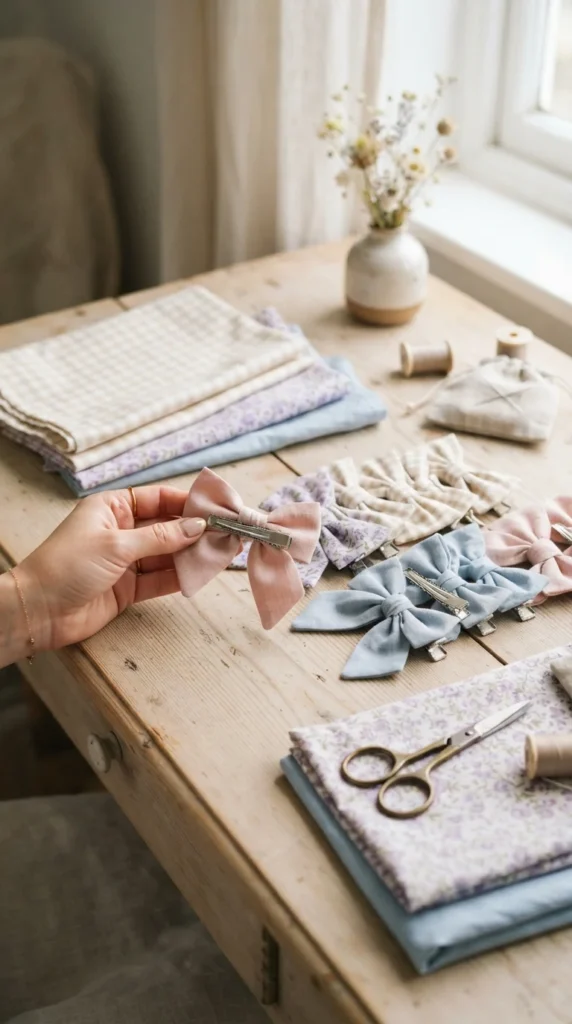
Fabric hair bows are charming accessories that can be sewn in several sizes and styles. They are suitable for children and adults, and you can attach them to hair clips, elastic bands, or headbands. Cotton fabric is easy to work with and holds its shape when paired with light interfacing.
Cut a large rectangle for the bow and a narrow strip for the center wrap. Fold the large rectangle lengthwise with the printed sides inward and stitch along the long edge. Turn it right side out, position the seam at the back, and fold the short edges inward. Pinch the middle to form the bow shape and wrap the narrow strip around the center. Stitch or secure the wrap at the back.
Attach the finished bow to a metal hair clip or an elastic band. Make small bows for everyday hairstyles and larger ones for special occasions. Use matching fabrics to create a coordinated set with scrunchies or headbands.
20. Reusable Makeup Remover Pads

Reusable makeup remover pads are small washable alternatives to disposable cotton rounds. They are easy to sew in batches, making them a good project for anyone with a small amount of cotton fabric and absorbent material. Use soft, washable fabrics that are suitable for contact with the face.
Trace a circular object onto cotton and terry cloth to create matching pieces. A diameter of around 3 inches is convenient for everyday use. Place the pieces together with their right sides facing inward and stitch around the edge, leaving a small opening. Turn the pad right side out and close the opening. For a quicker finish, use a serger or a suitable overlock stitch around the perimeter.
Make a stack of ten or twelve pads and store them in a small fabric basket. Wash them regularly according to the fabric care instructions, using a laundry bag to keep the smaller pieces together. Avoid rough fabrics or decorative materials that may irritate delicate skin.
21. Fabric Tissue Box Cover

A fabric tissue box cover is an easy home decoration that can make an ordinary cardboard box look more attractive. It works well in bedrooms, living rooms, offices, and guest spaces. You can sew one to fit a standard rectangular tissue box or adjust the measurements for a different shape.
Measure the length, width, and height of your tissue box. Cut fabric panels for the four sides and the top, leaving extra room for seam allowances. Sew the side panels together to create a fitted sleeve, then attach the top panel. Cut an opening in the center of the top panel and finish the edges with a narrow hem or bias binding.
Turn the cover right side out and place it over the tissue box. Use cotton prints that match your curtains, cushions, or bedding. You can also add a narrow decorative border around the opening. Make a second cover in a different print for another room in your home.
22. Simple Fabric Apron
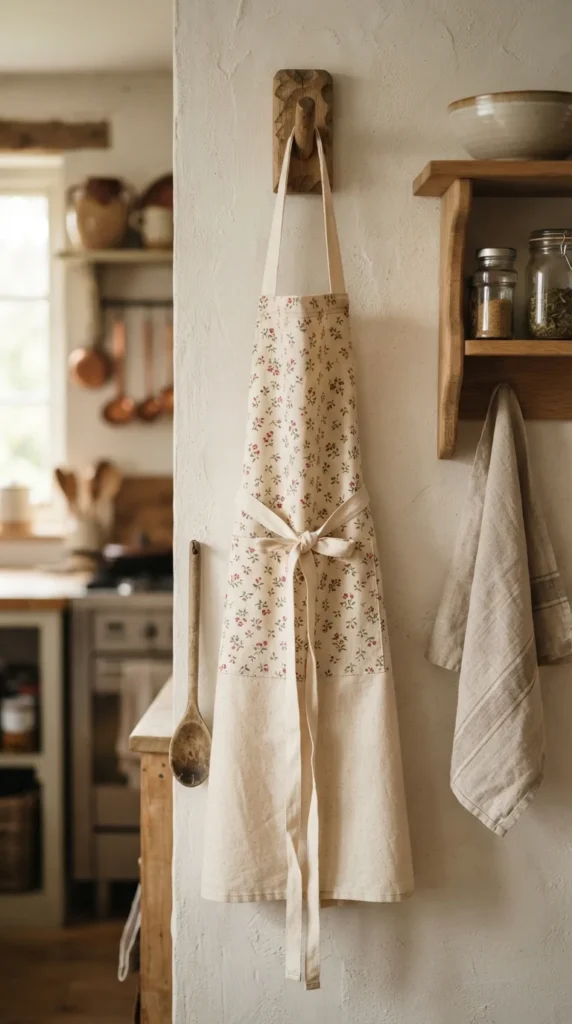
A simple fabric apron is a practical weekend project for anyone who enjoys cooking, baking, gardening, or crafting. It can be made with a single main fabric and a few additional strips for the ties. Medium-weight cotton is a comfortable choice and is easy to wash.
Fold a large rectangle in half lengthwise and shape the upper corners to create the apron body. Finish the side and top edges with a narrow hem or bias binding. Cut a smaller rectangle for the front pocket, fold its edges inward, and stitch it onto the lower front section. Add two long waist ties and a neck strap, reinforcing the attachment points with extra stitching.
You can make the apron longer for kitchen work or shorter for gardening and craft activities. Add two separate front pockets for holding small tools, measuring spoons, or clothespins. Choose a durable print that hides everyday marks and matches your kitchen style.
23. Fabric Plant Pot Covers
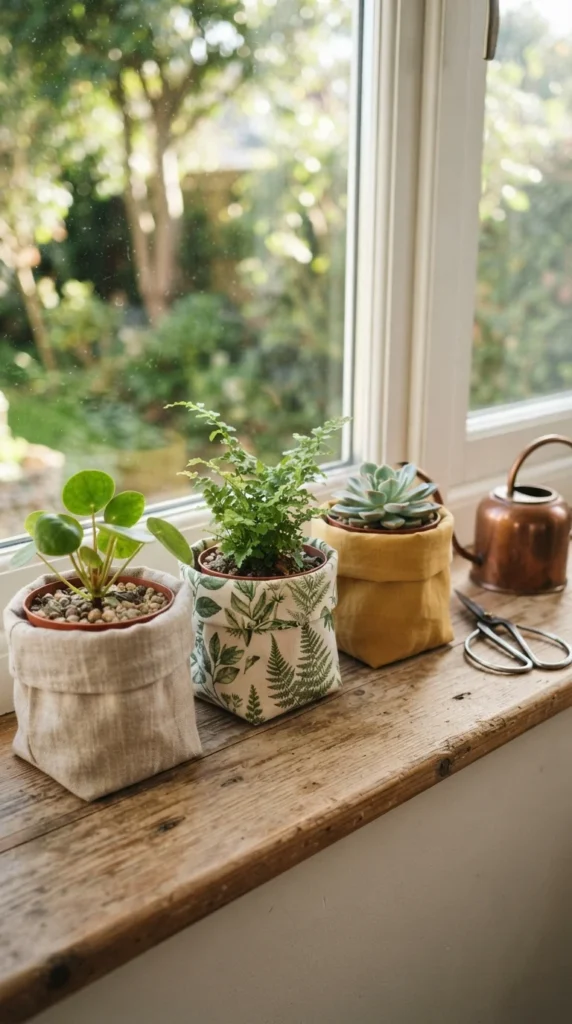
Fabric plant pot covers are a simple way to decorate plain nursery pots and bring color to a windowsill or shelf. They are especially useful for lightweight decorative pots that sit inside waterproof plant containers. Choose cotton canvas or another sturdy fabric that can hold its shape.
Measure the height and circumference of the pot, allowing extra room for the seams and a relaxed fit. Cut a rectangular body piece and a circular base piece. Fold the rectangle with the printed sides together and stitch the side seam. Attach the circular base, then turn the cover right side out. Fold the top edge inward or outward to create a cuff.
Use these covers around waterproof pots rather than placing wet soil directly inside the fabric. This helps protect the material from moisture and stains. Try neutral linen for a natural look or botanical prints for a colorful indoor garden. Make several matching covers in different sizes for your plant collection.
24. Simple Fabric Oven Mitt

A handmade oven mitt is a useful kitchen sewing project, but it requires suitable heat-resistant materials. Regular cotton batting alone may not provide enough protection from hot cookware. Choose purpose-made heat-resistant batting and follow its manufacturer instructions for layering and use.
Trace around an existing oven mitt to create a pattern, adding seam allowances. Cut two outer fabric pieces, two lining pieces, and the required heat-resistant layers. Quilt each outer section with its protective layers, then sew the front and back pieces together, shaping the thumb carefully. Make a separate lining and insert it into the outer mitt.
Finish the opening with a sturdy fabric binding and attach a hanging loop. Check the seams and lining before using the mitt. Avoid synthetic fabrics that can melt under high heat, and remember that homemade mitts should be tested carefully and replaced if the protective layers become damaged. A matching pair can give your kitchen a coordinated handmade look.
25. Fabric Toothbrush Travel Roll

A fabric toothbrush travel roll is a compact organizer for overnight stays, holidays, or gym visits. Its simple pocket design is easy to adjust, and you can add compartments for small personal care items. Use washable cotton and a water-resistant removable insert if you want extra protection from damp accessories.
Cut one large rectangle for the outside and another for the lining. Add a smaller folded rectangle across the lining to create pockets. Stitch vertical lines at regular intervals to divide the pockets into individual sections. Sew the outer and lining pieces together, leaving a gap for turning. Turn the organizer right side out and close the opening with neat topstitching.
Attach two narrow fabric ties along one side so the organizer can roll up securely. Keep wet toothbrushes in a separate ventilated case rather than placing them directly against the fabric. Choose a compact print that is easy to identify inside a travel bag.
26. Fabric Mug Cozies

Fabric mug cozies are small padded sleeves that wrap around a mug to provide a comfortable grip. They are easy to personalize and make charming gifts for coffee and tea drinkers. Use cotton fabric, suitable batting, and a secure closure that fits the shape of the mug.
Measure around the middle of the mug and add room for the overlap and closure. Cut two fabric pieces and one layer of batting in a curved or rectangular shape. Layer the materials, quilt a few straight lines, and finish the edges with bias binding. Attach a button to one end and create a fabric loop at the other.
Make sure the cozy fits securely without interfering with the handle. Keep fabric away from hot rims and avoid using the cozy in a microwave. You can make a matching set for different mugs using coordinating prints. A small handmade mug cozy also pairs nicely with a favorite tea or coffee as a gift.
27. Simple Fabric Cushion Cover
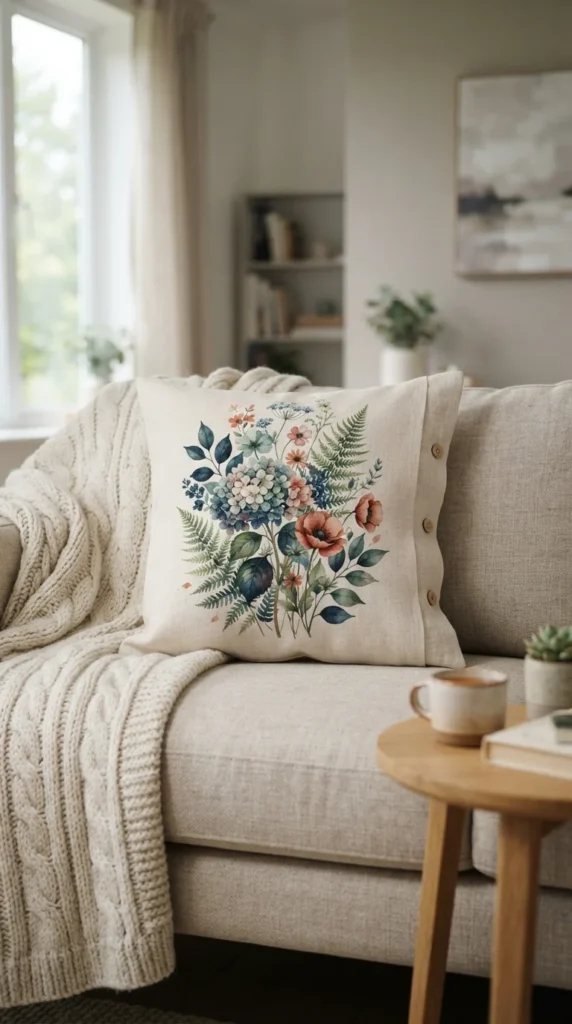
A simple cushion cover can change the look of a sofa, bedroom chair, or reading corner without requiring a complicated sewing pattern. An envelope-back design is especially beginner-friendly because it does not require a zipper or button closure.
Measure your cushion insert and cut one front square plus two overlapping back rectangles. Allow extra fabric for seam allowances and the overlapping sections. Hem one long edge of each back piece, then place both pieces over the front panel with their printed sides facing inward. The back pieces should overlap enough to cover the opening securely.
Stitch around all four sides, reinforce the corners, and turn the cover right side out. Insert the cushion and adjust the corners so the shape looks neat. Use heavier cotton or linen for a more structured appearance. You can also sew two covers in complementary prints and switch them whenever you want a different look in your room.
28. Fabric Coin Purse
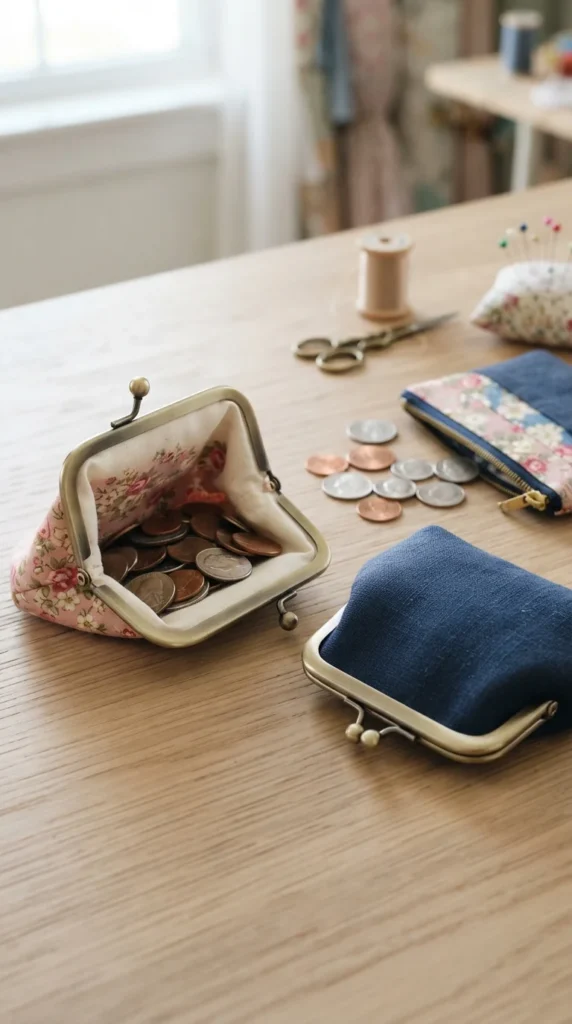
A fabric coin purse is a small accessory that can hold loose change, folded notes, earbuds, or tiny personal items. You can sew a basic zippered version or try a metal kiss-lock frame for a more traditional appearance. The zippered design is generally easier for someone who is new to small accessories.
Cut two outer fabric pieces and two lining pieces in a rounded purse shape. Add interfacing to the outer pieces, then place the outer fabric sections together and stitch around the sides and bottom. Repeat with the lining, leaving a small opening for turning. Insert the lining, attach a zipper along the top, and close the turning gap.
If you choose a metal frame, follow the frame manufacturer’s instructions for attaching the fabric securely. Add a small wrist loop or decorative tab if desired. Use contrasting lining fabric so the inside looks as attractive as the outside. This little purse is also a useful way to practice sewing curved seams.
29. Handmade Fabric Gift Card Holders

Fabric gift card holders are small, reusable sleeves that make store-bought gift cards and handwritten notes feel more personal. They are easy to sew in batches, and each one takes very little fabric. Choose cotton prints that match birthdays, holidays, weddings, or other special occasions.
Cut two fabric rectangles slightly larger than the card you plan to place inside. Add a layer of lightweight interfacing if the fabric is thin. Fold the lower edge upward to create a pocket, then place the lining piece behind it with the printed sides facing inward. Stitch around the sides and top, leaving an opening for turning. Turn the holder right side out and close the opening with neat stitching.
Add a small button and loop closure or a narrow ribbon tie. You can also decorate the front with a tiny fabric bow or a contrasting pocket panel. Make several holders in one sewing session and keep them ready for birthdays, thank-you gifts, and last-minute celebrations.
Final Thoughts
You don’t have to spend weeks on a sewing project to create something useful and beautiful. These 29 small ideas give you plenty of ways to practice basic techniques, use leftover fabric, organize your home, and make thoughtful handmade gifts. Start with one simple project, gather your supplies, and set aside a few hours this weekend. Once you finish your first piece, choose another idea and build your own collection of handmade creations.

Lily Summers is a digital artist and creative storyteller who loves bringing colorful characters to life. With a passion for cartoons, fan art, and playful sketches, she inspires others to explore their imagination through art. When she’s not sketching, you’ll find her dreaming up new ideas for CraftedWizard.com to spark creativity in every artist. 🌈✨