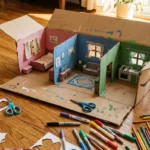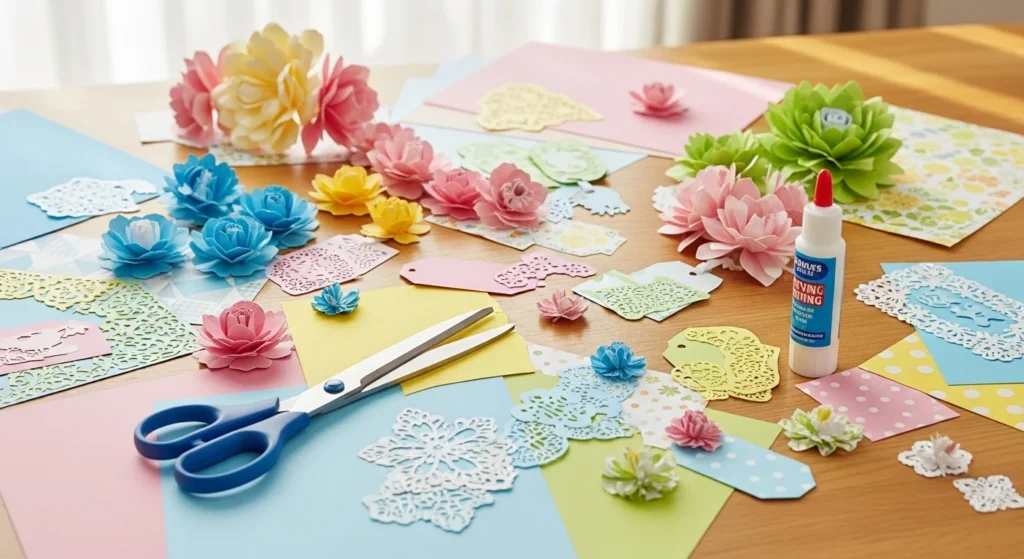
Paper crafts are one of the easiest ways to make something cute, useful, and personal without spending much money. With just paper, scissors, glue, and a few basic supplies, you can create wall decor, party pieces, gift extras, desk accessories, and boredom-buster projects that work for kids, teens, and adults. Many popular paper craft ideas stay simple on purpose, using folds, layered shapes, rolled strips, and bright color pairings to create projects that feel cheerful and doable in a short afternoon.
1. Layered Paper Flower Bouquet
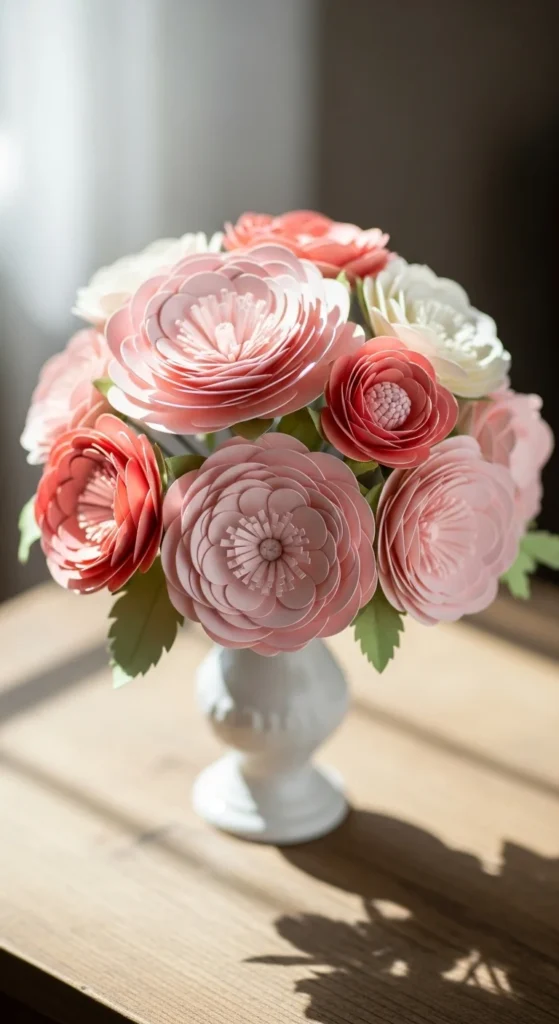
A layered paper flower bouquet is one of the prettiest ways to turn plain paper into decor that feels cheerful and handmade. Start with colored paper or cardstock in two or three shades that work well together. Cut petal shapes in different sizes, curl the edges with a pencil, and stack the layers with glue in the center. A button, paper circle, or bead can finish the middle. Once you make a few blooms, tape or glue them onto paper straws, skewers, or floral wire.
These flowers work well in a jar, mug, or simple vase. They are great for desks, shelves, party tables, or spring decor. If you want a lower-cost version, use old magazine pages for a more playful mix of color. For a softer look, try blush, cream, peach, and sage. For a brighter version, go with yellow, coral, blue, and pink.
This project is easy to repeat, which makes it great for group crafting or rainy afternoons. A bouquet of five to seven flowers already looks full enough to display. If you are making them with children, use larger petals and fewer layers. If you are making them for decor, smaller layered petals usually look neater and more polished.
2. Rainbow Paper Chain Garland
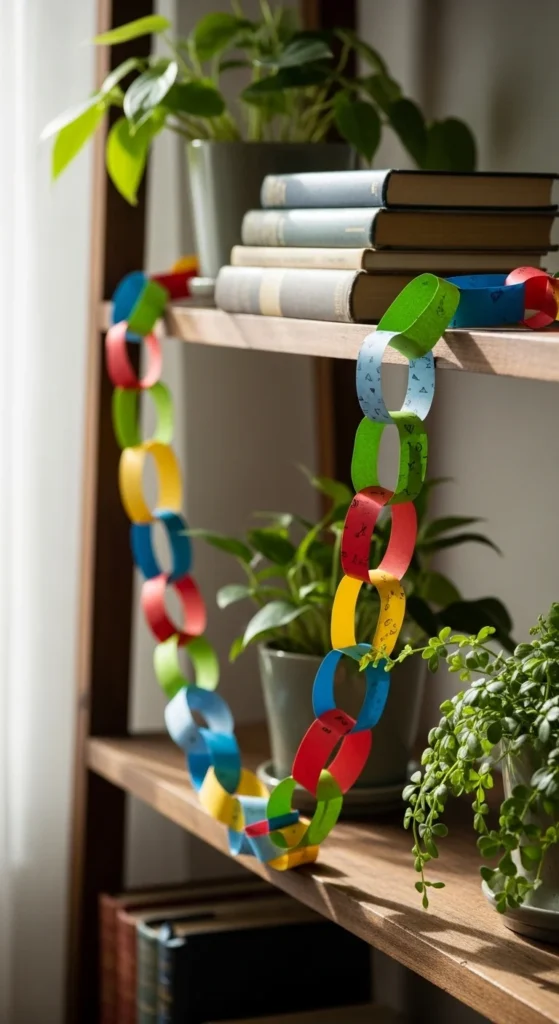
A rainbow paper chain garland is a classic craft that still looks charming when the colors are chosen well. Cut strips of construction paper, scrapbook paper, or cardstock into even lengths. Loop the first strip into a circle and glue or staple it shut. Then thread the next strip through the first ring and repeat until the chain feels long enough. It is simple, quick, and easy for almost any age.
This craft is perfect for bedrooms, parties, classrooms, playrooms, and holiday decor. A pastel chain feels soft and sweet, while a bright rainbow version brings more energy to a room. You can also use one-color shades for a calmer look, like all blues or warm sunset tones. If you want a more grown-up style, use kraft paper, white, black, or muted earthy shades.
It is also a strong choice when you want a low-cost project with big visual payoff. Paper scraps work well here, so nothing has to be wasted. Hang the garland across a shelf, doorway, headboard, or window. Make mini chains for gift wrapping, too. This is one of the easiest ways to decorate a space with very basic supplies, and the repeated loops make the whole process feel relaxed and fun.
3. Folded Paper Butterflies
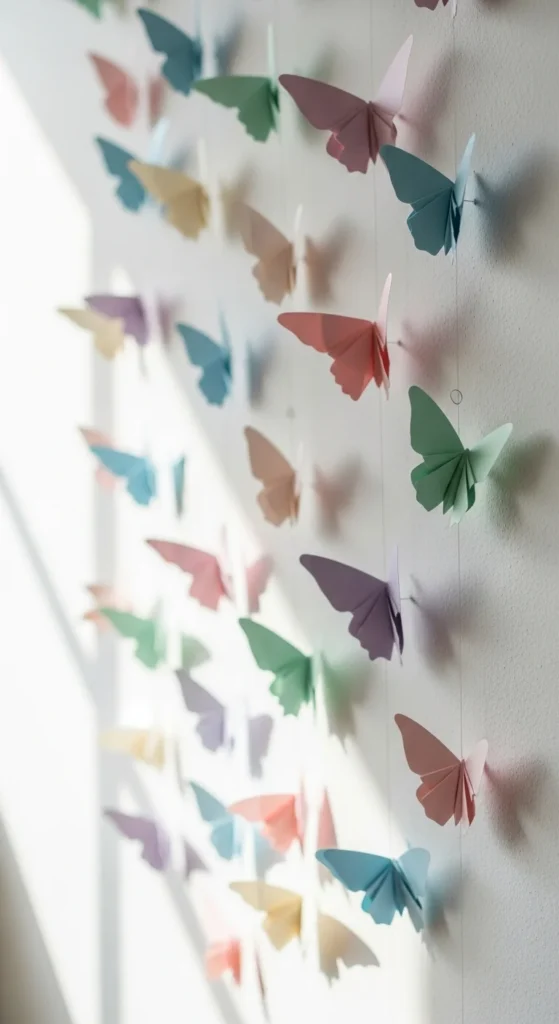
Folded paper butterflies are simple to make, yet they add a lovely light touch to walls, cards, and shelves. Start with squares or rectangles of paper in soft prints or solid shades. Fold each piece accordion-style, pinch the center, and secure it with glue, thread, or a paper strip wrapped around the middle. Spread out the wings and shape them gently with your fingers.
These butterflies can be used in many ways. Stick them onto a bedroom wall, attach them to gift bags, place them on a spring wreath, or hang them from string for a mobile. Patterned scrapbook paper works especially well because it gives the wings more interest without extra decorating. If you are crafting on a tight budget, magazine pages or painted notebook paper can still look really pretty.
For a cleaner finish, make butterflies in three sizes and group them in clusters. That gives the display more shape. You can also curl the wing tips slightly for a softer look. This is a great boredom-buster craft because it does not take much setup. Children can make bright butterfly sets, while teens and adults can go for calmer colors and more polished styling. A handful of folded butterflies can brighten up a room in less than an hour.
4. Rolled Paper Bead Jewelry
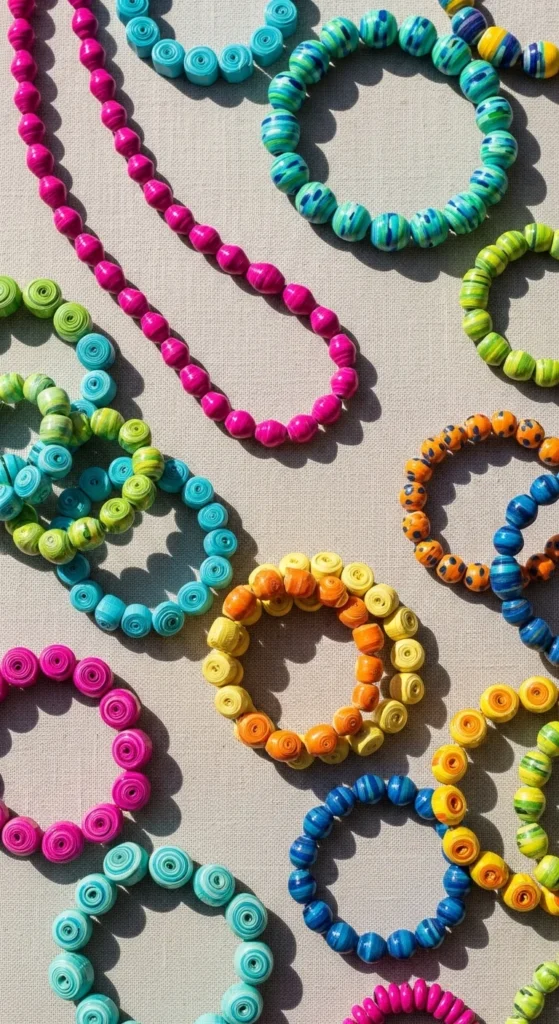
Rolled paper bead jewelry is a fun way to turn strips of paper into necklaces, bracelets, and keychains. Cut long triangles or strips from magazine pages, scrapbook paper, or colored paper. Roll each strip tightly around a skewer, toothpick, or thin straw, starting from the wide end and finishing at the point with a dab of glue. Once dry, slide the beads off and string them onto elastic, thread, or cord.
This project works well because it looks more detailed than it actually is. Bright magazine pages make colorful beads, while muted paper creates a softer style. If you want the beads to last longer, brush on clear glue or a light sealer after rolling. That gives them a smoother finish and a little extra strength.
Paper bead jewelry is a good group craft because everyone can make their own color mix. It is also budget-friendly since old papers work just fine. Make a bracelet for a friend, a necklace for dress-up play, or a keychain with a few bold beads and a tassel. This craft is great for summer afternoons, classroom art time, or party activities. It is simple, creative, and easy to personalize with different shapes and color combinations.
5. 3D Hanging Paper Stars
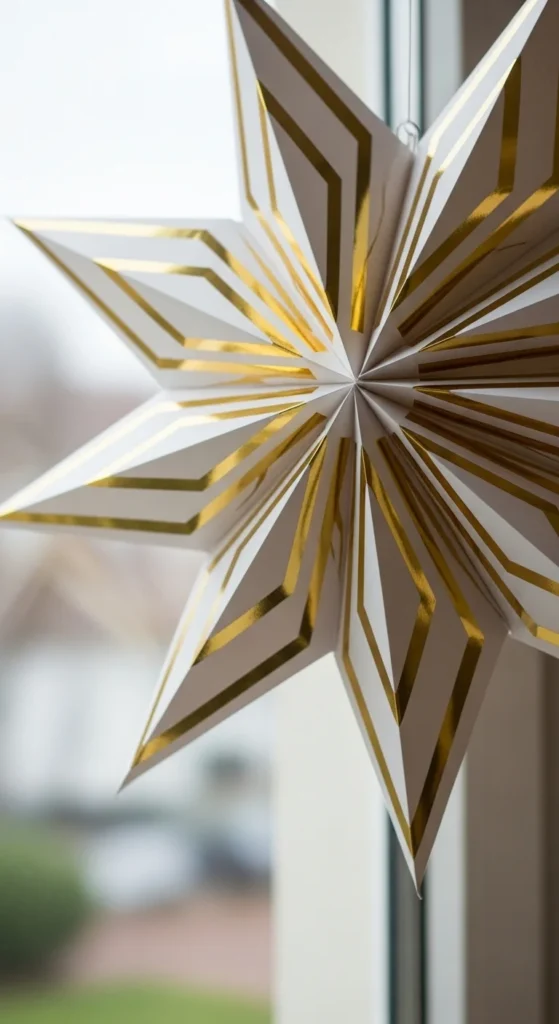
A 3D hanging paper star looks impressive, but the process is very manageable with folded shapes and a little patience. Use cardstock or thicker craft paper so the points hold their form well. Cut matching star pieces or folded diamond-like shapes, crease them neatly, and glue the sections together until the star becomes full and dimensional. Punch a small hole at the top and add thread or ribbon for hanging.
These stars are perfect for holiday decor, party backdrops, window displays, and bedroom accents. White paper gives a clean classic look, while metallic paper makes the star feel more festive. If you want a softer everyday version, use pale pink, dusty blue, kraft paper, or soft grey. A cluster of stars at different sizes usually looks better than just one.
This is a good project for older kids, teens, and adults who want something decorative but not too messy. Pre-cutting the pieces makes the crafting stage much faster. If you are short on supplies, even plain printer paper can work for smaller stars. Hang them with clear thread for a floating look. Once finished, these stars add shape and charm to a room without costing much, and they are easy to store flat for future use.
6. Patterned Paper Rosettes
Patterned paper rosettes are one of the fastest ways to create party decor, wall accents, or gift toppers with paper. Start with rectangular strips of paper and fold them accordion-style from one end to the other. Glue or tape the ends together to form a circle, then flatten the middle and secure it with a paper circle on top. Once the rosette opens, you have a full round shape that looks cheerful and decorative.
This craft works beautifully with scrapbook paper because the prints do most of the design work. Try florals, stripes, polka dots, or solid shades mixed together. Rosettes are great for birthday parties, classroom boards, holiday decor, or bedroom walls. Smaller ones can be attached to gift bags or cards, while larger ones work well in backdrops and wall clusters.
For a low-cost version, use magazine pages, wrapping paper, or old book pages. If the paper is thin, glue two strips together before folding. Mixing rosettes in three sizes creates more movement and makes the display feel fuller. This craft is especially handy when you want decor that looks bright and festive without taking much time. Fold, glue, flatten, and you are almost done. A few rosettes can change the feel of a whole wall or table in one afternoon.
7. Origami Heart Notes
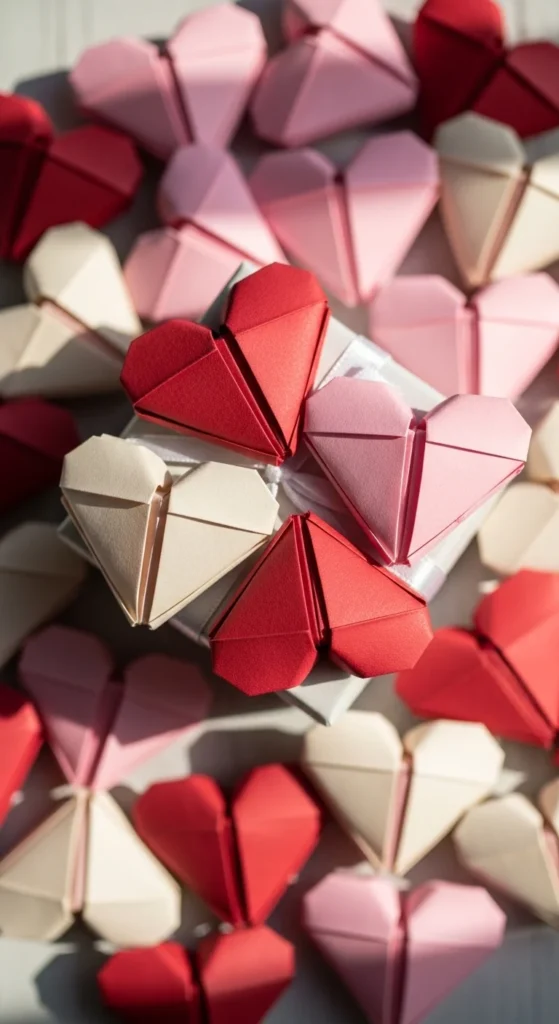
Origami heart notes are sweet little paper crafts that work as decorations, lunchbox surprises, card fillers, and tiny gifts. Fold square paper into neat heart shapes using simple origami steps. Once folded, write a short note inside or on the back if you want to make them more personal. The result is small, charming, and easy to make in batches.
These hearts are perfect for Valentine crafts, party favors, friendship notes, and gift wrapping. You can tuck them into jars, place them on pillows, slide them into books, or hang several together on string for a mini garland. Soft pinks and reds feel classic, but hearts also look lovely in florals, pastel checks, or even kraft paper for a more understated style.
The best part is that this craft uses very little paper, so it is easy on the budget. It is also a nice project for people who want a paper craft that feels more useful than decorative. Children enjoy the folding stage, and older crafters can use smaller paper for neater, more polished hearts. Make ten at once and keep them in a dish or envelope for easy use later. This is a tiny project, but it carries a lot of charm and can fit many occasions.
8. Magazine Collage Art Panels
Magazine collage art panels are perfect when you want a creative project that uses scraps and encourages playful design. Start with a piece of cardstock, cardboard, or canvas board as your base. Cut out colors, patterns, words, or pictures from magazines and layer them into an abstract design, mood board, or themed picture. You can keep the collage neat and color-based or let it feel more mixed and expressive.
This project works well for teens and adults, but children can enjoy it too with simpler shapes and themes. Try a color challenge like all blue tones, warm sunset shades, or black-and-white pages only. That makes the panel look more intentional. You can also build collages around a theme like flowers, travel, pets, fashion, or nature.
Magazine collage art is great for bedroom walls, desk areas, notebooks, or vision boards. It is also very low-cost because old magazines are easy to find. If you want a cleaner finish, use matte glue and press the paper flat as you go. A finished collage can be framed, pinned to a bulletin board, or turned into a greeting card front. This is a strong paper craft for creative days when you want freedom to cut, layer, and play with color.
9. Paper Tulip Stems
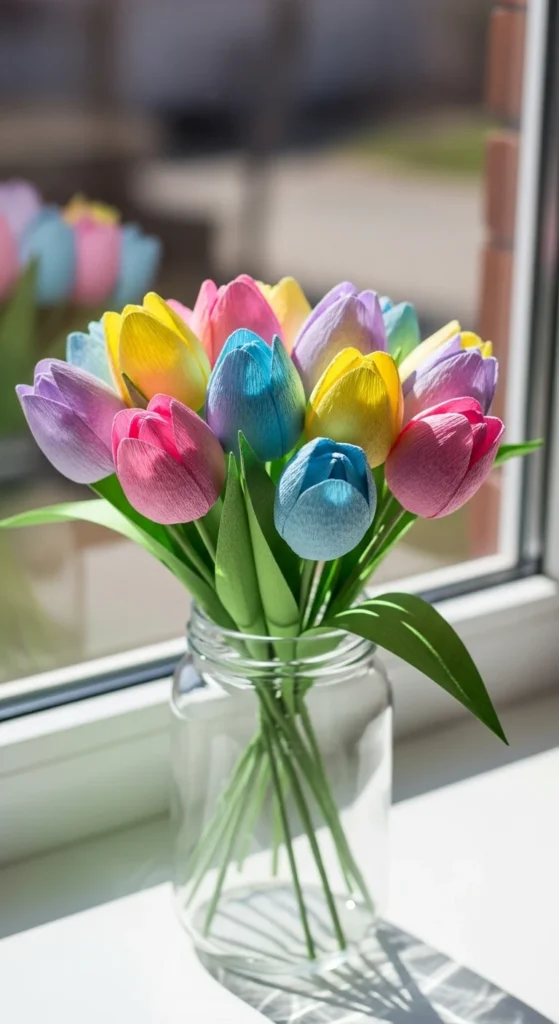
Paper tulip stems are bright, simple, and perfect for spring crafts or cheerful desk decor. Fold or cut tulip flower shapes from colored paper, then attach them to green paper stems, straws, or floral wire wrapped with green tape. You can make closed tulips for a cleaner look or open petals for more shape. A small leaf folded onto the stem adds a nice finishing detail.
These paper flowers work well in jars, mugs, party centerpieces, and classroom displays. Choose soft pink, coral, yellow, lavender, and white for a spring palette, or mix bold reds and oranges for a more playful arrangement. Tulips are easier to make than many layered flowers, so they are a good starting point for beginners.
This is also a budget-friendly project because one pack of paper goes a long way. Make three stems for a small display or a full bunch for a larger vase. If you are working with children, pre-cut the petals and let them do the gluing. If you want a more polished bouquet, curl the petal tips slightly and keep the stems all the same height. Paper tulips bring color to a room without any watering or upkeep, which makes them a fun handmade option for home decor or gifts.
10. Party Paper Crowns
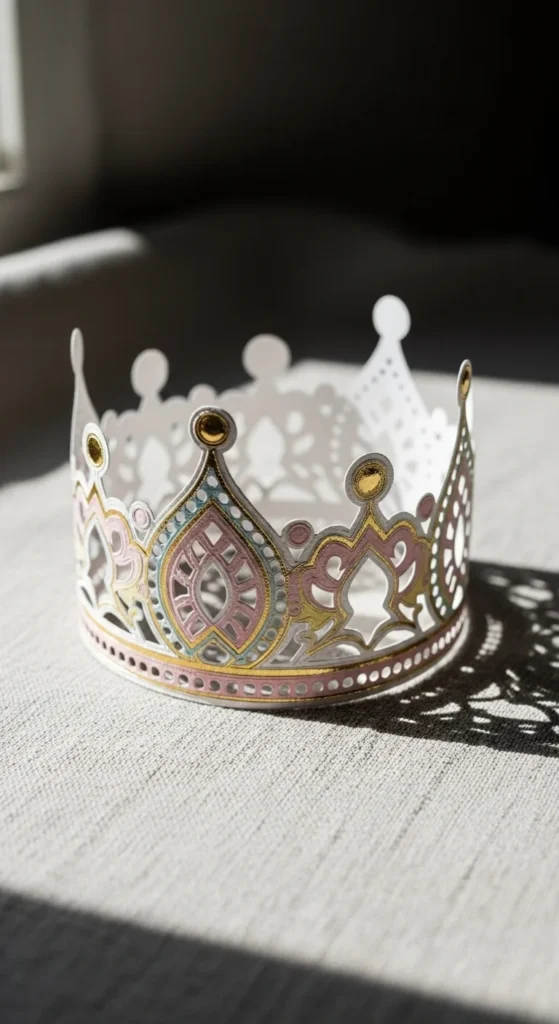
A paper crown is a fun craft that works for birthdays, classroom dress-up, pretend play, and party tables. Start with a strip of cardstock long enough to wrap around a head. Cut the top into points, rounded petals, or zigzag shapes. Then decorate it with paper jewels, stars, hearts, glitter paper, stickers, or hand-drawn patterns. Tape or staple the ends together when the crown is ready.
This project is great because it can be as simple or detailed as you want. Younger kids can use bright colors and stickers, while older kids might prefer a cleaner design with gold paper, pastel accents, or a name cutout. If you are making crowns for a group, set out bowls of paper shapes so everyone can decorate quickly.
Paper crowns are low-cost and easy to make in bulk, which makes them ideal for classrooms and parties. You can also turn them into seasonal headpieces with stars for winter, flowers for spring, or leaves for autumn. Keep a few plain bases ready, and the decorating part becomes even faster. A finished crown feels playful, creative, and ready for photos. It is one of those paper crafts that gives instant joy without asking for much setup or expensive materials.
11. Colorful Paper Pinwheels
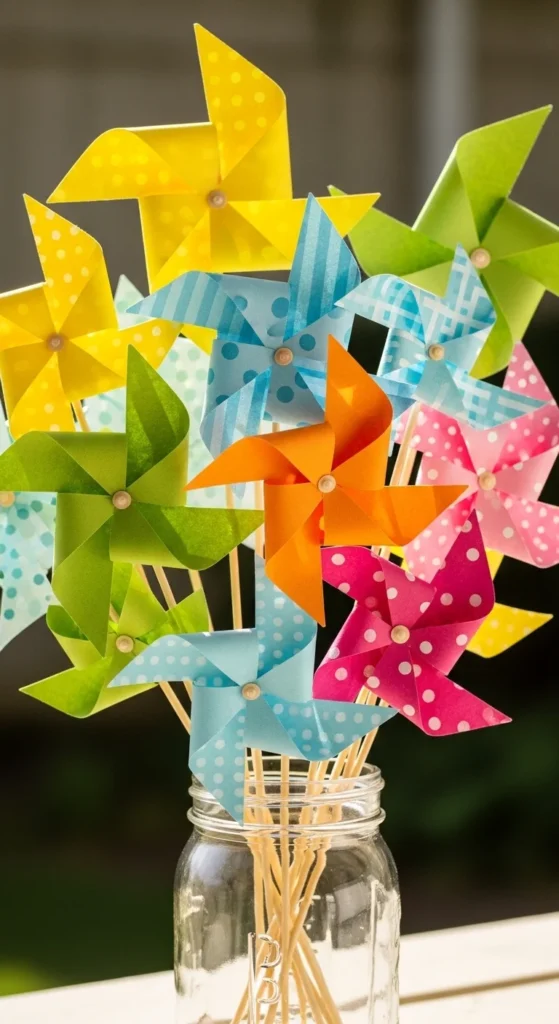
Paper pinwheels are cheerful little crafts that add movement and color to parties, gardens, desks, and gift baskets. Cut square paper pieces, slice diagonally toward the center without cutting all the way through, and fold every other corner inward. Secure the folded points in the middle with a pin or brad and attach the pinwheel to a straw, stick, or dowel.
This craft looks best with bright paper, patterned paper, or double-sided prints that show movement when the pinwheel spins. It is especially fun for summer parties, picnic decor, and kids’ craft sessions. You can make tiny versions for cupcakes or large ones for outdoor planters and centerpieces. If you want a longer-lasting display, use cardstock instead of thin paper.
Paper pinwheels are affordable and easy to customize. Use one color family for a polished party setup, or let every pinwheel be different for a more playful effect. This craft is also good for classrooms because the folding is simple and the finished result feels rewarding right away. Once you make one, the rest go quickly. A jar full of pinwheels on a table looks bright and happy, and even a single one can dress up a gift or party favor.
12. Paper Leaf Garland
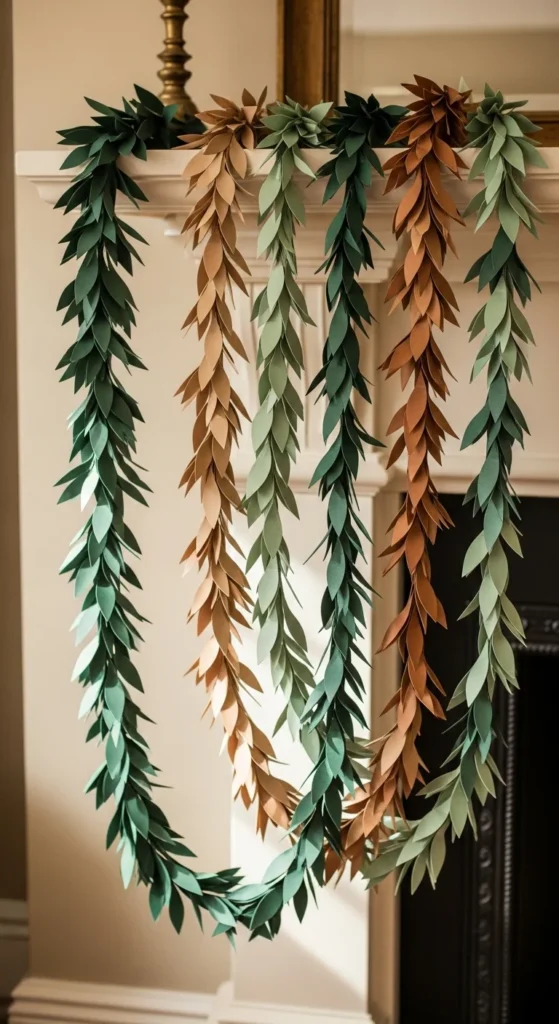
A paper leaf garland is a beautiful project for seasonal decor, nature themes, or cozy room styling. Cut leaf shapes from green, olive, rust, brown, or mustard paper. Fold each leaf lightly down the center to add shape, then glue or stitch them onto string in even spacing. If you want a fuller look, overlap some leaves slightly or mix sizes together.
This garland works especially well across mantels, bookshelves, windows, and headboards. It also fits party backdrops and classroom walls. You can make it soft and natural with earthy tones, or go bright and playful with rainbow leaves. If you only have basic supplies, plain printer paper colored with pencils or markers can still work.
The beauty of this project is how simple it feels while still looking decorative. A stack of leaf templates makes the cutting stage much faster. This is also a strong project for scrap paper because small pieces can still make good leaves. If you want a little more texture, crease each leaf gently or add drawn veins with a fine marker. A paper leaf garland is easy to hang, easy to store, and very flexible for different seasons. It brings a handmade touch to a room without taking much time or space.
13. Folded Paper Gift Boxes
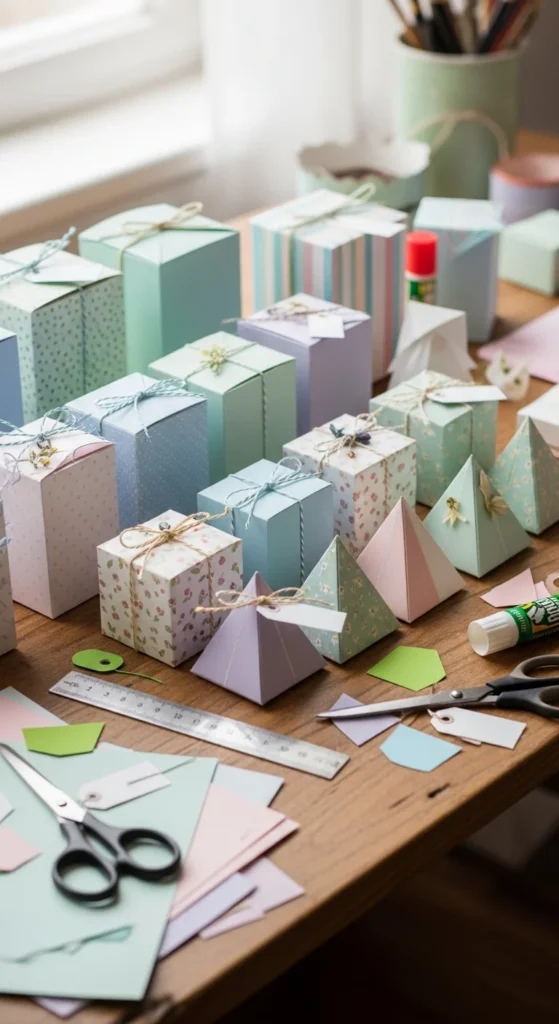
Folded paper gift boxes are useful crafts because the finished item can hold candy, jewelry, notes, small toys, or party favors. Use square paper or lightweight cardstock and fold it into a simple box shape using scored lines or basic origami-style folds. Once the base and lid are made, you can decorate them with ribbon, paper flowers, tags, or stickers.
These boxes are perfect for birthdays, classroom treats, weddings, and holiday gifting. Patterned paper makes them feel festive right away, while solid colors look neat and classic. If you want a stronger box, use cardstock or double up thinner paper. Small boxes are easier to shape cleanly, so start there if you are new to paper folding.
This is a smart low-cost craft because the box becomes part of the gift. It also helps you use up pretty paper that is too small for larger projects. A stack of folded boxes looks lovely on a shelf or party table, and making several at once saves time. Add tissue paper or shredded scrap paper inside for padding and extra charm. Paper gift boxes are practical, cute, and satisfying to complete, especially when you want a paper craft that feels useful as well as decorative.
14. Simple Quilled Greeting Cards
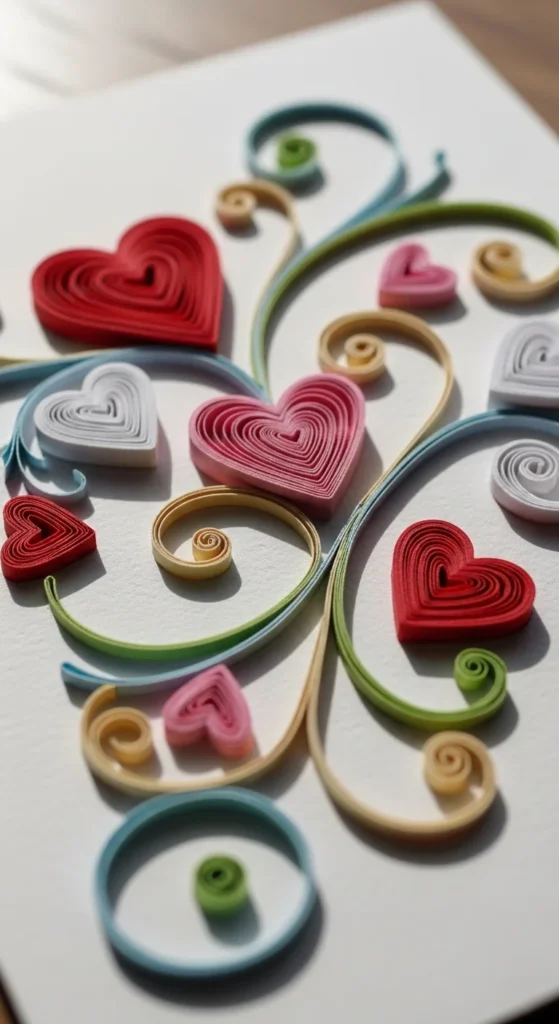
Simple quilled greeting cards are a lovely way to add texture and detail to paper without making the project too hard. Cut thin strips of paper and roll them into coils using your fingers, a toothpick, or a quilling tool. Shape the coils into teardrops, hearts, circles, or loose spirals, then glue them onto a blank card front in a floral, heart, or abstract design.
This project works best when you keep the design small and focused. A few petals and leaves in one corner often look prettier than a card packed with shapes. Quilled cards are great for birthdays, thank-you notes, Mother’s Day, and handmade gifts. Soft pastels look delicate, while bold colors make the design more playful.
You do not need fancy tools to try this. Thin paper strips cut from colored sheets can work just fine for beginner projects. If you want to save time, start with a mini flower card or a small heart design. Quilled cards feel special because the texture stands out right away. They are also a nice introduction to paper shaping for older kids and adults. A handmade card like this can mean more than a store-bought one, and once you get used to rolling the strips, the process feels calm and satisfying.
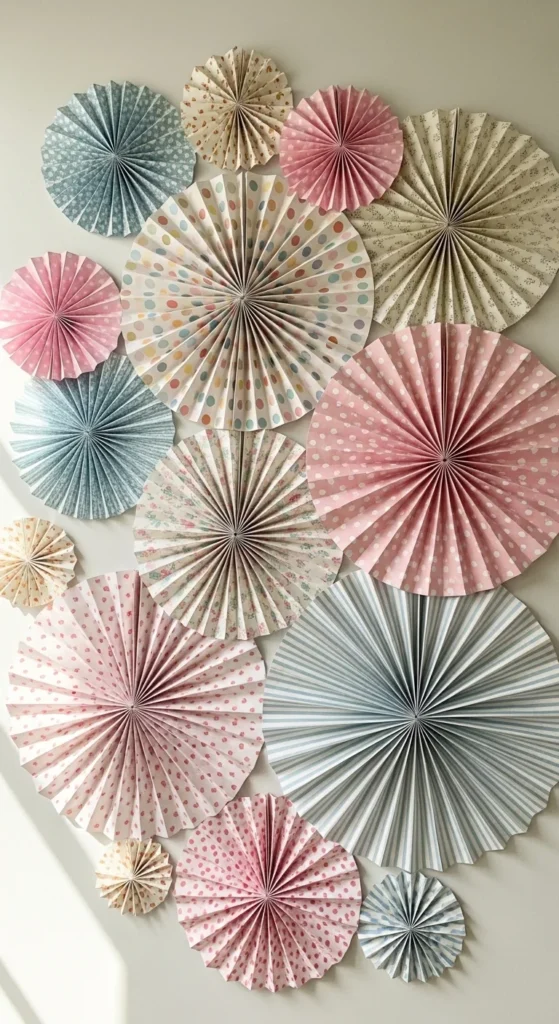
15. Decorative Paper Fans

Decorative paper fans are bold, quick to make, and perfect for walls, parties, or festive backdrops. Fold rectangular paper accordion-style from end to end, then pinch the middle and glue or tape one side into a half circle. Make two halves and join them together to create a full round fan. Add a paper circle in the middle if you want a finished center.
These fans look especially good in groups of different sizes. Use matching colors for a polished display or mix patterns for a cheerful party look. Pastels are lovely for birthdays and baby showers, while bright colors suit summer parties and classrooms. If you want a simpler version, make small fans and use them as gift toppers or card decorations.
Paper fans are great because they give a lot of visual impact without much cost. Scrapbook paper, wrapping paper, and even painted plain paper can all work. Hang them on a wall, tape them onto a door, or layer them behind a dessert table. They fold flat enough for easy storage, too. This craft is ideal when you need decor fast and want something that looks fun, full, and photo-friendly without needing many supplies.
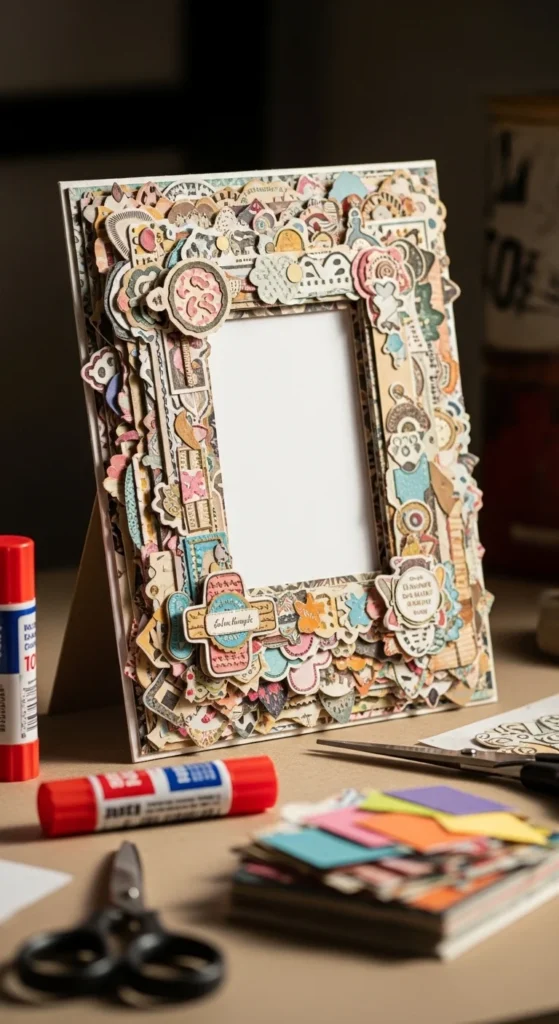
16. Scrap Paper Mosaic Frames
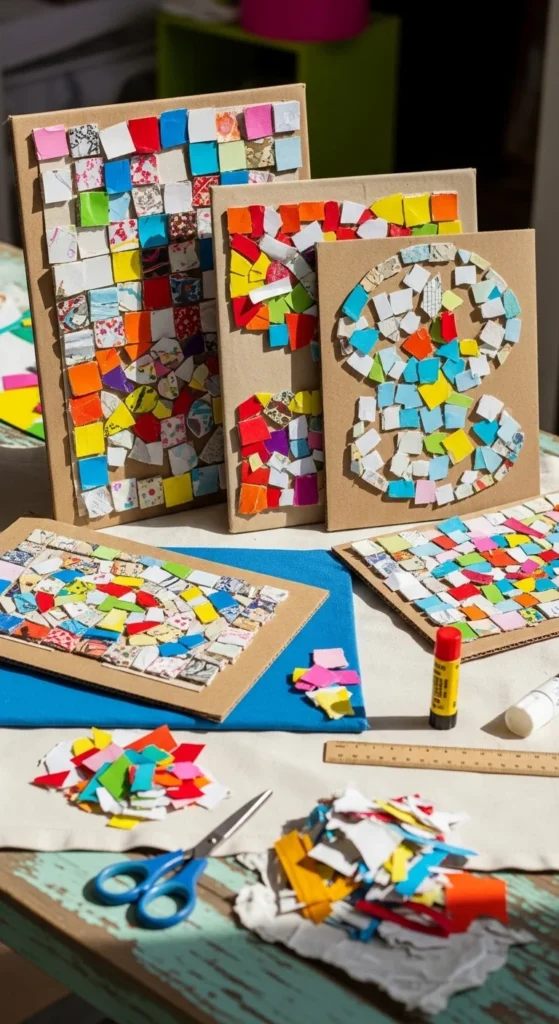
Scrap paper mosaic frames are a great way to use tiny leftover pieces that might otherwise be thrown away. Start with a cardboard or wood frame base, then cut your scrap paper into little squares, triangles, or rough pieces. Glue the pieces down closely together like a mosaic, mixing colors and patterns until the frame feels full and bright.
This project works well for all ages because the shapes do not have to be perfect. Kids can enjoy colorful random patterns, while older crafters might prefer a tighter color palette or geometric layout. Try all blues, warm sunset tones, black-and-white, or rainbow scraps for different looks. Once finished, add a photo, drawing, or quote inside the frame.
Scrap paper mosaics are low-cost and easy to personalize. They are also a strong classroom project because the materials are simple and the results feel rewarding. If you want a cleaner finish, paint the frame base first so small gaps are less visible. You can also seal the finished frame with clear glue for a smoother look. A mosaic frame feels lively and handmade, and it turns leftover paper into something display-worthy with just cutting, gluing, and arranging.
17. Cut-Out Paper Lanterns
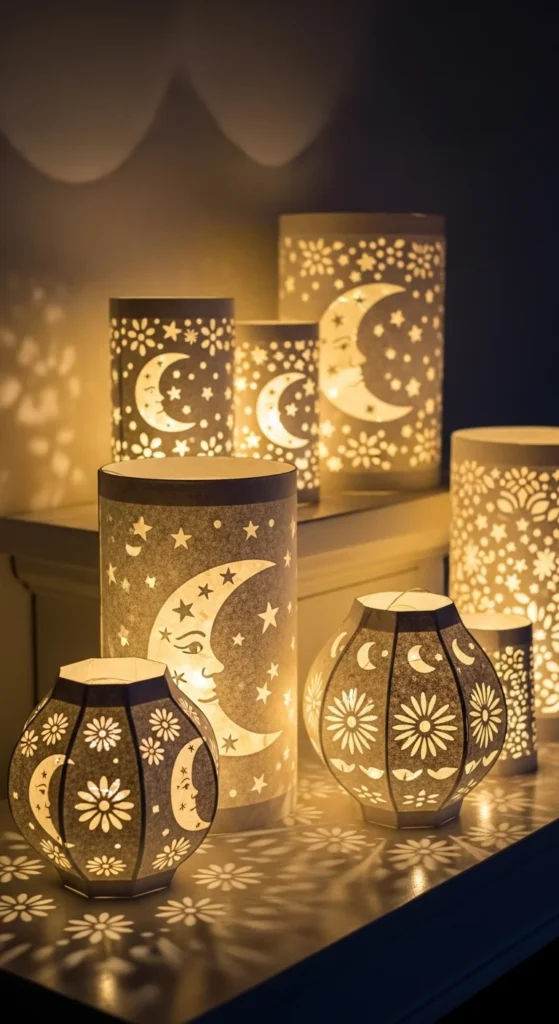
Cut-out paper lanterns bring a cozy look to shelves, tables, and party spaces. Use sturdy paper or cardstock to form a simple cylinder, square lantern, or folded lantern shape. Before assembling, cut tiny stars, hearts, circles, or leaf shapes into the panels so light can shine through. Place a battery tea light or fairy light inside once the lantern is done.
These lanterns are perfect for evening decor, birthdays, sleepovers, and holiday tables. White paper gives a calm glowing effect, while colored paper creates more playful light. If you want a festive look, add metallic paper handles or tiny paper tassels. For children, larger cut-out shapes are easier and safer to manage.
This craft feels special because the light changes the whole result. It is also affordable, especially if you make several from one paper pack. Keep the shapes evenly spaced for a neater look, and test the lantern with the light inside before making more. A row of paper lanterns on a windowsill or table feels warm and inviting. This is one of those paper projects that looks more detailed at night, which makes it a fun surprise once everything is turned on.
18. Layered Paper Bookmarks
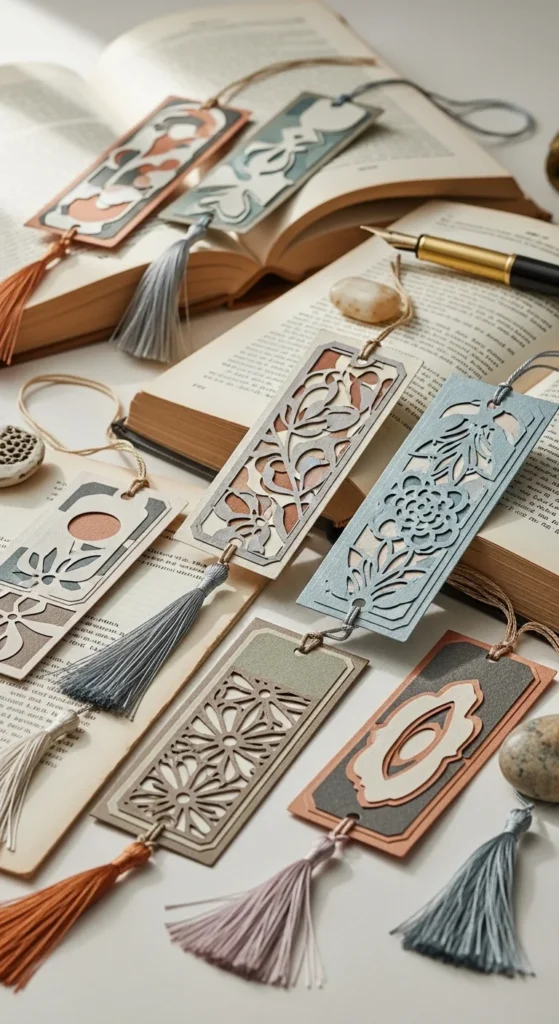
Layered paper bookmarks are easy, useful, and great for gifts, party favors, or school crafts. Cut a base strip from cardstock, then add smaller shapes, borders, or layered paper pieces on top. You can use hearts, leaves, stars, circles, or simple patterned strips. Punch a hole at the top and thread through a ribbon or yarn tassel for a finishing touch.
These bookmarks are ideal for readers, students, teachers, and anyone who enjoys stationery. They also make nice little handmade add-ons when you want to dress up a gift. The layered look gives the bookmark more personality without making the craft too hard. If you want a neat finish, round the corners and keep the color palette simple.
This is a good project for using paper scraps because even narrow pieces can become decorative layers. You can also laminate the bookmarks or cover them with clear adhesive film if you want them to last longer. Children enjoy adding stickers and bold shapes, while older crafters may prefer floral prints, neutral tones, or minimal patterns. A small stack of handmade bookmarks tied together with ribbon can make a lovely low-cost gift or craft fair item.
19. Folded Paper Wreath
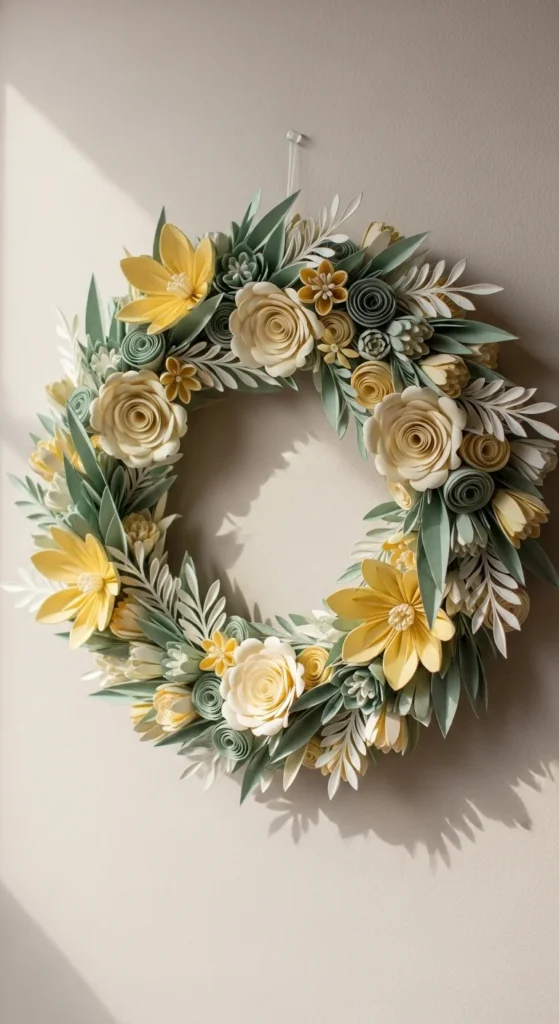
A folded paper wreath is a cheerful decor craft that works for many seasons and celebrations. Start with a cardboard ring as the base, then cover it with folded paper leaves, rosettes, flowers, or fan shapes. You can go with one repeating shape or mix a few together for more texture. Once the base is covered, add a ribbon loop for hanging.
This project is great for front doors, bedroom walls, classroom boards, and holiday displays. Spring wreaths look lovely with flowers and pastel leaves, while autumn versions work well in rust, mustard, brown, and olive. If you want a winter wreath, try white, silver, and dark green paper accents. Paper wreaths are light, easy to hang, and easy to store when the season changes.
It is also a good low-cost option because the cardboard base can be recycled from packaging, and scrap paper can be used for the decorations. The trick to making the wreath look full is overlapping the shapes closely. This craft works well as a solo project or group activity, and it is flexible enough for many styles. A handmade wreath adds color and charm to a wall without needing much more than paper, glue, and a little time.
20. Accordion Paper Snakes
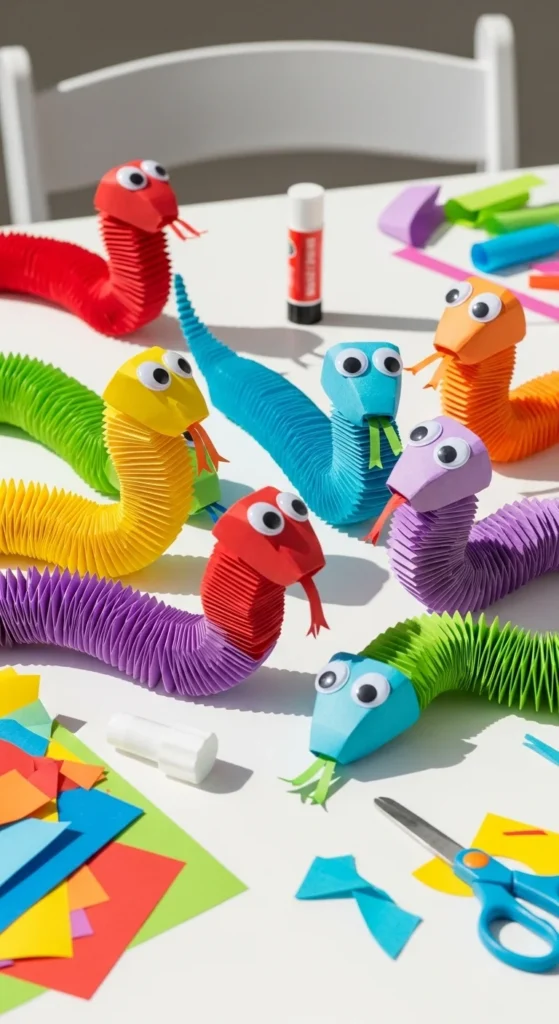
Accordion paper snakes are funny, lively crafts that kids especially love because the finished shape moves and stretches. Cut long strips of paper and fold two strips together in alternating right-angle folds until you form an accordion body. Add a paper head, drawn face, tongue, and eyes once the folded body is done. The result is playful and easy to customize.
These snakes are perfect for boredom-buster afternoons, classrooms, animal themes, and rainy-day crafts. Use bright colors for a silly look or green and brown shades for a more natural style. You can also make other animals with the same accordion fold, like caterpillars or dragons. This makes the project very flexible.
The materials are basic, and the folding pattern becomes easy after one try. That makes it a good project for group crafting. If you want to save time, cut the strips in advance and let kids do the folding and decorating. Accordion animals are also lightweight and easy to display on desks, windowsills, or bulletin boards. This is one of those paper crafts that feels more interactive than flat projects, which makes it extra engaging for younger crafters.
21. Handmade Paper Envelopes
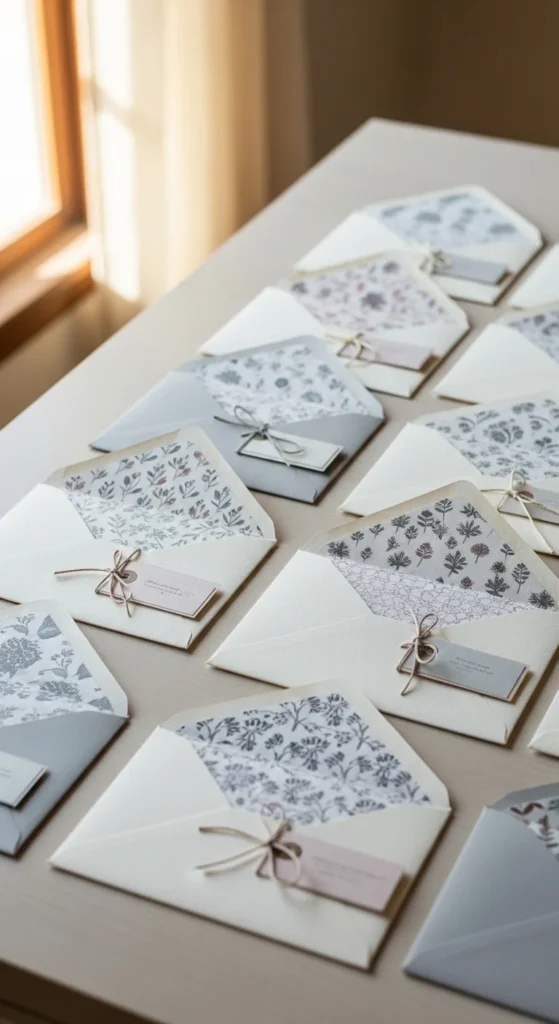
Handmade paper envelopes are useful little crafts that can turn letters, gift cards, stickers, and notes into something more special. Trace an envelope template onto scrapbook paper, old maps, wrapping paper, or plain paper, then cut and fold along the lines. Glue the side flaps and leave the top flap open for sealing later. Add a sticker, wax seal, or tie closure if you want a pretty finish.
These envelopes are perfect for party invitations, thank-you notes, mini gifts, and journal pockets. Patterned paper makes them feel decorative right away, while kraft or plain white paper looks clean and classic. If you want the envelope to feel extra polished, line the inside flap with a contrasting print. That tiny detail makes a big difference.
This is a strong low-cost paper craft because even one sheet of pretty paper can make several small envelopes. It is also practical, which makes it useful for everyday gifting and card making. Make a few at once and keep them in a drawer for future use. A handmade envelope turns even a simple note into something more memorable, and the process is simple enough for beginner crafters with just paper, scissors, and glue.
22. Layered Paper Rainbows
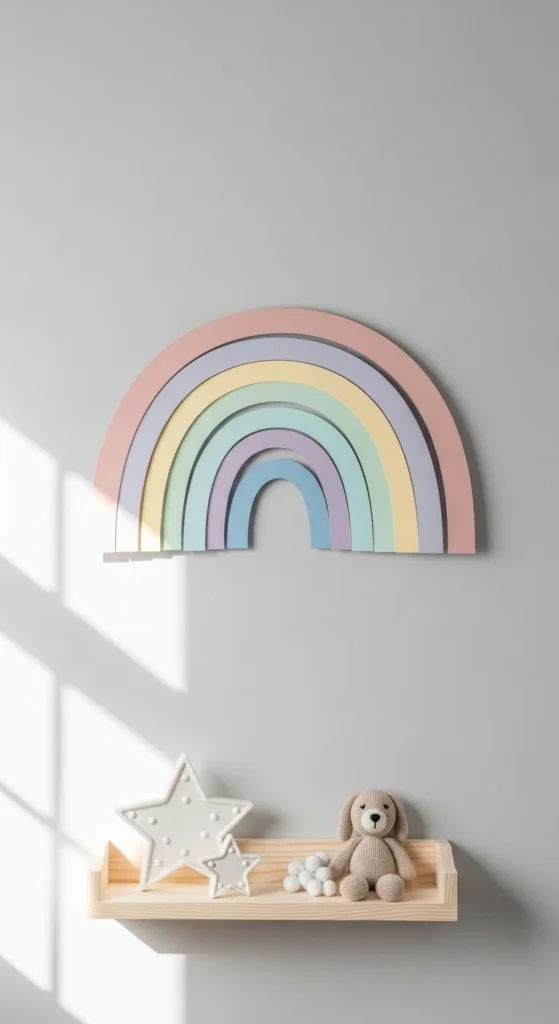
Layered paper rainbows are bright, happy crafts that work for nursery decor, classrooms, bedroom walls, and party themes. Cut rainbow arc shapes in graduating sizes from colored paper or cardstock, then glue them in stacked layers from largest to smallest. You can keep the colors traditional or switch to pastels, earthy tones, or monochrome shades for a different look. Add cloud shapes, tassels, or hanging strings if you want extra detail.
This project is very beginner-friendly because the shapes are simple and the process is repetitive in a satisfying way. It is easy to make smaller rainbows for cards and larger ones for wall decor. If you do not have colored paper, paint or color plain sheets first and then cut the arcs once dry. For a softer style, use muted terracotta, blush, cream, and mustard instead of bright rainbow tones.
Layered rainbows are especially nice because they look cute but still tidy. That makes them a good paper craft for both children and adults. Hang one in a playroom, prop it on a shelf, or attach it to a gift bag. It is a cheerful project that comes together fast and makes a room feel lighter right away.
23. Folded Paper Desk Organizers
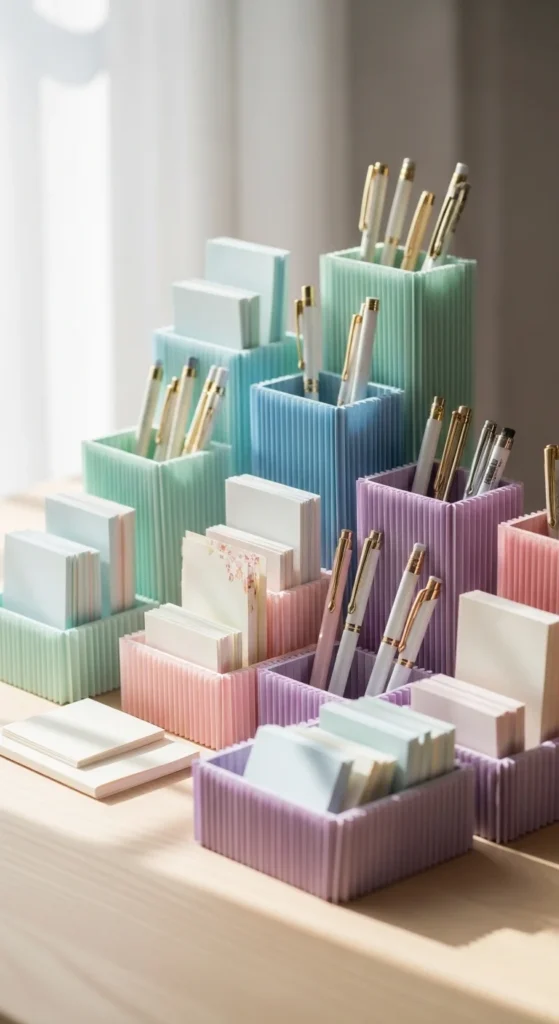
Folded paper desk organizers are practical crafts that help turn paper into something useful. Use sturdy cardstock or light cardboard to create small trays, pen holders, note holders, or open boxes with folded sides. You can make simple rectangle trays for clips and erasers or taller holders for pencils and brushes. Decorating the outside with patterned paper or labels makes the organizer feel more personal.
These pieces work well on homework desks, craft tables, and study corners. They are especially helpful for children and teens because they make the desk feel more fun while also holding small supplies. For a more polished look, choose two colors that work well together and keep the folds crisp. If the paper feels too soft, glue two layers together before folding.
This project is low-cost and very useful because it creates storage from basic supplies. It is also a good classroom or rainy-day activity since the steps are straightforward and the finished item can be used right away. A small desk tray or holder may be simple, but it makes a workspace feel more organized and more inviting, which adds extra value to the craft.
24. Paper Tassel Garland
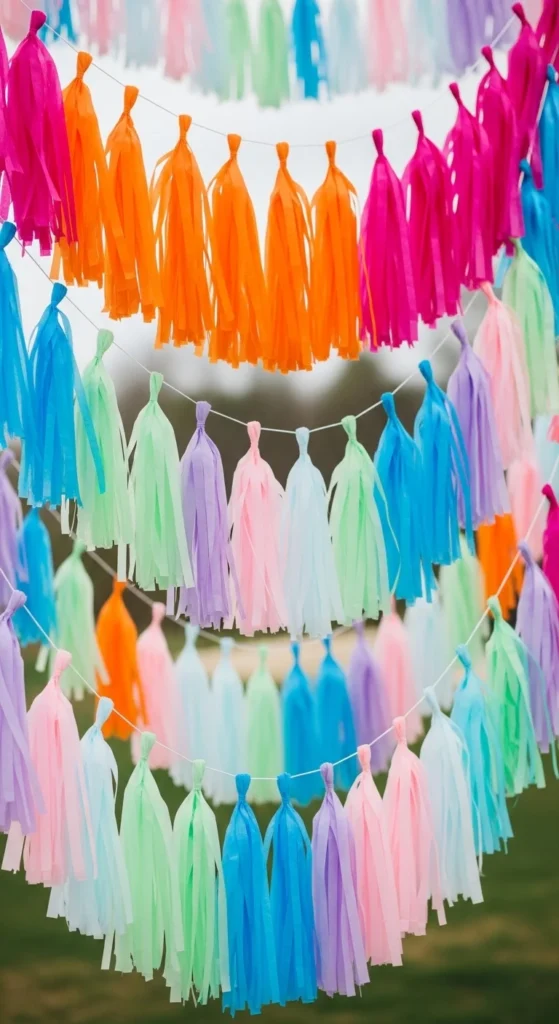
A paper tassel garland is a lively final project because it is easy, colorful, and perfect for parties or room decor. Cut tissue paper or lightweight paper into rectangles, then fringe each piece from both sides, leaving the center uncut. Twist the middle to form the tassel top and loop it over string or ribbon. Repeat with several tassels until the garland feels full enough.
These garlands are great for birthdays, baby showers, holiday tables, sleepovers, and bedroom walls. Bright colors create a playful mood, while blush, white, peach, and gold feel softer and more decorative. If you want a lower-cost version, use reused gift tissue or thin wrapping paper instead of buying new craft paper.
The beauty of this project is speed. Once the first tassel is done, the rest move fast. Tassels also look best in groups, so even simple shapes create a big visual effect when strung together. Hang the garland across a doorway, shelf, party backdrop, or headboard. It packs a lot of color into a small project and works well when you need easy decor with little setup. This is one of the most cheerful paper crafts on the list and a strong one to save for celebrations.
Conclusion
Paper crafts are a simple way to turn basic supplies into decor, gifts, party pieces, and playful projects that suit many ages and skill levels. From flowers and stars to garlands, bookmarks, boxes, and desk accessories, these ideas show how much you can make with a small stack of paper and a little time. Start with one easy project, use the colors and paper you already have, and let the process stay light and enjoyable. Even the simplest paper craft can bring a lot of charm to a shelf, a party, or a quiet afternoon at home.

Lily Summers is a digital artist and creative storyteller who loves bringing colorful characters to life. With a passion for cartoons, fan art, and playful sketches, she inspires others to explore their imagination through art. When she’s not sketching, you’ll find her dreaming up new ideas for CraftedWizard.com to spark creativity in every artist. 🌈✨