A pretty bookmark can make even an ordinary reading session feel a little more special. And when it is laminated, it is not just cute, it is practical too. No bent corners, no paper tearing, and no handmade design getting ruined after a few uses. That is why laminated bookmarks are such a fun DIY project. They are easy to personalize, budget-friendly, and perfect for gifts, party favors, classroom crafts, or just upgrading your own reading routine.
The best part is that you do not need fancy supplies to make them look good. A few simple materials and a little creativity can turn scraps of paper, stickers, pressed flowers, or doodles into bookmarks that feel polished and long-lasting.
Why laminated bookmarks are such a great DIY
Laminated bookmarks hit the sweet spot between creative and useful. They are not the kind of craft that ends up sitting in a drawer unused. You actually get to enjoy them every day.
Here is why people love making them:
- They last much longer than plain paper bookmarks
- They are easy to customize with different colors and themes
- They make thoughtful handmade gifts
- They are great for kids, teens, and adults
- They use inexpensive craft supplies
You can keep the design minimal and elegant, or go bright and playful. That flexibility makes this project perfect for Pinterest-style DIY inspiration.
Gather your supplies before you begin
You can make laminated bookmarks with either a laminating machine or self-adhesive laminating sheets. Both options work well, so just use what you already have.
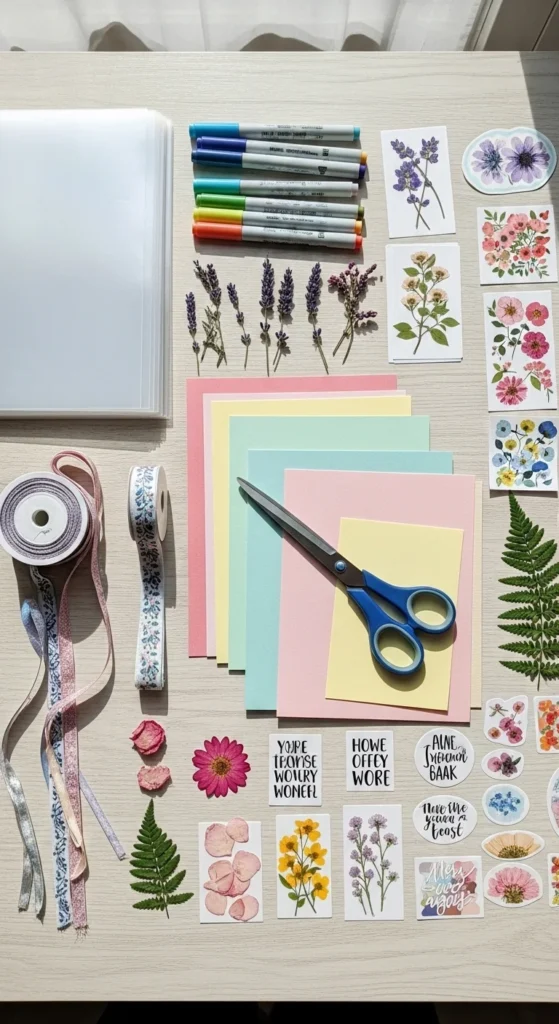
Here is what you may need:
- Cardstock, scrapbook paper, or watercolor paper
- Scissors or a paper cutter
- Laminating pouches or self-laminating sheets
- Hole punch
- Ribbon, yarn, or tassels
- Stickers, washi tape, or stamps
- Pressed flowers, magazine cutouts, or printed art
- Markers, pens, or paint for hand-drawn details
A sturdy paper base works best because it gives the bookmark a clean shape before laminating. Thin printer paper can work too, but cardstock usually looks more finished.
Choose a style that matches your vibe
This is where the fun begins. Before cutting and laminating, decide what kind of bookmark you want to make. You can go simple or layered depending on how decorative you want the final piece to feel.
A few cute design ideas:
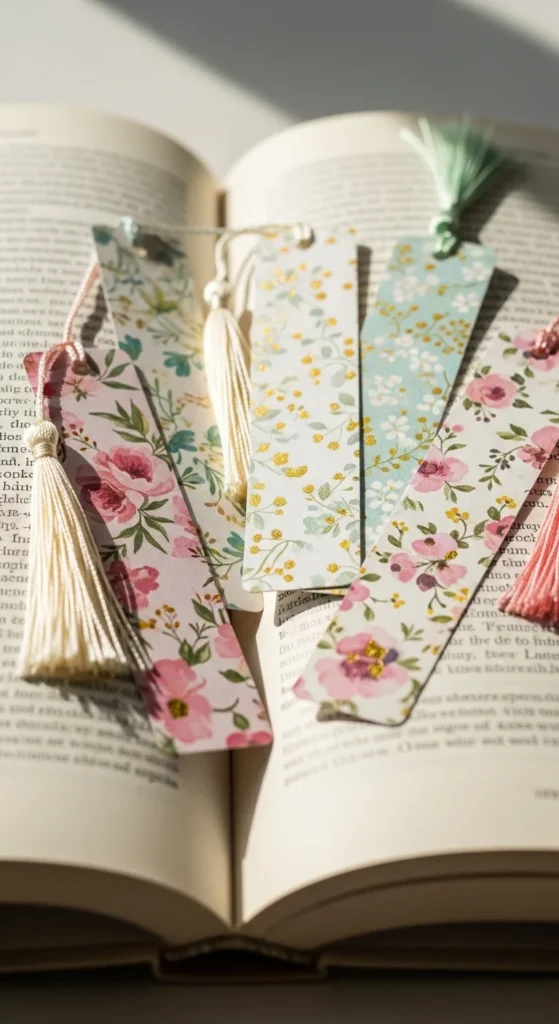
- Floral bookmarks with pressed flowers
- Aesthetic pastel bookmarks with soft colors and washi tape
- Minimal black-and-white bookmarks with line doodles
- Book-themed bookmarks with tiny stars, moons, or cozy reading art
- Kids’ bookmarks with cartoon stickers and bright patterns
- Seasonal bookmarks for fall, spring, or holiday gift sets
If you are making more than one, try choosing a mini collection theme. For example, create three bookmarks in matching shades or designs. That instantly makes them look gift-ready.
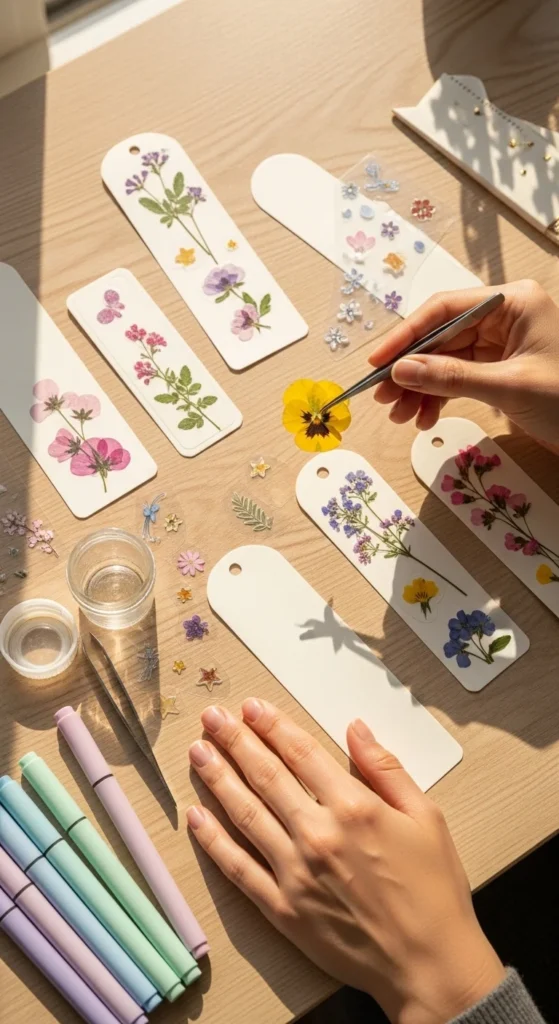
Cut and decorate the bookmark base
Start by cutting your paper into bookmark आकार. A good size is around 2 x 6 inches, but you can make them slightly wider or shorter depending on the look you want.
Once the base is cut, decorate it before laminating.
Easy ways to decorate:
- Layer patterned paper over cardstock
- Add hand lettering or tiny doodles
- Glue down pressed flowers or leaves
- Use stickers sparingly for a clean look
- Add a border with markers or washi tape
Try not to make the design too bulky. Very thick embellishments may create bubbles or uneven edges inside the laminate. Flat decorations work best.
If you are crafting with kids, this is the stage where they can really have fun. Let them mix colors, add drawings, or create themed bookmarks for their favorite books.
Laminate carefully for a smooth finish
After decorating, it is time to seal everything in place. If you are using a laminating machine, place the bookmark inside the laminating pouch with enough space around the edges. Run it through slowly and make sure it comes out flat.
If you are using self-adhesive sheets, press carefully from one side to the other to reduce air bubbles.
A few helpful tips:
- Leave a small clear border around the bookmark when trimming
- Do not cut too close to the paper edge
- Smooth the pouch before sealing if anything shifts
- Work slowly so the design stays centered
That small border matters more than people think. It helps keep the laminate sealed, which makes the bookmark more durable over time.
If bubbles appear, do not panic. Minor ones are often barely noticeable once the bookmark is finished, especially with patterned designs.
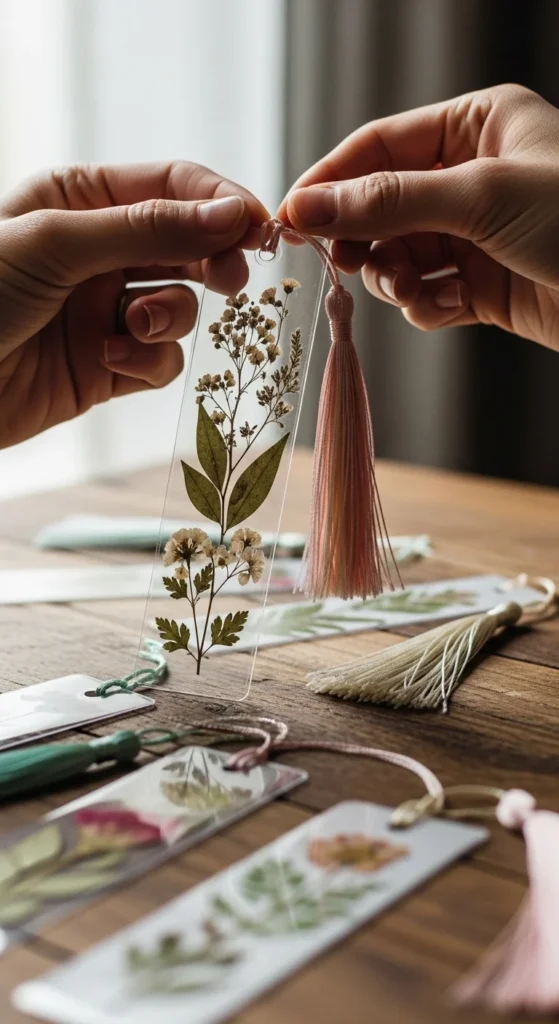
Add finishing touches that make it extra cute
Once laminated, your bookmark is already usable. But a few finishing details can make it look much more polished.
Try adding:
- A punched hole at the top
- Satin ribbon in a matching color
- Twine or yarn for a rustic style
- A tassel for a more elegant look
- Rounded corners for a softer finish
Rounded corners are especially nice because they make the bookmark feel more professional and prevent sharp plastic corners from catching on pages.
These small details take only a minute, but they really elevate the final look.
Fun ways to use or gift laminated bookmarks
One reason this DIY is so satisfying is that the result is both pretty and practical. You can make bookmarks for yourself, but they are also ideal for gifts.
Some simple ideas:
- Slip one into a book as a thoughtful present
- Make sets for birthdays or classroom treats
- Create custom bookmarks for book clubs
- Use themed sets as Etsy or craft fair items
- Let kids make personalized ones for friends
You can even package a few together with ribbon or place them in a small envelope for an easy handmade gift.
Final thoughts
Laminated bookmarks are one of those crafts that look charming, cost very little, and actually get used again and again. With a bit of paper, a few cute details, and a simple laminate finish, you can create DIY designs that feel durable, polished, and personal.
Whether you love florals, minimal designs, or bright playful colors, there is plenty of room to make them your own. Save this DIY for later and make a few laminated bookmarks the next time you want a quick, cute, and useful craft project.

Lily Summers is a digital artist and creative storyteller who loves bringing colorful characters to life. With a passion for cartoons, fan art, and playful sketches, she inspires others to explore their imagination through art. When she’s not sketching, you’ll find her dreaming up new ideas for CraftedWizard.com to spark creativity in every artist. 🌈✨