
Working with clay at home is simple, calming, and surprisingly practical. You don’t need a studio setup or pricey tools. A small block of air-dry clay, a rolling pin, and a few household items can help you make everyday pieces that look stylish and useful. This list brings easy ideas anyone can try, especially beginners. Every project supports quick crafting sessions, low-cost materials, and creative freedom. Whether you want storage pieces, home decor, or personal accessories, you’ll find ideas that fit your style without making things complicated.
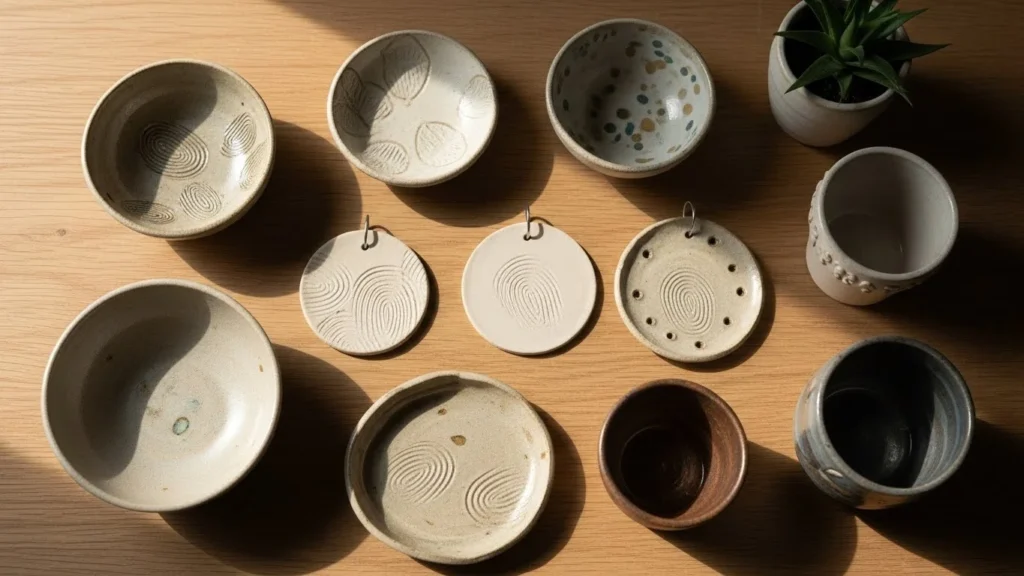
1. Trinket Dish for Jewelry

A clay trinket dish is one of the easiest things to craft. Roll a small ball of clay, flatten it with a glass, and pinch the sides upward. You can shape it into a circle, heart, or wavy-edged form. Keep the edges uneven for a handmade look. Once dry, add a pop of metallic paint around the rim. It works well on nightstands or bathroom counters. If you mis-shape the clay, just re-roll and start again. Add pressed flowers or fabric texture for detail. It’s affordable and takes very little drying space. You can make several sizes for earrings, rings, or keys. This tiny dish often becomes a go-to catchall at home.
2. Mini Clay Plant Pots

Mini clay pots add charm to desks and windowsills. Shape a small cylinder, press the bottom flat, and smooth the sides with a bit of water. If you want a textured surface, press lace or netting around the clay before it dries. These pots work best for air plants, faux plants, or dried stems since they’re usually not waterproof. Paint them with soft neutrals or leave them bare for a natural look. They dry quickly and require very little clay. They also make cute gifts. Try grouping three pots together for visual balance. Kids enjoy making them too because the shapes don’t need to be perfect.
3. Clay Keychain Charms

Clay keychains allow creative shapes without much effort. Roll small pieces into flat tokens and cut shapes using bottle caps or cookie cutters. Add a hole with a straw before drying. Once hardened, attach the charm to a keyring. These charms are great for backpacks, zipper pulls, or even gift tags. Acrylic paint works well on them and dries fast. Keep the designs simple since tiny details can chip off. Mix clay colors for a marbled look. This project is quick, cheap, and helps personalize everyday items. Make a batch so you always have a small homemade gift ready.
4. Textured Coasters
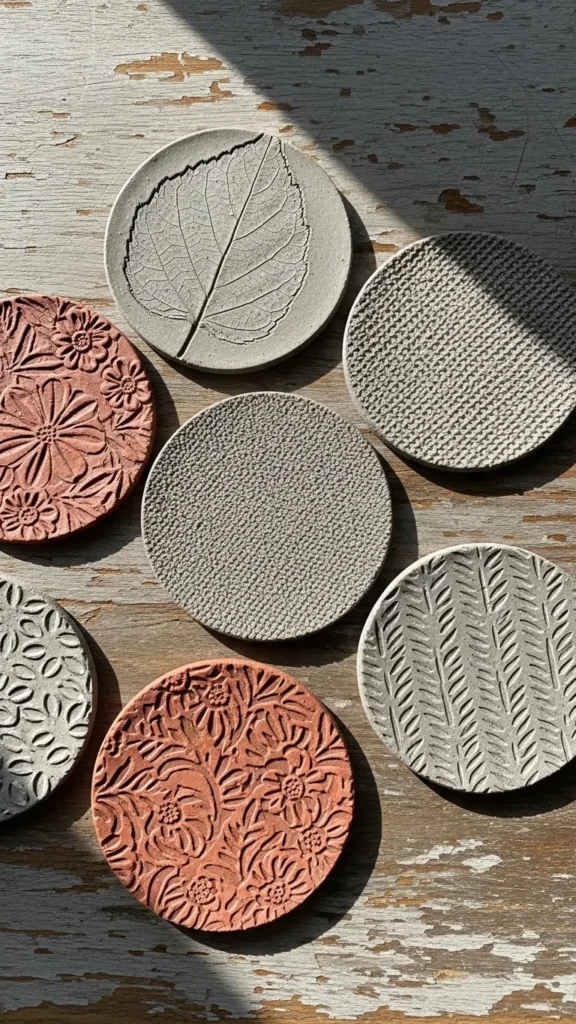
Clay coasters protect surfaces while adding style. Roll out a slab of clay and cut circles with a cup or jar lid. Press leaves, lace, or wooden stamps onto the surface before drying. Keep them thick enough so they don’t warp. After drying, sand the edges lightly for smoother sides. Paint only parts of the pattern for a minimalist look. These coasters save money compared to store-bought sets. Make four or six for a matching set. They look great on coffee tables and make thoughtful homemade gifts.
5. Clay Spoon Rest

A spoon rest keeps your stovetop tidy. Shape an oval, pinch the sides upward, and create a small groove where the spoon can sit. Keep the form simple so it stays sturdy. Once dry, add waterproof varnish if you plan to use it often. This is an ideal project for beginners because the shape can be forgiving. You can stamp patterns into the clay or leave it plain. It dries flat and doesn’t need special tools. Place one beside the stove or give it as a kitchen-friendly gift.
6. Desk Pen Holder

A pen holder keeps supplies from cluttering your space. Roll clay into a coil and stack it into a cylinder. Smooth the sides with water for a cleaner finish. Let it dry completely before adding paint. Neutral tones look nice on desks, but bold colors also work well. Make the base thick so it doesn’t tip over. You can also divide the inside with small clay walls for extra compartments. This project helps tidy your workspace while giving your desk a handmade accent.
7. Clay Soap Dish

A clay soap dish gives your bathroom a simple upgrade. Shape a rectangle or oval, then press grooves into the center so water can drain. You can lift the edges slightly for depth. Let the dish dry flat to keep it sturdy. Seal it with waterproof varnish so it lasts longer. You can paint it or leave it plain. This small dish works well near sinks or tubs. It’s an easy way to keep bars dry and tidy.
8. Drawer Knobs

Clay knobs offer a budget-friendly way to change furniture. Shape small rounded pieces, flatten the back, and insert a screw while the clay is soft. Let them dry before tightening onto drawers. They work well for dressers, nightstands, or craft storage. Add texture with stamps or by pressing small objects. Paint them in solid tones to match your decor. These knobs give furniture a custom handmade touch without spending much money.
9. Clay Candle Holders

Clay candle holders create a cozy atmosphere. Roll clay into small cylinders or donut shapes and carve a shallow cavity for a tealight. Make sure the candle fits snugly but not too tight. Once dry, paint or glaze the surface as you like. These holders work well on shelves, tables, or patio setups. Use several at once for a warm display. They’re quick to make and require only a handful of clay.
10. Clay Magnets

Clay magnets are fun and quick. Shape tiny pieces, flatten them slightly, and attach magnets with strong glue after drying. Paint them in cheerful colors or keep them neutral for a minimal look. These magnets brighten refrigerators, lockers, or memo boards. Make sets for seasonal decor or gifts. They use leftover clay scraps well and dry quickly. Kids enjoy shaping them too because the sizes are small and manageable.
11. Clay Phone Stand

A clay phone stand helps keep your device upright. Shape a small block of clay, then cut a slanted groove deep enough to hold a phone. Keep the base thick for stability. Smooth the surface with water as needed. After drying, paint it or leave it raw. This stand is helpful for cooking videos, calls, or desk work. It takes only a few minutes to shape and makes everyday tasks easier.
12. Clay Incense Holder

An incense holder is simple and stylish. Roll clay into a long oval or shape it like a leaf. Add a slight curve if you want it to catch the ash. Poke a small hole at one end before drying. Once hardened, smooth the edges and add color. These holders take up little space and add a calm touch to any room. You can make several in different shapes.
13. Clay Ring Cones

Ring cones keep jewelry organized while adding charm to a shelf or dresser. Shape clay into tall cones, keeping the base wide for stability. Add marbling by mixing two clay colors gently. Let them dry upright. These cones take only minutes to form and help keep rings from getting lost. They make lovely gifts and pair nicely with trinket dishes.
14. Clay Wall Hooks

Clay wall hooks provide extra storage. Shape a thick hook with a flat back, then glue it onto a wood base after drying. Seal for added strength. These hooks work for lightweight items like scarves or jewelry. You can paint them to match your wall or keep them earthy. They’re affordable, easy to make, and add personality to small spaces.
15. Clay Picture Frame Border

A clay frame border adds character to plain frames. Roll a thin clay strip and press patterns into it. Attach the strip to a wooden frame using strong glue once dry. Paint or leave it natural. This small touch upgrades inexpensive frames and helps create a cohesive decor theme. Make several matching frames for gallery walls or gifts.
16. Clay Mini Bowls

Mini bowls are handy in kitchens, craft rooms, or bedrooms. Shape small rounded forms by pressing clay into a ball and smoothing the inside. Keep them shallow for snacks, spices, or tiny storage. They dry fast and require very little clay. Paint them in sets or keep the raw stone look. These bowls help organize small items without clutter.
17. Clay Bookmark Tabs

Clay bookmark tabs are fun for readers. Roll clay thin, cut small shapes, and smooth the edges. Let them dry flat. Attach them to paperclips with glue. These tabs look charming in planners or books. Paint them softly or leave them plain. They’re quick, low-cost, and make sweet gifts for book lovers.
18. Clay Utensil Holder

A clay utensil holder helps keep cooking tools in one spot. Shape a thick cylinder and smooth the sides. Make the walls strong so it holds weight. Once dry, add color or leave it unfinished. This holder sits nicely near stoves and keeps tools organized without much effort. It’s larger than other projects but still simple to make.
19. Clay Candle Plate

A candle plate keeps melted wax contained. Roll out clay, cut a circle, and pinch a small ridge around the edge. Let it dry slowly to avoid warping. After drying, paint or seal it. This plate works for candles, crystals, or small decor clusters. It’s practical and stylish, especially when made in earthy shades.
20. Clay Drawer Dividers

Clay dividers help organize drawers affordably. Roll long strips and flatten them slightly. Let them dry fully before placing them inside a drawer. These dividers work well for makeup, office supplies, or tools. You can customize lengths and shapes easily. It’s a smart way to repurpose leftover clay.
21. Clay Desk Cable Holder

A cable holder prevents cords from sliding off desks. Shape tiny rounded pieces and carve a small groove along the top. Let them dry, then stick them to your desk with adhesive strips. These holders keep chargers neat and easy to reach. They use very little clay and take only minutes to make.
Conclusion
Clay crafting can fit into any home and any budget. Each idea here focuses on simplicity, creativity, and everyday usefulness. Whether you want to organize your space, decorate a shelf, or make personal gifts, small clay projects offer a relaxing way to create something practical. Start with one idea today and let your hands guide the rest.

Lily Summers is a digital artist and creative storyteller who loves bringing colorful characters to life. With a passion for cartoons, fan art, and playful sketches, she inspires others to explore their imagination through art. When she’s not sketching, you’ll find her dreaming up new ideas for CraftedWizard.com to spark creativity in every artist. 🌈✨


