
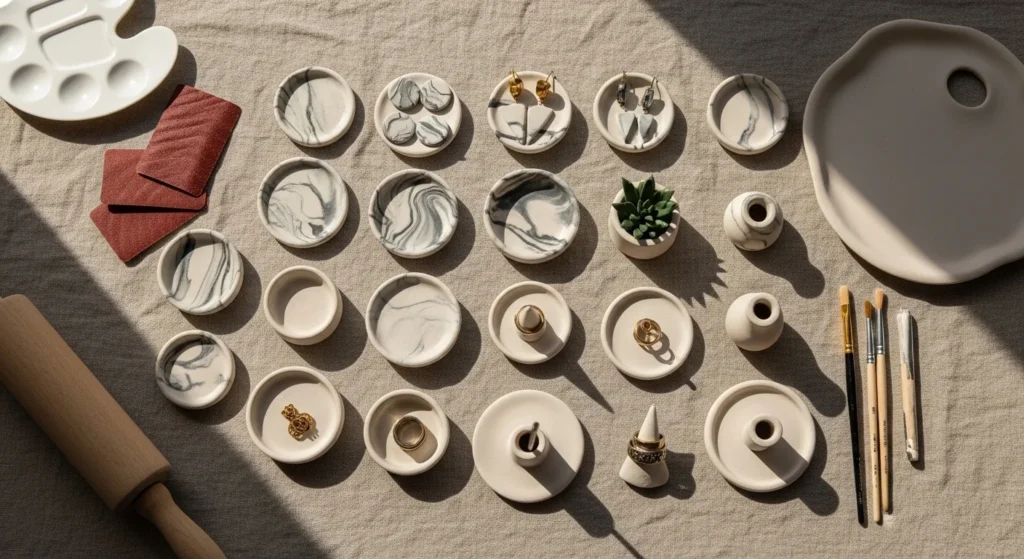
Small clay projects are one of the easiest ways to make your home and gifts look thoughtfully “shop-bought” without spending shop-bought money. With the right clay type, clean shapes, and a smooth finish, even beginner pieces can look like they came from a boutique shelf. This list is packed with mini ideas that work with polymer clay (durable, bake-and-finish) or air-dry clay (no-bake, simple setup). You’ll also see the small steps that change everything rolling thin to reduce warping, sanding before sealing, and using gloss varnish or resin for that polished shine.
1) Marble Trinket Dish
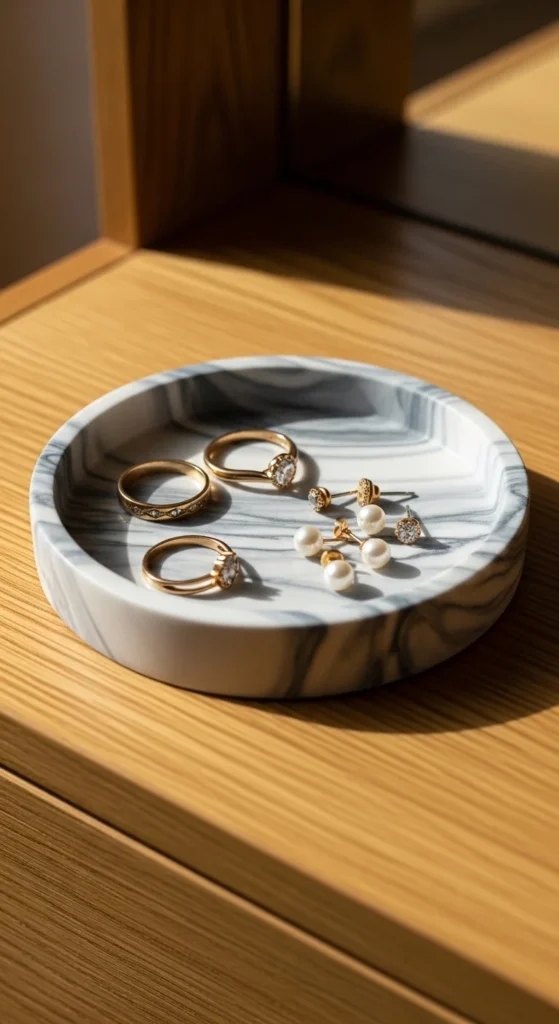
A trinket dish is the fastest “boutique result” project because it’s small, useful, and easy to finish cleanly. Roll clay to an even thickness (thin, but not flimsy), then cut a simple circle or oval. For the marble look, twist two or three clay colors together lightly—stop early so you get swirls, not mud. Press the slab into a shallow bowl shape using a real bowl as a mold with cling film between.
After it cures or dries, sand the rim and base until it feels smooth to the touch. This single step makes it look far more expensive. Add gold paint along the edge with a small brush if you want a luxe detail, or keep it matte for a modern look.
2) Minimalist Ring Cone Stand
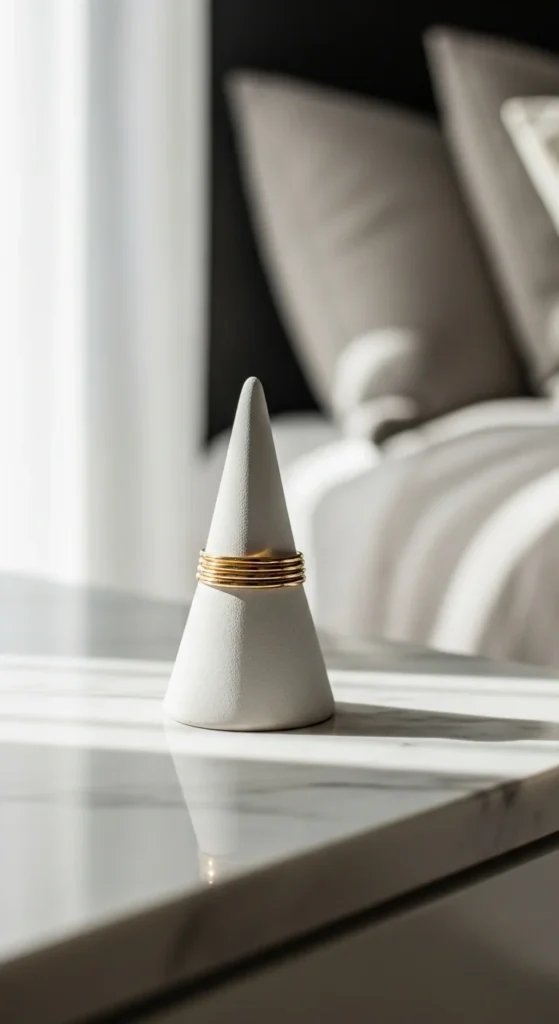
A ring cone looks like something you’d find at a jewelry counter, but it’s basically one shape. Roll clay into a smooth ball, then form a cone by gently tapering one end. Keep the base flat so it stands without wobbling. If you’re using air-dry clay, keep it on a smooth tile while drying so the base stays even.
The “store-bought” part comes from the finish. Once it’s fully dry or baked, sand any tiny bumps and seal it. Gloss varnish gives that boutique shine, while matte sealers look modern and ceramic-like. You can also paint it in one solid neutral color for a clean brand look.
3) Speckled “Terrazzo” Jewelry Tray
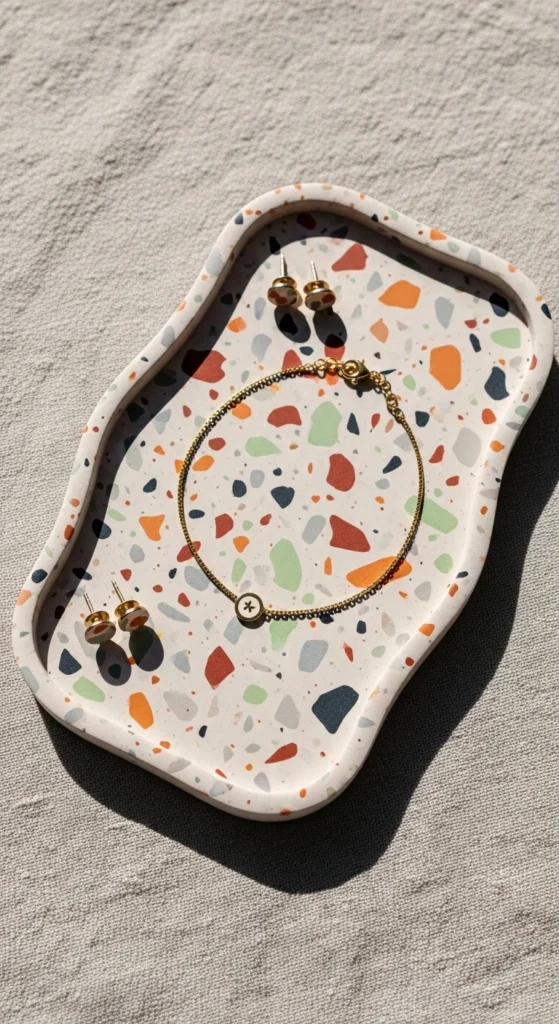
Terrazzo looks expensive because it mimics real stone, but it’s friendly for beginners. Start with a base color, then chop tiny “chips” from contrasting clay colors. Press the chips lightly into the surface of your slab, then roll once more to set them in place. Cut a rectangle or rounded rectangle, and gently lift the edges using a thin card underneath.
For a tray shape, press the slab into a shallow mold (a small box lid works) so the edges sit up slightly. After drying/baking, sand the edges so they feel crisp. Seal it so the surface looks unified and wipe-clean.
4) Mokume Gane Stud Earrings
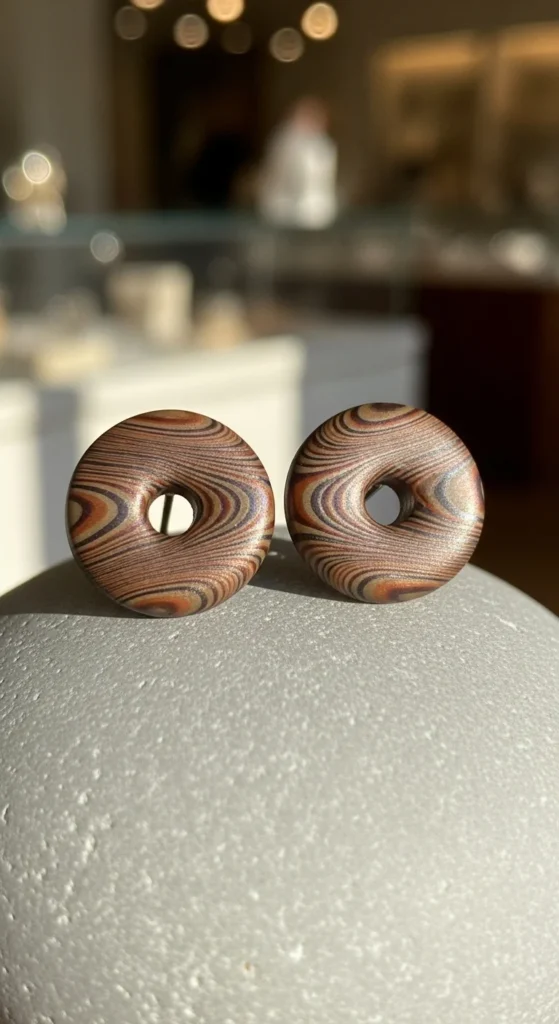
Mokume gane is a layered pattern technique that looks like high-end jewelry. Stack thin sheets of different clay colors, press gently, then slice into shapes so the layers show. You can create patterns by lightly stamping the top layer with a comb or texture tool, then shaving a thin layer off to reveal the layers underneath.
Cut small circles or arches for studs. Bake polymer clay pieces according to package directions, then attach earring posts with strong jewelry glue. The difference-maker is smoothness: sand lightly after baking (especially edges), then seal. If you want shine, use a gloss topcoat; for a more “ceramic” vibe, use satin.
5) Mini Donut Charm Keychain
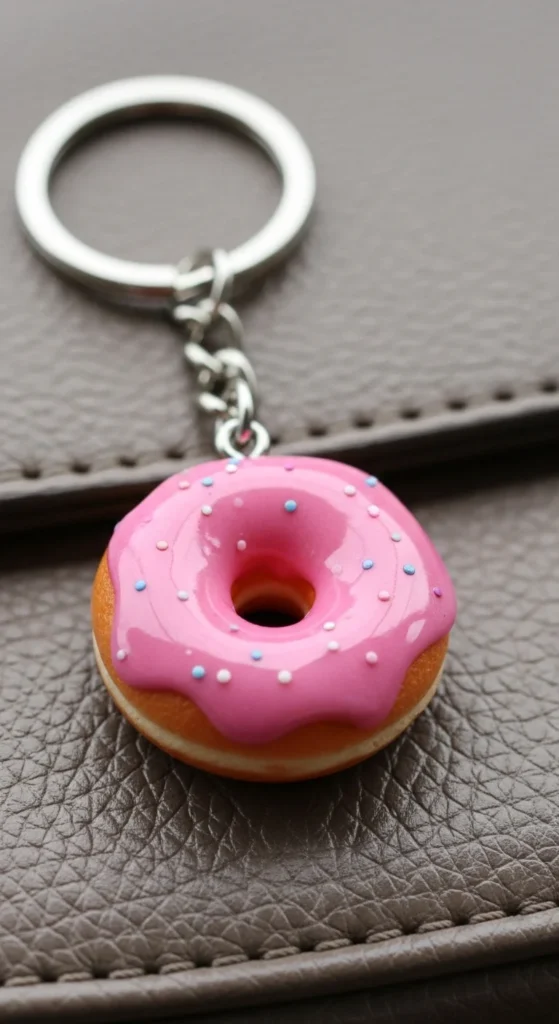
Mini food charms keep going viral because they’re cute, small, and giftable. For a donut, shape a tiny ring, then add a thin “icing” layer on top using a contrasting color. Use a toothpick to add sprinkle indents or place micro sprinkles (tiny clay bits). Bake, then coat with gloss varnish so it looks like real glaze.
To make it feel boutique, focus on clean hardware. Use a small screw eye pin (for polymer clay) or embed a loop before baking. After baking, add a jump ring and keychain clip.
6) Tiny Succulent Planter Cup
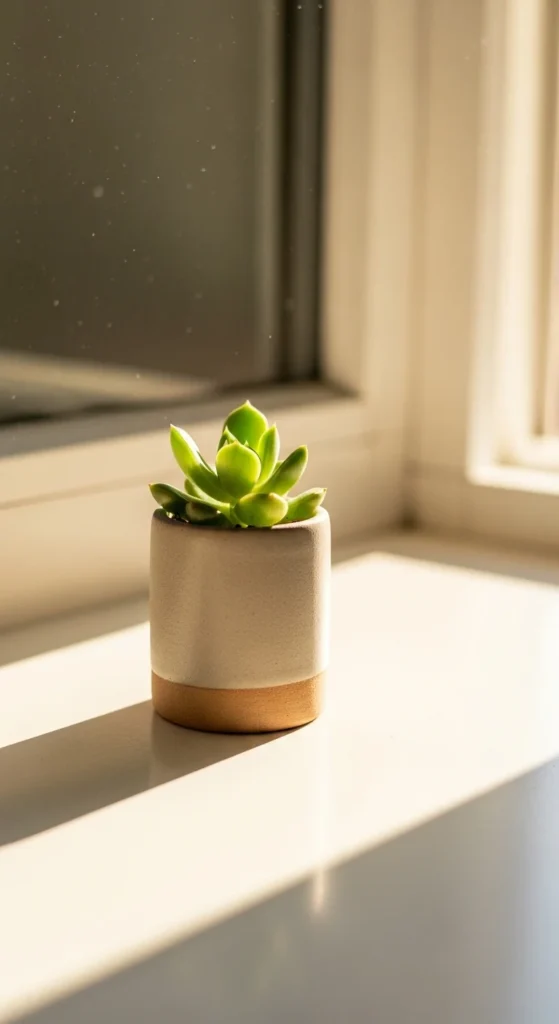
Mini planters are trending because they’re functional decor in a small footprint. Use polymer clay for durability and a cleaner finish, or air-dry clay if you want no-bake. Shape a small cup by wrapping clay around a foil ball or pressing into a mold. Keep walls even so it doesn’t crack.
If using air-dry clay, let it dry slowly and evenly. Flip it occasionally so the base doesn’t stay damp. Once dry, sand the rim and seal it. If it will hold a real plant, make it a cachepot (place a small plastic nursery pot inside) so the clay doesn’t sit in water.
7) Incense Holder With Clean Groove

A small incense holder looks high-end when the groove is clean and the surface is smooth. Roll a slim slab, then carve a shallow channel with the back of a spoon. Add a small hole for the incense stick using a skewer. Keep it centered so it feels intentional.
Once cured/dried, sand lightly, especially along the groove edges. Seal it so ash wipes off easily. Gloss sealers look polished; satin feels modern. You can also add a tiny “lip” at one end to stop ash from slipping off the side.
8) Mini Bud Vase Made With Foil Mold

Mini vases feel boutique because they look like tiny ceramics. Make a foil “core” (a small bottle shape), then wrap clay around it, smoothing seams carefully. Keep the opening neat by trimming with a blade and smoothing the rim with a damp finger (air-dry) or gentle pressure (polymer).
After baking/drying, sand any seam lines. Seal the outside for a refined look. If you want it to hold water, polymer clay is better, but many people use these as dried-flower vases anyway.
9) Scalloped Edge Trinket Plate
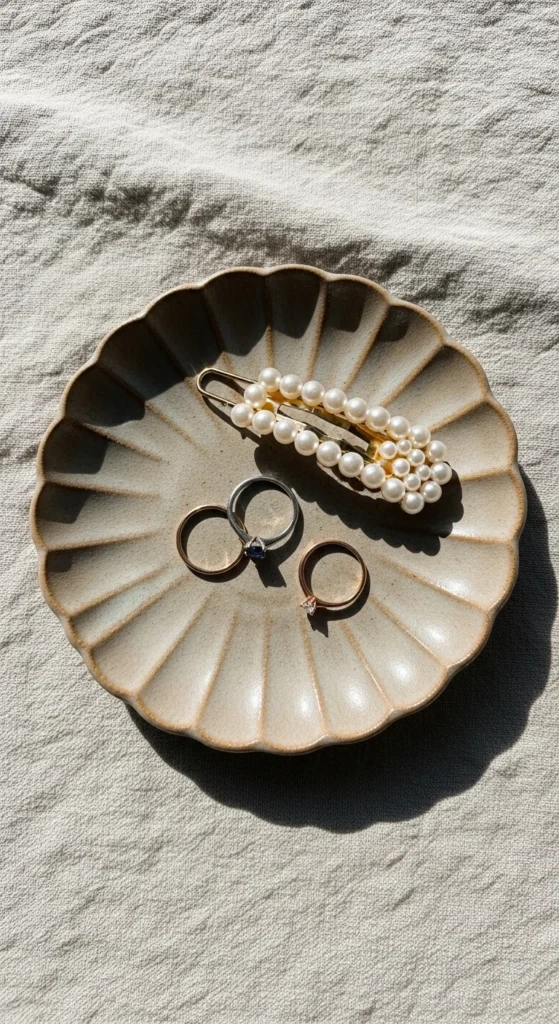
Scallops look fancy, but the method is simple. Roll a thin slab, cut a circle, then pinch the edge gently in evenly spaced sections. Keep your pinches consistent so the shape feels “designed,” not random. Press the plate into a shallow bowl to give it a slight curve.
Once cured, smooth the edge with fine sandpaper. Seal it. If you want a boutique touch without expensive paint, add a thin gold or black rim line using a tiny brush.
10) Faux Stone Coaster Set (Mini Size)
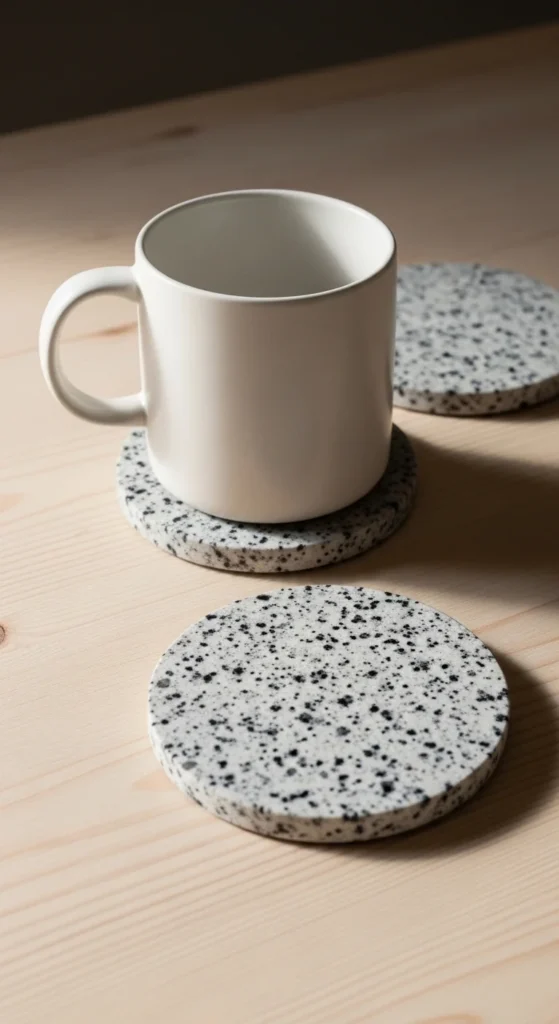
Small coasters can look boutique when they mimic stone. Mix a base color with tiny flecks of darker clay to create a granite effect, or use a marbling twist for a stone swirl. Cut circles or squares, then smooth edges before curing so you don’t fight rough rims later.
After baking/drying, sand the edges and seal. A gloss coat makes it look like polished stone; satin looks like matte ceramic. Add cork or felt pads underneath for a pro touch that also protects tables.
11) Textured Soap Dish Using a Toothbrush
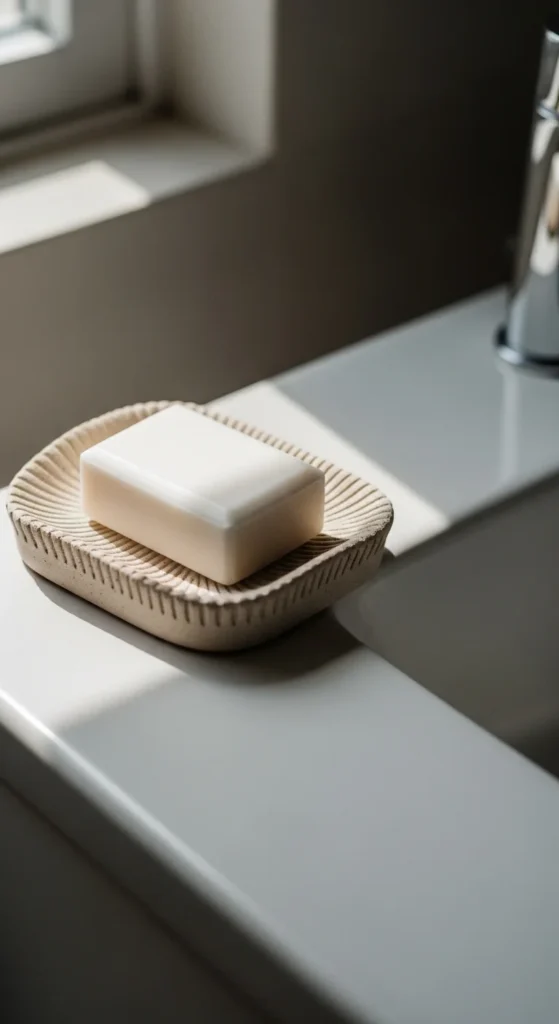
A soap dish looks expensive when the texture is subtle and even. Roll a slab, cut a rectangle, then press a toothbrush lightly across the surface to create fine grip lines. Curve the slab slightly so water can drain, or add a few raised “feet” underneath.
If you’re using air-dry clay, dry it slowly so it doesn’t warp. Once dry, sand the edges smooth. Seal well, since bathrooms are humid. A waterproof sealer helps it last longer and keeps it easy to clean.
12) Pinch Bowl Tea Light Holder
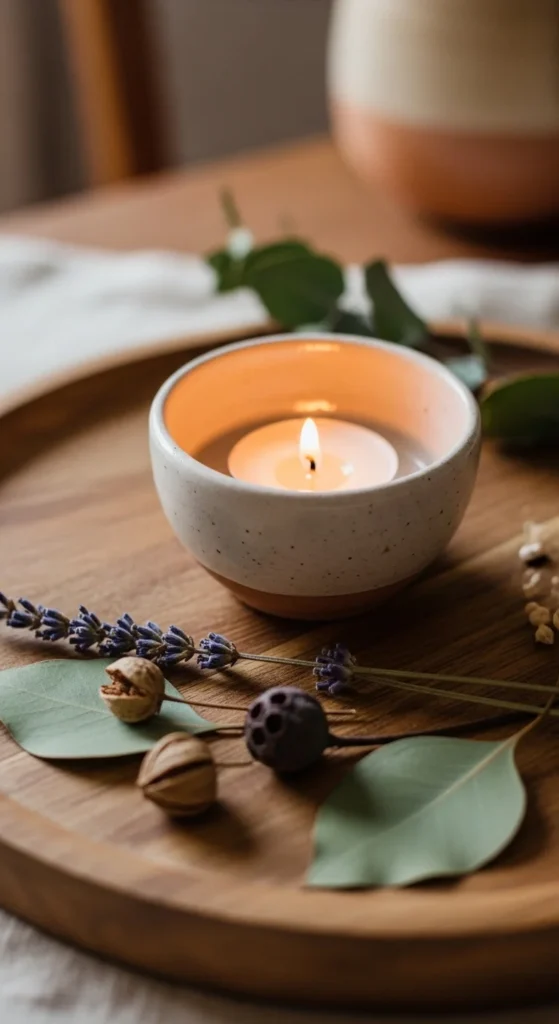
A pinch bowl tea light holder is beginner-friendly and looks handmade in a good way. Start with a ball of clay, press your thumb into the center, and pinch the walls outward. Rotate as you pinch so thickness stays even. Keep the rim smooth by gently rubbing with a damp finger (air-dry) or careful smoothing (polymer).
After curing, sand the rim and seal. If you’re using a real flame, choose a safe tea light insert and keep clay type in mind many people use these with LED tea lights for peace of mind.
13) Initial Charm Gift Tag (Clay + Ribbon)
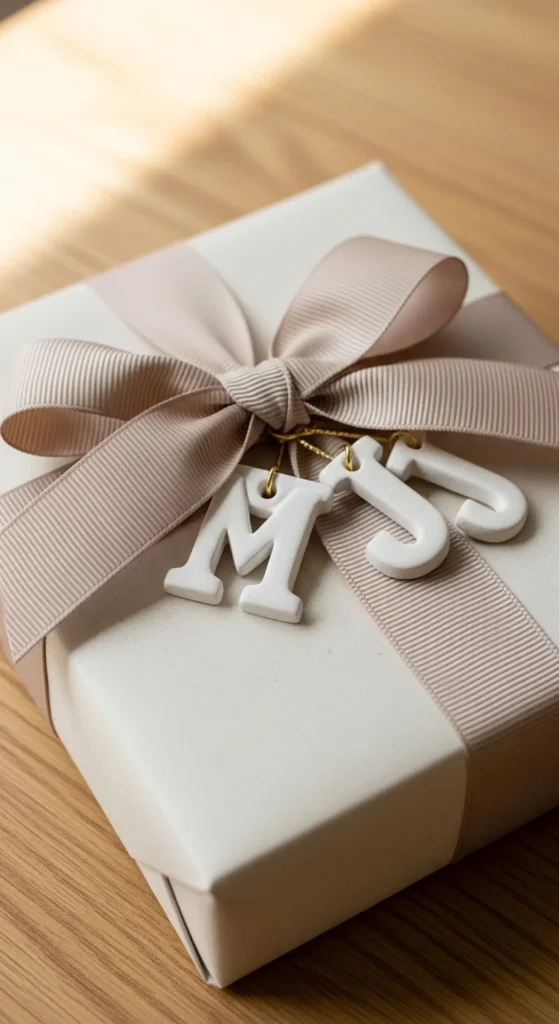
Personalized charms make gifts feel custom without extra cost. Roll clay thin, cut a small tag shape, then press an initial using a letter stamp or carve it with a toothpick. Punch a hole for ribbon before curing. After it sets, sand the edges and seal.
If you want a pro finish, paint the initial with a small brush and wipe back gently so color stays in the letter groove. A gloss topcoat makes it look like a retail accessory.
14) Geometric Magnet Set (Modern Shapes)
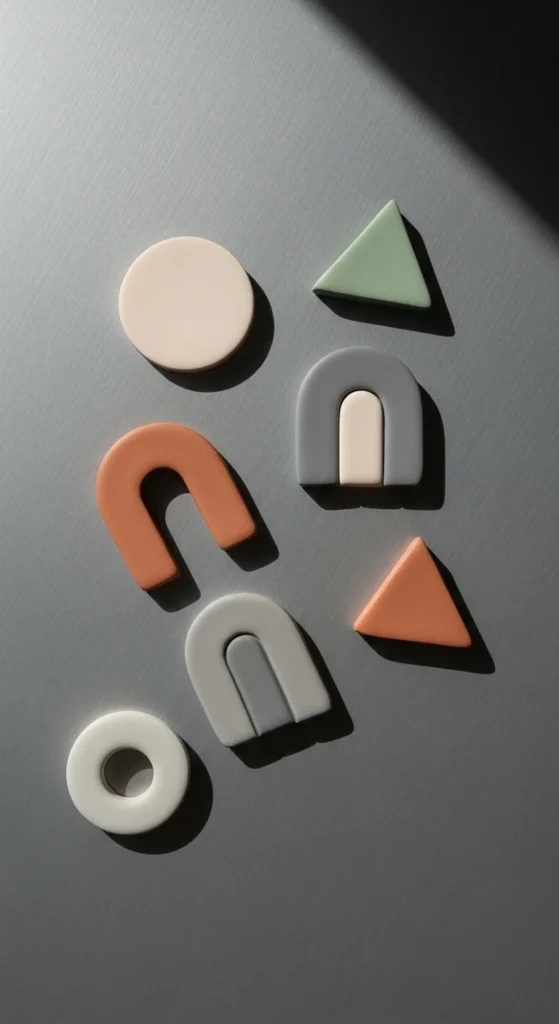
Geometric magnets look clean and modern, and they use very little clay. Cut shapes with cookie cutters or a blade. Keep edges crisp by smoothing before curing. Bake/dry, then attach small strong magnets on the back with glue.
The boutique trick: make a tight color palette. Two neutrals plus one accent looks intentional. Seal them so they wipe clean and keep a consistent sheen across the set.
15) Faux Leather Texture Key Pouch Panel
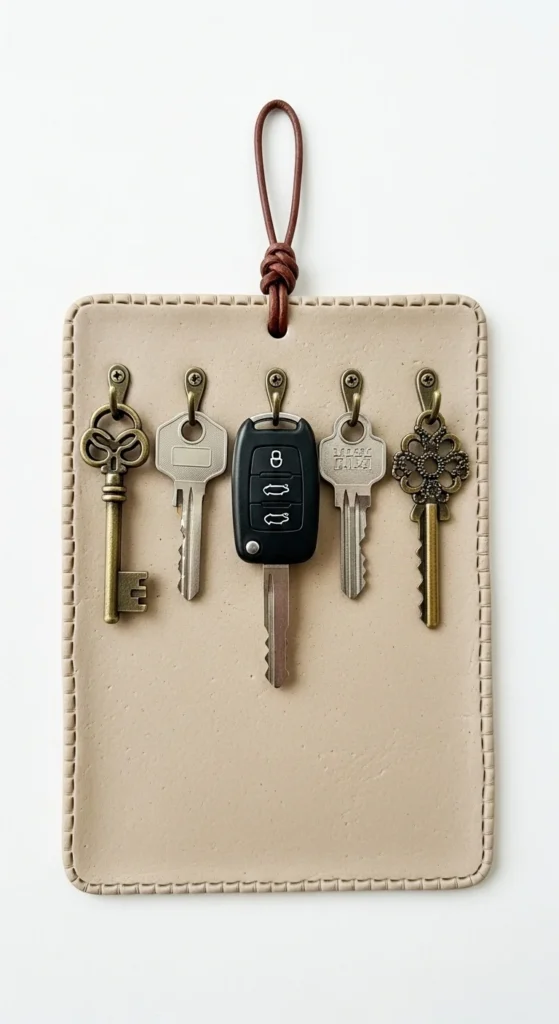
Clay can mimic leather when you focus on texture. Roll a thin slab and press a fine texture into it—use fabric, denim, or a textured sponge. Add a faux “stitched edge” by poking evenly spaced dots with a needle tool or toothpick. Cut a small rounded rectangle panel.
You can turn this into a zipper pull charm, a key fob accent, or a decorative tag on a bag. Seal it well so it feels smooth in the hand. A satin finish often sells the leather look better than high gloss.
16) Mini Mushroom Miniature (Realistic Style)
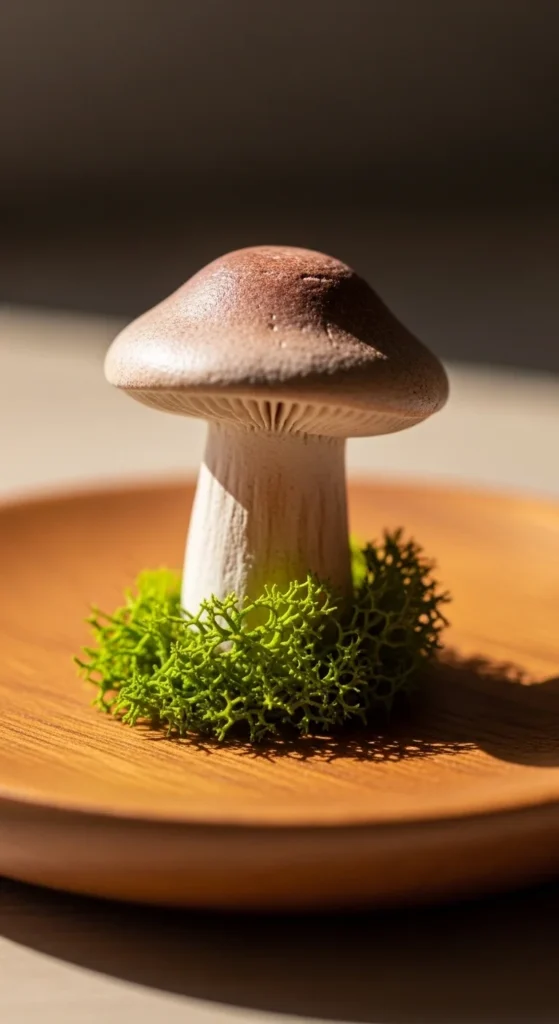
Mushroom minis are popular because they’re cute and easy to display. Shape a tiny stem and cap. Add realism with small texture marks use a toothbrush lightly or a needle tool for gills under the cap. Bake polymer clay for durability.
For a boutique look, finish matters. Sand any rough spots, then add a thin varnish. You can also paint gentle shading with acrylic paint just a little around the base and under the cap then seal.
17) Wavy Edge Incense Dish (Ash Catcher)
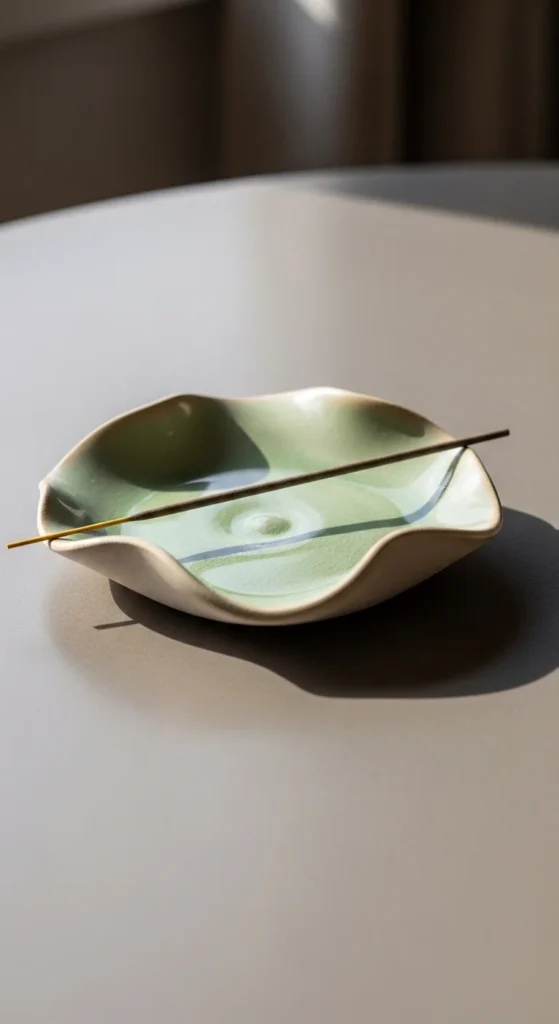
If you like organic shapes, a wavy dish looks designer with very little effort. Cut a circle, then gently push the edge in and out to form waves. Add a small hole or a tiny “pinch ridge” to hold the incense stick angle.
Once cured, sand the rim so it feels smooth, then seal. A gloss topcoat makes it feel like a boutique ceramic glaze. If you want a stone vibe, add subtle marbling before shaping.
18) Mini Photo Clip Stand (Hands-Free Display)
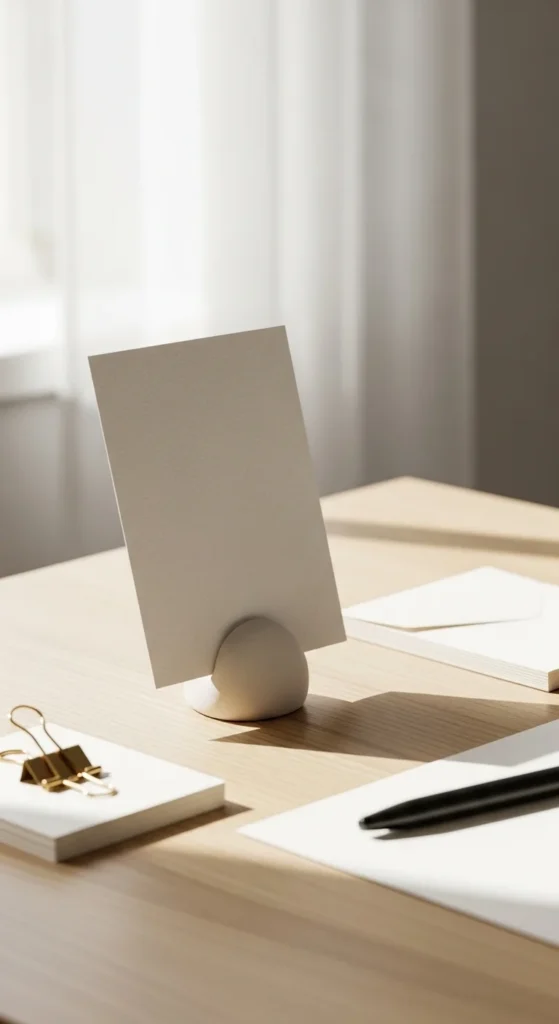
A tiny stand is useful and looks like a gift-shop item. Make a small wedge or arch base, then press a slit into the top using a thin card while the clay is soft. Remove the card before curing so the slot stays clean. Keep it stable by making the base wide enough.
After curing, sand the edges and seal. If you want a boutique detail, add a marbled surface or a terrazzo speckle pattern. Keep the rest of the shape simple.
19) Tiny Wall Hook Backplate (Decor Accent)
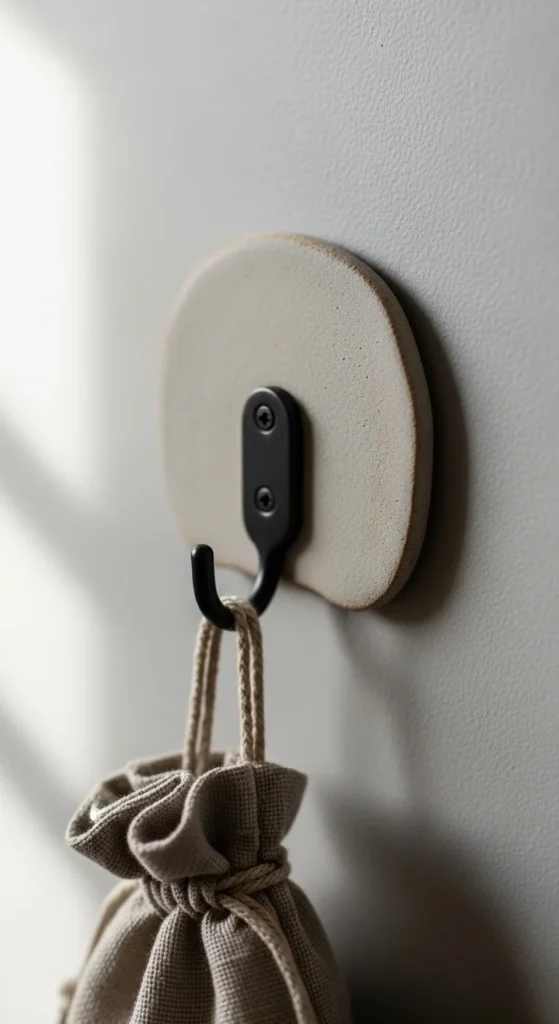
If you rent or want low-commitment decor, a clay backplate can make basic hooks look custom. Create a small rounded shape (circle, arch, or scallop) with a hole in the center for the screw. Use polymer clay for strength, and bake it flat.
Sand, seal, and pair it with a simple hook. The clay becomes a “design frame” behind the hardware. Stick to a neutral palette so it looks intentional and fits many rooms.
20) Faux Ceramic Bead Bracelet Set
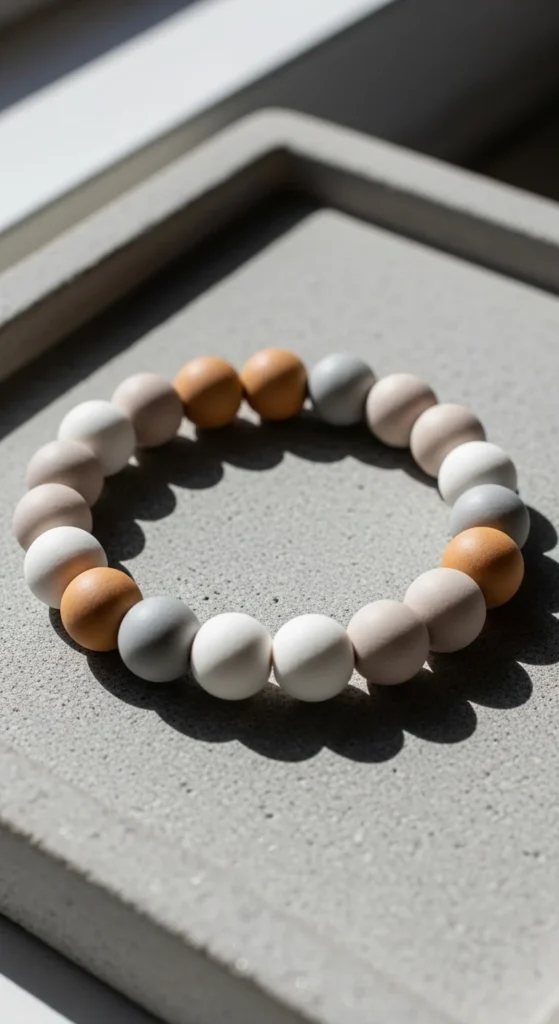
Clay beads are budget jewelry that can look surprisingly polished. Roll evenly sized balls, poke holes with a skewer, and bake polymer clay beads for durability. The key is consistency: same size range, smooth surface, and a cohesive palette.
After baking, sand lightly if any bead has a flat spot, then seal for a uniform finish. String them on an elastic cord with a simple knot, then hide the knot inside a bead with a larger hole.
21) Mini Candle Match Striker Tile (Decor Piece)
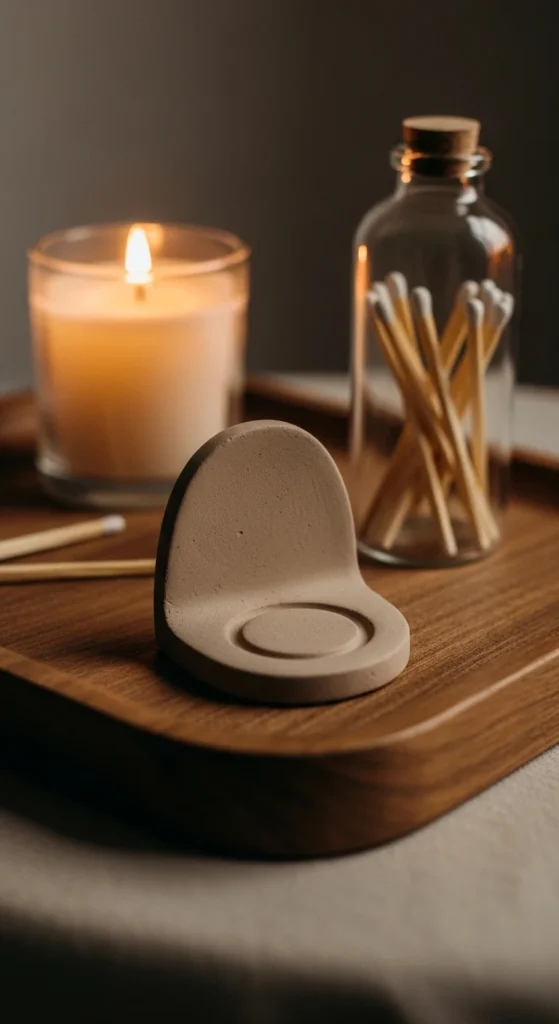
A match striker tile is the kind of tiny home accessory people buy in boutiques. Make a small flat tile with rounded edges. Before curing, press a textured patch area (some people use a rough texture medium) where matches will strike.
Seal the rest of the tile for a refined look, leaving the striker patch functional. Keep it small so it’s easy to place on trays and shelves.
22) Tiny “Pocket” Vase Wall Dot

A tiny wall pocket vase looks like artisan decor, but it’s a simple form. Shape a small half-cylinder pocket with a flat back, using a mold to keep it even. Bake polymer clay for strength. After curing, sand and seal.
Mount it using removable strips (if lightweight) or a small wall hook system. Use it for dried stems rather than water to keep it simple. The boutique feeling comes from clean lines and a smooth surface.
23) Fossil Print Medallions (Toy Imprint)
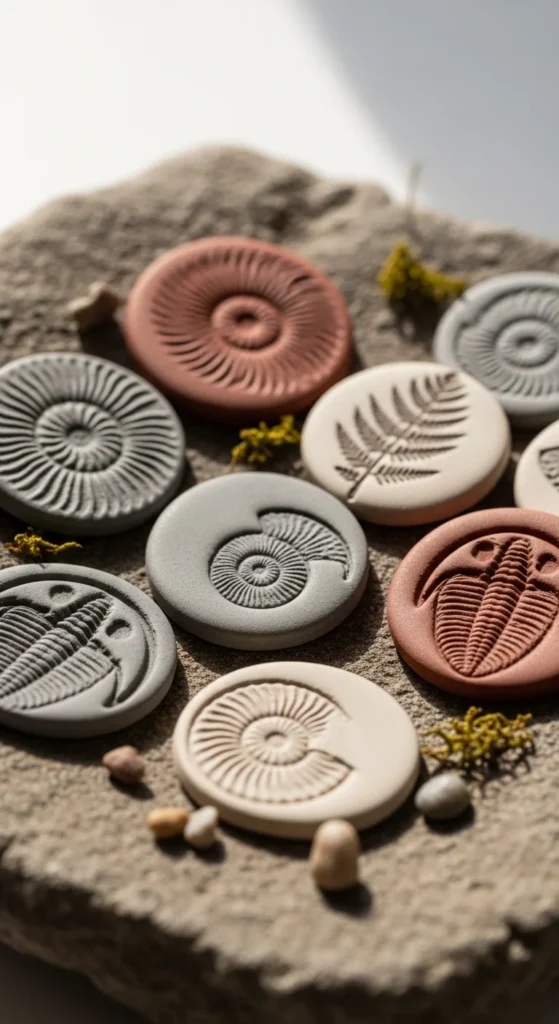
Fossil prints are fun and look detailed without complex sculpting. Press small toy dinosaurs, shells, or textured objects into clay to create a clean imprint. Cut into medallions and add a small hole if you want to turn them into charms.
Once cured, gently sand the edge, then highlight the imprint with a wash of paint—brush it on, wipe it back so color stays in the grooves. Seal it to lock in the contrast.
24) Mini Desk Pencil Cup (Short + Wide)
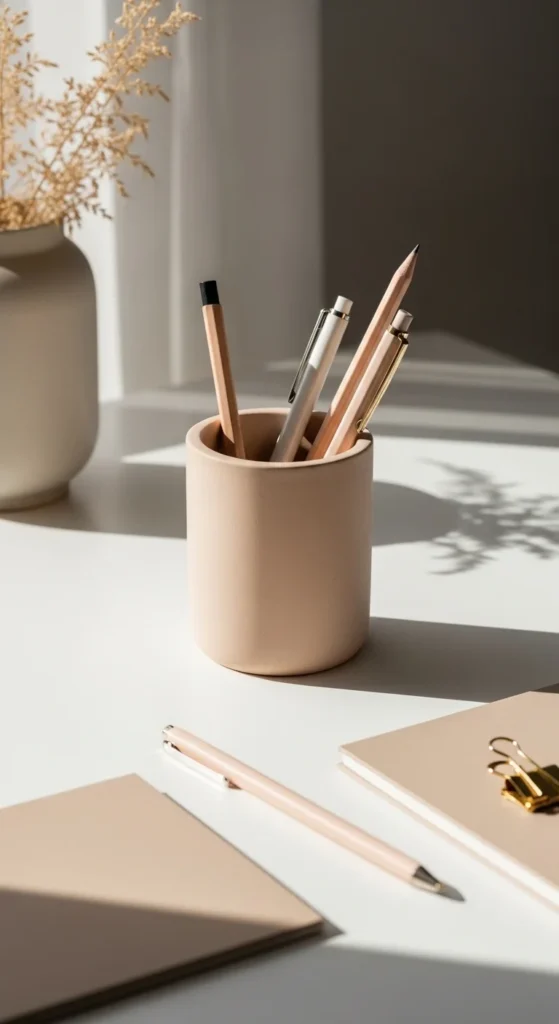
A small pencil cup makes a desk feel styled, and it’s easier than a tall vase. Shape a short cylinder using a jar or foil core to keep it even. Keep walls consistent so it dries without cracks.
After curing, sand the rim and outside. Seal it so it wipes clean. If you want a designer look, add a simple pattern: a subtle stripe, a color-block base, or a tiny terrazzo speckle.
25) Glossy Fruit Charm Set (Tiny Citrus + Berries)
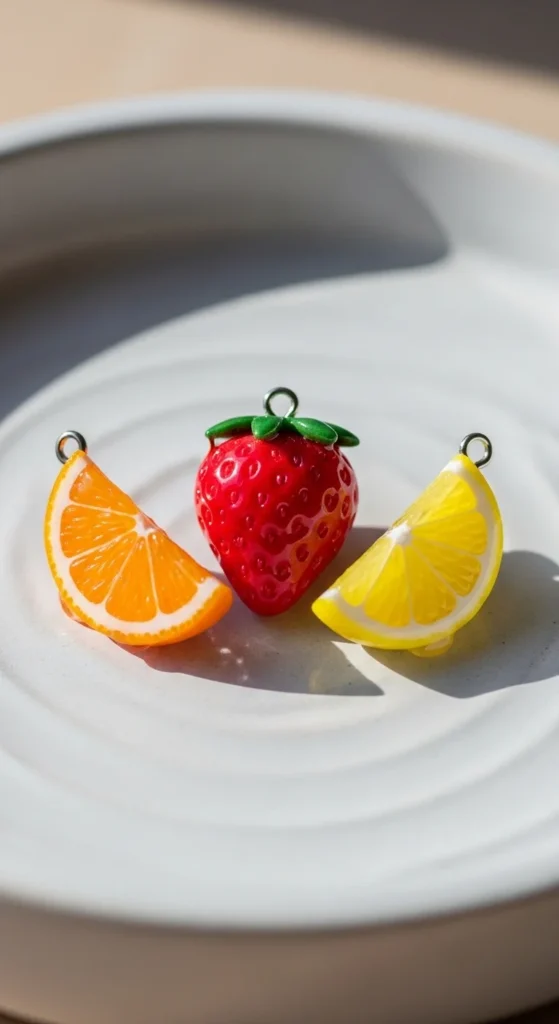
Tiny fruit charms hit the sweet spot: cute, fast, and easy to finish. Shape a small citrus slice by flattening a circle, adding tiny segment lines with a needle tool, then adding a thin rind border. For berries, add texture with a toothbrush or dot tool. Bake polymer clay, then seal with a glossy topcoat for a candy-like finish.
Turn them into zipper pulls, phone charms, or keychains using jump rings and small clasps. The boutique part is to make a small set in the same style and hardware.
Conclusion
If you want small clay crafts that look boutique-made, focus on two things: clean forms and pro finishing. Polymer clay often wins for durable minis you can bake, sand, and seal for a crisp result. Air-dry clay is great when you want no-bake ease—just roll evenly, dry slowly, then sand before sealing. Trinket dishes and jewelry pieces stay popular because they’re functional and photo-friendly, while marbling and mokume gane patterns give that luxury stone vibe with simple techniques. Pick three projects from this list, keep a tight color palette, and finish each piece with sanding + a glossy or satin topcoat. Once you see how different the final surface looks, you’ll start making small sets that feel like a real mini collection—perfect for gifting, selling, or styling your own space.

Lily Summers is a digital artist and creative storyteller who loves bringing colorful characters to life. With a passion for cartoons, fan art, and playful sketches, she inspires others to explore their imagination through art. When she’s not sketching, you’ll find her dreaming up new ideas for CraftedWizard.com to spark creativity in every artist. 🌈✨


