Trying mehndi for the first time can feel exciting and a little intimidating. The good news is that easy simple mehndi designs for beginners focus on small shapes, repeated lines, and forgiving patterns that still look beautiful. You don’t need professional skills or expensive tools. A basic mehndi cone, tissue, and a little patience go a long way. These designs are made for steady practice, quick application, and everyday wear. Start with light pressure, thin lines, and small sections of the hand. As your control improves, your designs will naturally look cleaner and more balanced.
1. Tiny Flower Chain
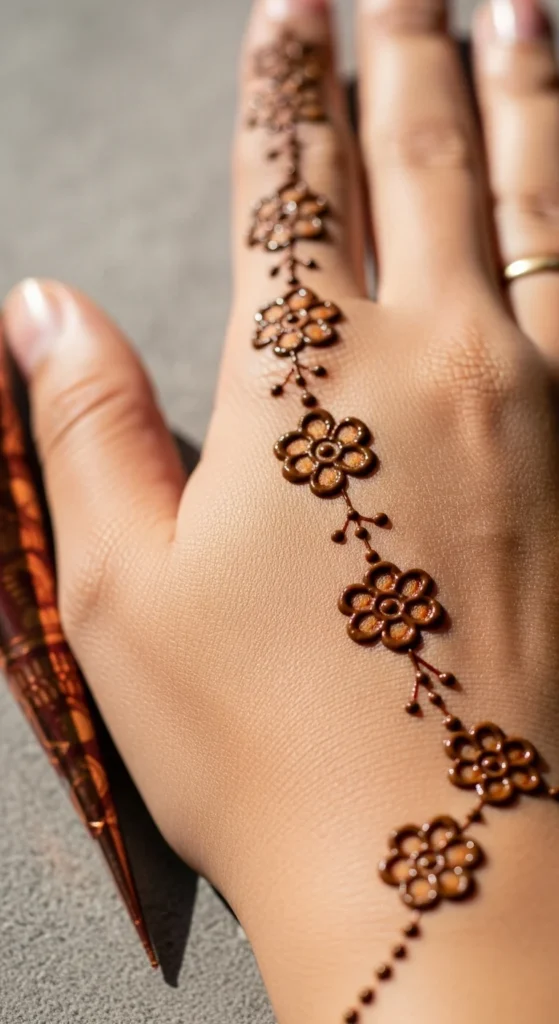
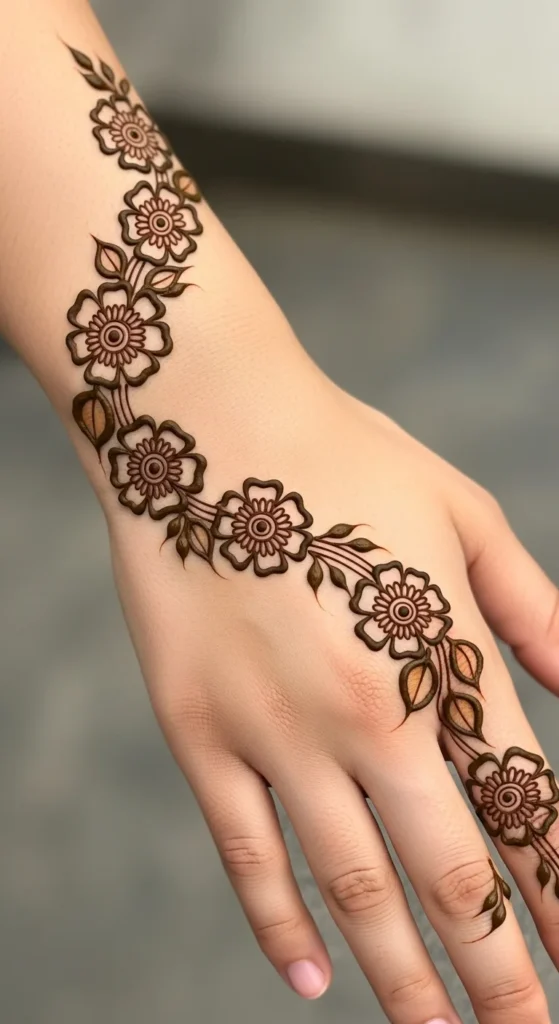
A tiny flower chain is perfect when you want something pretty without filling your whole hand. Start by drawing one small circle and add five rounded petals around it using short, curved strokes. Keep your lines thin and don’t worry if the petals aren’t identical. Mehndi looks natural with slight variation. From one side of the flower, draw a gentle curved line and place another small flower at the end. Repeat this pattern to form a soft trail across the hand or wrist. Add tiny dots around the flowers to fill empty spaces and hide small gaps. Rest your elbow on a table to steady your hand while working. This design dries quickly and is easy to extend if you want more coverage later.
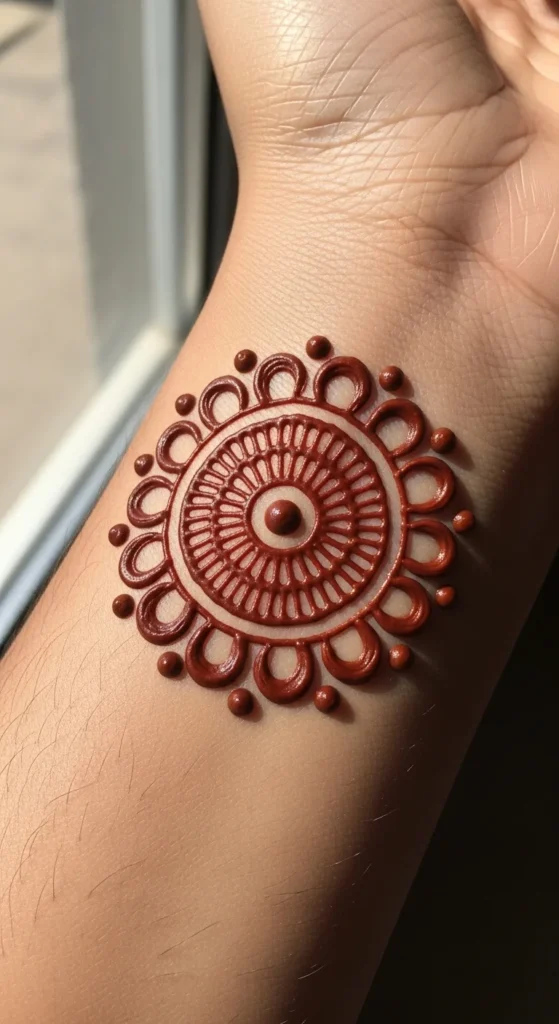
2. Simple Mandala Dot Circle
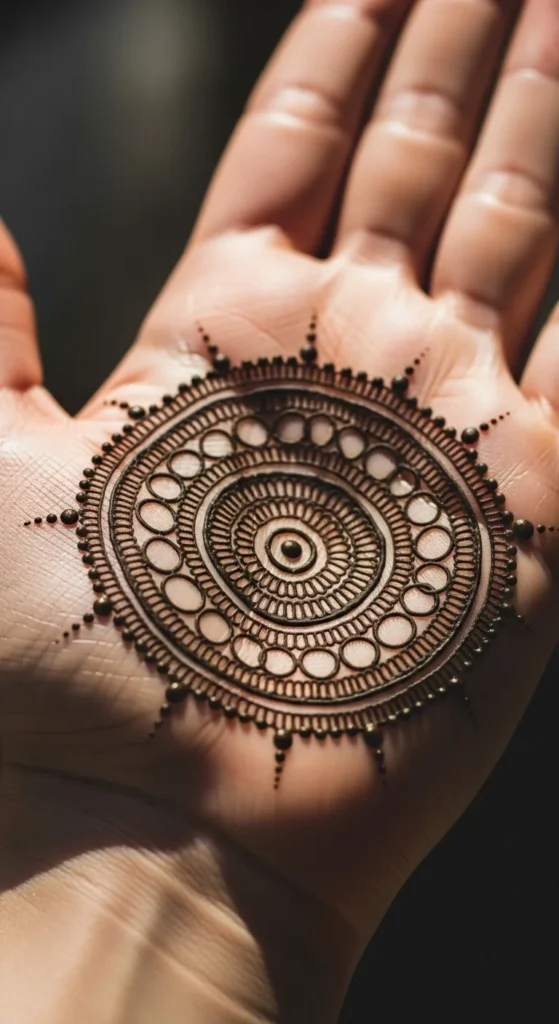
A small mandala in the center of the palm is one of the easiest classic designs. Begin with a tiny circle in the middle of your palm. Around it, add a ring of evenly spaced dots. Next, draw small petal shapes around the dots, like a sun with soft rays. Keep each petal short and rounded. Add another outer ring of dots to frame the shape. The key is spacing, not perfection. Turn your hand slightly as you work so your wrist stays relaxed. If lines look uneven, add more dots to balance the design visually. This style looks neat, dries fast, and works well for festivals or casual outings.
3. Finger Tip Caps
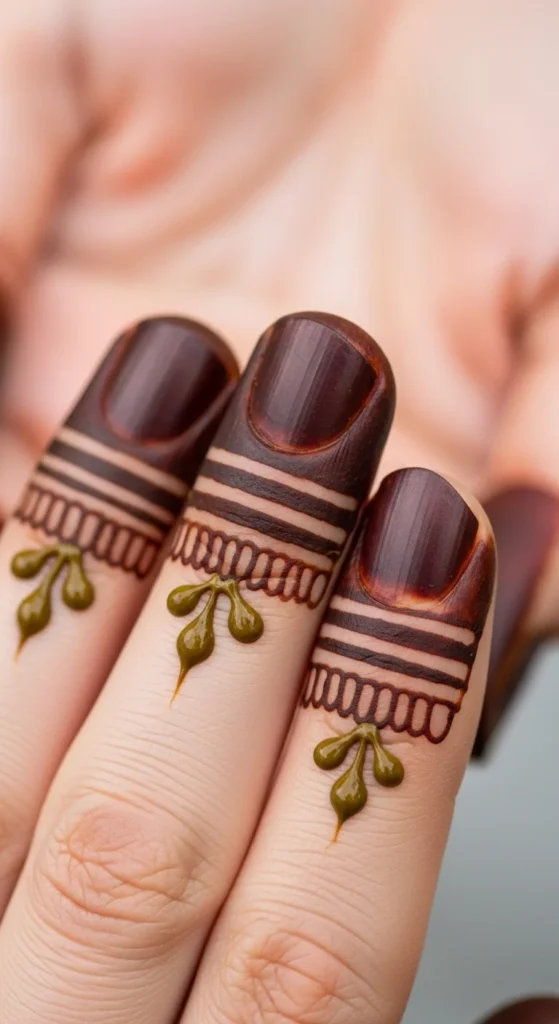
Finger tip caps are great for beginners who want a bold look with little effort. Fill just the top section of each finger with henna, creating a rounded edge where the design ends. Keep the line smooth by moving slowly from one side of the finger to the other in one motion. Once filled, you can add a thin border line under the cap to make it look polished. This style hides shaky lines because the filled area looks solid and intentional. It also stains darker on fingertips, making the design stand out even more.
4. Three-Line Bracelet
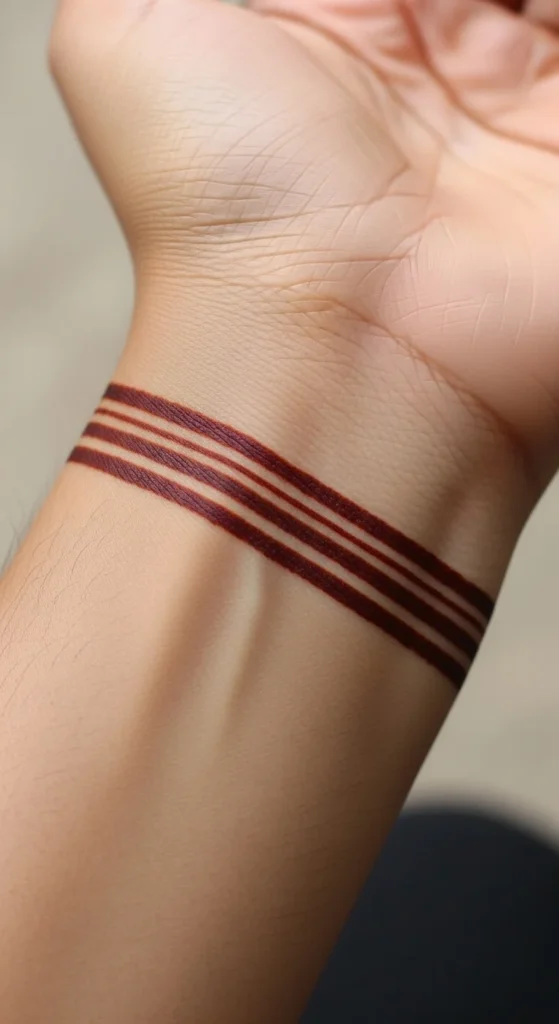
A bracelet design is simple and stylish. Draw three thin parallel lines around your wrist like a bangle. Keep space between each line equal. If a line wobbles, add tiny dots along it to make it look decorative. You can connect the lines with short vertical strokes in one section to create a clasp effect. This design is quick, neat, and easy to match with real jewelry.
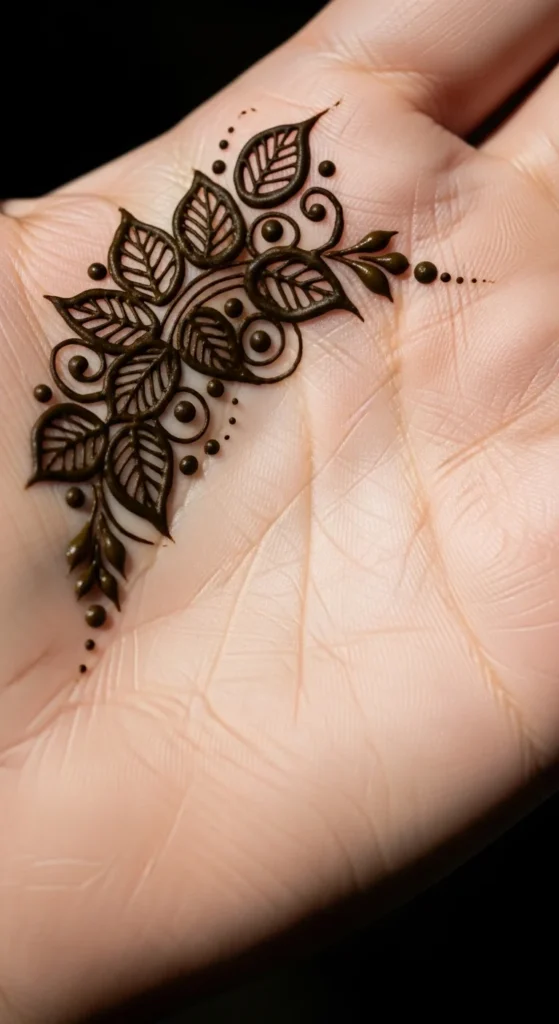
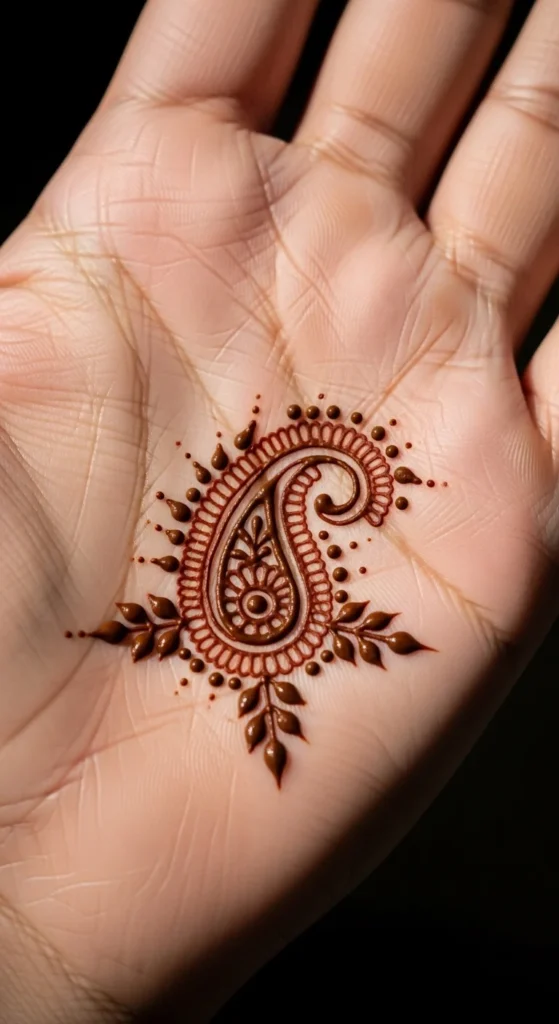
5. Paisley Starter Motif
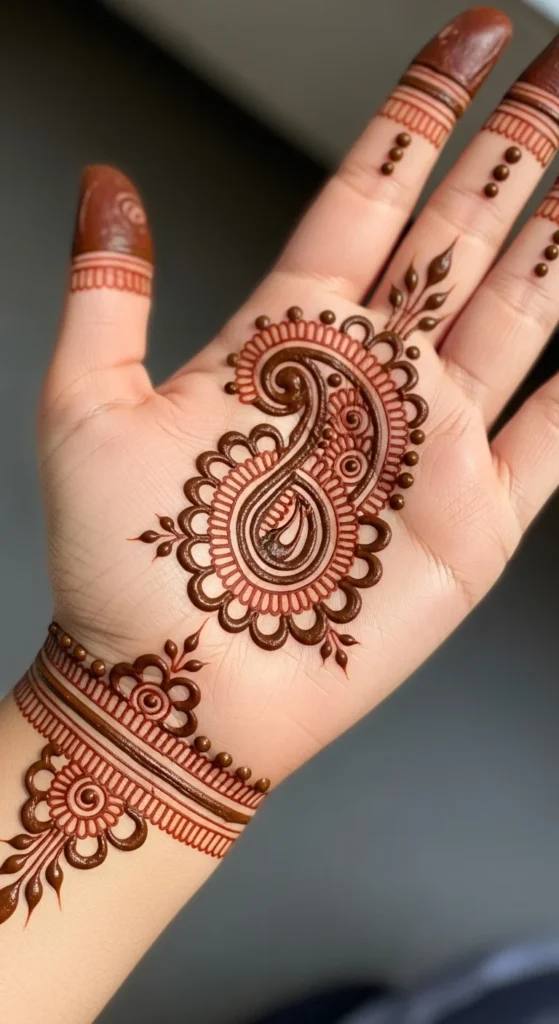
Paisley shapes look detailed but are beginner friendly. Start with a small curved mango shape. Inside, add a few short curved lines following the same direction. Outline the paisley once more to make it bold. Surround it with dots and tiny leaves. This creates a complete look using only simple curves.
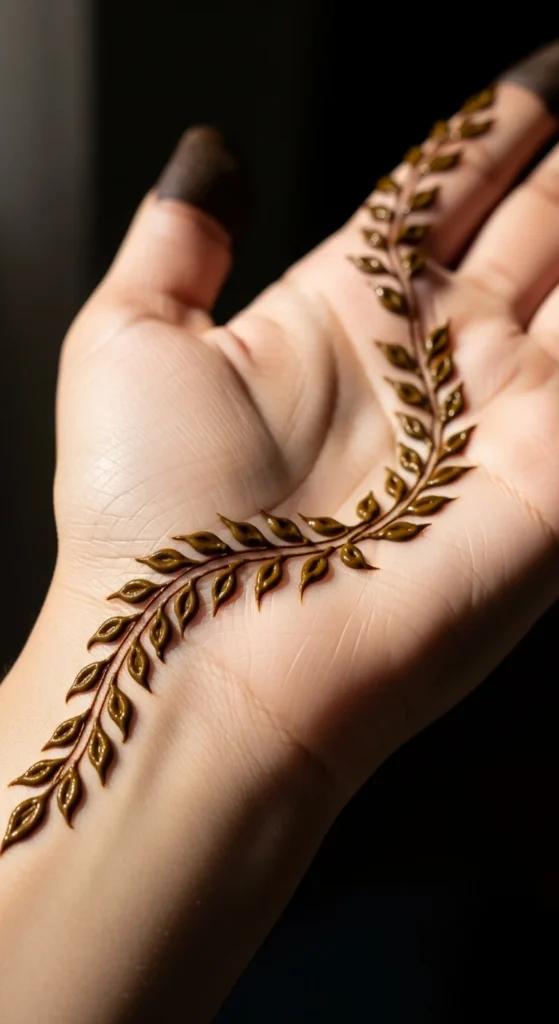
6. Leaf Vine Trail
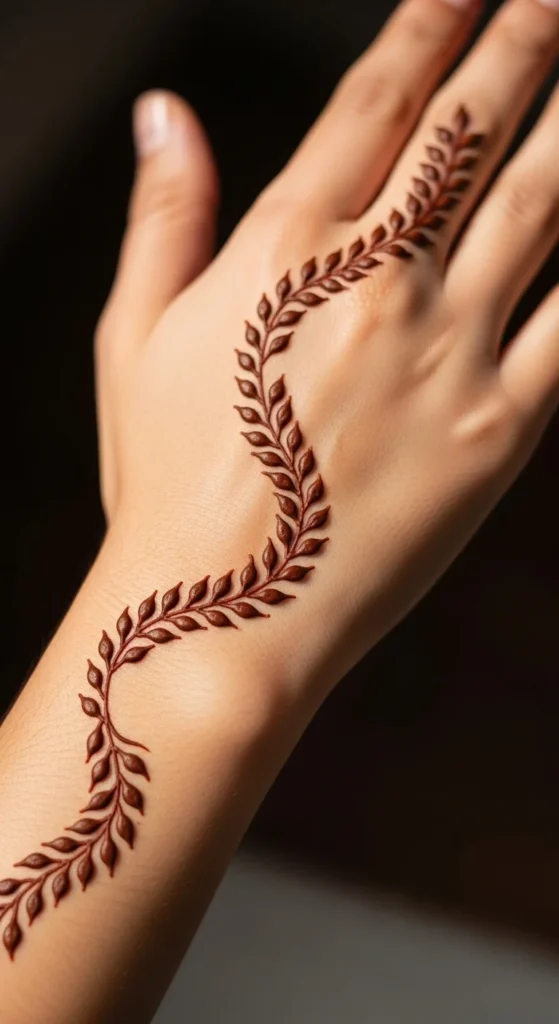
Draw a thin curved line like a stem. Add tiny leaf shapes on each side, pointing outward. Keep leaves small and evenly spaced. This design is forgiving because leaves don’t need to match exactly. Add dots along the vine for extra detail.
7. Single Finger Ring Design
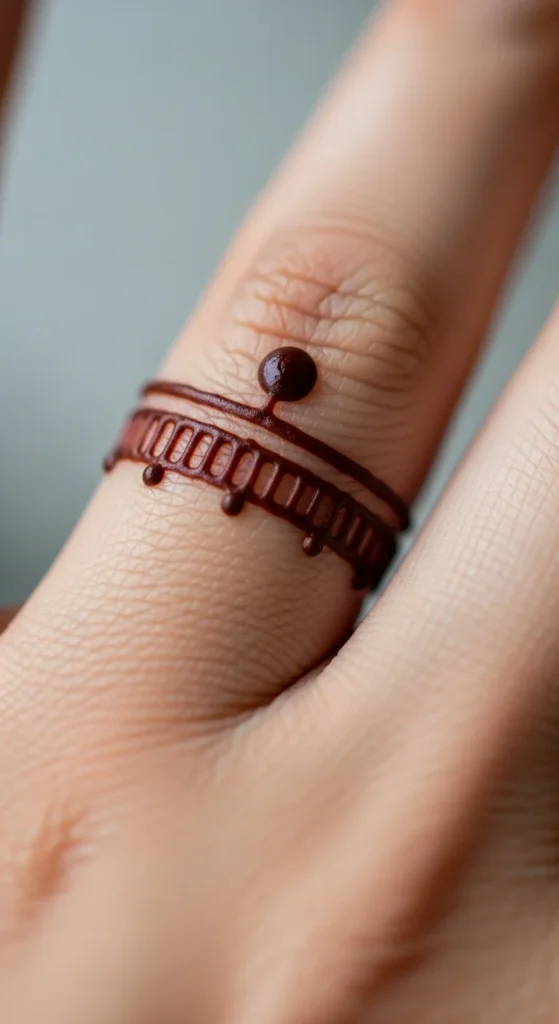
Draw a thin band around one finger. Add a small flower or dot cluster on top of the finger. Connect it with a thin line to the band. It looks like a delicate ring made of henna and takes just minutes.
8. Half Sun Palm Corner
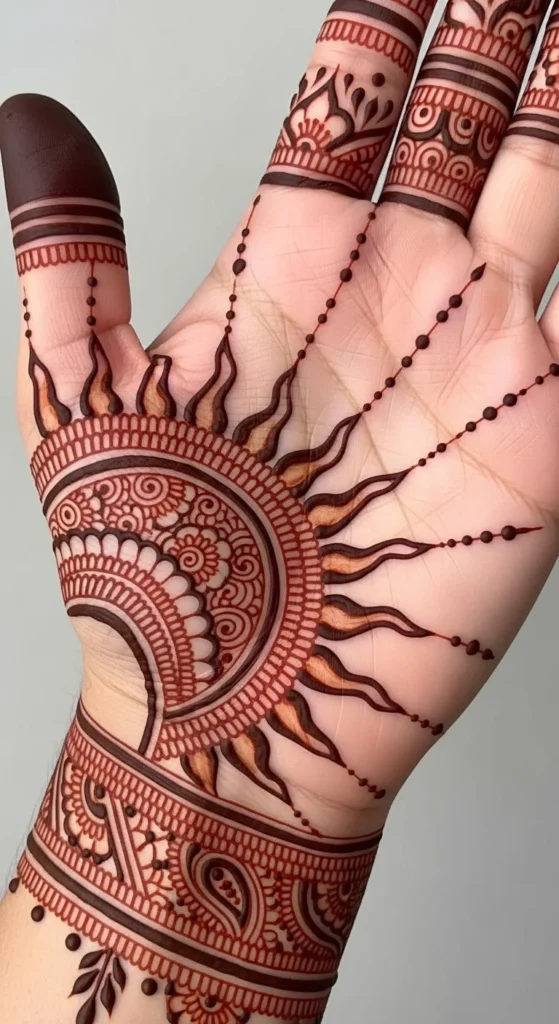
Place a half circle at one corner of your palm. Add short lines radiating outward like sun rays. Fill gaps with dots. This off-center design looks balanced without covering the full palm.
9. Minimal Dot Grid
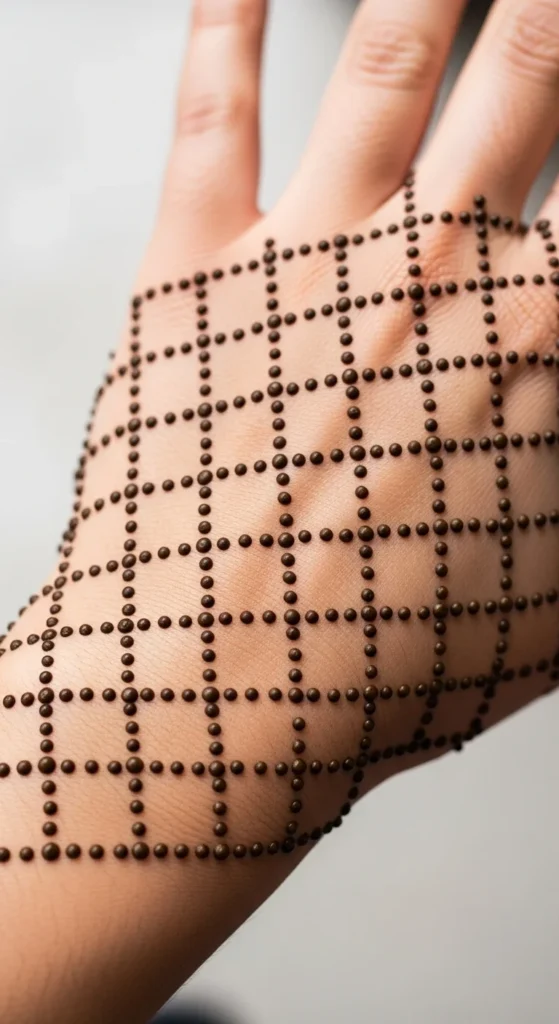
Create a small square grid of evenly spaced dots on the back of your hand. Connect a few with tiny curved lines. This modern style is simple and very quick.
10. Easy Arabic Diagonal
An easy Arabic diagonal design gives your hand a stylish flow without covering too much space. Start at one side of your wrist and draw a thin curved line moving diagonally toward a finger. This becomes your main vine. Along this line, add medium-sized simple flowers made with round petals. Leave small gaps between flowers so the design looks airy. Between flowers, draw pairs of small leaves using short curved strokes. Keep the shapes spaced rather than crowded. Arabic styles look best when one side is detailed and the other side is left more open. Add small dots around the flowers to soften empty areas and hide uneven spacing. Turn your hand slowly while working so your lines stay smooth.
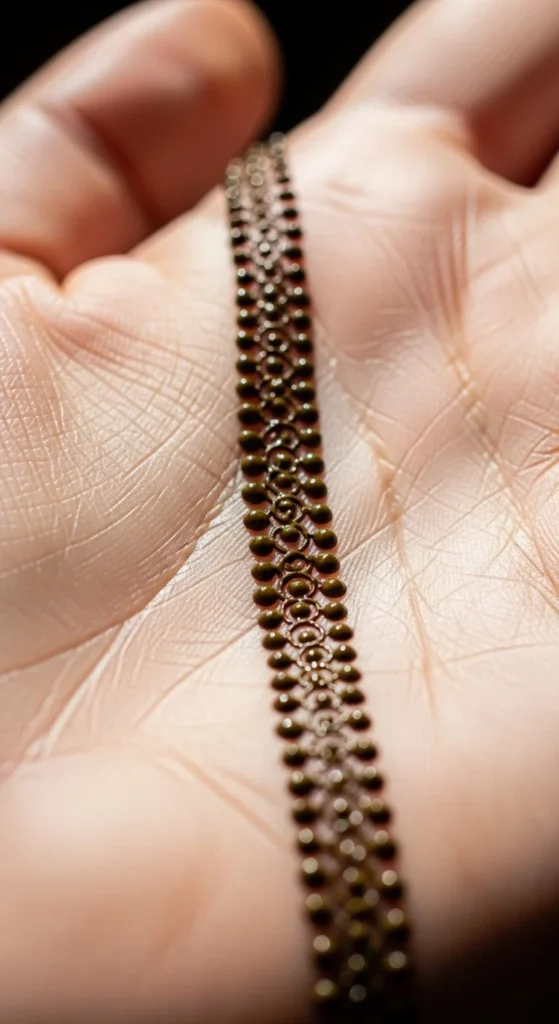
11. Wrist Band with Dots

A wrist band design is quick and looks like a piece of jewelry. Draw one thin line around your wrist like a bracelet. Keep your hand relaxed and rotate your wrist instead of moving the cone too much. Once the main band is drawn, add a row of tiny dots just above the line and another row below it. These dots frame the band and make it look decorative. If the line looks wavy, don’t worry. The dots help distract from small imperfections. You can also add short vertical strokes crossing the band in one small section to create a clasp-like detail. This design takes only a few minutes and pairs nicely with real bangles. It is perfect for beginners because straight lines are easier to control when drawn slowly with light pressure.
12. Tiny Heart Motifs

Tiny heart motifs are playful and simple for beginners. Start by drawing a small “V” shape. Then round the top edges to turn it into a heart. Keep each heart small so the design looks neat. Place a few hearts along the side of a finger or near the wrist. Leave space between them so the pattern doesn’t feel crowded. You can connect two hearts with a line of tiny dots for extra detail. If your lines look shaky, outline the heart once more to smooth the shape. Hearts dry fast and are easy to practice on paper first. This design works well for casual wear or younger girls who want something cute and light.
13. Spiral Swirl Accent
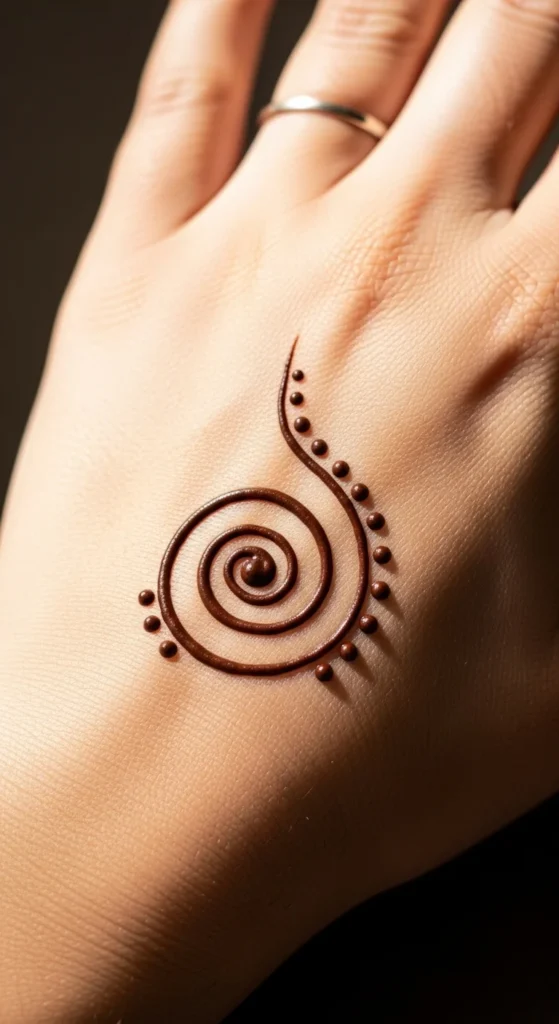
A spiral swirl is one of the easiest shapes to draw with a mehndi cone. Start with a tiny curve and slowly circle outward in a smooth motion. Keep the spiral loose rather than tight. Once the spiral is complete, add a few dots around it to fill the surrounding space. You can place this design on the back of your hand, near the thumb area, or on the wrist. If the spiral looks uneven, add a thin outline around it to make it look bolder and more intentional. This design is quick, modern, and very forgiving for beginners learning hand control.
14. Petal Burst Flower
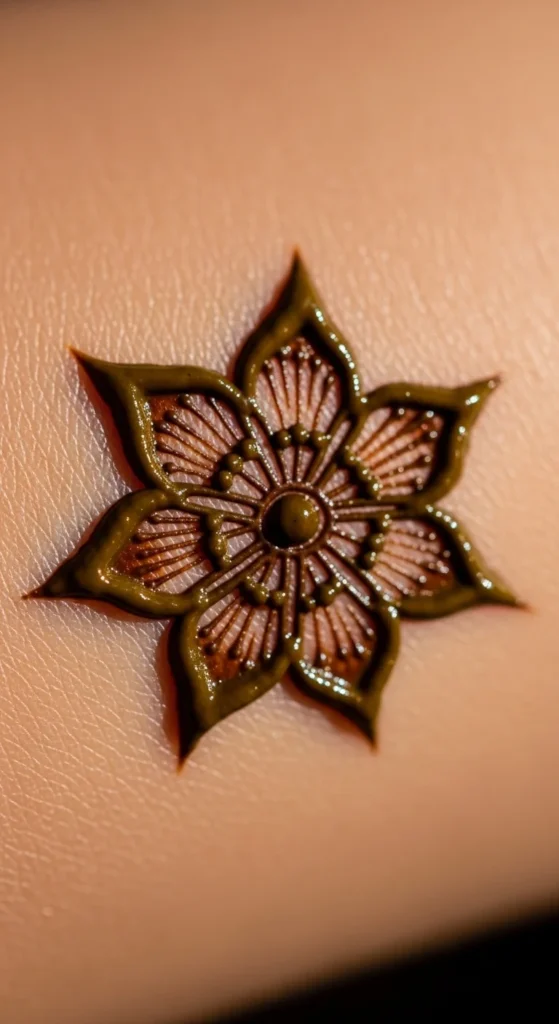
A petal burst flower looks detailed but uses simple strokes. Begin with a small dot in the center. From that dot, draw short pointed petals going outward like a star. Keep each petal thin and evenly spaced. After finishing one layer, you can add a second layer of slightly longer petals between the first ones. Add dots around the outer edge to frame the flower. This design looks great on the palm corner or back of the hand. If petals vary in size, it still looks natural. Flowers are forgiving and always look pretty.
15. Finger Ladder Lines
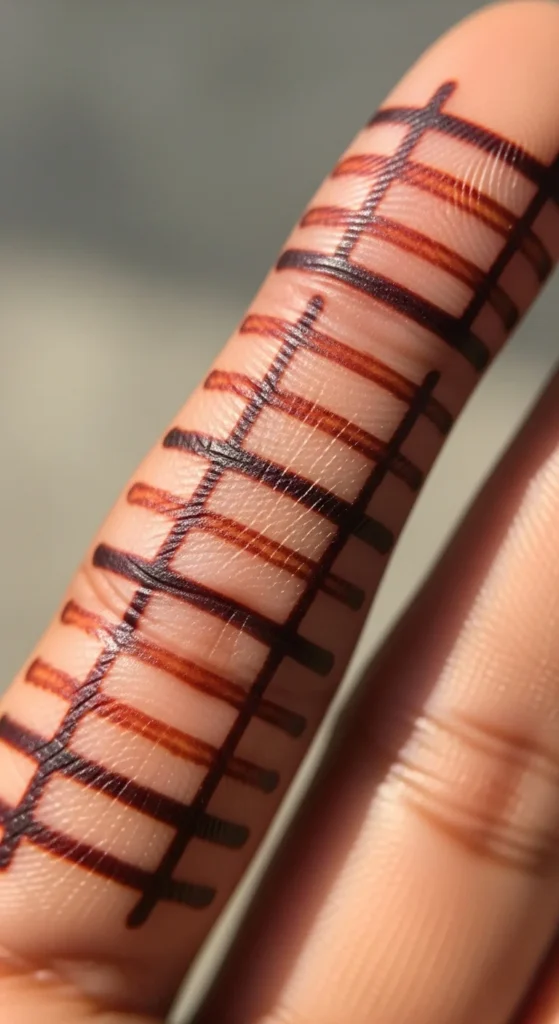
The finger ladder pattern is modern and very simple. Draw thin horizontal lines across one finger, leaving small gaps between each line. Then connect them with short vertical strokes on one side to create a ladder look. Keep the strokes light and straight. If lines wobble, add tiny dots at the corners to make them look decorative. This design works best on the middle or ring finger and pairs nicely with other small hand designs.
16. Corner Leaf Cluster
A leaf cluster fills a small space beautifully. Choose one corner of your palm and draw a short curved stem. Add small leaf shapes along the stem using teardrop strokes. Keep the leaves pointing outward. Fill tiny gaps with dots to make the cluster look fuller. This is a great filler design and easy to expand if you want more detail later.
17. Ring Chain Dots
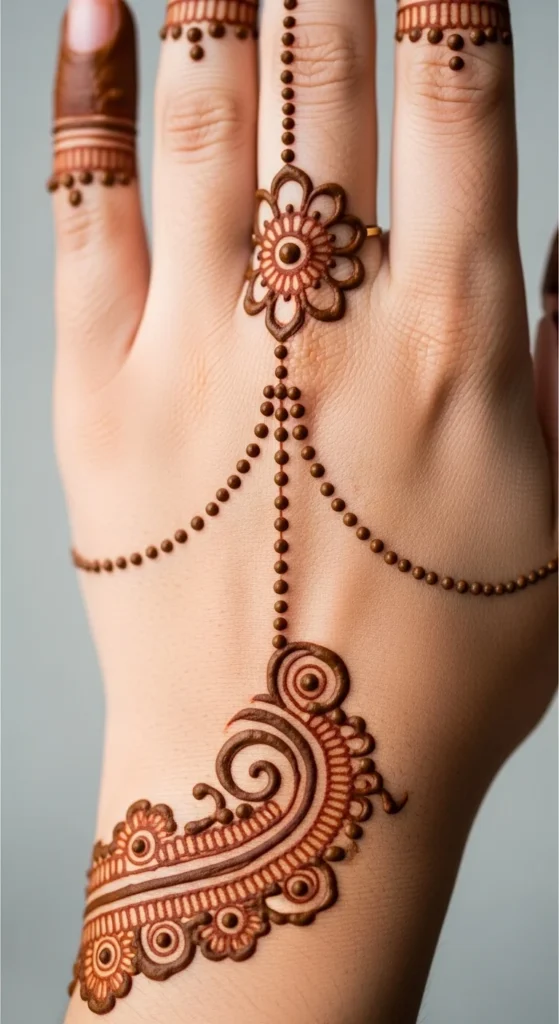
This design looks like a hand chain accessory. Draw a thin band around one finger like a ring. From the center of that band, create a straight line of evenly spaced dots going down toward the wrist. You can end the line with a small flower or circle. The dots don’t need to be perfect. Even spacing matters more than size.
18. Small Sunflower
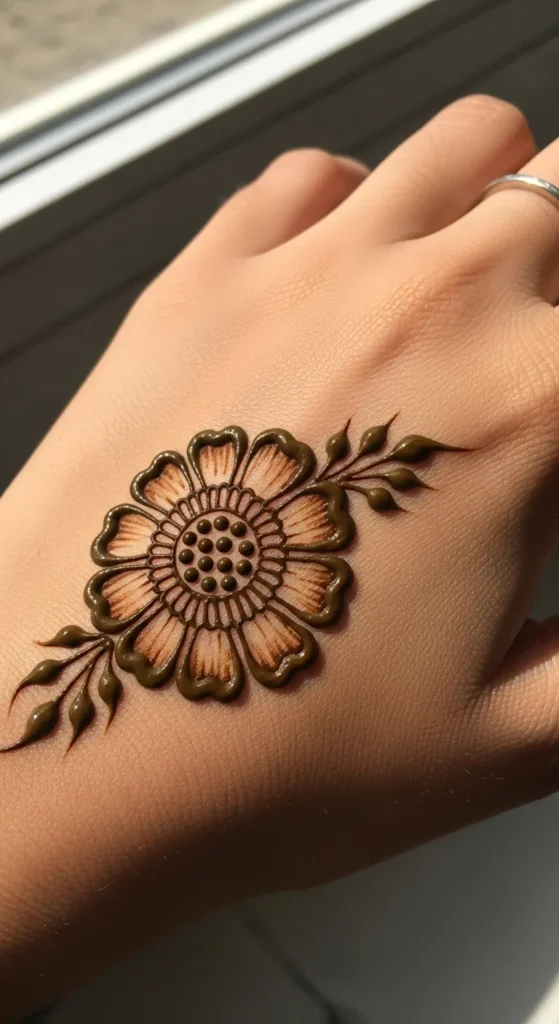
A small sunflower design looks bold but is made from very easy shapes. Start by drawing a medium circle. Fill the inside with tiny dots placed close together. This creates a textured center. Around the circle, draw short rounded petals going all the way around. Keep the petals similar in size but don’t stress about perfect spacing. Mehndi flowers look natural with small variations. Once the petals are done, you can outline the entire flower with a thin border to make it stand out more. Add a few dots around the outside if the area feels empty. This design works well on the back of the hand, near the wrist, or even as a finger accent. Because it uses repeated strokes, it helps beginners practice steady pressure and control while still creating a design that looks full and eye-catching.
19. Double Line Curve
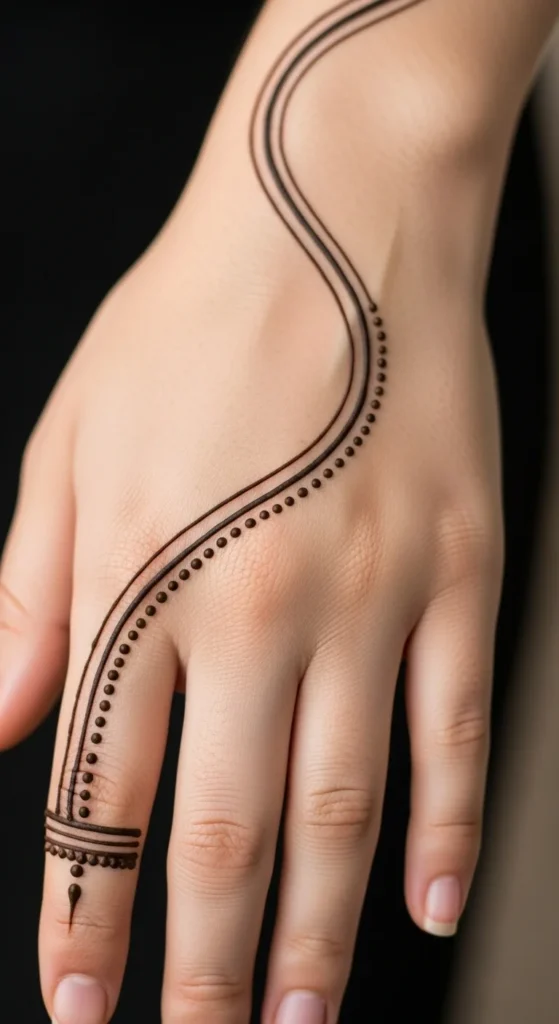
The double line curve is simple, neat, and elegant. Begin by drawing one thin curved line across your hand. Move slowly and keep your wrist relaxed. Once the first line is complete, draw a second line right beside it following the same path. Try to keep the spacing between the lines even. If the lines are not perfectly smooth, don’t worry. You can add tiny dots between them to decorate the space and distract from small wobbles. This design looks great along the side of the hand or sweeping diagonally across the back of the hand. It is quick to apply and pairs nicely with other small patterns like flowers or leaf vines. Practicing long curved strokes like this helps improve control with the mehndi cone.
20. Side Palm Vine
A side palm vine adds detail without covering the entire hand. Start near the base of your palm and draw a thin curved line following the outer edge toward your little finger. This becomes the stem of the vine. Along the stem, add small leaf shapes using short teardrop strokes. Alternate the direction of the leaves to make the vine look natural. Keep the leaves small and evenly spaced. If there are empty gaps, fill them with tiny dots. This design is very forgiving because vines naturally curve and flow. It works well on its own or combined with a small wrist band or finger design. Beginners like this pattern because it uses simple shapes and doesn’t require symmetry on both sides.
21. Dotted Finger Trail
A dotted finger trail is one of the easiest mehndi styles to try. Start at the base of a finger and place a line of small dots moving toward the fingertip. Try to keep the dots evenly spaced, but don’t worry if they vary slightly in size. You can make the trail straight or gently curved depending on your preference. This design looks delicate and modern, especially when paired with finger tip caps or small flowers on the hand. If your hand shakes, pause between each dot instead of dragging the cone. This gives you more control and keeps the dots round. The design dries fast and is great for everyday wear when you want something light and minimal.
22. Mini Mandala Wrist
A mini mandala on the wrist looks neat and balanced. Begin with a small circle in the center of your wrist. Around it, add a ring of tiny dots spaced evenly. Next, draw short rounded petals around the dots to form a soft flower shape. You can add one more outer ring of dots to frame the mandala. Keep each layer small so the design doesn’t spread too wide. This pattern is great practice for spacing and symmetry. If the shape looks uneven, add extra dots to balance the sides visually. A wrist mandala pairs nicely with bracelet-style lines or finger designs, making it easy to build a larger look later.
23. Paisley Corner Accent
A paisley corner accent fills an empty space beautifully. Choose one corner of your palm and draw a small curved mango shape. Outline it once more to make the border bold. Inside the paisley, add a few short curved lines that follow the same direction as the outer shape. Around the paisley, place tiny dots and small leaf shapes to complete the look. This design is easy to expand if you want to add more later. Paisleys are forgiving because their curved form hides small line mistakes. It works well as a starting point for a larger design or as a small standalone detail.
24. Criss Cross Lines
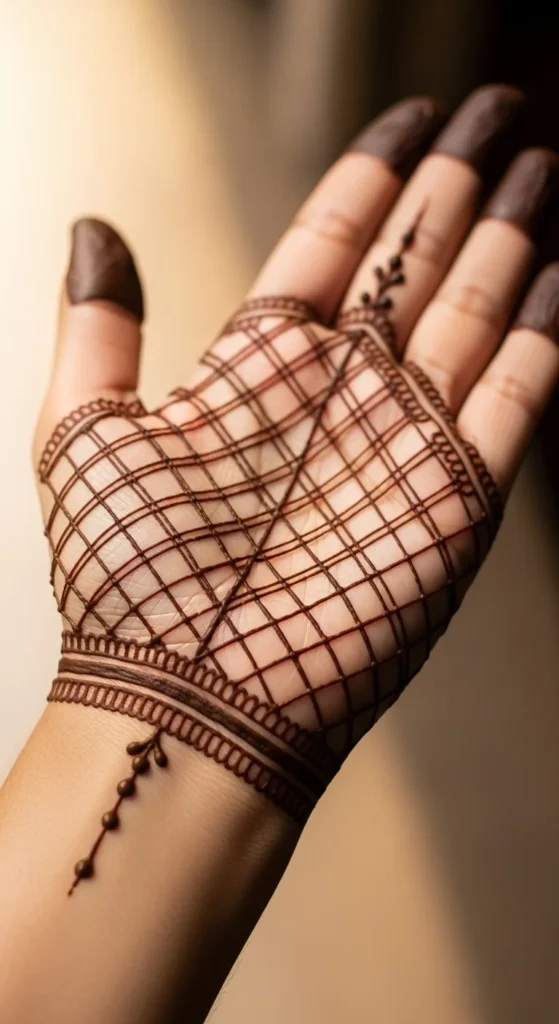
Criss cross lines create a net pattern that looks detailed but is very easy. Draw a set of thin diagonal lines going in one direction. Then draw another set crossing them in the opposite direction to form small diamond shapes. Try to keep the spacing between lines similar. If lines look uneven, add a dot where they intersect. This makes the design look decorative rather than accidental. Keep the net pattern limited to a small area so it doesn’t feel too busy. This style works well as a background behind flowers or along the wrist.
25. Simple Floral Finger Band

A simple floral finger band looks like a delicate ring. Draw a thin line around the middle of your finger to form the band. Along the top of the band, add tiny flowers made from small dots and short petals. Keep each flower close to the next so the band looks continuous. If there are small gaps, fill them with dots. This design is great for beginners because the finger gives a small area to work on, making control easier. It pairs nicely with dotted trails or small wrist patterns and is perfect when you want something subtle but pretty.
Conclusion
Simple mehndi is all about small shapes, steady lines, and relaxed practice. You don’t need full-hand coverage to create something beautiful. Start with one design at a time and repeat it on paper before applying on skin. As your control improves, you can combine elements from different ideas in this list. Keep your cone tip small, let the paste dry naturally, and enjoy watching the color deepen over time.

Lily Summers is a digital artist and creative storyteller who loves bringing colorful characters to life. With a passion for cartoons, fan art, and playful sketches, she inspires others to explore their imagination through art. When she’s not sketching, you’ll find her dreaming up new ideas for CraftedWizard.com to spark creativity in every artist. 🌈✨