
Simple back hand mehndi designs are loved for one big reason — they look graceful without feeling heavy. You don’t need a full bridal pattern to make an impact. A few well-placed flowers, clean lines, or airy vines can look just as beautiful. These styles are perfect for festivals, family events, or even everyday wear. They’re also beginner-friendly, quick to apply, and easy to match with different outfits. If you want mehndi that feels light, modern, and effortless, these ideas will help you create pretty designs without stress or complicated steps.
1. Sunburst Center Glow
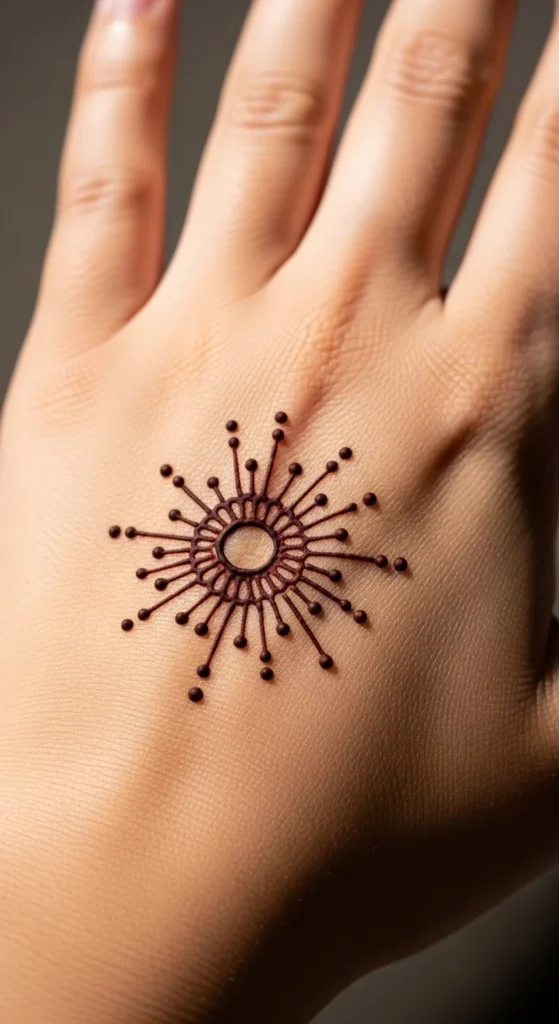
A small sunburst mehndi in the center of the back hand creates instant beauty without crowding the skin. Start with a tiny circle, then draw slim straight lines around it like soft rays. Keep the spacing even so the design feels balanced. Add tiny dots between every two rays to fill empty spots while keeping the look airy. This design takes less than ten minutes and looks neat even if your lines are not perfect. You can leave it just as it is for a super minimal style, or extend two or three rays slightly toward the fingers for gentle movement. It pairs nicely with simple rings and light nail polish shades. Budget tip: Practice drawing thin lines using a regular pen before using henna so your hand feels steady. This design is perfect for small family gatherings or casual outings where you want something pretty but not heavy.
2. Single Flower Statement
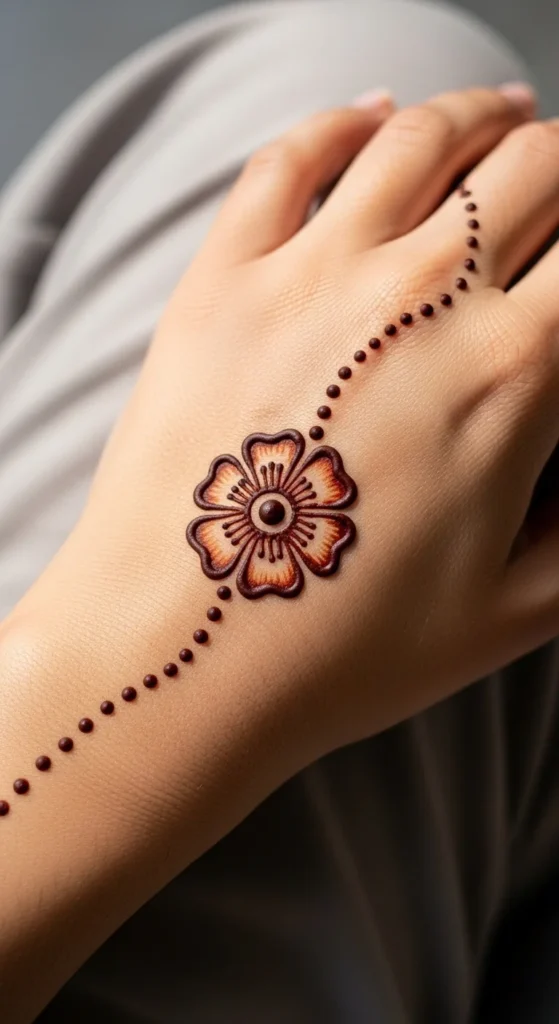
A single bold flower on the back of the hand looks clean and stylish without taking much time. Draw a small circle for the center, then add rounded petals around it. Keep petals wide and simple instead of detailed. Add a short dotted trail flowing toward one finger to give it direction. This makes the design feel complete without adding extra patterns. You can place the flower slightly off-center for a modern touch. This design works well when you want mehndi that matches everyday outfits. It also looks nice with watches or bracelets because it does not fight for attention. Budget tip: Use a toothpick dipped in leftover henna to add tiny dots if your cone tip feels too thick. This style is beginner-friendly and easy to fix if a petal shape goes wrong. It’s perfect when you want a quick design before heading out.
3. Minimal Mandala Dot Ring
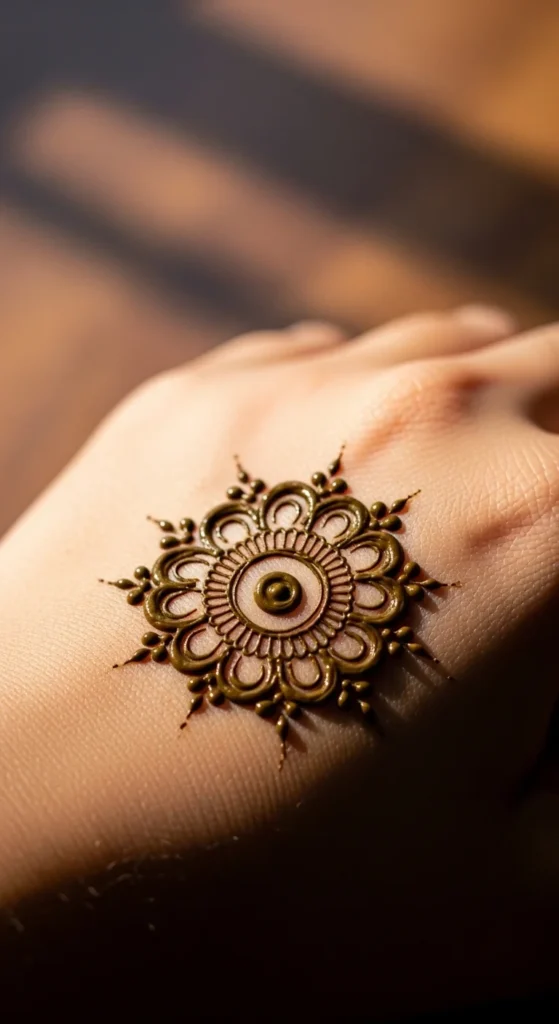
A mini mandala made mostly with dots looks detailed but is actually very simple to create. Start with a small circle in the center of your hand. Around it, add evenly spaced dots to form a ring. Then draw tiny curved petals between some of the dots to give a floral feel. Because this design relies on dots, it is very forgiving for beginners. If one dot is slightly bigger, it still blends in. Keep the size small so the back of the hand looks light and modern. This design pairs beautifully with traditional outfits as well as western clothes. Budget tip: Practice making evenly sized dots on paper first by gently pressing the cone without dragging it. You can add a thin line trail toward the wrist if you want more flow. This is a great choice when you want something classic that doesn’t cover the whole hand.
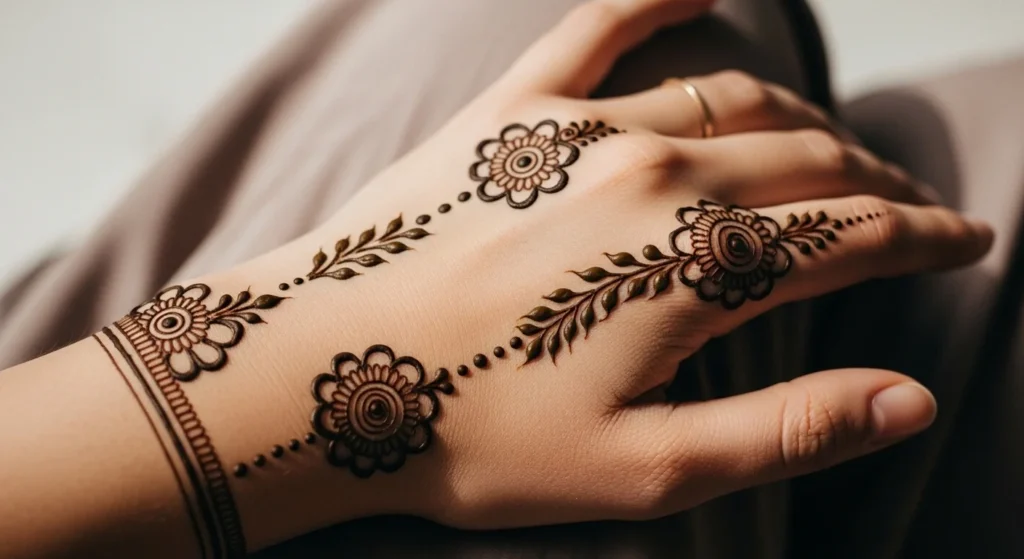
4. Bracelet Style Wrist Band
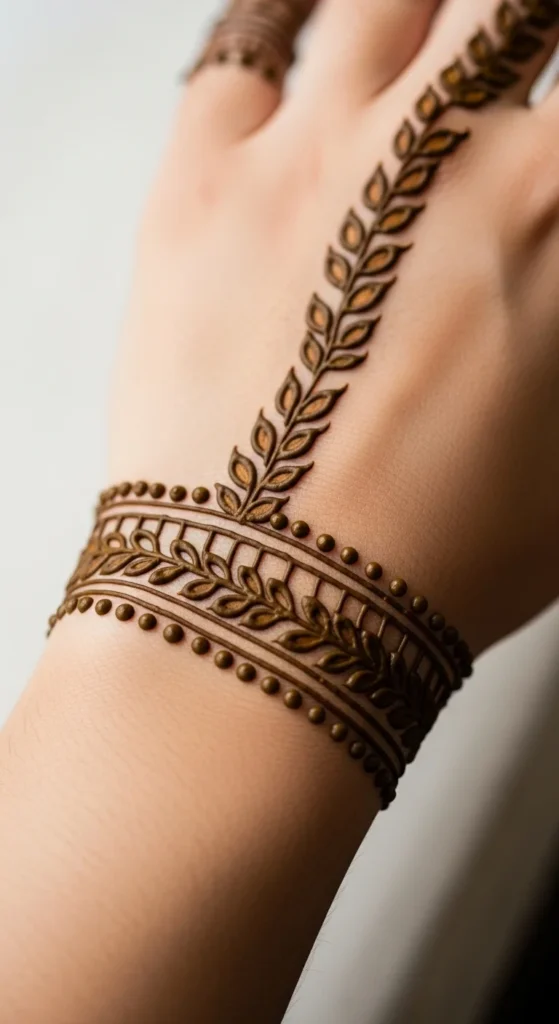
A bracelet-style mehndi band around the wrist looks like jewelry and keeps the back of the hand mostly empty. Draw two thin parallel lines across the wrist area. Inside the lines, add tiny leaves, dots, or small diagonal strokes. This creates the look of a delicate henna bracelet. You can extend one thin line slightly upward onto the back of the hand to connect it visually. This style is perfect if you plan to wear rings because it balances the hand without crowding the fingers. Budget tip: Use tape as a guide if you struggle to draw straight lines freehand. Remove it once the henna dries slightly. This design is quick and works well for events where you want subtle detail. It also fades gracefully, so it still looks nice after a few days. Great for beginners who want a clean, wearable style.
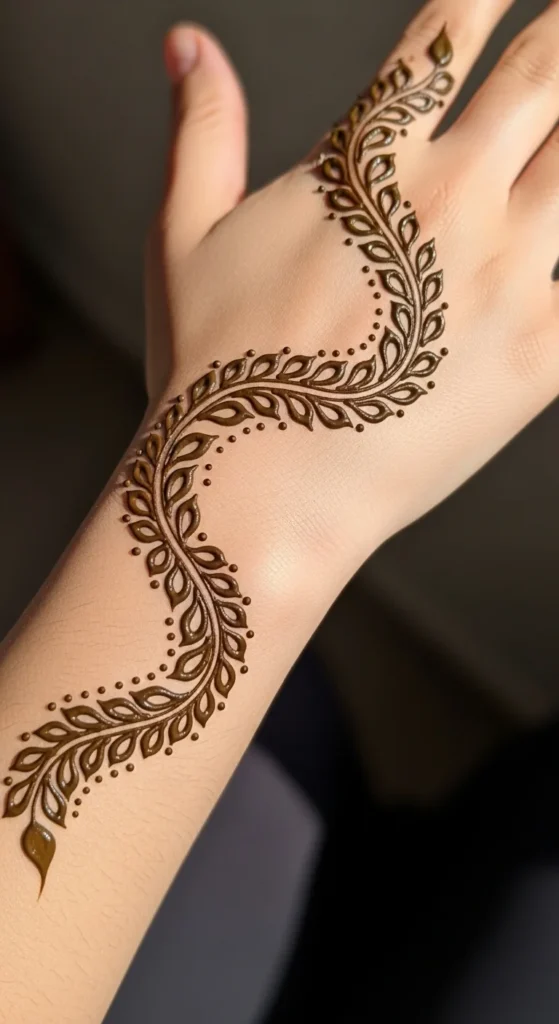
5. Leafy Side Trail
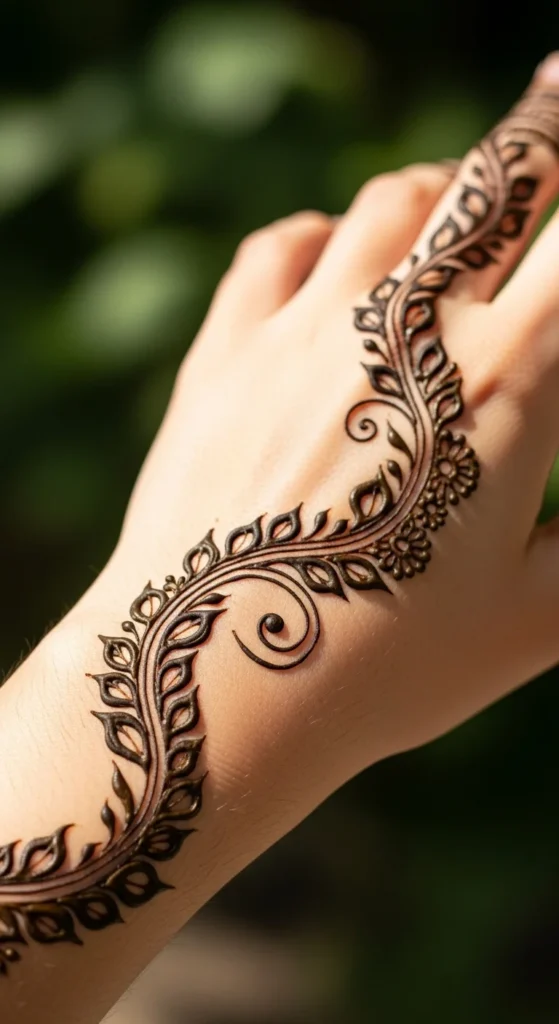
A leafy vine trail along one side of the hand creates a sleek and modern feel. Start at the wrist and draw a curved line toward the index finger. Add small leaves along one side of the line, keeping the other side mostly open. This asymmetry makes the design look stylish and light. Add a few dots near the leaves to fill small gaps. This style elongates the hand visually, making fingers appear longer. Budget tip: Practice leaf shapes on paper first using quick curved strokes. Leaves don’t need to match perfectly; slight differences look natural. This design works well for everyday wear and pairs nicely with simple bangles. It’s also great for people who don’t want a center design. Because most of the hand stays open, the mehndi feels breathable and comfortable.
6. Diagonal Vine Flow
A diagonal vine design gives movement without heavy detail. Draw a curved line from one corner of the wrist toward the opposite finger. Along the line, add tiny flowers made of five dots around a center dot. Fill gaps with single dots. This keeps the design playful and light. Diagonal placement flatters the hand shape and looks great in photos. Budget tip: Use a pen to lightly trace the path on your skin before applying henna if you want extra control. This design usually takes under fifteen minutes and looks balanced even with basic shapes. You can stop after a few flowers for a minimal look or extend the vine across two fingers for more drama. Perfect for casual events or festive dinners.
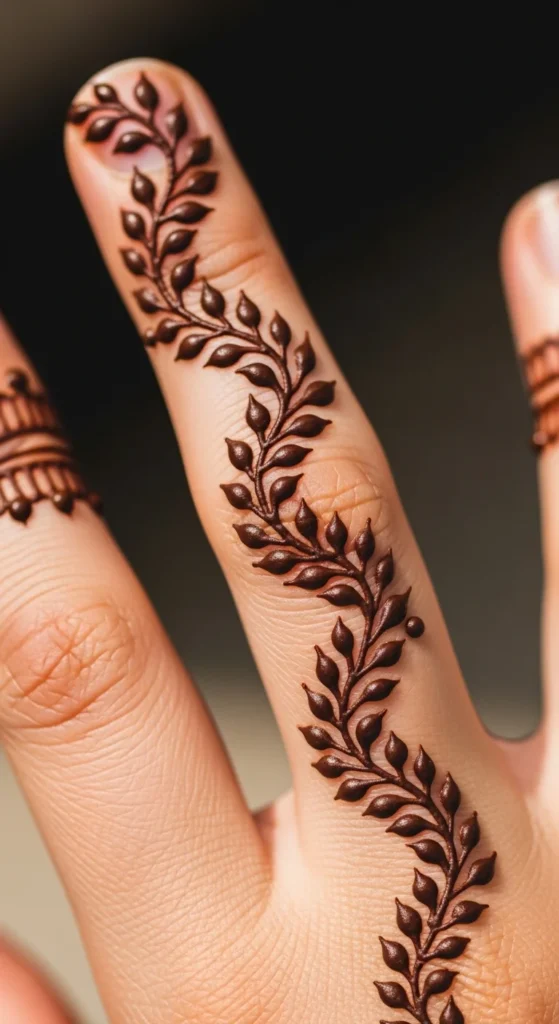
7. Ring Style Finger Connect
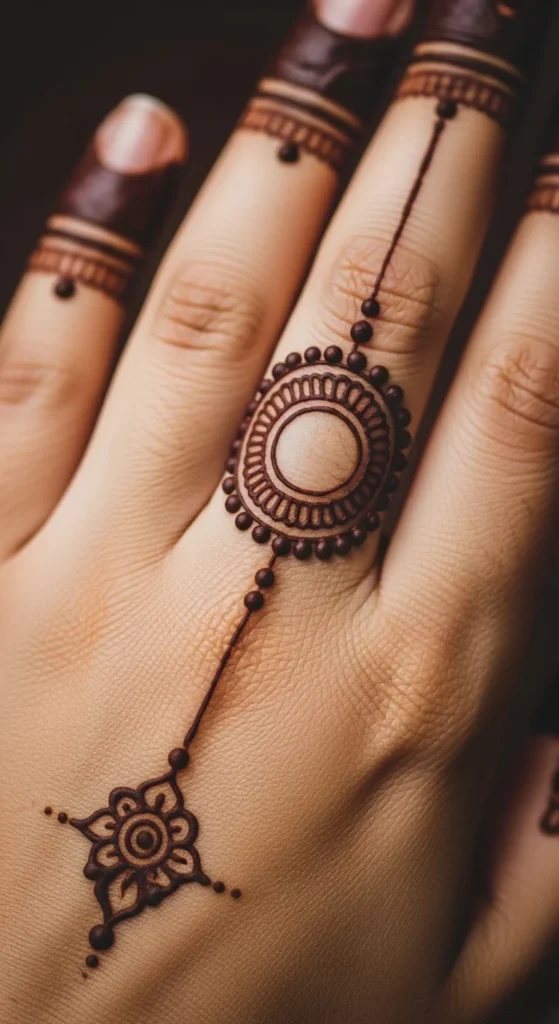
A ring-style mehndi mimics jewelry and feels trendy without being heavy. Draw a thin band around one finger like a ring. Then extend a slim line from the band to a small floral or dot cluster on the back of the hand. This connection makes the design look thoughtful but still simple. Keep the line thin and clean. Add tiny dots along it if you want texture. Budget tip: Practice drawing thin continuous lines on paper to avoid breaks. This design pairs beautifully with real rings and looks stylish at parties. It’s quick to do and easy to adjust based on how much space you want to fill.
8. Dot Magic Scatter
A dot-only mehndi design is perfect when you want something ultra simple. Start by placing a small cluster of dots near the center of the hand. Then add curved dotted lines flowing toward the fingers. Keep the spacing uneven for a natural look. This style looks delicate and modern. It’s also very beginner-friendly because dots are easy to fix. Budget tip: If your cone tip is too thick, trim it slightly to get smaller dots. This design dries quickly and is great for last-minute plans. You can pair it with bold nail colors for contrast.
9. Half Mandala Edge
A half mandala along the edge of the hand gives a balanced yet airy feel. Draw a half circle near the thumb side and add simple petals and dots radiating outward. Keep the other side of the hand empty. This creates contrast that feels stylish and modern. Budget tip: Sketch the half circle with an eyebrow pencil first if you want a guide. This design looks detailed in photos but is easy to create with basic shapes. It works well for festive days without looking too bridal.
10. Tiny Heart Accent
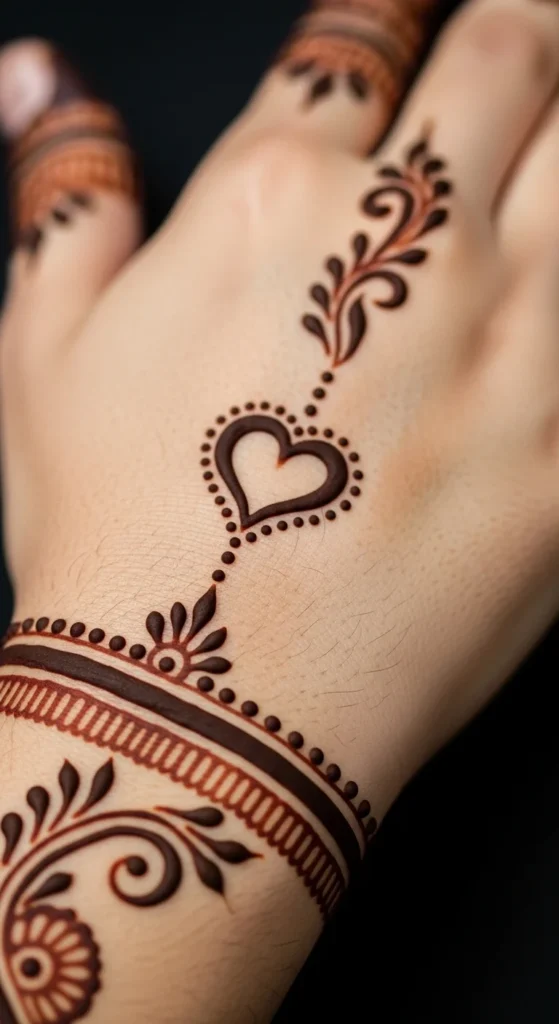
A tiny heart mehndi design adds a soft playful touch without covering much space. Place a small heart slightly off-center on the back of the hand so it feels relaxed instead of stiff. From one side of the heart, draw a thin dotted trail moving gently toward a finger. Keep the dots spaced so the skin still shows through. This makes the design feel light and modern. You can add two miniature leaves near the heart for extra detail while keeping the look simple. This style works well for casual days, small gatherings, or when you just want a little decoration. Budget tip: Practice drawing hearts with a pen first so both curves look even. If the heart shape turns out uneven with henna, you can thicken one side slightly to balance it. Pair this design with soft nail shades or clear gloss so the focus stays on the cute, minimal detail.
11. Fingertip Fill Detail
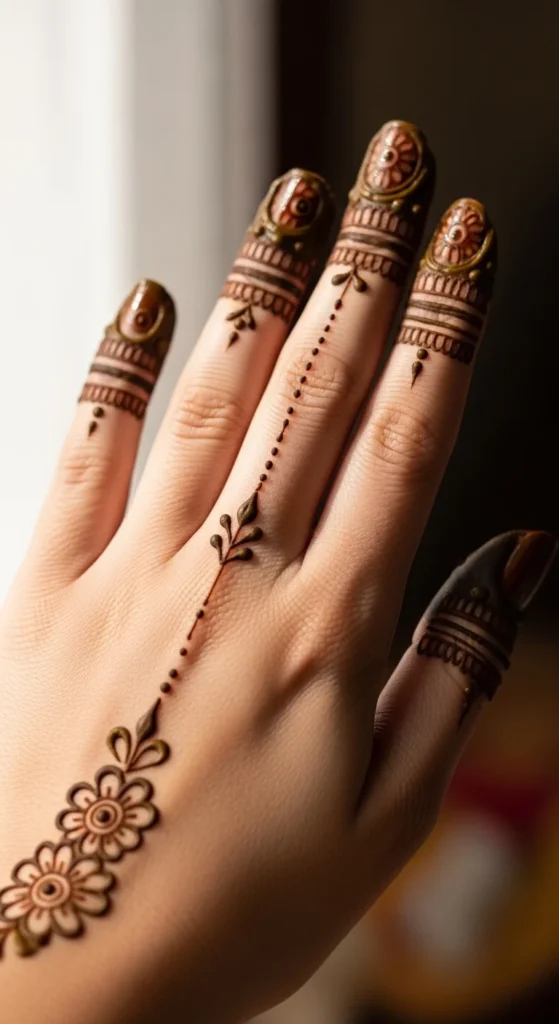
Fingertip mehndi fill gives your hand a finished look while keeping the back mostly open. Start by shading just the tips of your fingers with small lines, dots, or tiny leaf shapes. Keep the fill light rather than solid so it dries faster and looks neat as it fades. Then place a very small floral or dot cluster in the center of the back of the hand to connect everything visually. This creates balance without heavy coverage. The contrast between detailed fingertips and open skin looks stylish and clean. Budget tip: Use leftover henna from another design to decorate fingertips so nothing goes to waste. This style is great when you want something different from full-hand patterns. It pairs nicely with rings because the fingertip detail draws attention upward. Even beginners can manage this look since small repeating strokes are easier than large shapes.
12. Paisley Chain Line

A paisley chain mehndi design brings a classic feel in a very simple layout. Draw a row of small paisley shapes flowing diagonally across the back of the hand. Keep each paisley hollow or lightly lined instead of heavily filled. This keeps the design from looking crowded. Add tiny dots between the paisleys to connect them and fill small gaps. The diagonal direction gives movement and flatters the hand shape. You can stop after three or four paisleys for a minimal style or extend the chain slightly onto one finger. Budget tip: Practice drawing one paisley shape repeatedly on paper until your hand feels comfortable with the curve. Paisleys do not have to match perfectly; slight differences make the design look more natural. This style suits festive outfits while still feeling light enough for daytime events.
13. Negative Space Flower Frame
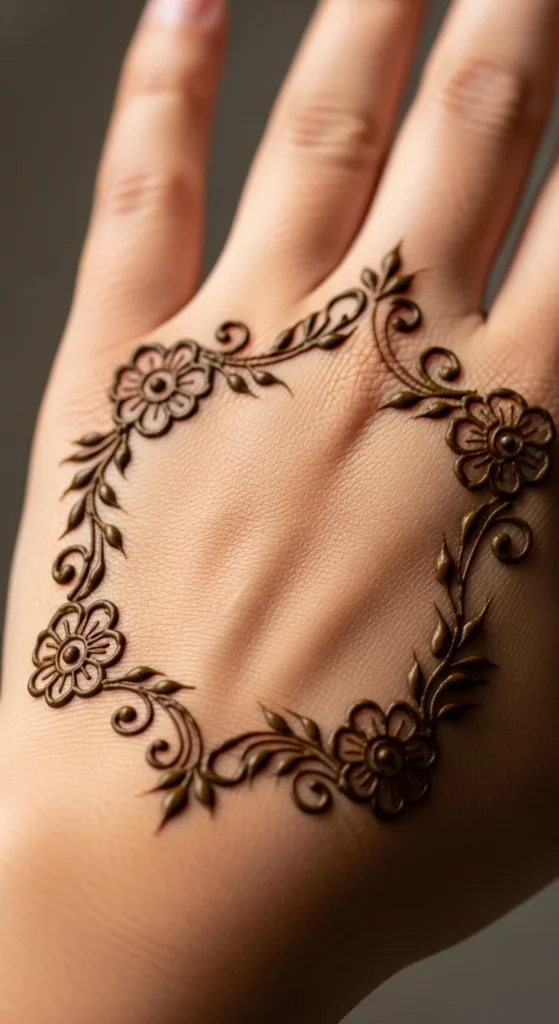
A negative space floral design looks modern because it uses bare skin as part of the pattern. Instead of filling the whole hand, draw two or three small flowers spaced apart to create a loose frame shape. Connect them with thin lines or dotted curves that guide the eye without adding bulk. Leave large areas empty so the design feels airy. This style looks elegant in photos and works well for people who prefer subtle decoration. Budget tip: Stop adding details sooner than you think you should. The open space is what makes this design special. If you feel the hand looks too empty, add just a few dots rather than another full flower. This mehndi pairs nicely with both traditional and western outfits because it feels light and clean. It is also comfortable to wear since less henna means quicker drying time.
14. Geometric Line Pattern

Geometric mehndi lines offer a modern alternative to floral styles. Start by drawing two or three thin parallel lines across the back of the hand. Then add small shapes like diamonds, triangles, or tiny squares between the lines. Keep everything evenly spaced so the design looks tidy. Because these shapes are simple, they are easier to control than complex petals. This style pairs beautifully with modern outfits and minimal jewelry. Budget tip: Practice straight lines on paper first and move your whole hand instead of just your fingers when applying henna. That helps keep lines steady. If a line turns slightly wobbly, add tiny dots along it to disguise the imperfection. The result feels stylish and different while still being easy to create at home.
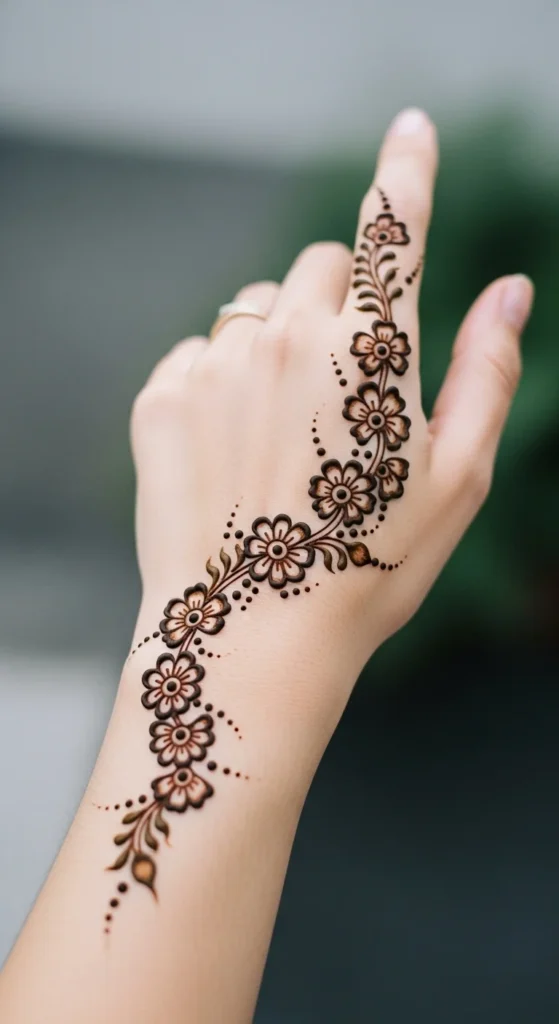
15. Floral Finger Trail
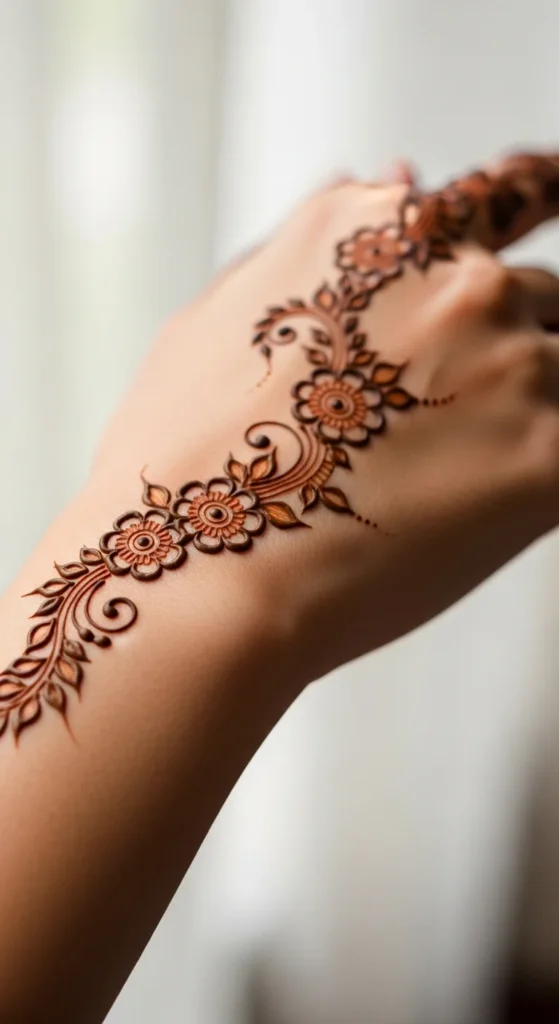
A floral finger trail creates gentle movement across the hand without full coverage. Begin near the wrist with a tiny five-petal flower. From there, draw a thin curved line traveling toward the ring finger. Add two or three more small flowers along the line. Fill small gaps with dots to keep the trail looking soft. This design makes the hand appear longer and more graceful. You can leave the other fingers bare to keep the look balanced. Budget tip: Keep flowers simple with round petals instead of detailed shading. That saves time and still looks pretty once the henna darkens. This style works well for daytime events and family functions where you want something noticeable but not heavy. It also looks lovely in hand photos because the trail guides the eye naturally.
16. Small Sun and Moon Pair
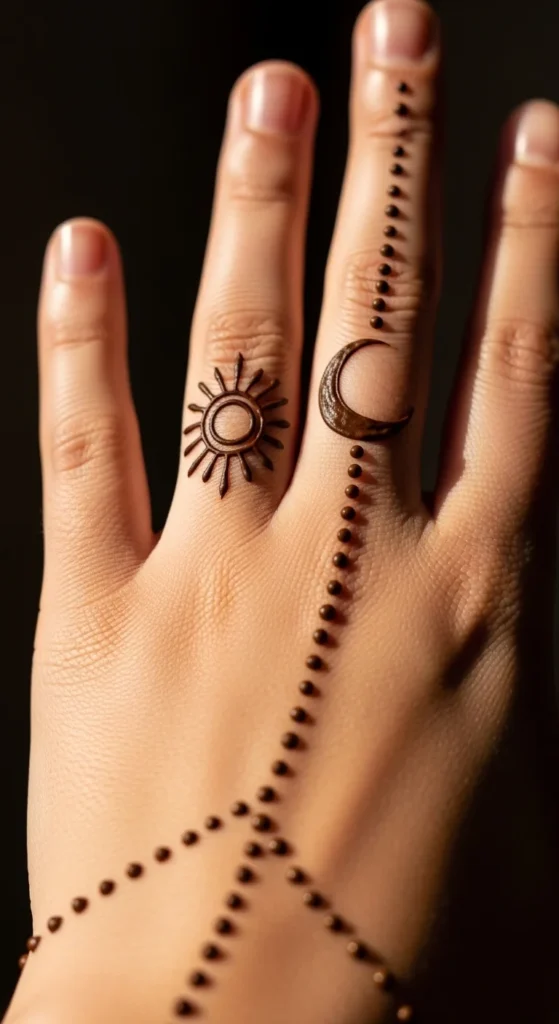
A sun and moon mehndi pair adds symbolic charm while staying minimal. Draw a tiny sun with short rays on one side of the back of the hand. On the opposite side, draw a small crescent moon. Connect the two with a thin dotted curve so the design feels linked. Keep both symbols small so the overall look stays light. This style feels meaningful yet simple enough for beginners. Budget tip: Sketch the shapes lightly on paper first to get comfortable with the curves and rays. If the sun rays look uneven, you can shorten a few to balance the shape. This design pairs well with simple outfits and looks sweet without trying too hard. Because there is lots of open skin, it dries quickly and feels comfortable throughout the day.
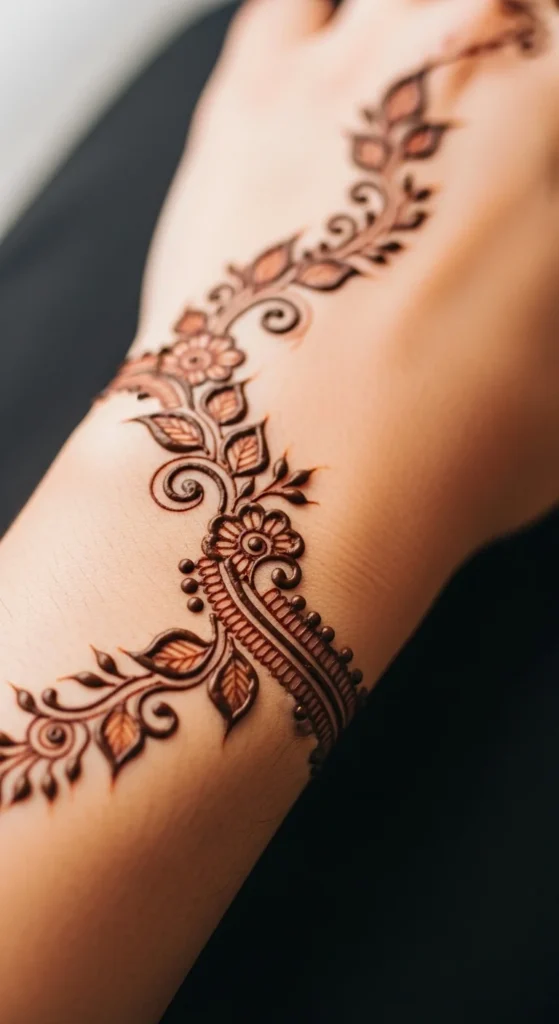
17. Wrist to Thumb Curve
A wrist-to-thumb mehndi curve frames the hand beautifully while keeping the center open. Start at the wrist and draw a smooth curved line toward the thumb area. Along the line, add small leaves pointing outward. Fill tiny spaces with dots to soften the look. This curved placement flatters the natural shape of the hand and looks graceful in motion. Budget tip: Practice long curved strokes on paper without stopping. Smooth movement creates cleaner lines. If the curve looks too plain, add a second thinner line beside part of it for depth. This design pairs nicely with bangles or watches since the detail begins near the wrist. It is a great choice when you want a design that feels elegant but not heavy.
18. Mini Mandala Chain
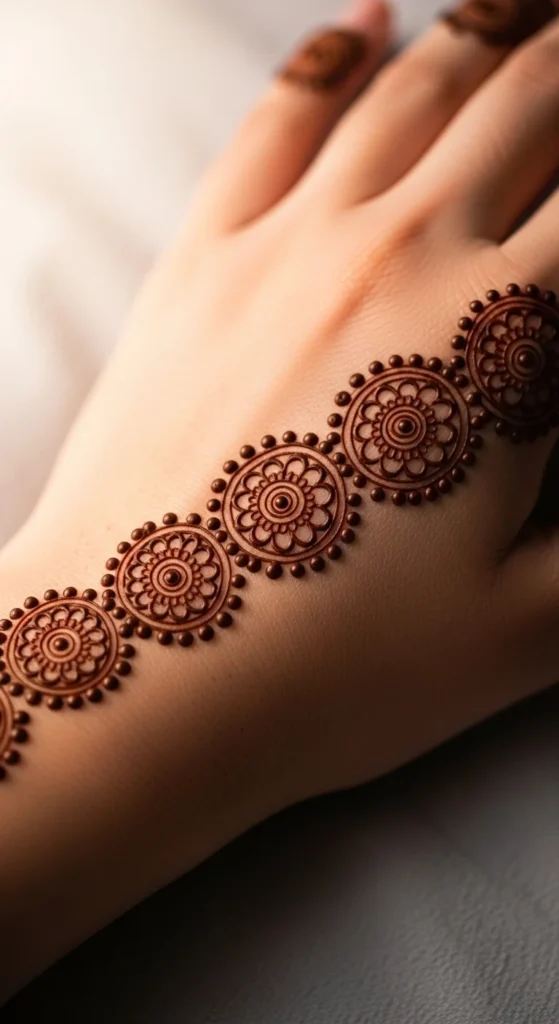
A mini mandala chain looks decorative yet remains simple. Draw three small circles in a gentle row across the back of the hand. Around each circle, add tiny petals or dots to create miniature mandalas. Connect them with dotted lines so they feel like a chain. Keep each mandala small and similar in size for balance. This style looks detailed from a distance but is made of easy repeated shapes. Budget tip: Use the cap of a pen to practice drawing circles of the same size on paper. If one mandala looks slightly larger, add extra dots around the others to balance the spacing. This design works well for festive gatherings while still feeling light enough for daytime wear.
19. Starry Dot Trail
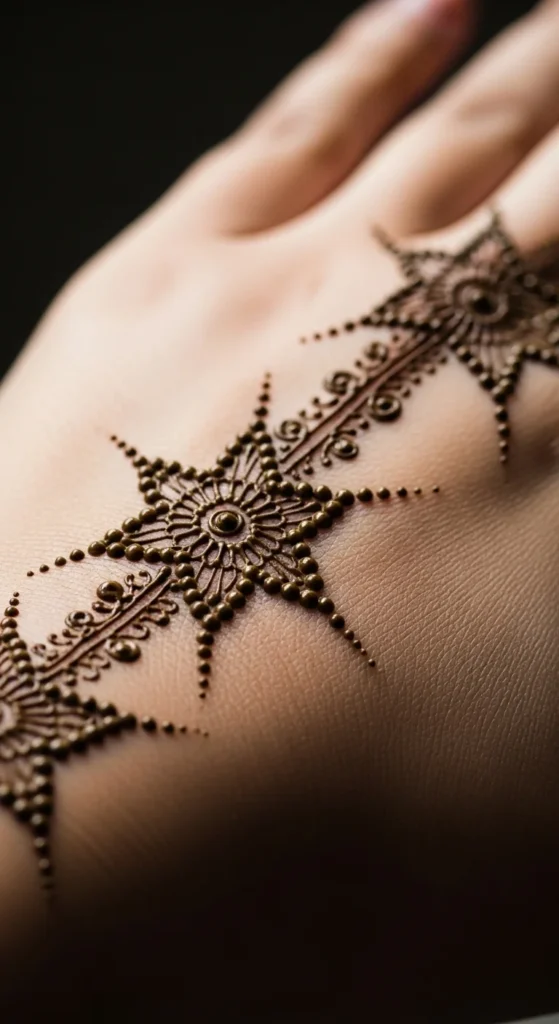
A starry dot mehndi trail uses tiny star shapes made from dots for a playful look. Create each star by placing five or six dots in a circular form. Arrange several stars along a soft curved line across the back of the hand. Leave space between each one so the design feels light. Add a few single dots around the stars to fill gaps gently. Budget tip: Press the cone lightly and lift straight up to get round dots. If a dot spreads too much, turn it into part of a tiny flower. This design feels fun and modern while being very easy to create. It dries quickly and works well for casual events or relaxed celebrations.
20. Elegant Leaf Bracelet
An elegant leaf bracelet mehndi wraps the wrist like delicate jewelry. Draw two thin parallel lines around the wrist area. Between the lines, add small pointed leaves placed closely together. Add a row of tiny dots just outside one of the lines for extra detail. This creates the look of a henna bracelet without covering the whole hand. Budget tip: Keep leaves small and angled in the same direction for a tidy appearance. This style pairs beautifully with rings and leaves the back of the hand open for comfort. It is perfect when you want subtle decoration that still feels dressed up.
21. Simple Net Patch
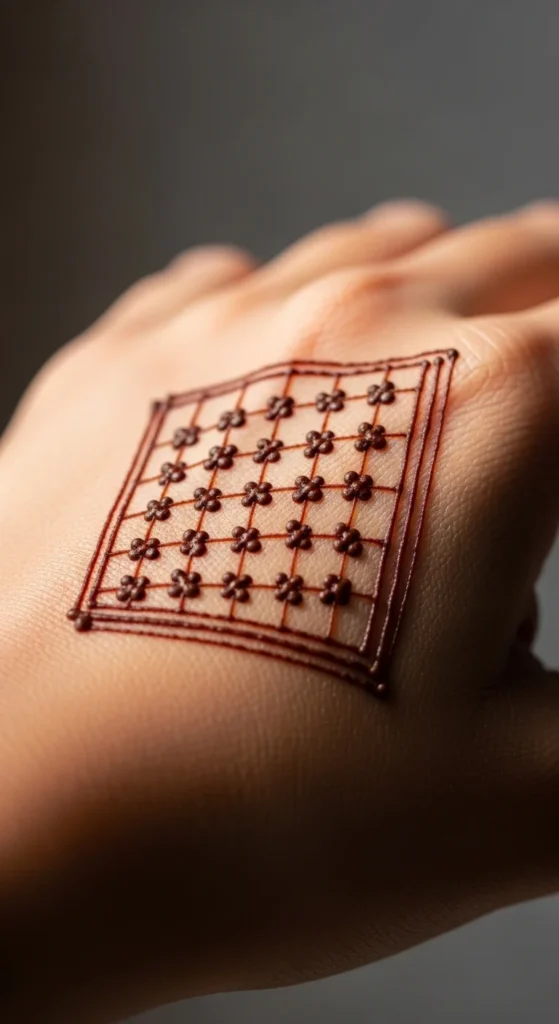
A small net mehndi patch adds texture in a limited area without heavy coverage. Choose one corner of the back of the hand and draw a tiny crisscross grid. At each crossing point, place a small dot. Keep the patch compact so the rest of the skin stays open. This creates contrast between detail and empty space. Budget tip: Draw lines slowly and lightly so they do not thicken too much. If lines overlap unevenly, extra dots can hide small mistakes. This design looks stylish and works well with both simple and festive outfits. It is also quick to apply compared to full-hand net patterns.
22. Side Finger Vines
Side finger vine mehndi decorates the edges of the fingers instead of the center of the hand. Draw thin curved lines along one side of two or three fingers. Add tiny leaves or dots along the lines. Keep the vines slim so the fingers still feel comfortable to move. This style looks delicate and pairs well with a bare back hand or a small central motif. Budget tip: Practice drawing short curved strokes to create leaf shapes quickly. Because the design sits on the sides, it looks subtle from the front and more detailed from angles. It is a great option for those who want something different from traditional center-heavy designs.
23. Minimal Wrist Charm
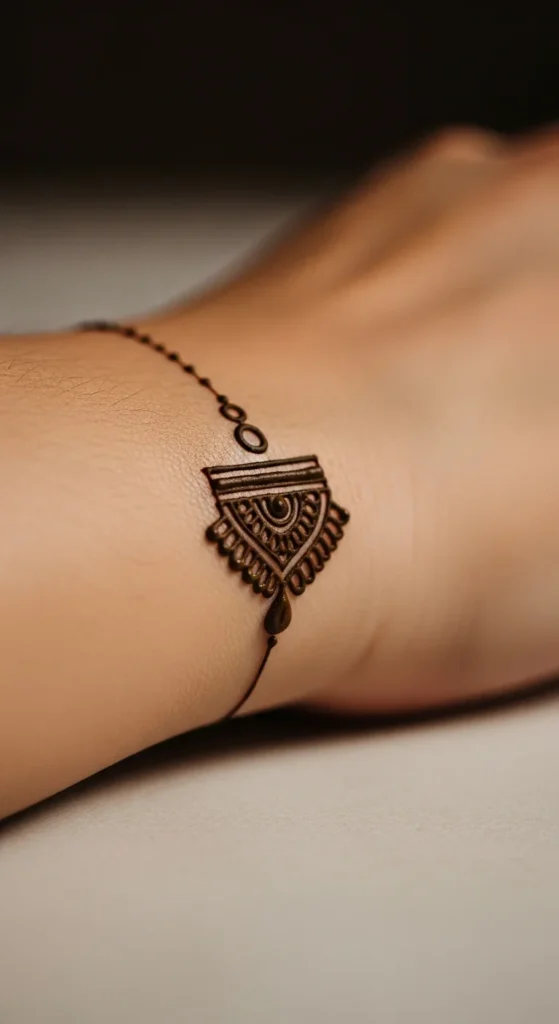
A minimal wrist charm mehndi looks like a tiny pendant drawn on the skin. Start with a small circle or diamond shape near the wrist. From it, draw a short vertical line ending in a tiny dot or teardrop shape. Add a few dots above the charm to make it look suspended. Keep the rest of the hand empty for a light, modern feel. Budget tip: Make the charm small so it stays neat even if lines spread slightly as the henna dries. This design works beautifully with bangles and watches and is perfect for those who prefer very subtle decoration.
24. Classic Floral Cluster
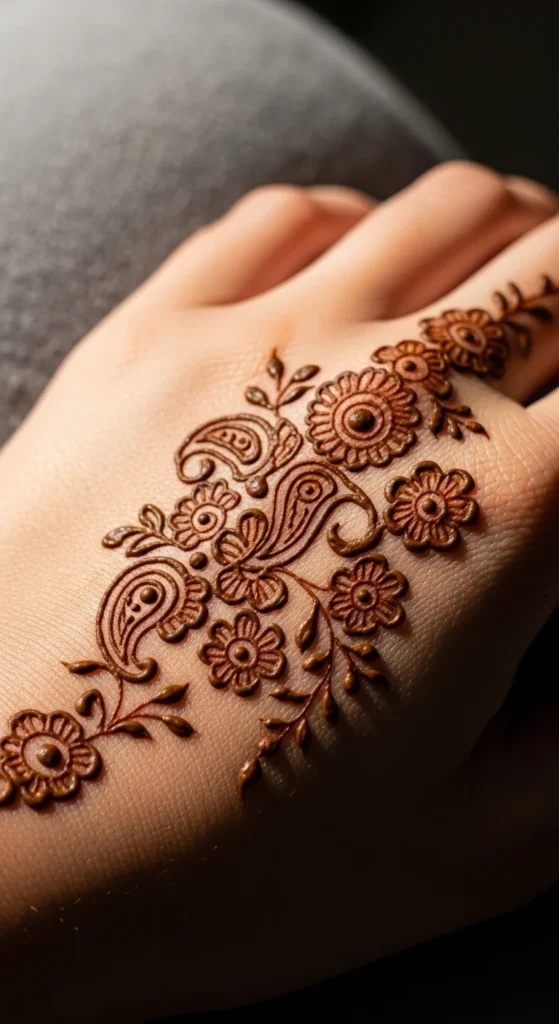
A classic floral cluster mehndi uses three or four tiny flowers grouped closely together. Draw one small flower, then add two more beside it, slightly overlapping. Keep petals round and simple. Add a few dots and short curved lines around the cluster to soften the edges. Leave the rest of the hand open so the design does not feel heavy. This style works for almost any occasion and feels timeless without looking bridal. Budget tip: Use basic five-petal flowers for speed and consistency. If one flower looks uneven, extra dots around it can balance the shape. This design is great for beginners because it focuses on one small area instead of the whole hand.
Conclusion
Simple back hand mehndi designs show that small details can look just as beautiful as large patterns. Light florals, airy vines, dots, and minimal shapes create charm while keeping the hand comfortable and easy to wear. These styles are great for beginners, quick events, and everyday moments when you want a touch of decoration. Pick one idea, practice a little on paper, then try it on your hand. A few steady lines and dots can turn into an elegant design that feels effortless and personal.

Lily Summers is a digital artist and creative storyteller who loves bringing colorful characters to life. With a passion for cartoons, fan art, and playful sketches, she inspires others to explore their imagination through art. When she’s not sketching, you’ll find her dreaming up new ideas for CraftedWizard.com to spark creativity in every artist. 🌈✨


