
Every child’s birthday deserves a bit of magic and what’s more magical than a Rainbow Dash cake that bursts with color, sweetness, and sparkle? Inspired by the beloved My Little Pony character, this cake is a showstopper that combines fun baking with vibrant creativity. Whether you’re throwing a themed party or just want to surprise your little one, this guide walks you through every step to create a cake that looks straight out of Equestria!
Step 1: Gather Your Magical Ingredients
Before you dive into baking, gather everything you need so your kitchen feels like a mini bakery bursting with color and joy.
For the Cake Layers:
- 3 cups all-purpose flour
- 2 ½ tsp baking powder
- ½ tsp salt
- 1 cup unsalted butter (room temperature)
- 2 cups granulated sugar
- 4 large eggs
- 1 tbsp vanilla extract
- 1 cup whole milk
- Gel food coloring (red, orange, yellow, green, blue, purple)
For the Frosting:
- 2 cups unsalted butter (softened)
- 5 cups powdered sugar
- 2 tsp vanilla extract
- 2–3 tbsp heavy cream
- Blue food coloring for the base
- White food coloring for clouds
Step 2: Bake the Rainbow Layers
Now comes the fun part — creating the rainbow magic inside your cake!
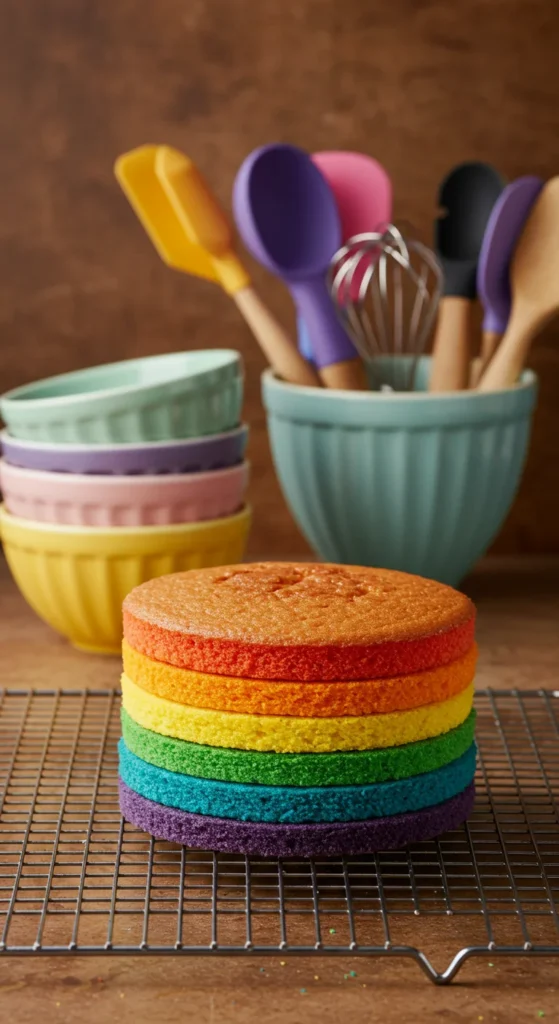
- Preheat your oven to 350°F (175°C). Grease and line six 8-inch round pans (or bake in batches if you don’t have six).
- Prepare your batter by creaming butter and sugar until fluffy, then add eggs one by one and mix in vanilla.
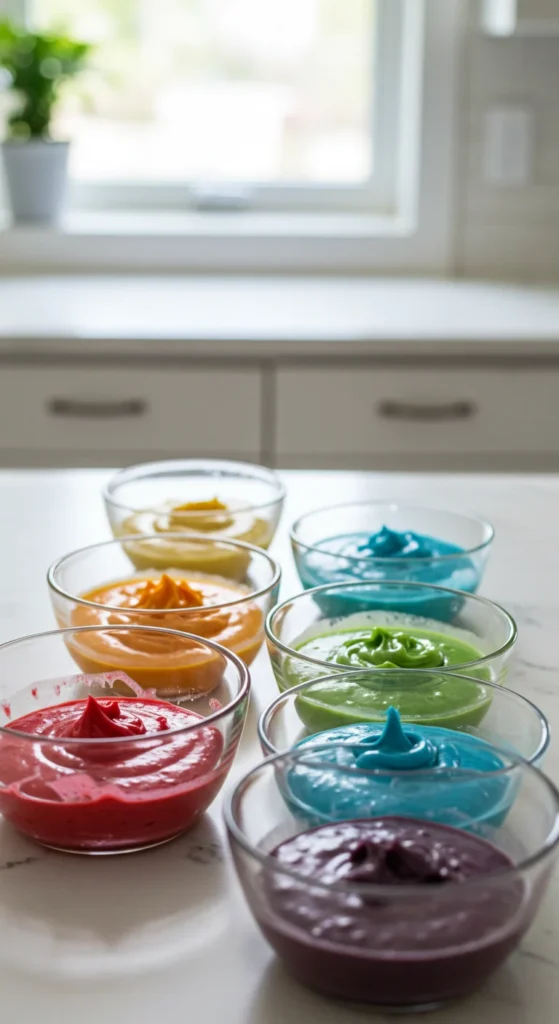
- Divide the batter evenly into six bowls. Use gel food coloring to dye each bowl into a different rainbow color.
- Bake each color layer for about 12–15 minutes or until a toothpick comes out clean.
- Cool completely on a wire rack before stacking — patience is key here to avoid melting the frosting!
Step 3: Whip Up the Dreamy Frosting
A smooth, cloud-like frosting gives your Rainbow Dash cake that perfect fantasy finish.
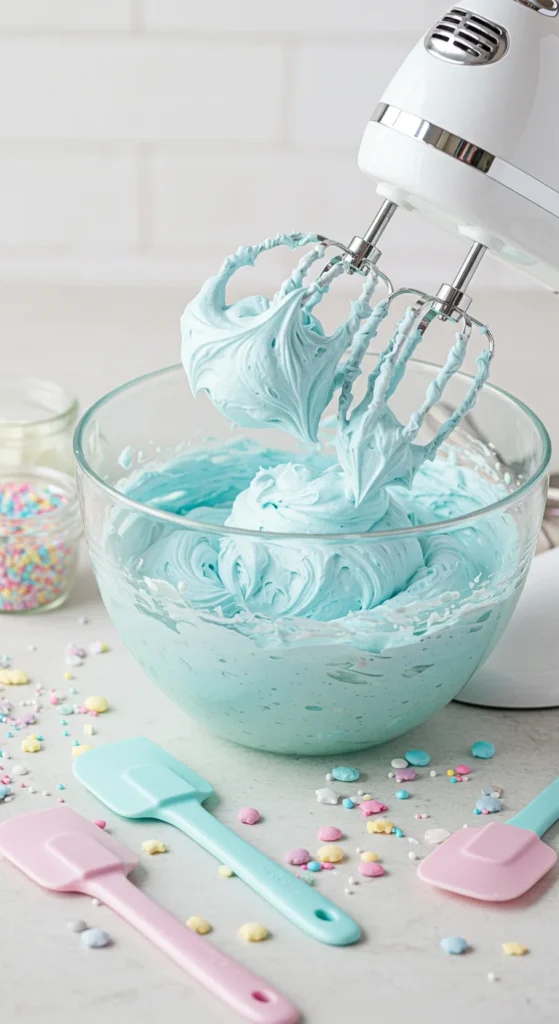
- Beat butter until creamy and pale.
- Add powdered sugar gradually, followed by vanilla and cream, until the texture becomes light and fluffy.
- Color half of the frosting with blue food coloring to represent the sky. Keep the rest white for fluffy clouds and decorations.
💡 Pro Tip: For extra flavor, add a touch of almond or coconut extract it’ll give your cake a bakery-style aroma that kids adore.
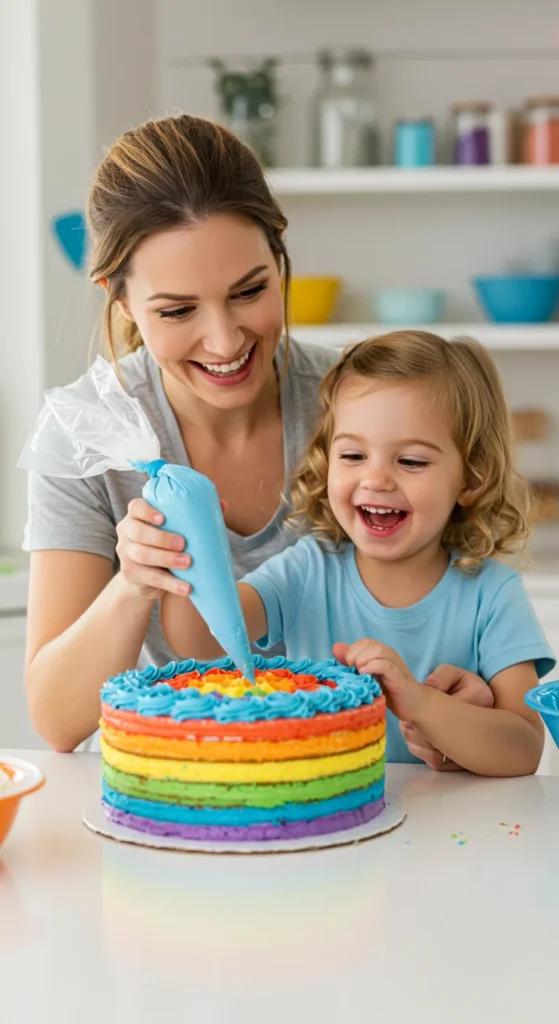
Step 4: Assemble Your Rainbow Creation
Stacking and decorating your cake is where it all comes to life!
- Trim the tops of your cake layers if they’ve domed while baking.
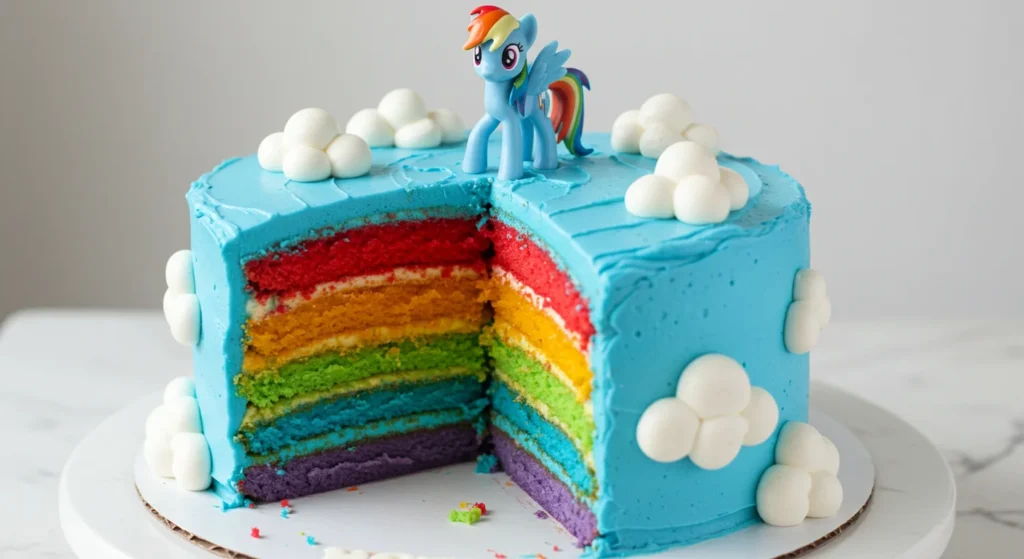
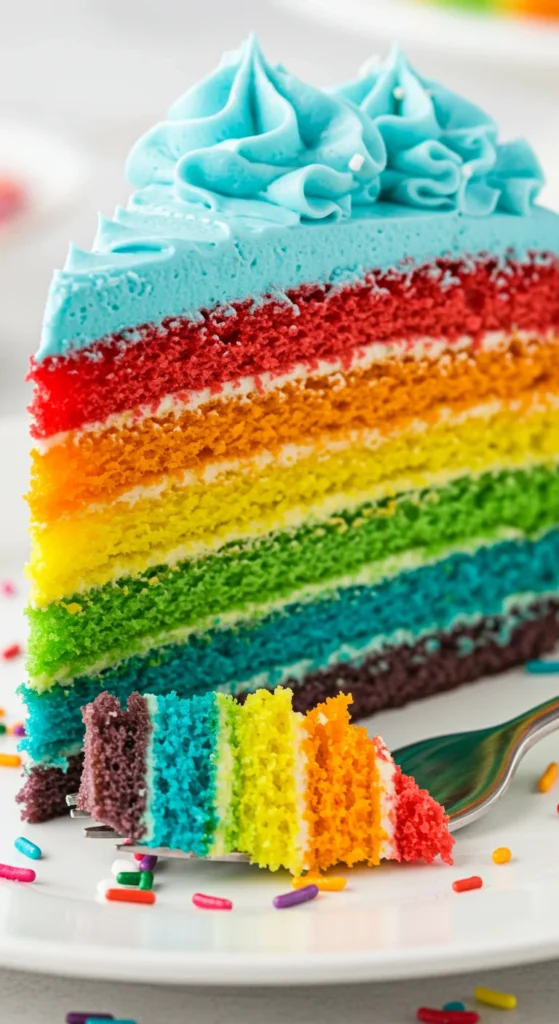
- Start stacking: place purple at the bottom, followed by blue, green, yellow, orange, and red on top. Add a thin layer of frosting between each.
- Crumb coat your entire cake with a thin layer of blue frosting and chill it for 20–30 minutes.
- Apply the final coat of blue frosting, smoothing the surface with a spatula to create a sky effect.
- Pipe white clouds using the white frosting — focus around the top and sides. You can even swirl a few rainbows or stars if you’re feeling creative!
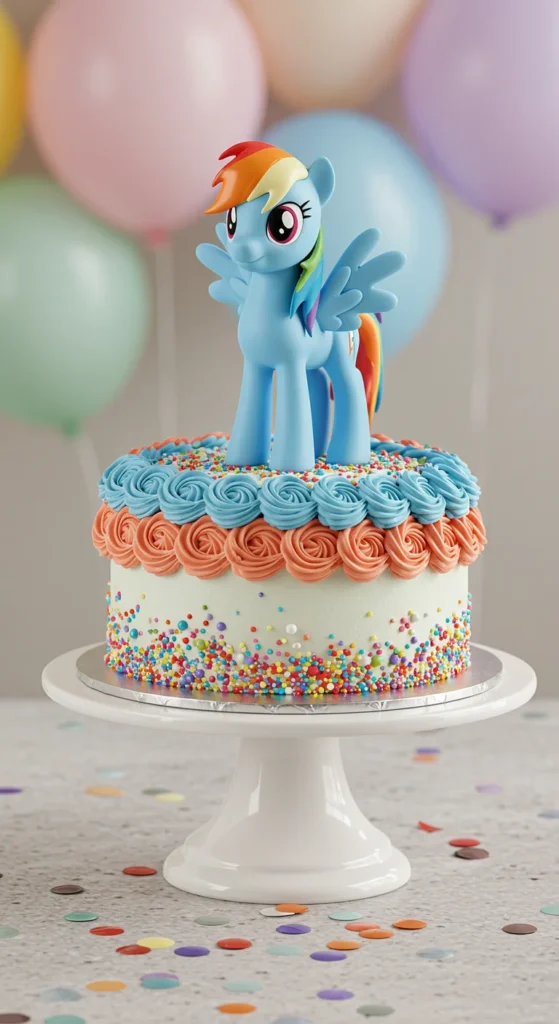
Step 5: Add the Rainbow Dash Magic
This is where your cake becomes a real showpiece!
- Top your cake with a small Rainbow Dash toy or edible topper.
- Sprinkle edible glitter or tiny rainbow sprinkles around the edges.
- Add fondant rainbows or clouds if you want an extra professional touch.
- Display proudly! Place it on a white cake stand to let the colors pop.
When you slice through the cake, each layer reveals a perfect rainbow a magical moment every kid will remember.
Step 6: Celebrate and Share the Joy
Once your masterpiece is ready, it’s time for the best part sharing it! Watch your kids’ faces light up as you cut into the cake and reveal the rainbow inside. The colors, the sweetness, and the excitement combine into one unforgettable celebration moment.
💬 Fun Idea: Turn cake-making into a family activity! Let the kids help with coloring the batter or decorating the top they’ll love being part of the creative process.
Save This Recipe for Later!
A Rainbow Dash cake isn’t just dessert it’s a joyful memory in every bite. Whether it’s for a birthday, a themed party, or just because, this cake brings out everyone’s inner child. Pin it, save it, or share it with your fellow parents who love adding a little sparkle to their celebrations!

Lily Summers is a digital artist and creative storyteller who loves bringing colorful characters to life. With a passion for cartoons, fan art, and playful sketches, she inspires others to explore their imagination through art. When she’s not sketching, you’ll find her dreaming up new ideas for CraftedWizard.com to spark creativity in every artist. 🌈✨


