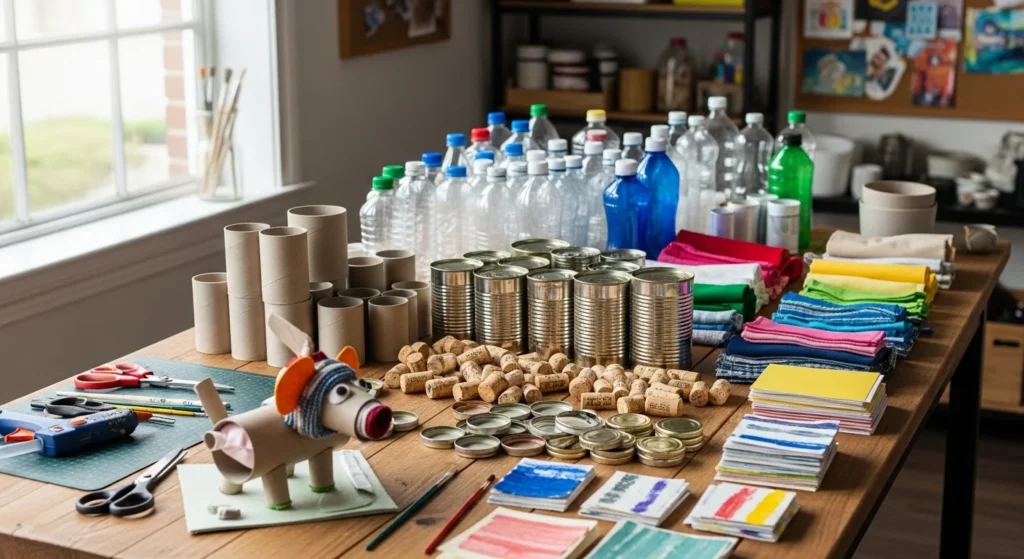
Quick recycled crafts are one of the easiest ways to turn everyday household waste into something useful, decorative, or fun without spending much money. Empty toilet paper rolls, plastic bottles, shoeboxes, tin cans, old T-shirts, jar lids, and fabric scraps can all become part of budget-friendly DIY projects that feel creative instead of cluttered. That is why upcycled crafts keep showing up in 2026 trends. They are practical, low-cost, and simple enough for beginners who want fast results with minimal tools. Whether you want desk storage, wall decor, garden pieces, or quick kid-friendly projects, these recycled craft ideas help you turn common throwaway items into handmade pieces worth keeping.
1. Roll Revolution Desk Caddies
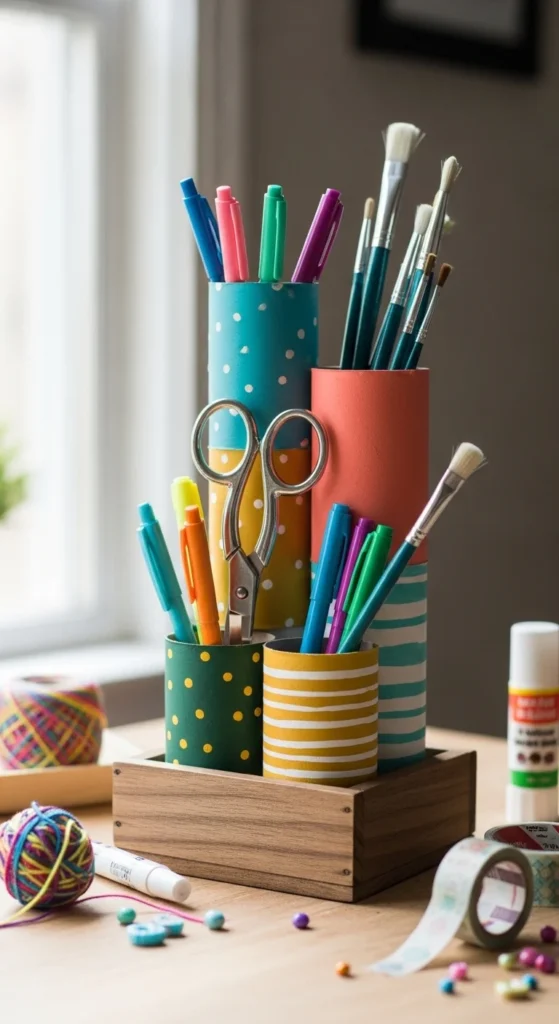
Toilet paper roll desk caddies are one of the fastest recycled crafts because the shape is already useful. Gather several empty rolls, trim them to different heights if you want a more interesting look, and glue them inside a shallow box lid or a small cardboard base. Then paint the whole piece in one color or cover it with wrapping paper, magazine pages, or leftover fabric. This makes a simple organizer for pens, brushes, markers, makeup tools, or small craft supplies. It works especially well because each roll creates its own storage section without needing extra dividers. If you want a lower-cost finish, use paper scraps and glue instead of paint. That still gives the caddy color and texture without opening new supplies. A helpful tip is to place the tallest rolls at the back so the organizer stays easy to use. This kind of project is great for kids’ desks, homework corners, and craft tables because it turns something usually thrown away into something practical. It is quick, useful, and one of the easiest ways to start upcycling with materials already at home.
2. Bottle Blossom Towers

Plastic bottle planters are popular because they are quick to make and genuinely useful. Cut a large opening into the side of a clean plastic bottle, smooth the edges with tape or careful sanding, then add drainage holes at the bottom. After that, paint the bottle or wrap it with twine, fabric, or paper if you want a softer look. These work beautifully as windowsill herb planters, balcony flower holders, or vertical garden pieces tied to a fence. A strong budget-friendly trick is to use matching bottle sizes so the final arrangement looks neater even if the decoration stays simple. This type of upcycle is especially good for small spaces because bottles can hang, stack, or line up along a rail without taking much room. If you are growing herbs, label each bottle with painted dots or tiny tags made from scrap cardboard. Bottle planters are a practical way to reuse household plastic while adding greenery to a space. They look cheerful, cost very little, and give old containers a second life that actually serves a purpose every day.
3. Tube Texture Play
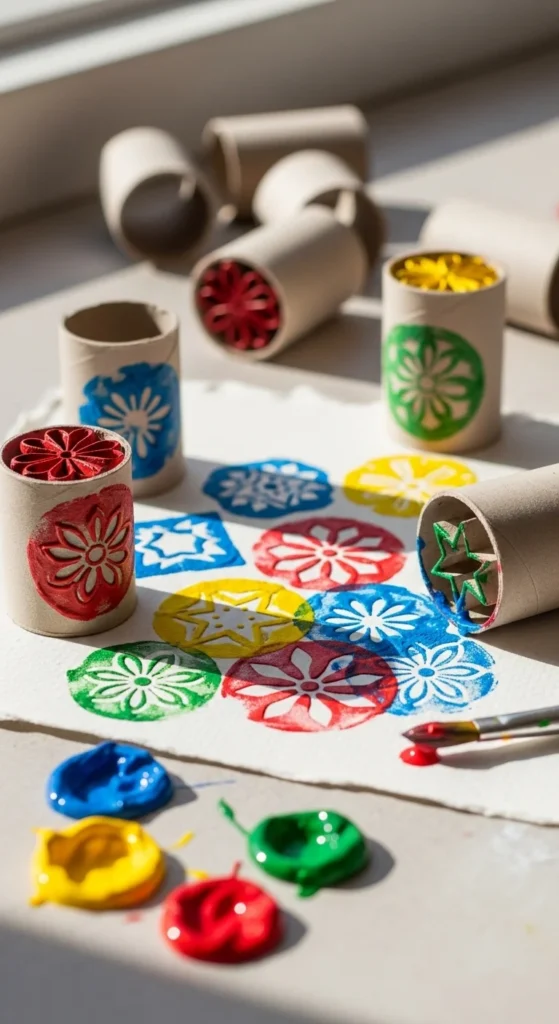
Cardboard tube stamps are a fun recycled craft because they turn packaging waste into a reusable art tool. Start with empty paper rolls and pinch or cut them into simple shapes like hearts, petals, ovals, leaves, and circles. Dip the ends into paint and stamp them onto paper, fabric scraps, or gift wrap. This creates easy patterns without needing store-bought stamp sets. It is especially useful for kids or quick group projects because the process is fast and satisfying. A plain tube can become a flower stamp, a butterfly wing shape, or even a repeating border tool in just a minute. If you want to stretch your supplies, use old trays or plates for paint and wash the tubes between colors so they can be reused for several sessions. These stamps also work well for homemade cards and wrapping paper, which makes the project feel more useful than one-time painting. This craft is quick, playful, and very affordable. It proves that even a simple cardboard tube can become a creative tool instead of ending up in the trash.
4. Cork Cluster Walls
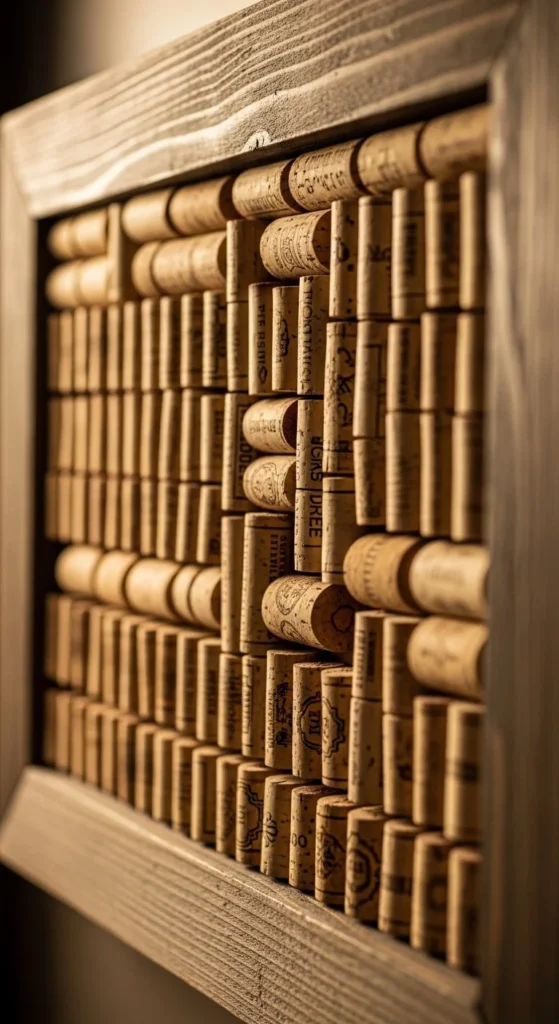
Wine cork boards are a smart upcycled project because they take a pile of saved corks and turn them into something decorative and functional. Glue the corks side by side inside an old frame, on a scrap wood board, or across a thick cardboard base reinforced underneath. Once finished, the board can hold notes, photos, recipe cards, or small reminders with push pins. This works especially well in kitchens, craft rooms, and entryways because the natural cork texture already looks warm and handmade. If you do not have many wine corks, mix in sliced cork sections, bottle caps, or small wood pieces to fill the frame. That can actually make the design more interesting. A nice low-cost touch is to stain or paint the frame using leftover wall paint or a sample pot from another project. Cork boards are one of those recycled crafts that look more expensive than they are. They are practical, easy to personalize, and useful enough to justify the little bit of glue time. It is a strong project for anyone who likes rustic decor with real everyday function.
5. Rag Rug Revival
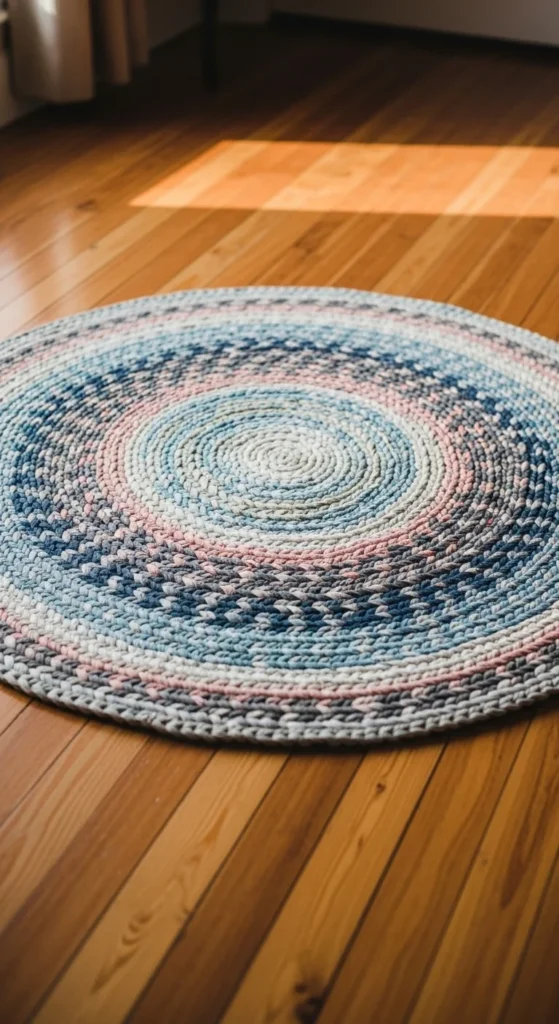
Old T-shirts can become a soft braided rug with very little cost beyond time and scissors. Cut the shirts into long strips, stretch them lightly into T-shirt yarn, then braid the strips and coil the braid into a circle or oval. You can stitch the coils together by hand or glue them for a faster decorative version that will not get heavy foot traffic. This project is especially good if you have shirts that are too worn to donate but still soft enough to reuse. A mix of grays, whites, denim blue, and faded colors often creates a casual, cozy rug with a nice lived-in look. If you want to keep the result neat, sort the fabric strips by color family before braiding. That gives you more control over the final pattern. This kind of rug works well as a bathroom mat, chair pad, pet corner accent, or bedside piece. It is a budget-friendly way to reuse fabric that might otherwise be thrown away, and it gives worn clothing a second life in a form that still feels useful around the home.
6. Glow Can Gardens
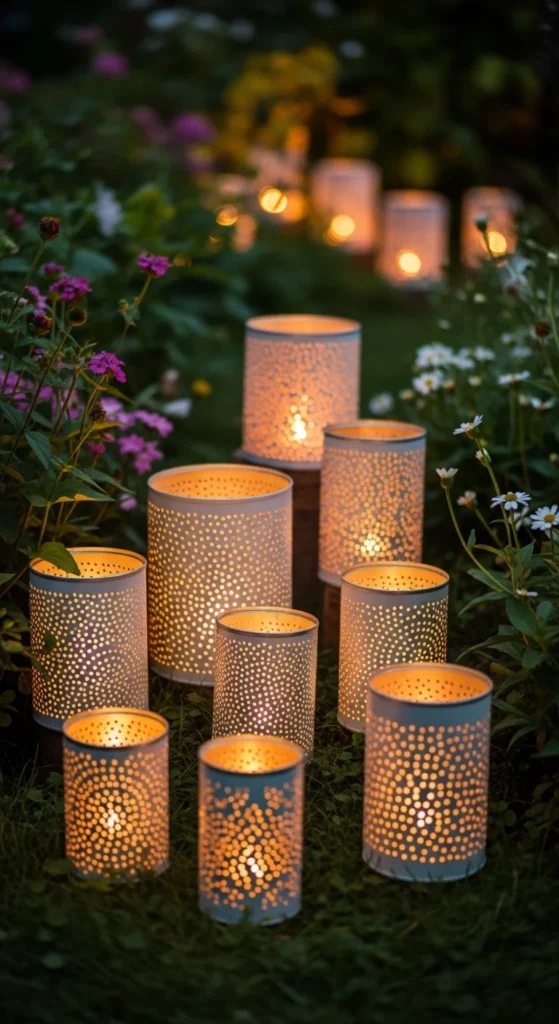
Tin can lanterns are one of the prettiest recycled crafts for outdoor decor. Clean an empty tin can, fill it with water, and freeze it first if you plan to punch designs into the metal. The ice helps the can keep its shape while you use a nail and hammer to create dots, stars, lines, or simple floral patterns. Once the design is done, paint the can or leave it raw for a more industrial look. Add a tealight or battery fairy lights inside, and the punched holes will glow beautifully in the evening. This is a budget-friendly project because the main material is something you already used in the kitchen. If you want to make a matching set, use similar can sizes and paint them all in one color like matte white, black, or soft gold. These lanterns work well on patios, balconies, garden paths, and even indoor shelves if you use safe lights. They feel handmade and atmospheric without taking much money to put together. It is a simple way to turn kitchen waste into decor that actually changes the mood of a space.
7. Disco Daisy Mirrors
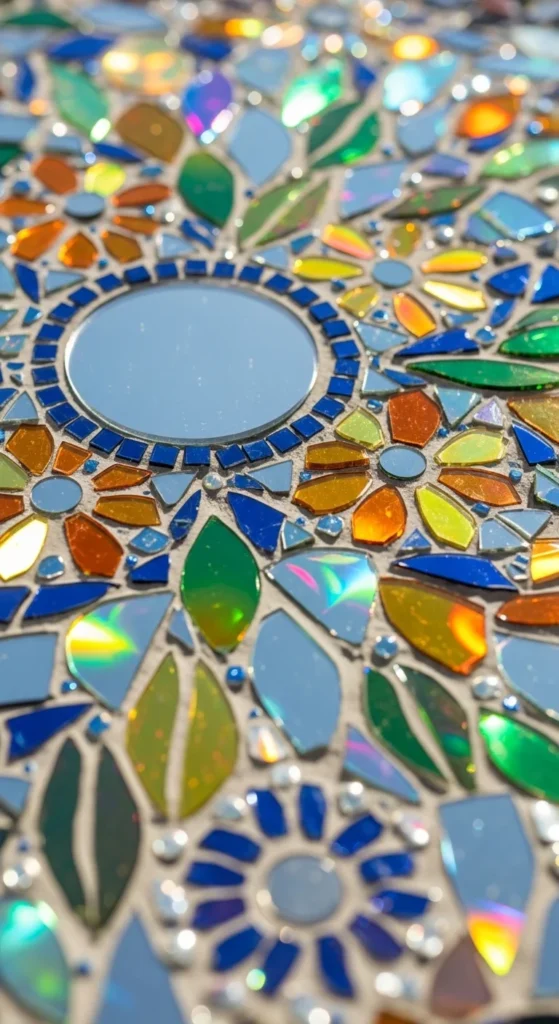
Old CDs can make stunning mosaic decor because of their reflective shine. Cut or break the discs carefully into small irregular pieces, then glue them around a mirror frame, flower shape, box lid, or wall plaque to create a sparkly mosaic surface. The effect works especially well in floral designs, sunbursts, or abstract patterns because the light catches every angle. A small central mirror surrounded by CD petals can become a playful “disco daisy” wall piece with very little cost. If you are working indoors, wear gloves and keep the pieces on a tray so the sharp edges stay controlled. A good tip is to combine shiny CD pieces with painted cardboard or plain backgrounds so the mosaic does not overwhelm the whole design. This kind of recycled craft is ideal when you want a dramatic result from materials that are otherwise obsolete. It adds brightness, texture, and a little humor to a room. It is bold, creative, and a strong choice for anyone who likes upcycled decor with more shine and personality.
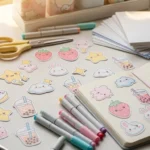
8. Carton Carnations
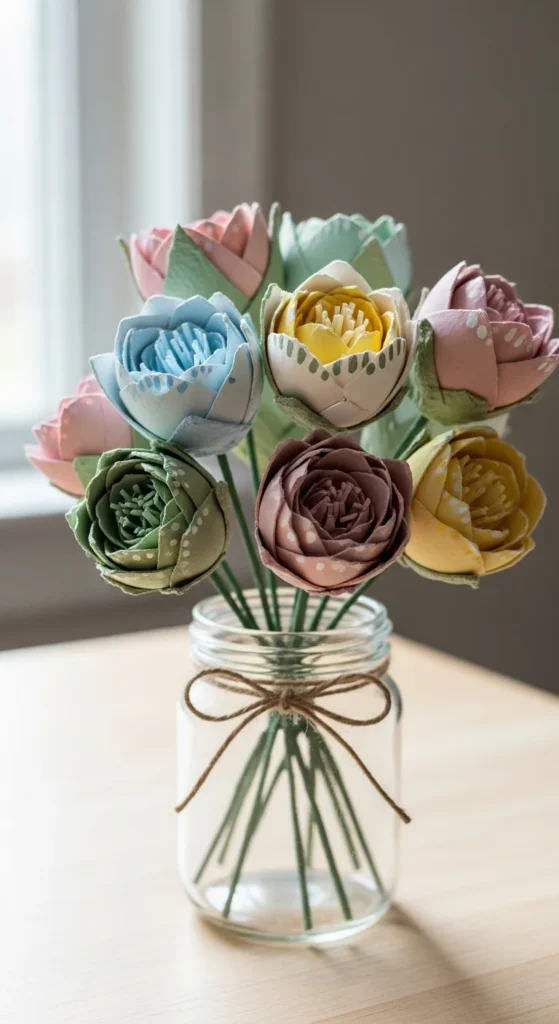
Egg cartons are perfect for quick floral crafts because each cup already has a petal-like shape. Cut the cups apart, trim the edges into soft rounded petals or pointed blossom forms, then paint them in flower colors like pink, coral, cream, yellow, or white. Once dry, layer two or three sections together for fuller blooms and glue them onto sticks, floral wire, or sturdy straws. The finished flowers look sweet in jars, cans, or bottle vases, and they last far longer than real blooms. This is a great project for using cardboard packaging in a more decorative way, and it is easy enough for kids or beginners. If you want a fuller arrangement, mix different carton flower shapes in one bouquet instead of making them all identical. That gives the final display more charm. A budget-friendly trick is to use leftover paint sample pots or craft paint already at home. Egg carton flowers are cheerful, light, and surprisingly pretty once grouped together. They are one of the easiest ways to turn kitchen waste into something display-worthy for shelves, desks, or table decor.
9. Box Bureau Builds
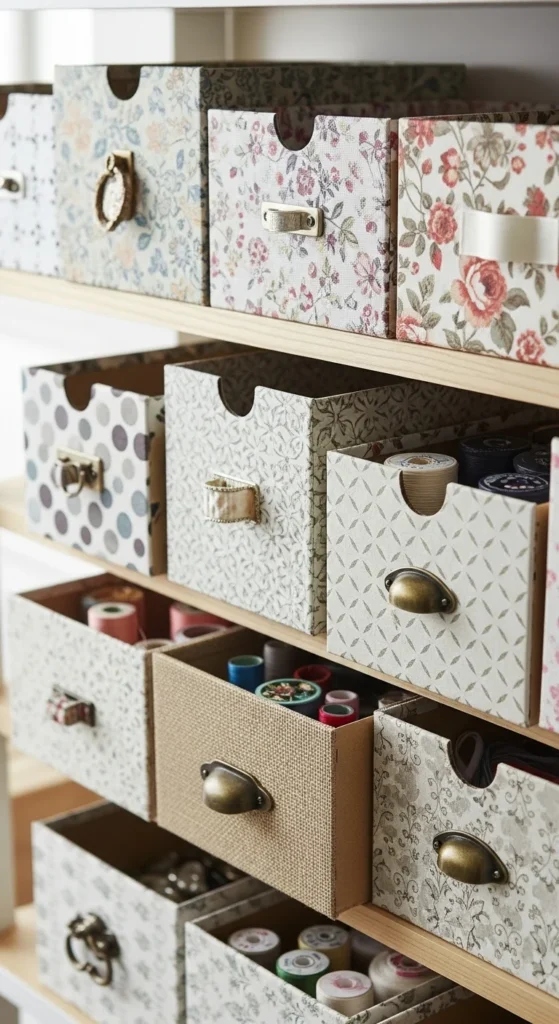
Shoeboxes make excellent storage crafts because they already have structure and size. Cover the outside with wrapping paper, leftover wallpaper, fabric scraps, or paint, then use the box and lid as separate organizer pieces or turn the box into a drawer-style compartment for shelves. Smaller boxes can be stacked like a mini organizer for stationery, sewing supplies, accessories, or mail. This is one of the most practical upcycled projects because it solves clutter quickly without buying bins. A helpful low-cost trick is to line the inside with old magazine pages, contact paper scraps, or leftover shelf liner for a cleaner finish. If you want the boxes to slide easily, glue on cardboard pulls or ribbon loops at the front. Matching shoebox organizers look especially nice in closets and desks, but mixed patterns can also feel playful in kids’ rooms or craft corners. This project is fast, very affordable, and genuinely useful. It takes something bulky that often gets thrown out and turns it into storage that can keep a room looking much more organized.
10. Lid Lockers
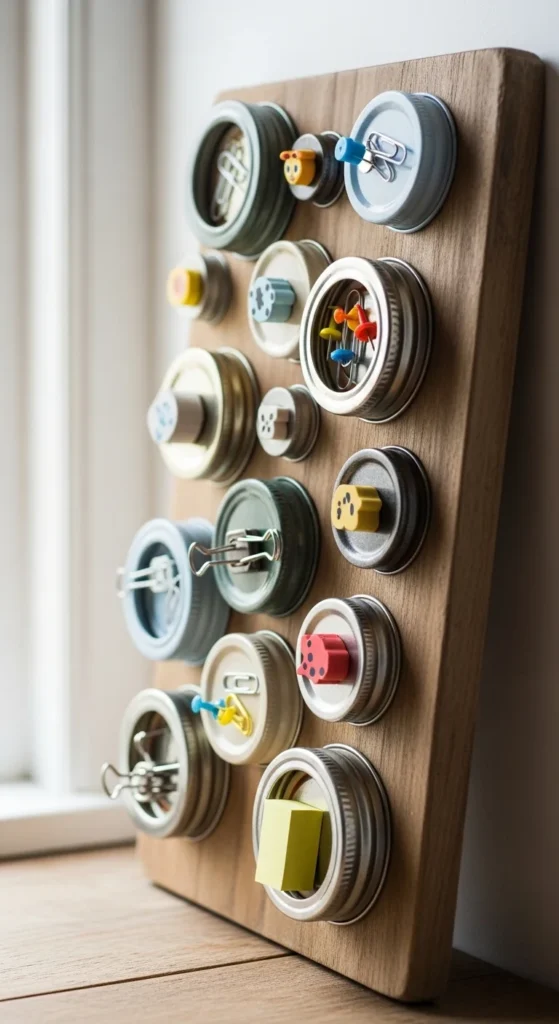
Jar lids are often overlooked, but they can become smart little organizers with almost no effort. Glue a strong magnet to the back of each clean metal lid, then fill the lids with small items like paper clips, beads, buttons, pins, or tiny screws. Stick them onto a magnetic board, tool strip, or even the side of a fridge if the contents are light enough. This turns ordinary lids into mini storage spots that help keep loose items visible and easy to grab. It is especially useful in craft rooms, sewing corners, home offices, and workshops. If you want a cleaner look, paint the lids all one color before adding the magnets. That helps the final setup feel coordinated instead of random. A very low-cost tip is to use leftover magnets from old packaging, promotional items, or broken fridge magnets rather than buying new ones. Lid lockers are a strong example of quick recycled crafting because they require so few steps and solve a real everyday problem. They are simple, tidy, and easy to customize for whatever small clutter tends to gather around the house.
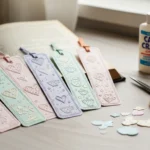
11. Quilted Coasters
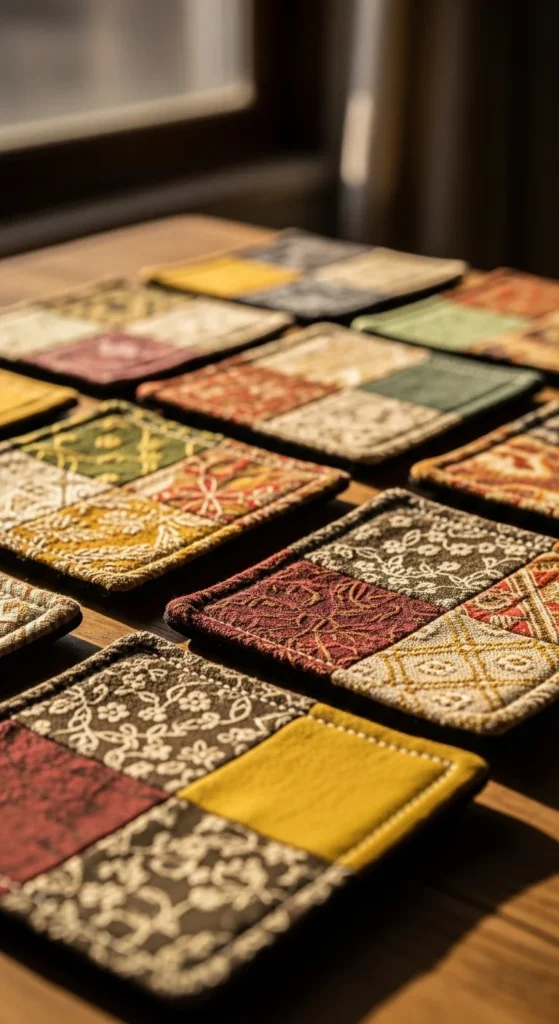
Fabric scraps can become lovely little patchwork coasters without much planning or expense. Cut small squares, rectangles, or strips from leftover fabric, old shirts, or worn pillowcases, then stitch or glue them together into mini patchwork panels. Add a backing layer from felt, denim, or another sturdy fabric, and you have soft coasters for mugs and glasses. This project is ideal for using up those tiny textile pieces that are too small for larger sewing projects but too nice to toss. If sewing feels like too much for a quick craft, fabric glue or fusible backing can still make a decorative coaster set that works well for light use. A nice touch is to group scraps by color family so the final patchwork looks intentional even if the fabric pieces are all different. These coasters make sweet handmade gifts, especially when tied with twine or stacked in sets of four. They are practical, affordable, and a satisfying way to turn fabric leftovers into something that can actually live on a coffee table or desk instead of sitting forgotten in a scrap bag.
12. Bubble Bloom Plates
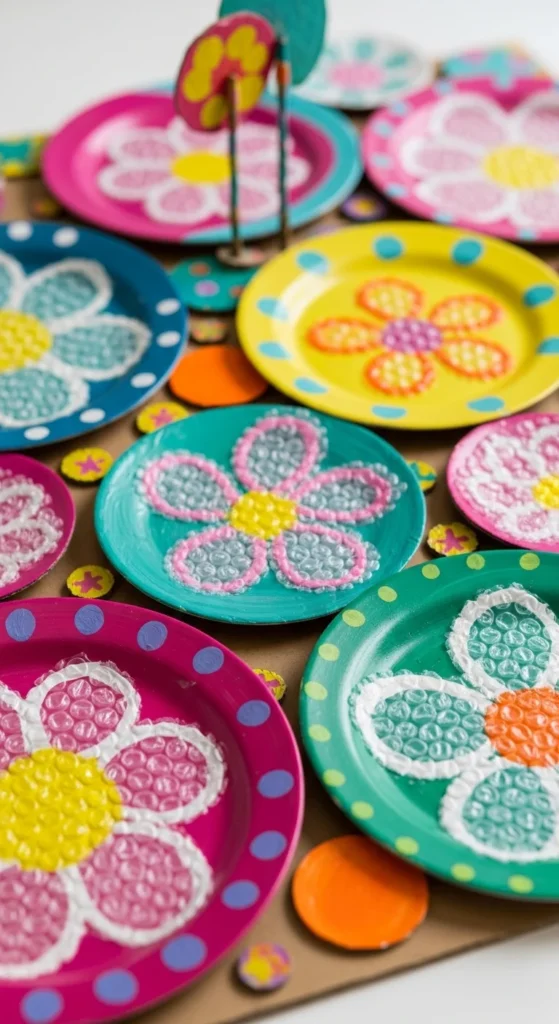
Bubble wrap prints are a fun way to turn packing waste into art tools. Use a piece of saved bubble wrap like a stamp by pressing paint onto it and printing floral textures, dotted backgrounds, or abstract blooms onto cardboard plates, scrap paper, or old packaging turned into art boards. The bubble texture creates instant pattern, which makes this a great quick craft for kids and adults alike. A plain cardboard circle can become a “bubble bloom plate” with just a few layered prints in flower colors and maybe a hand-painted stem added afterward. If you want more control, cut the bubble wrap into smaller pieces and stamp petal clusters one section at a time. This is a low-cost project because the main materials are packaging scraps and leftover paint. It works especially well for homemade wall art, cards, and gift tags. The result feels playful but still decorative if the colors stay coordinated. Bubble wrap printing is one of those upcycled crafts that reminds you how many useful textures are already in everyday household trash.
13. Utensil Umbrellas
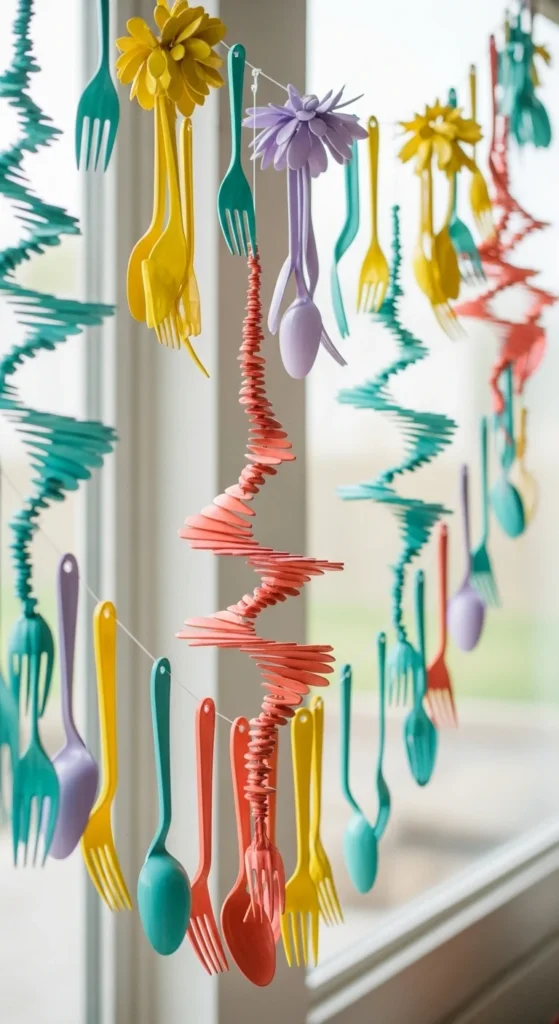
Plastic cutlery is not the first thing most people think of for crafts, but it can create fun garlands and hanging decor when repurposed carefully. Painted spoons and forks can be tied, glued, or layered into umbrella-like shapes, flowers, mobiles, or party garlands. A few spoon heads arranged around a cardboard center can make a blossom, while fork handles can become hanging links or decorative spikes. This kind of project works best when you keep the shapes simple and repeat them consistently so the final look feels intentional instead of random. If the cutlery is brightly colored already, leave it as is. If not, one coat of spray paint or craft paint can make the whole piece look more unified. A budget-friendly tip is to use leftover event cutlery that is still clean instead of buying new plastic. This craft is playful and unusual, which makes it a good choice for kids’ rooms, casual party decor, or garden garlands. It turns overlooked waste into something that feels sculptural and fun without requiring many extra supplies.
14. Brick Bed Planters
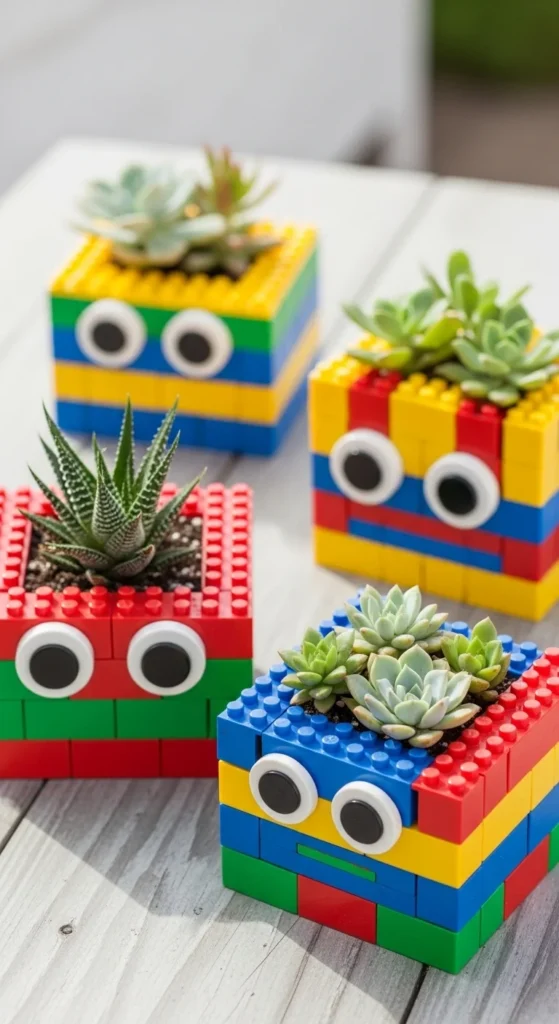
Old building bricks or similar reusable toy pieces can become fun mini planters if you have extras around the house. Create a box shape with a stable base, line the inside with a small plastic cup or recycled container, and then add soil and a succulent or tiny herb. This keeps the plant safe while letting the outer brick structure act as the decorative shell. These planters work especially well on desks, kids’ shelves, and windowsills because they feel playful but still practical. A good low-cost tip is to use broken toy sets or mixed leftover bricks rather than buying anything specifically for the project. If you want the look to feel more grown-up, stick to one color family like white, gray, black, or soft mixed neutrals. If you are making them with kids, brighter colors can be part of the charm. This is a simple recycled craft that gives unused toy pieces a second life and creates a cheerful little container at the same time. It is especially nice for people who want upcycled decor with personality and a small amount of greenery.
15. Roll Ranger Views
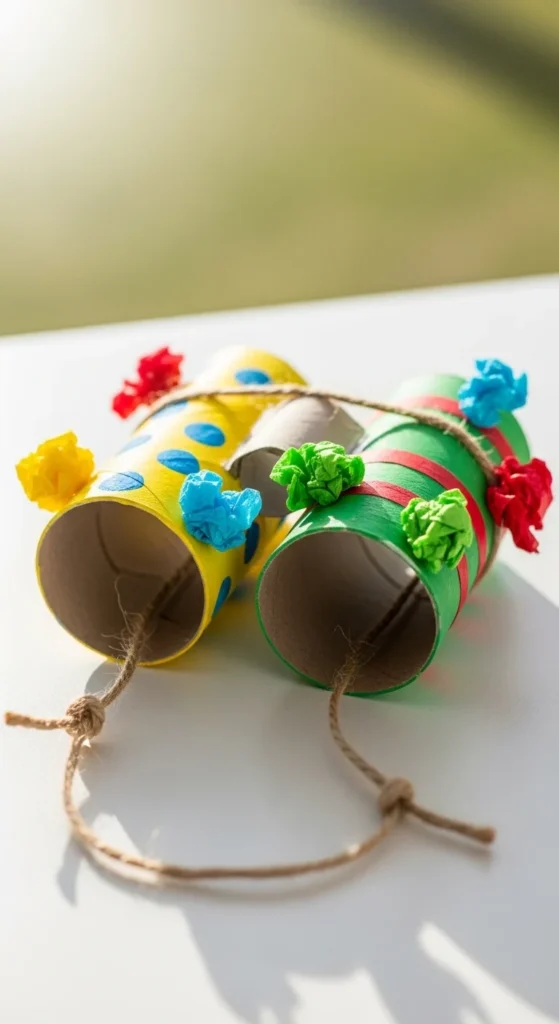
Paper roll binoculars are quick, inexpensive, and perfect for playful DIY. Tape or glue two cardboard rolls together, decorate them with paint, stickers, paper, or markers, and add a yarn strap so they can hang around the neck. This is a classic recycled craft because it is easy to make and still useful afterward for pretend play, bird watching, or scavenger hunts. If you want the binoculars to feel sturdier, wrap the rolls in paper before decorating. That gives them a smoother finish and helps hide labels or wear marks. A budget-friendly tip is to use scraps of wrapping paper, fabric strips, or magazine pages instead of opening new decorative supplies. Kids especially love this project because the craft leads directly into a game. That makes it great for rainy days, backyard adventures, and school holiday afternoons. It is also one of the fastest upcycled projects on this list. In just a short time, empty rolls go from bathroom waste to something children actually want to carry around and use in their own stories and adventures.
16. Jean Junk Jots
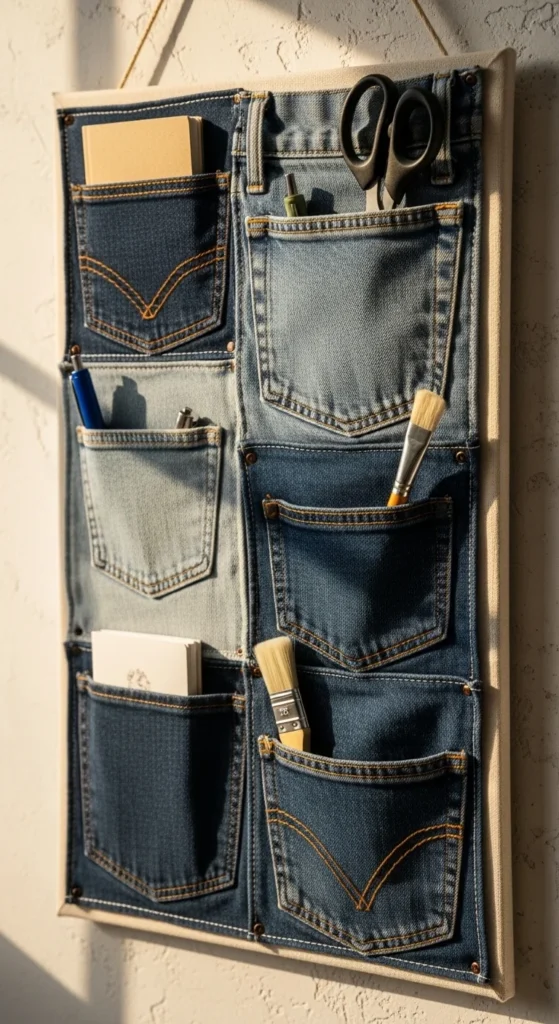
Old jeans are full of usable fabric, and the pockets are especially good for quick organizing projects. Cut the pockets from worn denim, then sew or glue them onto a sturdy backing like canvas, cardboard covered in fabric, or an old placemat. The finished piece can hold pens, notes, scissors, brushes, charging cords, or small tools. This makes it a great recycled craft for study spaces, sewing corners, entryways, and kids’ rooms. Denim already has structure, which means the pockets hold their shape well without much extra work. If you want the piece to look more decorative, mix different wash shades of denim or add stitched labels and patches from other old clothes. A helpful budget tip is to use a hanger, stick, or cardboard strip at the top so the organizer can hang without needing a fancy frame. This kind of upcycle is practical because it reuses durable fabric and solves clutter at the same time. It also feels a little vintage and handmade, which gives the organizer more character than store-bought plastic bins.
17. Spud Splatter Art

Potato stamping is a classic quick craft, and it works even better when paired with recycled paper, boxes, or old card fronts. Cut a potato in half, carve a simple shape like a leaf, heart, flower, or circle, then dip it into paint and stamp repeated patterns onto your reused surface. This is a great way to turn old cardboard packaging into gift tags, wall pieces, wrapping paper, or casual home art. If carving a shape feels too much, even basic cut surfaces can create fun textures and abstract prints. A budget-friendly tip is to use old takeout boxes, cereal boxes, or plain packaging panels as your stamping canvas instead of opening new sketch pads. This craft works especially well with kids because the result appears quickly and the shapes feel bold. It is also useful for adults who want fast handmade paper goods without spending much money. Spud print art is playful, simple, and one of the best examples of turning both kitchen scraps and paper waste into something cheerful and usable.
18. Cap Chronometers
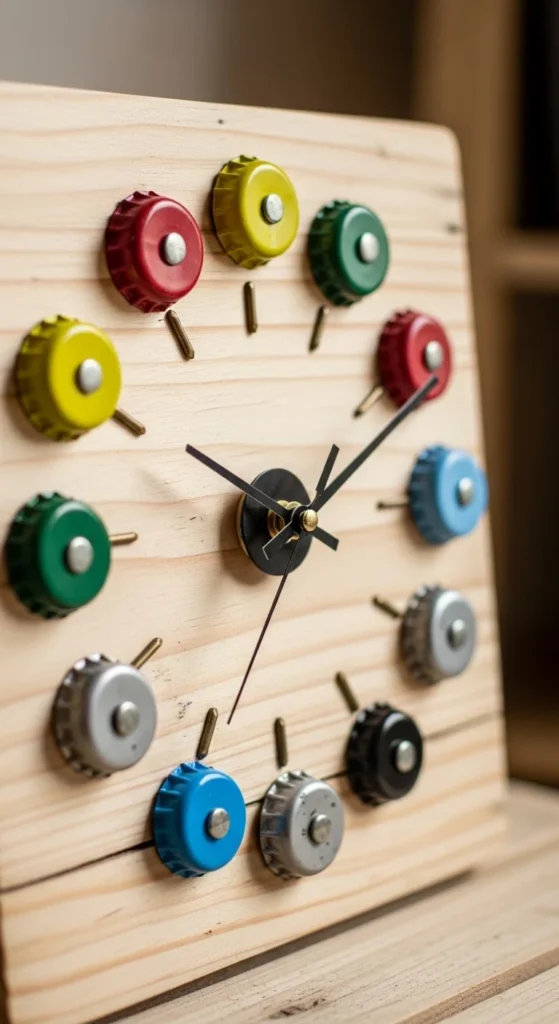
Bottle caps can become a fun and functional wall clock if you want a recycled project with a little more presence. Use a flat base like sturdy cardboard, an old tray, a wood circle, or a thick packaging lid. Arrange bottle caps around the outer edge where the hour markers would go, then add a basic clock mechanism in the center if you have one available. If you do not, the same layout can still become decorative wall art. This project works well because the caps naturally create a repeating frame around the circle. A helpful tip is to sort the caps by color before gluing them down. Matching caps create a cleaner look, while mixed caps feel more playful and casual. This is an especially good project for kitchens, workshops, game rooms, or patio spaces. It gives saved caps a real purpose and turns them into something far more interesting than a jar of leftovers. Even if you skip the working clock part, the design still looks creative and intentional as a recycled decor piece.
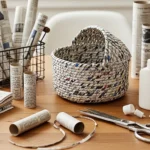
19. Tube Totes
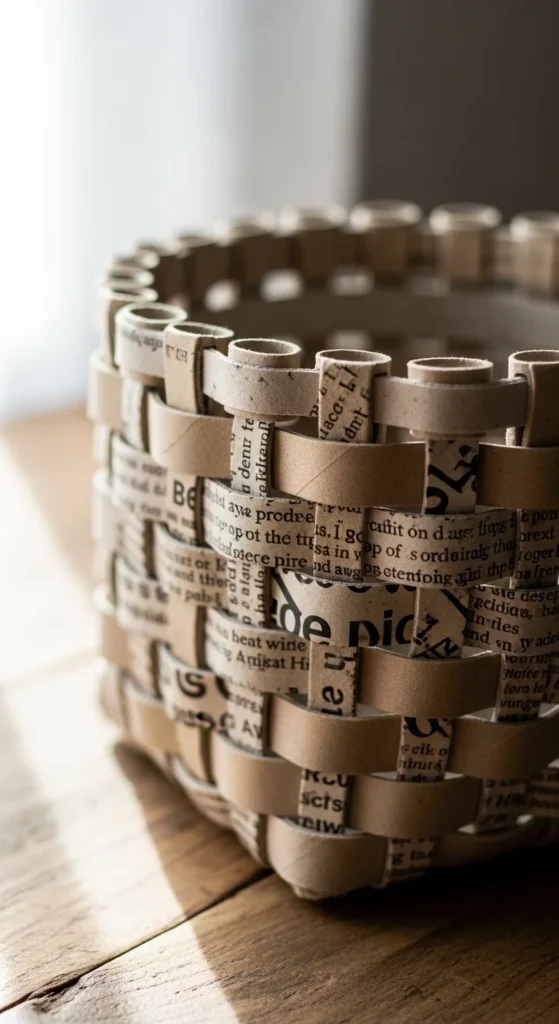
Cardboard tubes can become woven basket organizers with a little patience and a very small budget. Cut paper rolls or cardboard tubes into even sections, arrange them upright or flatten them into weaving strips, and then weave scrap paper, fabric strips, or lightweight cardboard through them to build a basket-like shape. This is a good craft for people who want something more structured than simple gluing. It creates a finished piece that can hold mail, napkins, socks, or craft supplies. If a full basket feels too much for a quick project, start with a shallow tray or mini holder. That keeps the weaving manageable. A good low-cost tip is to use grocery bags, magazines, or old T-shirts cut into strips for the weaving material. This type of organizer looks especially nice when the colors are limited to one or two tones. It turns humble cardboard waste into something that feels handmade and useful. Tube totes are practical, lightweight, and a clever way to reuse materials that would normally head straight to the recycling bin.
20. Foil Frame Facades
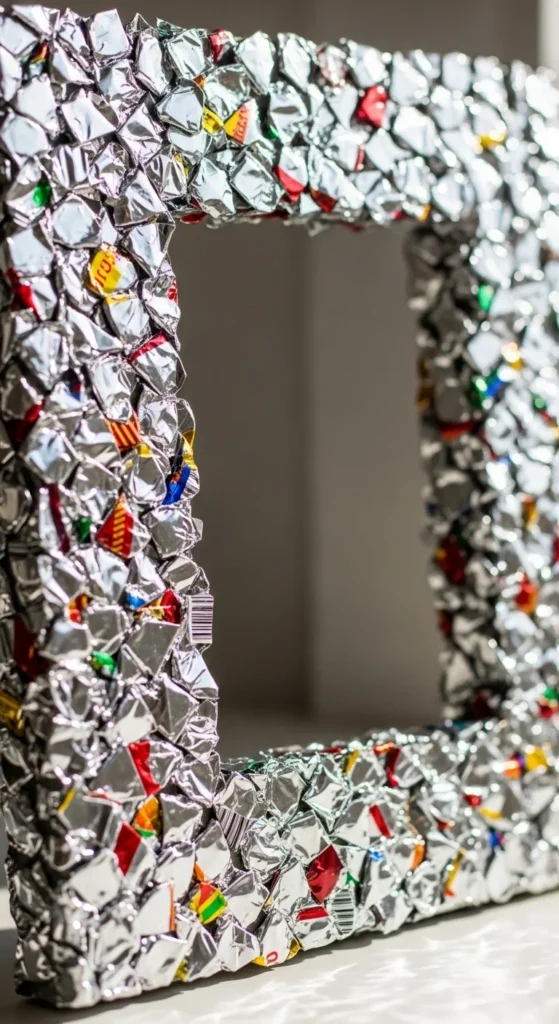
Chip bags and other foil snack packaging can create surprisingly striking decor when used as a frame covering. Wash the bags, cut them open, flatten the shiny sections, and glue them onto a cardboard or wood picture frame base. The reflective surface can mimic metallic craft paper and gives the frame a glam finish at almost no cost. This works especially well for small mirrors, photo frames, and decorative wall pieces where the shine has room to catch the light. If the foil patterns are very busy, use only silver or plain inner sections for a cleaner look. If you like a more playful result, mix bright snack colors into a patchwork metallic surface. A smart tip is to seal the final frame with a clear layer of glue or sealer so the pieces stay smoother and more durable. This is one of the boldest recycled crafts because the original material is so ordinary, yet the finished piece can look surprisingly decorative. It is a fun reminder that even snack packaging can become part of a stylish DIY project with just a little imagination and glue.
Conclusion
Quick recycled crafts work so well because they turn everyday waste into storage, decor, art tools, planters, organizers, and playful DIY pieces without asking for a big budget. Empty rolls, plastic bottles, shoeboxes, tin cans, corks, lids, old fabric, and snack wrappers all have more creative value than they first seem to. The best part is that most of these projects use materials already sitting at home, which makes it easier to start right away. Pick one simple idea, gather a small pile of saved packaging or fabric, and turn ordinary household leftovers into something useful, decorative, or just plain fun.

Lily Summers is a digital artist and creative storyteller who loves bringing colorful characters to life. With a passion for cartoons, fan art, and playful sketches, she inspires others to explore their imagination through art. When she’s not sketching, you’ll find her dreaming up new ideas for CraftedWizard.com to spark creativity in every artist. 🌈✨