
Polymer clay miniatures captivate because they turn everyday objects into tiny, realistic forms that feel alive. These small creations are approachable for beginners and hobby crafters alike, using minimal clay and simple tools. Texture, color variation, and careful shaping make a big difference in realism. This guide highlights 25 polymer clay miniatures that look real, providing practical tips and easy steps for creating miniature food, household items, and decorative pieces without wasting materials. Each idea focuses on simple techniques, small clay portions, and low-cost methods to help anyone bring miniature scenes to life.
1. Tiny Croissants With Flaky Layers

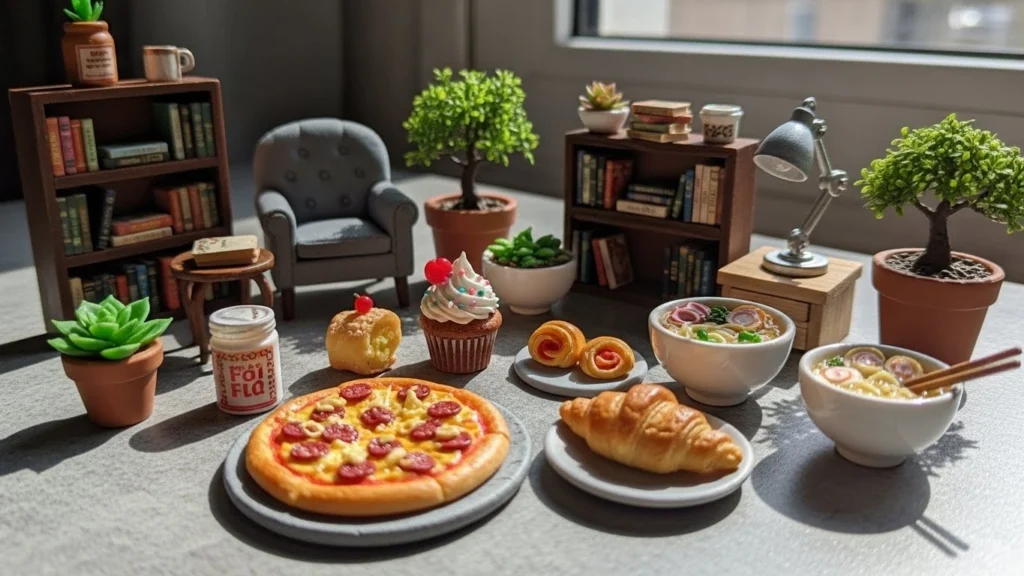
Mini croissants appear realistic because of layered texture. Roll very thin sheets of clay and stack them loosely to mimic flakiness. Shape curved ends gently with a toothpick. Mix tan clay with a small amount of brown for baked tones. After baking, brush chalk pastel lightly on edges. Skip heavy gloss to keep a soft matte finish. These croissants are budget-friendly, perfect for dollhouse kitchens, display pieces, or practice projects. Using scraps for layers minimizes waste. Small details like uneven layers and slight color variations make a big difference. Beginners can experiment with different shapes and sizes, learning control over delicate structures. These croissants are satisfying because a few simple steps yield results that look lifelike and polished.
2. Mini Strawberries With Seed Texture

Mini strawberries feel authentic when seeds and color are carefully applied. Roll small red clay balls and press shallow seed marks using a pin. Random spacing improves realism. Blend darker red near the top to create depth. Small green clay leaves complete the look. Use a subtle satin finish to make them appear fresh without shine. These strawberries work well in bowls, earrings, or as miniature décor. They require minimal clay and scraps can be used for leaves. Beginners can focus on achieving subtle surface details rather than perfect shapes. Small adjustments like slightly flattened bases or uneven coloring help the strawberries look more organic. With practice, you can create multiple strawberries quickly, each with unique textures and natural-looking imperfections.
3. Realistic Mini Coffee Cups

Mini coffee cups are realistic when wall smoothness and foam details are precise. Use beige clay for foam and dab lightly with a sponge to create soft texture. Thin clay ropes form handles easily. Apply a thin gloss inside to mimic liquid, while leaving the exterior matte for ceramic realism. Small amounts of clay allow multiple cups per project. Cups can be paired with tiny plates or saucers for full sets. Adjusting wall thickness or foam height gives variety and makes each cup unique. This project is low-cost, beginner-friendly, and perfect for charm-making or dollhouse displays. Small, simple steps—like gently shaping handles and layering foam—create a believable, miniature café scene.
4. Dollhouse Bread Loaves

Bread loaves gain realism from uneven crusts and warm tones. Shape simple oval forms and press crumpled foil lightly to create texture. Slice shallow lines along the top to mimic baking cracks. After baking, add light brown pastel to deepen the crust color. Use a matte seal for natural appearance. These loaves are inexpensive, requiring very little clay per piece. Small variations in size and texture make them look handmade. Perfect for dollhouse kitchens, displays, or miniature scenes, they teach beginners how to manipulate clay for realistic surfaces. Practicing crust patterns and color blending improves overall miniature skills while keeping the process simple and fun.
5. Mini Sushi Rolls With Rice Detail
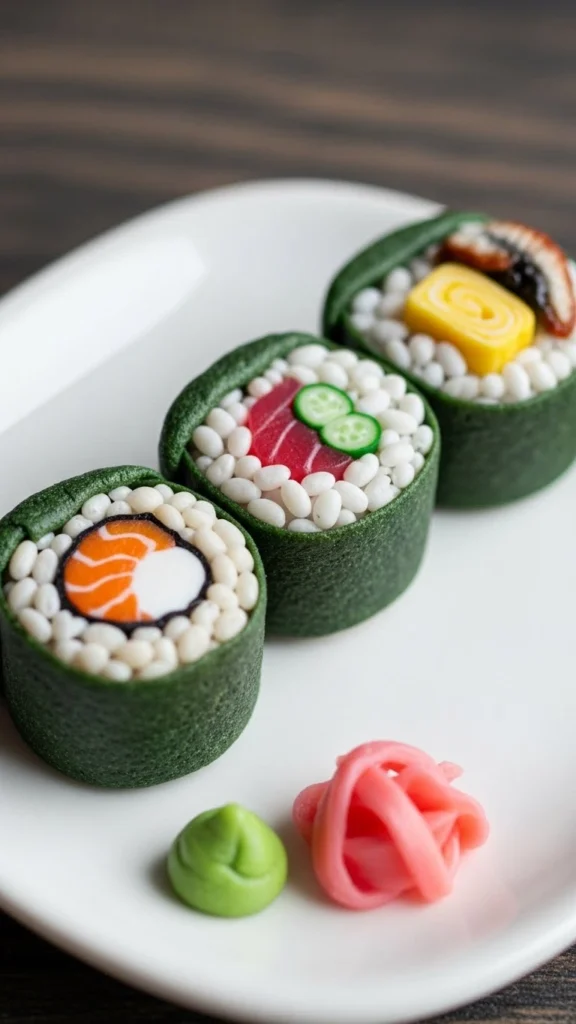
Mini sushi looks real when rice texture is distinct. Press a toothbrush gently into white clay to create individual grains. Wrap a thin strip of dark green clay for seaweed. Fillings work best as simple colored clay strips for fish or vegetables. Add a small touch of gloss only to fish areas to simulate freshness. Keeping rolls small and tidy makes them believable. These sushi pieces are low-cost and fast to make. Beginners can practice texture, rolling, and color placement. Adding slight size variations between rolls enhances realism. Display on tiny plates, in bento boxes, or as charms. Subtle color transitions and texture precision turn simple clay into miniature delicacies.
6. Tiny Potted Succulents

Mini succulents appear lifelike when leaf shapes and color gradients are applied carefully. Form individual leaves as small teardrops, blend two green shades for depth, and arrange around a central point. Pots can be simple cylinders; press brown clay crumbs on top to create soil texture. Matte finish works best. This project uses scraps efficiently and lasts indefinitely. Small variations in leaf size and tilt add realism. Beginners can create multiple plants with leftover clay from other projects. Succulent minis work in miniature gardens, terrariums, or décor, offering a satisfying result for little effort. Attention to subtle gradients and leaf placement makes them look alive even at tiny scale.
7. Mini Donuts With Glaze Drips

Donuts feel real when glaze drips naturally. Shape the base by cutting small holes with a straw or round tool. Bake lightly, then apply tinted liquid clay or gloss for glaze. Allow drips to fall unevenly. Tiny clay pieces make realistic sprinkles. Keeping the donut slightly irregular adds authenticity. One donut uses minimal clay, so multiple pieces can be created from scraps. Matte areas with subtle gloss on glaze balance realism. Donuts are ideal for charms, display trays, or miniature bakery sets. Focus on layer textures and drip shapes to create believable sweets.
8. Tiny Cheese Wedges
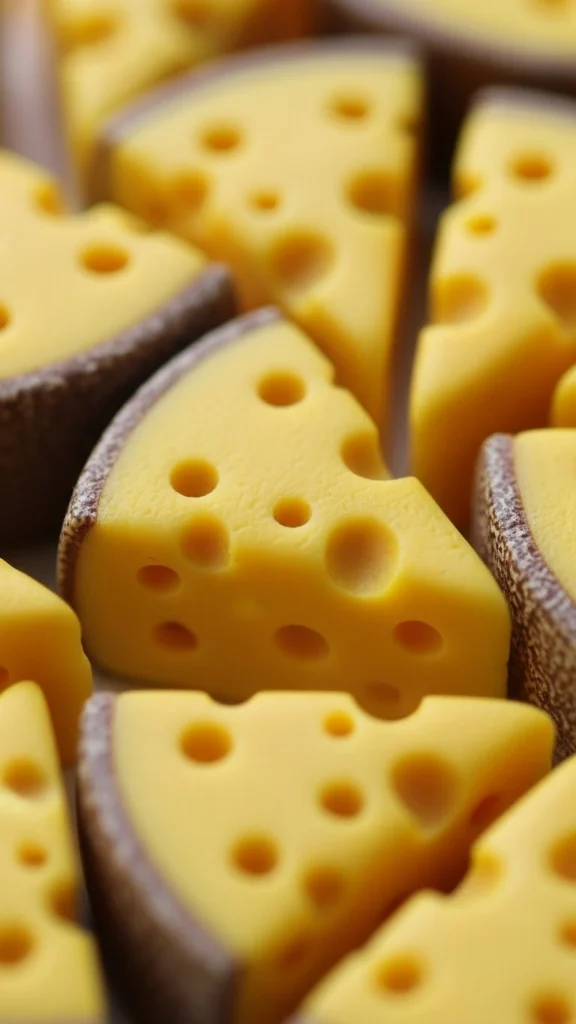
Mini cheese wedges look authentic when surface texture mimics real cheese. Roll yellow clay into triangles, press tiny pinholes to represent air pockets, and add a thin darker edge for the rind. Keep surfaces matte. Small size variations and irregular edges enhance realism. These wedges are inexpensive and allow experimentation with cutting and shaping. Perfect for cheese boards, dollhouse kitchens, or small food displays. Practicing pinhole spacing and rind color variation produces realistic results without extra effort.
9. Mini Cupcakes With Frosting Swirls

Cupcakes appear real when frosting is stacked in spirals using thin clay ropes. Lightly shape edges with a toothpick. Use soft pastel colors to keep them believable. Too much gloss makes frosting look fake; subtle satin finish is enough. Bases can remain matte. Small adjustments like uneven frosting height or tilt add charm. Mini cupcakes are excellent for charms, gifts, or dollhouse displays. Using scraps for frosting and bases reduces waste while producing attractive, realistic results.
10. Tiny Milk Bottles

Milk bottles look real with simple cylindrical shapes and subtle color blending. Mix white clay with a small amount of translucent clay for a soft milk effect. Keep the cylinder walls smooth and even. Gloss inside the bottle creates liquid depth, while the exterior remains matte. Skip labels for a cleaner look. These bottles are inexpensive and versatile, suitable for miniature kitchen scenes, dollhouses, or display shelves. Small adjustments in shape and gloss make each bottle unique and visually appealing.
11. Mini Pizza Slices

Mini pizza slices appear realistic with uneven crust edges and thin cheese layers. Press foil along the crust to create bumps. Cheese layers should be thin and slightly irregular. Toppings like tiny pepperoni or vegetable dots enhance realism. After baking, add soft brown pastel to crust edges and seal with matte finish. Small imperfections make each slice look hand-made. Mini pizzas are perfect for dollhouse kitchens or miniature food displays. Scraps from other projects can be reused for toppings, keeping the project low-cost and practical.
12. Tiny Jam Jars

Jam jars feel realistic when the jar and contents have depth. Use small cylinders of clear or translucent clay. Tint liquid clay red or orange for jam, filling the jar partially. Smooth the surface and avoid bubbles. Gloss on the jam enhances its look. Keep shapes simple; skip labels for clarity. Jars are perfect for miniature kitchens or display shelves. Beginners can practice layering, color mixing, and filling techniques. Small jars are inexpensive and allow experimentation without wasting clay.
13. Mini Chocolate Bars

Chocolate bars appear real with clean shapes and slight color variation. Roll brown clay into rectangles. Score squares shallowly before baking. Mix two shades of brown to give depth. Avoid high gloss; a satin finish mimics real chocolate. Small imperfections and uneven edges enhance authenticity. These bars are quick to make, excellent for dollhouse trays, charm sets, or miniature dessert displays. Using leftover clay reduces waste and keeps the project budget-friendly.
14. Tiny Teacups With Saucers

Teacups appear realistic when walls are thin and smooth. Shape small cylinders for cups and thin clay ropes for handles. Saucers should be slightly concave with soft rims. Bake separately to avoid distortion. Plain pastel colors keep the focus on shape and proportion. Light satin finish mimics ceramic. Teacups can be paired with plates, spoons, or other miniature sets. Small variations in cup height or saucer diameter add character and realism.
15. Mini Apples With Natural Blush

Apples look realistic when colors are blended softly. Begin with yellow or pale green clay. Blend red on one side without fully mixing colors. Press a small dent for the stem. Add a tiny brown clay stem after baking. Use chalk pastel lightly for blush effects. Matte seal keeps the surface natural. Slight variations in size and blush placement make each apple unique. These are ideal for bowls, baskets, or miniature displays. Small projects can be created quickly using scraps.
16. Tiny Books With Page Texture

Tiny books feel real when page edges show subtle texture. Stack thin sheets of light clay and press gently. Wrap darker clay around the stack for covers. Skip patterns or text. Sand page edges lightly after baking to create realism. Plain covers make the books look believable. These are ideal for dollhouse desks, miniature libraries, or decorative shelves. Varying book sizes and heights adds dimension to displays. Using leftover clay for pages minimizes waste.
17. Mini Soap Bars

Mini soap bars work best with simple shapes and subtle textures. Cut rectangles from pastel clay. Lightly press fabric or mesh for surface patterns. Matte finish creates realistic soap appearance. Avoid high gloss. These bars are perfect for miniature bathrooms or spa displays. Using scraps for multiple bars makes this a low-cost, approachable project. Small size variations and edge softening add authenticity. Beginners can practice clean cuts and texture techniques while keeping the project simple and satisfying.
18. Tiny Ice Cream Scoop

Ice cream scoops appear real when textures mimic softness. Roll small clay balls, roughen lightly with a toothpick for surface details. Blend two shades per scoop for depth. Slightly flatten bottoms to sit naturally. Light gloss applied only to melting edges creates a realistic effect. Small drips or irregularities improve realism. These scoops are great for cones, bowls, or miniature dessert displays. Scraps can be reused for multiple flavors. Practicing surface texture makes future mini ice creams look more convincing.
19. Mini Plant Pots With Soil Texture
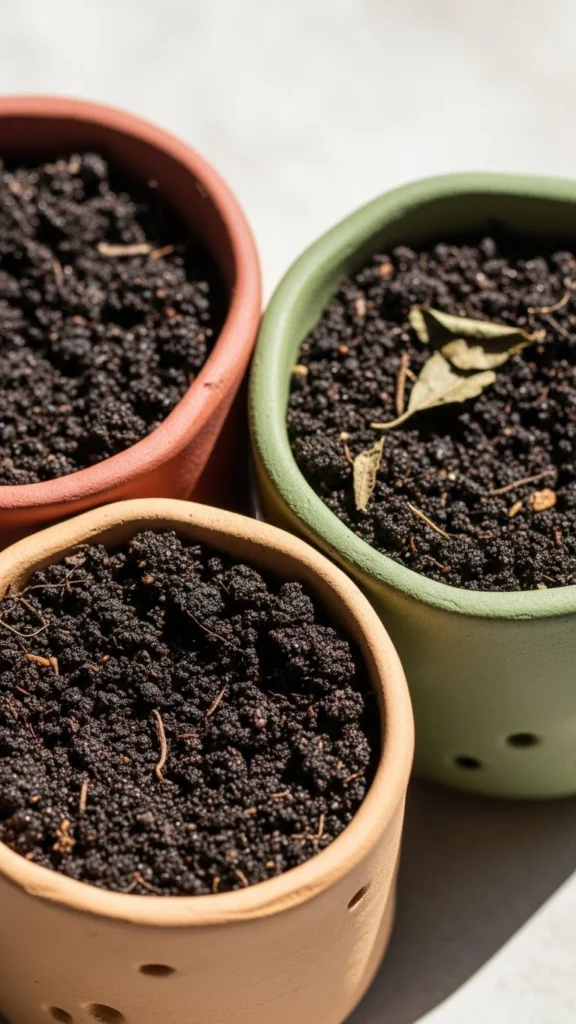
Mini plant pots look real when soil is textured. Use simple cylinder pots and press tiny brown clay crumbs to form soil. Avoid smoothing the surface. Matte finish enhances authenticity. Pots can be paired with miniature plants or succulents. Using scraps for soil and pot bases keeps costs low. Slight size and shape variations add character. These pieces are excellent for practicing small detail work and creating natural-looking garden scenes in miniature.
20. Tiny Plates With Crumbs

Tiny plates feel real with scattered crumbs. Form flat discs with raised edges for plates. Press baked clay dust lightly onto surfaces to create crumbs. Apply a thin gloss to the plate only; crumbs should remain matte. Slight irregularity in placement adds realism. These plates are ideal for miniature food scenes or bakery displays. Small touches like uneven crumbs or gloss contrast make simple clay pieces feel lived-in. Reusing leftover crumbs minimizes waste.
21. Mini Cheese Boards
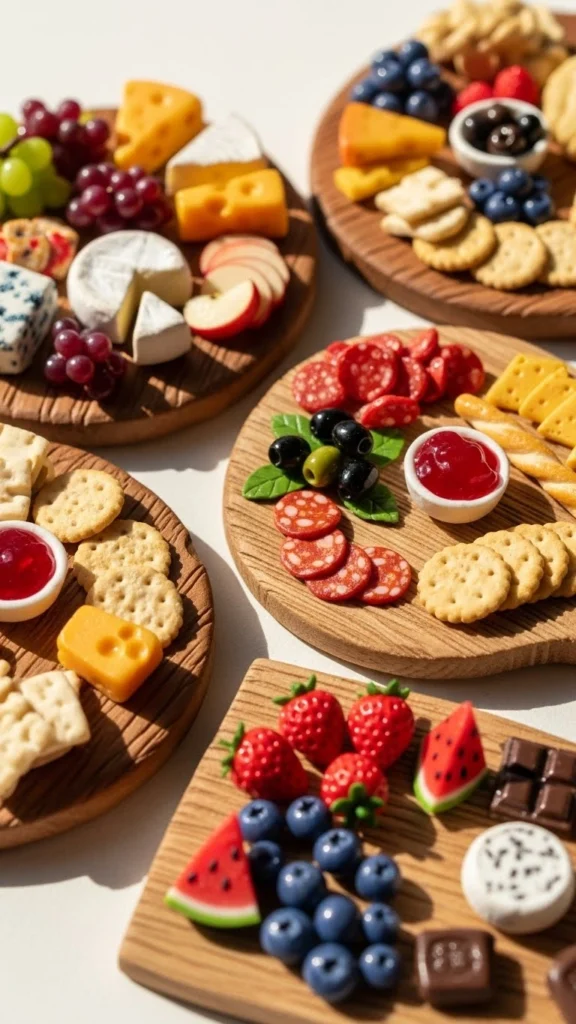
Cheese boards look authentic when different textures are combined. Create a flat brown clay board, press lightly with foil for wood texture. Arrange miniature cheeses, fruits, and crumbs loosely on top. Matte finish works best. Small variations in piece size and placement make it feel handmade. Using leftover clay pieces makes this a low-cost project. Cheese boards are great for dollhouse kitchens, food displays, or miniature party scenes.
22. Tiny Perfume Bottles

Perfume bottles feel realistic when shapes are clean and surfaces smooth. Use clear or slightly tinted clay. Keep designs minimal. Apply glossy finish to mimic glass. Skip labels or decorative elements. Slight differences in shape and height give each bottle personality. Perfect for vanity sets or miniature shelf displays. Small clay amounts make multiple bottles quickly. Smooth edges and proportionate dimensions improve believability.
23. Mini Cookies With Cracks

Mini cookies gain realism through cracks and uneven coloring. Flatten small clay balls, press shallow cracks lightly before baking. Mix light and dark brown shades to simulate baked spots. Matte finish keeps the surface authentic. Minor size variations and imperfect shapes make them feel handmade. These cookies are ideal for plates, jars, or miniature bakery displays. Using scraps for extra batches minimizes waste. Texture and subtle color changes are key to realism.
24. Tiny Stacked Pancakes
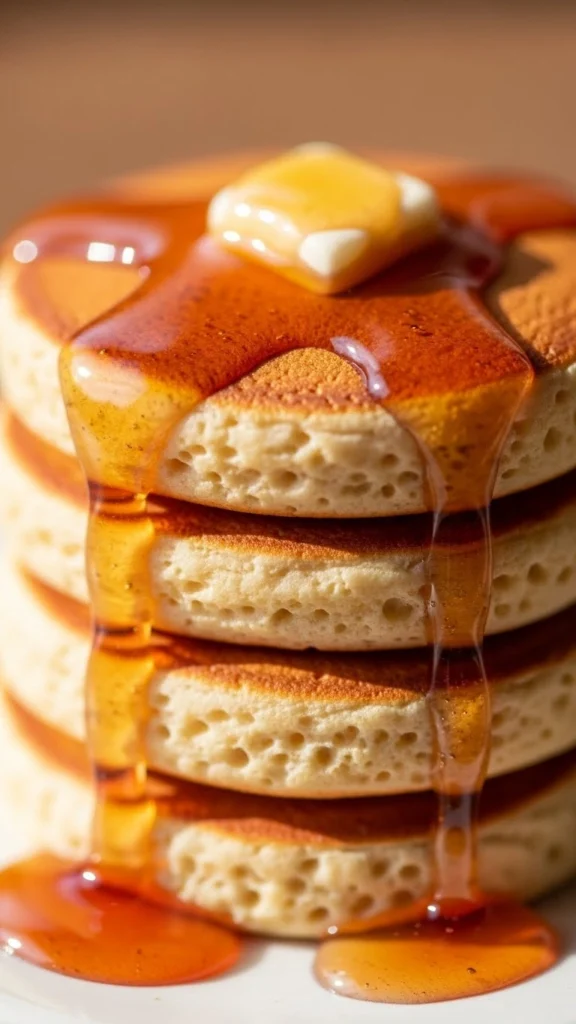
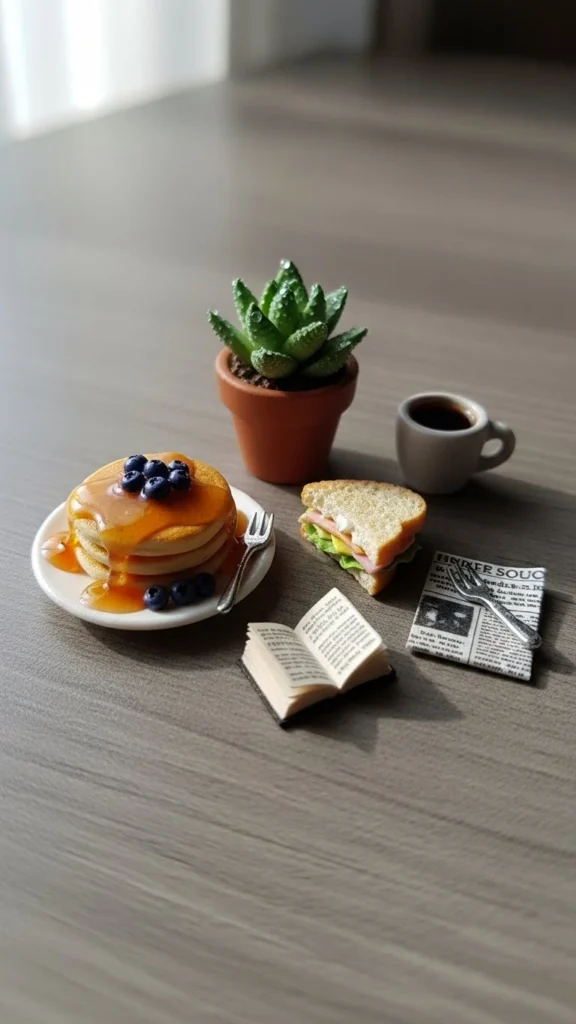
Stacked pancakes feel real when edges are slightly irregular. Form thin clay discs, stack slightly off-center. Use tinted gloss for syrup, allowing it to drip naturally. Avoid over-glossing; keep pancakes matte. Small imperfections in disc shape add realism. These pancakes suit breakfast miniature displays or dessert sets. Scraps from other clay projects can create syrup or fruit toppings. The project is inexpensive and quick while creating a satisfying realistic look.
25. Mini Grocery Bags
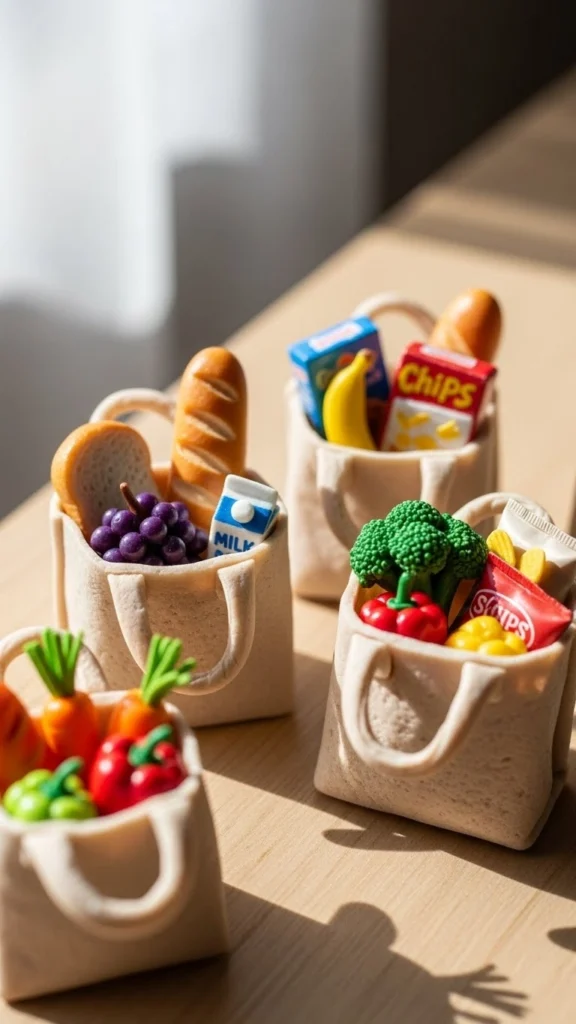
Mini grocery bags look real when folds remain loose. Roll thin clay sheets and fold gently, mimicking paper bags. Fill with scrap miniature foods for fullness. Leave tops slightly open for realism. Matte finish keeps the paper look believable. Bags are inexpensive and allow creative reuse of leftover clay. Small variations in bag size or content enhance the miniature scene. Ideal for dollhouse kitchens or miniature market displays.
Conclusion
Polymer clay miniatures show how small details create realism without high costs or complicated tools. Each project uses limited clay, simple shaping techniques, and basic tools, making them approachable for beginners and hobby crafters. Focusing on texture, color variation, and slight imperfections produces lifelike miniature food, décor, and household items. Practicing these 25 projects helps you create miniature scenes, gifts, or charming displays that are satisfying and visually convincing. Start small, experiment, and enjoy crafting miniatures reward patience with stunning realism.

Lily Summers is a digital artist and creative storyteller who loves bringing colorful characters to life. With a passion for cartoons, fan art, and playful sketches, she inspires others to explore their imagination through art. When she’s not sketching, you’ll find her dreaming up new ideas for CraftedWizard.com to spark creativity in every artist. 🌈✨


