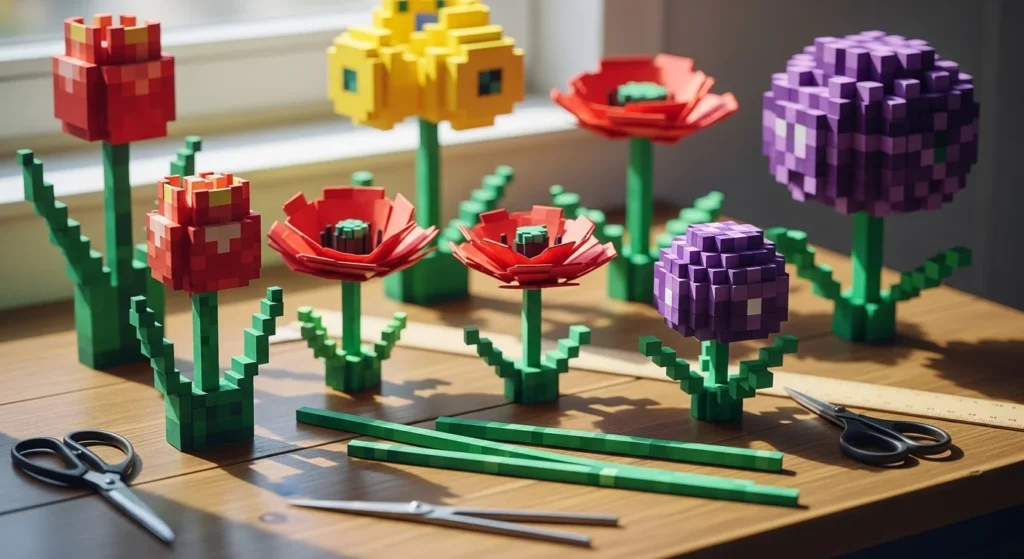
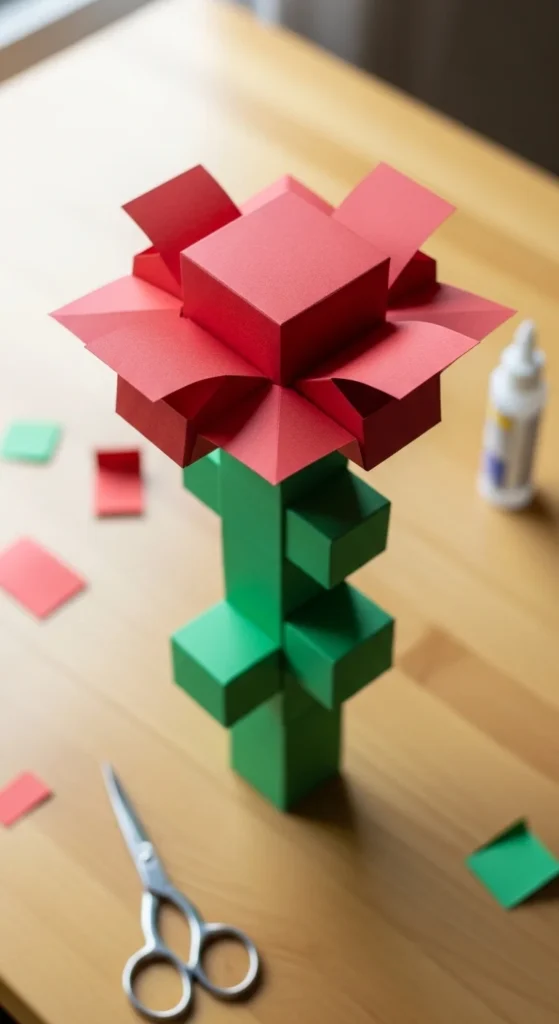
Minecraft-inspired paper flower crafts are a fun way to turn pixel art into hands-on decor without spending much money. These projects take the blocky look of in-game flowers and recreate it with folded paper cubes, square petals, and simple stacked stems. Many crafters like this style because it feels playful, easy to customize, and beginner-friendly. You can keep things simple with no-glue paper cube builds, or add a tiny amount of adhesive for faster holds if you want extra support. This list shares creative flower ideas that work for desks, bedrooms, party decor, classroom displays, and DIY gifts. From classic tulips and poppies to mini potted blooms and critter pairings, these paper flower crafts make it easy to bring game-inspired style into real life using colored paper, a ruler, and a little patience.
1. Pixel Petal Basics
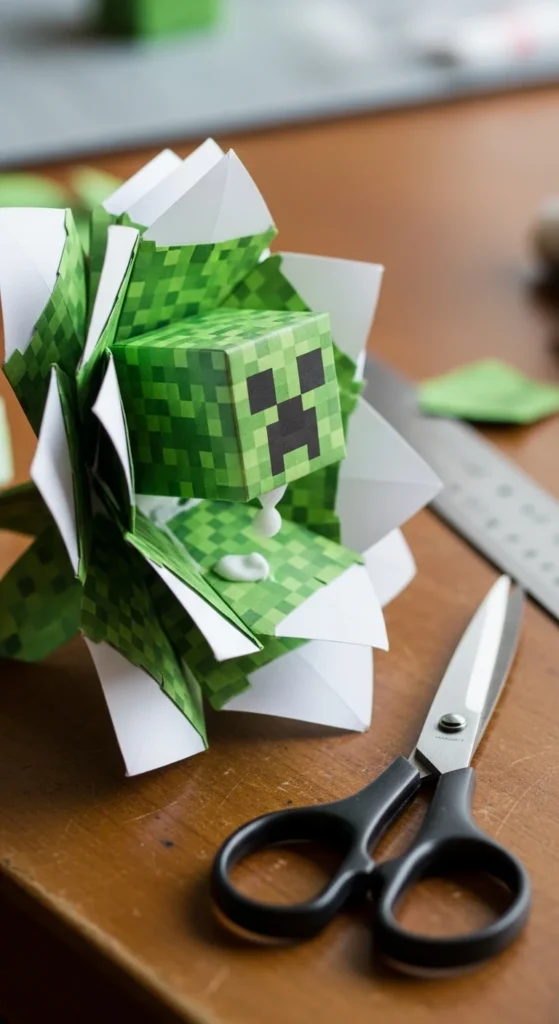
Start with the most basic skill in this craft style: the paper cube module. This is the building block behind many Minecraft-inspired flowers. Cut paper strips into even pieces, fold them carefully, and tuck the flaps so each cube holds its shape. That simple habit makes every later project easier. If your first cubes look a little uneven, that is normal. Use a ruler every time and crease with your fingernail or the edge of a card for sharper lines. Colored cardstock works better than thin printer paper because it keeps the block shape longer and holds its corners more cleanly. If you are trying to keep costs low, buy a small pack of solid-color paper instead of fancy craft sheets. One pack can make a whole set of flowers. A smart beginner move is to make ten or twelve cubes in one color before switching shades. That repetition helps your hands learn the fold pattern faster. Once your cubes start looking neat, flower shapes become much easier. This basic step may seem small, but it is what makes the final bloom look truly pixel-style instead of just folded paper.
2. Glue-Free Cube Tulip
A glue-free tulip is one of the best first flower builds because it shows how flap tucks can hold a full design together. Start from the stem and work upward so the structure feels more stable in your hands. Green cubes stack neatly for the stem, and a few red cubes at the top can form the tulip head. The beauty of this style is that you do not need a large craft supply haul. Just paper, scissors, and a ruler can be enough. If you want the flower to stand on a shelf, use slightly thicker paper for the stem than for the petals. That small change helps a lot. Keep the tulip head compact so the top does not feel too heavy for the base. A beginner-friendly tip is to test your flap locks by gently shaking the flower after each section is built. If anything feels loose, retuck before you move on. This kind of craft is great for party favors, desk decor, or a quick themed gift. It feels clever because it looks more complex than it really is, which makes it very satisfying for beginners.
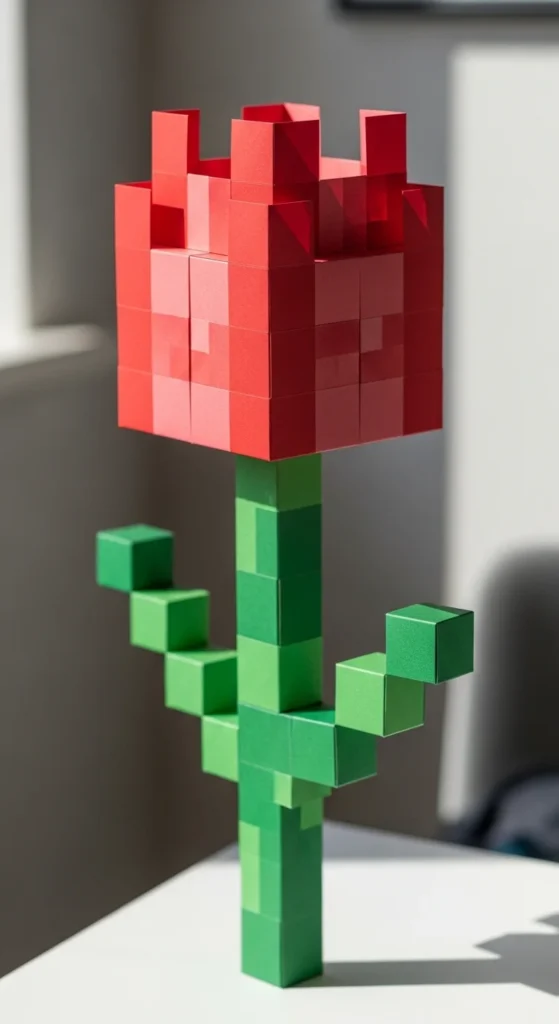
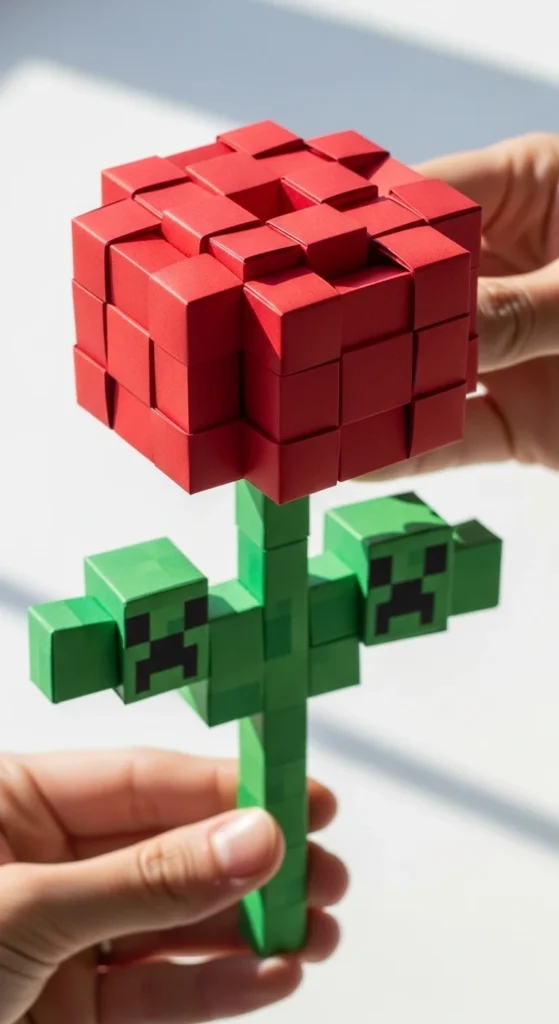
3. Red Pixel Poppy
A red pixel poppy is a strong choice when you want a flower that looks bold without asking for too many complicated parts. The shape is simple, the color palette is easy to find, and the blocky form suits paper cubes perfectly. Use green cubes for the stem, then create a flower top with red outer cubes and a darker center section. Black, dark brown, or even deep maroon paper can work for the middle if you do not have exact shades. That makes this project easy to adapt with whatever is already in your craft drawer. If you want the petals to look fuller, stack the top cubes in a slightly wider pattern instead of keeping them in a strict square. That gives the poppy a more flower-like spread while still keeping the pixel style. A poppy also looks great in a simple paper pot or taped to a gift bag. This is a fun project for kids and adults because it comes together quickly and has a clear recognizable shape. It is one of those builds that looks impressive even with basic supplies and beginner folding skills.
4. Yellow Block Tulip
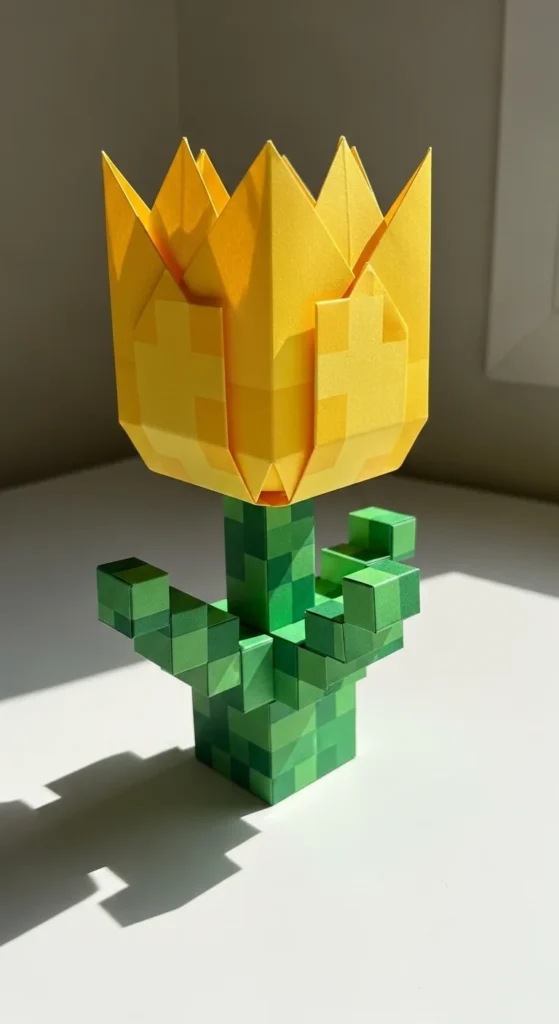
A yellow block tulip brings a cheerful color pop to any paper flower set. It is also a smart way to practice the same tulip form in another shade without learning a whole new structure. Once you already know how to build the stem and flower head, changing the color lets you focus on cleaner folds and better alignment. That repetition is helpful for beginners. Yellow paper can sometimes show fold marks more clearly, so take your time with creasing and keep your hands clean while you work. If your paper feels too thin, double up only the flower head section and keep the stem lighter. That keeps the build upright without using much extra material. A yellow tulip looks great on a school desk, windowsill, or small shelf, especially when paired with red and pink versions. If you want a low-cost group craft idea, this is a nice option because everyone can use the same fold pattern but choose different colors. The finished result feels bright, simple, and very game-inspired. It is easy to make, easy to display, and easy to turn into a mini bouquet.
5. Pink Pixel Bloom
A pink pixel bloom is perfect when you want a softer version of the classic Minecraft-style flower. Use light pink, hot pink, or even a mix of both for a layered look. That mix can help the flower feel more dimensional while still keeping the square block pattern. If you only have plain white paper, color the petal pieces with markers before folding. That is a simple budget trick for making custom shades without buying extra packs. Keep the stem sturdy and straight by stacking from the bottom first. Then build the flower head in a way that spreads outward a little, so the pink cubes read more clearly as petals. This kind of bloom is great for room decor, birthday table accents, or small handmade gifts. A pink flower also pairs well with tiny green cube leaves if you want a fuller plant look. For beginners, it is nice because the result feels cute and polished even if the folds are not perfect. The pastel or bright color does a lot of the work visually. It is easy, playful, and very display-friendly.
6. Pocket Pixel Mini Flower
Mini flowers are a great choice when you want something cute, fast, and easy to display almost anywhere. Shrinking the size turns a full flower project into a tiny desk charm, shelf accent, or handmade topper for gift wrap. The main trick is keeping your cuts even. When working small, uneven paper strips show up more clearly. Use a ruler and sharp scissors, and cut several strips at once only if the paper stack stays aligned. Colored cardstock still works best, but you can also use cereal box cardboard covered with colored paper if you are trying to spend less. A mini flower can be attached to a pencil cup, tiny pot, or card front. It is also fun for group projects because each person can finish one quickly. Start with a simple tulip or poppy shape before trying more detailed mini flowers. If the first attempt feels fiddly, go up slightly in size rather than giving up. Once your hands adjust, these little builds become surprisingly fun. They look great in sets and make the blocky Minecraft style feel even more charming.
7. Spotted Allium Style Flower

An allium-style flower is a fun way to move past basic tulips and try something with a fuller top. Use purple or lavender cubes for the bloom and add tiny darker squares or marker dots for that spotted look. This makes the flower feel closer to the game style while still staying easy to assemble. The rounded blocky top works well when you cluster cubes closely together, almost like a pixel ball sitting on a tall green stem. To keep the build from wobbling, make the stem first and test its strength before adding the top section. That bottom-up approach saves a lot of frustration. A smart low-cost idea is to use one paper shade for most of the flower and only add a few darker pieces for detail instead of buying many purple tones. This flower works nicely in a single-stem display or mixed into a paper bouquet with tulips and poppies. It looks a little more advanced than the simpler flowers, so it is a great next project once you feel comfortable with cube tucks. The result feels playful, bold, and very pixel-art inspired.
8. Brown-Spotted Beginner Bloom

A brown-spotted bloom is a nice beginner option when you want something a little different from the usual red or pink flower set. The color scheme is forgiving, which helps if you do not have perfectly matching paper. Browns, creams, dusty yellows, and warm oranges all work well together in a blocky spotted flower. That makes it easier to use leftovers from other paper crafts. Start with a basic bloom structure, then add a few spotted cubes or paper squares on top to create variation. This craft is especially useful for practicing pattern placement without making the build too hard. If the spots are too evenly spaced, the flower can look stiff. A more relaxed placement usually feels better. Use colored pencils or markers if you do not want to cut extra small paper details. That keeps the process faster and cheaper. This kind of flower works well in rustic party decor, shelf displays, or mixed paper bouquets. It has a softer tone than brighter blooms but still fits the Minecraft-inspired block style really well. It is simple, affordable, and beginner-friendly from start to finish.
9. Layered Pixel Tulip Head
A layered tulip head takes the basic tulip idea and gives it more depth. Instead of using one flat row of cubes for the bloom, stack the petal cubes in two levels. This makes the top look more three-dimensional and closer to a full paper sculpture. It is a good next step once you have already made one or two basic flowers. The trick is not to make the top too heavy. Keep the stem sturdy and the flower head compact. If the tulip leans, shorten the bloom by one layer or add a wider base where the stem meets the flower. That small fix often helps. You do not need a lot of extra materials for this upgrade. It mostly uses the same cube method, just with more thoughtful stacking. Try using two shades of the same color, like dark pink and light pink, for a more detailed look without much extra effort. This build looks great as a centerpiece flower in a small paper bouquet. It feels more advanced, but the steps stay friendly for beginners who already know the cube basics.
10. Seamless Top Cap Flower
One detail that can make a paper flower look much cleaner is the top cap piece. This small finishing section hides the open seams at the top and gives the bloom a tidier block-like appearance. It is a simple upgrade, but it makes a big visual difference. After building the flower head, cut and fold a square cap that matches the top color, then tuck or lightly glue it into place. If you want to stay fully glue-free, make the cap snug enough to hold by pressure. This works best when your measurements are accurate. A top cap is especially helpful on tulips, poppies, and allium-style flowers where the upper surface is clearly visible from above. If you are making flowers as gifts or room decor, this finish helps them look more polished. Use scrap paper from the same flower color so you do not waste good sheets. This is also a smart trick for hiding minor fold issues inside the build. It is a small step, but it gives your final flower a smoother, more complete look with almost no extra cost.
11. Stack-Smart Tall Stem Build
Tall stems are where many beginners run into trouble, so learning a stack-smart method early really helps. Start from the bottom and build upward instead of making the flower head first. That gives you better control over balance and lets you test the stem strength before the bloom goes on top. If the stem feels wobbly, switch to slightly thicker paper or make the lower section one cube wider. That extra support can save the whole build. A tall stem looks great for display, especially if you want flowers in a simple paper vase, jar, or desk pot. Keep the green shades consistent for a cleaner look, or mix light and dark green cubes if you want a more textured in-game style. If you are working with kids, shorter stems are easier and less frustrating, so save the taller versions for a second or third attempt. This kind of practice might seem plain compared to building petals, but it is what helps the finished flower stay upright. A strong stem gives every bloom a better chance to look neat and last longer on display.
12. Pixel Potted Flower
A potted flower is one of the most display-friendly versions of this craft because it feels like a complete little decor piece. Start with a simple cube-style pot in brown, gray, or terracotta paper, then build the flower stem and bloom separately before placing them inside. You can fill the pot with folded scrap paper to hold the stem upright without using much glue. That makes the whole project cheaper and easier to adjust. A potted build is also helpful for beginners because the pot hides the base of the stem and gives the flower more stability. If your stem is a little uneven, the pot often makes the final piece still look great. Try classic red tulips, pink blooms, or purple allium tops for variety. These potted flowers work well on bookshelves, study desks, party tables, and gift baskets. They also make fun room decor for kids who like game-inspired crafts but want something handmade rather than store-bought. This is a good project when you want a finished object that looks more decorative and less like a practice piece.
13. Game Palette Flower Set
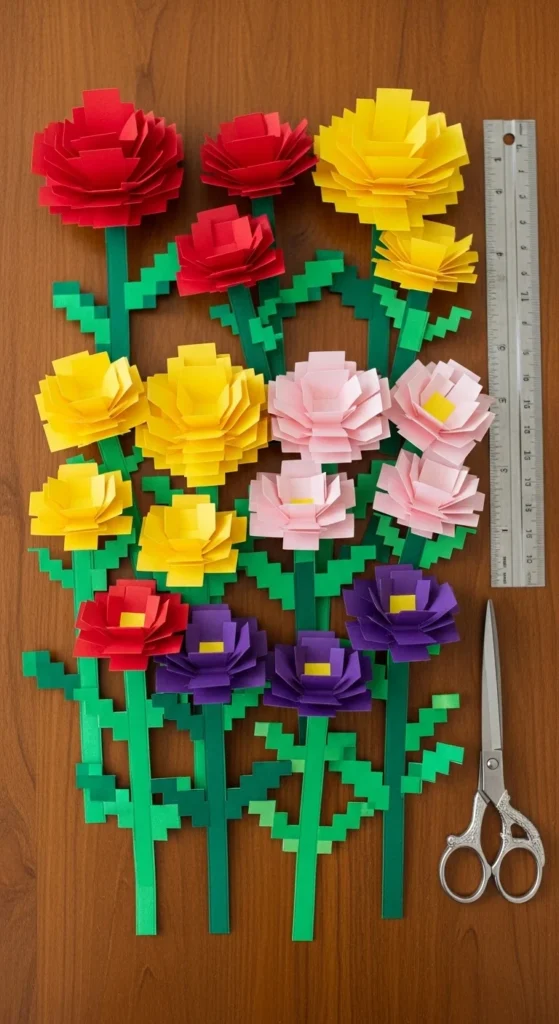
A game palette flower set is a smart project if you want several matching flowers without inventing a new design each time. Pick a few classic Minecraft-style shades like red, yellow, pink, green, and purple, then make the same flower structure in each one. This saves time because you only learn one build pattern while still ending up with a varied group. It also helps your decor look more coordinated. A set like this is great for party tables, birthday decor, classroom crafts, or a shelf arrangement. If you are trying to keep costs down, buy one assorted paper pack with the main colors instead of buying separate sheets from different brands. That often makes the tones look more consistent too. A beginner-friendly tip is to sort your cut pieces by color before folding. That keeps the work cleaner and makes assembly faster. Once finished, group the flowers in a blocky paper vase or line them up individually across a desk. This project feels satisfying because it turns one easy technique into a full decorative set with very little extra planning.
14. Fold and Stack Hybrid Bloom

A fold-and-stack hybrid bloom mixes two simple paper craft styles in one project. Use cube modules for the stem and base, then add folded square petal layers on top for a slightly different flower look. This is a nice way to break up the repeated cube pattern while still keeping the pixel-art feel. It works especially well if you enjoy origami but want the final flower to stay clearly Minecraft-inspired. Keep the folded petal pieces square-edged rather than rounded so they still match the blocky style. A hybrid flower can also help if you run low on paper, because folded toppers may use fewer tiny modules than a full cube bloom. For beginners, start with one folded layer and one cube layer rather than trying a very detailed top right away. This kind of craft is good for experimenting once you feel comfortable with basic cube tulips and poppies. The final result looks a little more custom and gives your flower collection more variety. It is simple enough to make at home with basic supplies and still feels creative and personal.
15. Shake-Proof Flap Lock Flower
One of the biggest frustrations in no-glue paper cube crafts is a flower that loosens when you pick it up. A shake-proof flap lock flower focuses on solving that problem. The goal is simple: make each cube and connection tight enough that the flower stays together even with light movement. Start by cutting paper strips evenly and creasing firmly. Loose folds make weak cubes. When you tuck flaps, press them fully into place with a fingernail or blunt tool instead of leaving them half-seated. Test each section before adding the next one. If a cube feels soft, rebuild it right away rather than hoping it will hold later. This method is especially helpful for stems, where one weak module can affect the whole flower. If you are okay using a tiny bit of glue, add it only at hidden stress points, not all over the craft. That keeps the look clean while still helping the structure. A shake-proof flower is useful for classroom displays, gift toppers, and kids’ crafts because it holds together better through handling. Strong flap locks make the entire project feel more satisfying and less fragile.
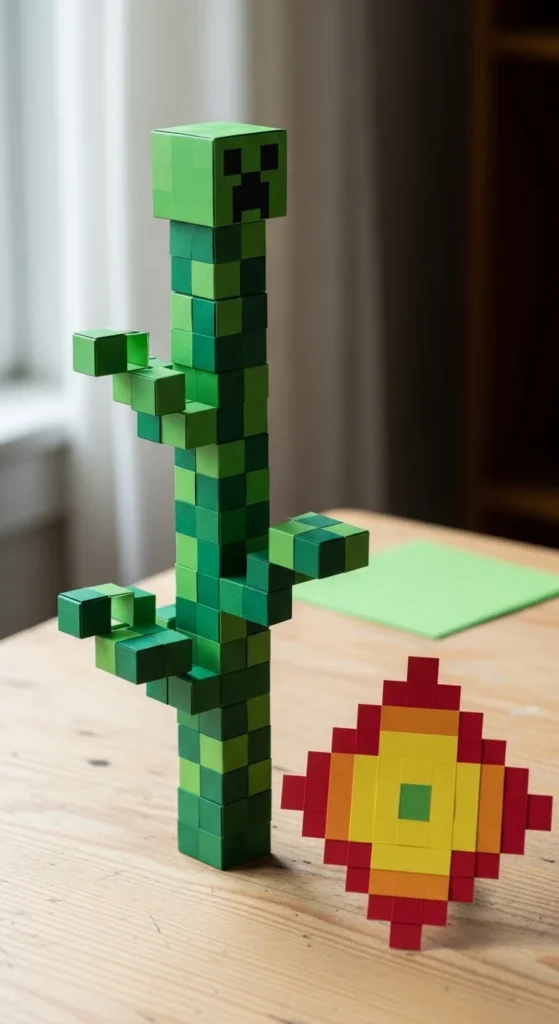
16. Critter Companion Tulip
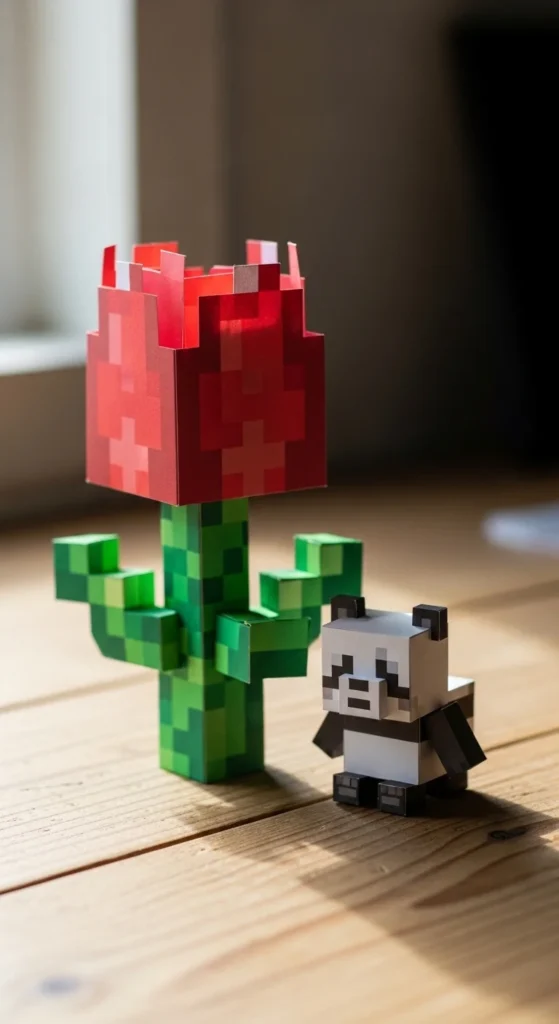
A critter companion tulip adds extra fun by pairing a simple flower with a tiny blocky animal figure. A panda works especially well because the black-and-white cube pattern matches the paper module style nicely. Keep the flower build easy, like a tulip or poppy, then make a tiny companion from just a few paper cubes placed near the base. This turns a single flower into a mini scene rather than just decor. Kids usually love this kind of project, but adults enjoy it too because it feels playful and display-worthy. If you are short on time, use only a head or a very small body for the critter instead of a full figure. That keeps the craft simple and saves paper. A tulip with a panda companion works nicely on desks, bookshelves, and gift boxes. It also makes a birthday or classroom craft feel more memorable. This idea is budget-friendly because one small stack of black, white, green, and flower-color paper can cover the whole build. It is cute, easy to customize, and adds a story-like feel to the final display.
17. Desktop Pixel Bouquet
A desktop bouquet is a great way to turn several small flower builds into one standout decor piece. Instead of making one large complicated flower, create three to five simple flowers and group them together in a small paper vase, cup, or recycled container. This works well because even basic tulips and poppies look more impressive in a set. Keep the stems at slightly different heights so the arrangement feels less flat. If you are trying to save money, use scrap paper for the inner support pieces and keep your best cardstock for the outer visible parts. A bouquet is also nice because it hides minor flaws. One flower might lean a bit, but the group still looks balanced overall. This makes it a forgiving project for beginners. A desktop bouquet fits nicely on a study table, game shelf, or bedside stand. It can even work as party decor for a themed event. The final result feels much more decorative than a single stem, but it is still built from very simple pieces. That makes it practical, affordable, and very satisfying to finish.
18. Cube Size Showdown Flower Set
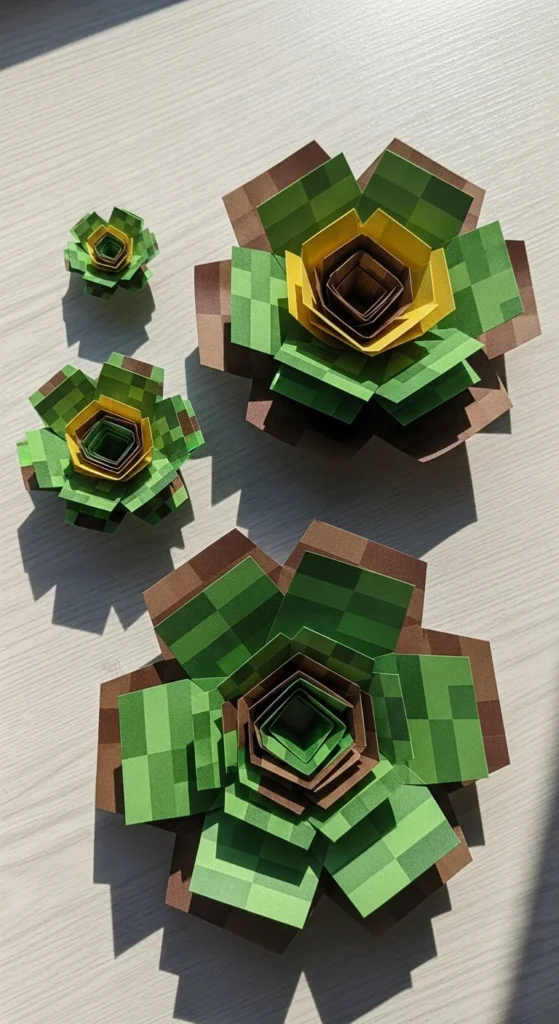
Trying the same flower in different cube sizes is one of the best ways to understand how scale changes the final look. Make one flower with small modules, one with medium modules, and one with larger cubes. This side-by-side setup shows which size feels easiest to build and which one works best for display. Many beginners find medium cubes easiest because they are not too fiddly and not too bulky. Mini cubes look adorable, but they take more patience. Larger cubes are easier to fold, but the flower can get heavy or awkward if the stem is not strong enough. A size showdown set is useful if you plan to make these crafts for party decor, shelf styling, or gifts. You can quickly decide which version suits your goal best. It is also a smart way to use paper scraps from other projects. Just cut the strips at different widths and test the same flower pattern. This kind of experiment feels simple, but it teaches a lot. It helps you work smarter on future builds and gives you a fun comparison display at the same time.
19. Quick-Set Supported Bloom
Not every crafter wants to stay fully no-glue, and that is okay. A quick-set supported bloom uses mostly flap tucks but adds tiny hidden dots of glue where extra hold helps most. This is a great choice if you love the cube look but want a little more peace of mind with the structure. Use glue sparingly on hidden joins near the flower head or lower stem support points. There is no need to coat every flap. That can make the build bulky and messy. If you use glue, let each supported section set briefly before stacking more cubes on top. This project is especially helpful for younger kids, classroom crafts, or flower builds meant to be handled often. It also helps if your paper is slightly thinner than ideal. A quick-set bloom still looks clean and blocky, but it gives you a little more flexibility than a fully tucked build. This makes it a good middle-ground project for people who like the Minecraft-inspired style but do not want to fight with every flap. It stays beginner-friendly, affordable, and much less stressful.
20. Blocky Garden Display
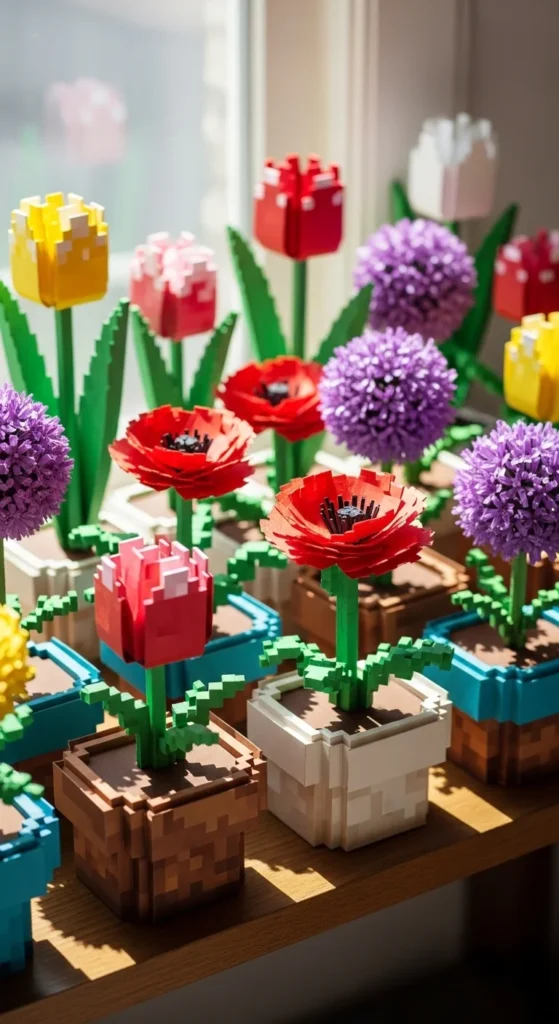
A blocky garden display is the perfect final project because it brings several flower ideas together into one themed arrangement. Use a mix of tulips, poppies, spotted blooms, and allium-style flowers in different heights and colors. Place them in several small paper pots or line them across a long tray for a mini garden look. This project feels bigger, but it is really just a collection of smaller builds you may already know. That makes it very manageable. If you are working on a budget, build the garden slowly. Make one flower a day and reuse cardboard packaging for the inner pot forms. Cover those forms with colored paper so the outside still looks neat. A full blocky garden works beautifully on a shelf, desk, game corner, or party table. It also makes a fun gift for a Minecraft fan because it feels handmade and display-ready. This kind of craft shows how simple paper cubes can turn into something much more eye-catching over time. It is creative, practical, and a great way to use everything you have learned from the earlier flowers.
Conclusion
Minecraft-inspired paper flower crafts are a fun mix of pixel art, simple folding, and budget-friendly DIY decor. With just colored paper, a ruler, scissors, and a little patience, you can turn basic cube modules into tulips, poppies, spotted blooms, mini flowers, potted stems, and full blocky garden displays. The best part is how flexible these projects are. You can keep them fully no-glue, add a little hidden support where needed, scale them down for desktop minis, or build full bouquets for themed rooms and parties. Start with one easy flower like a tulip or poppy, practice your cube folds, and then grow your paper garden one bloom at a time.

Lily Summers is a digital artist and creative storyteller who loves bringing colorful characters to life. With a passion for cartoons, fan art, and playful sketches, she inspires others to explore their imagination through art. When she’s not sketching, you’ll find her dreaming up new ideas for CraftedWizard.com to spark creativity in every artist. 🌈✨