Japanese paper crafts are perfect when you want something calming, hands-on, and doable with what you already have at home. With a few sheets of origami paper or washi, you can make gifts, decor, and little daily-life upgrades in one afternoon. These projects lean into classic Japanese craft vibes—clean folds, soft textures, and simple shapes that look great even when you’re still learning. Pick one for a quick win, or try a few across the week and build a small “paper craft corner” you can come back to anytime.
1) Classic Origami Crane Garland
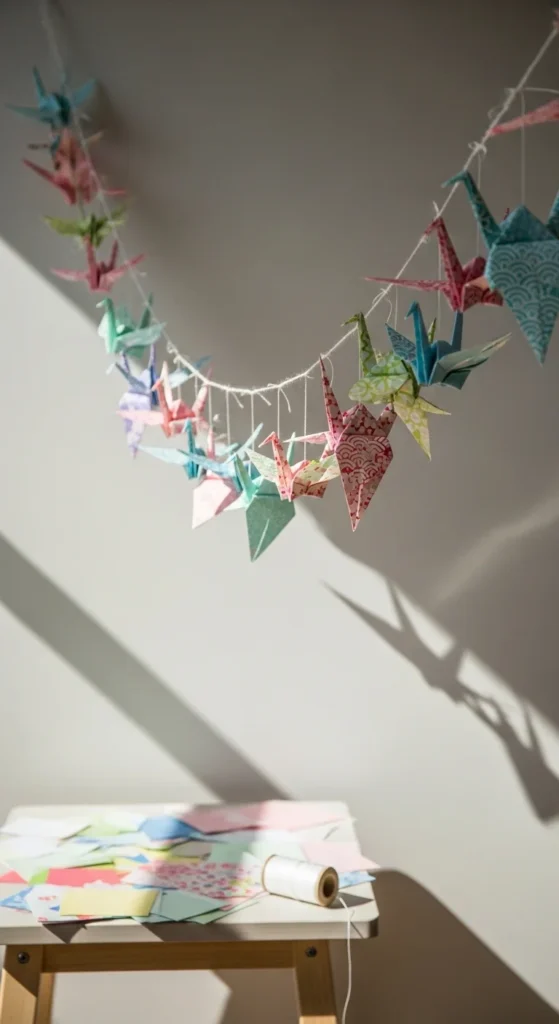
A crane garland is one of those projects that feels relaxing once your hands learn the fold rhythm. Start with 10 to 20 cranes, then keep adding a few each day. Use budget-friendly origami paper, or cut printer paper into squares if you’re practicing. If you want it to look extra clean, pick two to three colors and repeat them in a pattern. Thread a needle with cotton string, poke carefully through the crane body, and add a small bead between each crane so they don’t bunch up. Hang it above a desk, along a curtain rod, or across a shelf. If you’re gifting it, wrap the garland around a small cardboard card so it doesn’t tangle. A simple trick for nicer results is to press folds with a ruler edge or a spoon handle if you don’t have a bone folder. If your cranes look uneven at first, that’s normal. The garland still looks charming because the movement and repetition do the work. Make it a “one crane a day” habit this week and you’ll have decor by Sunday.
2) Washi Tape Collage Bookmark Set
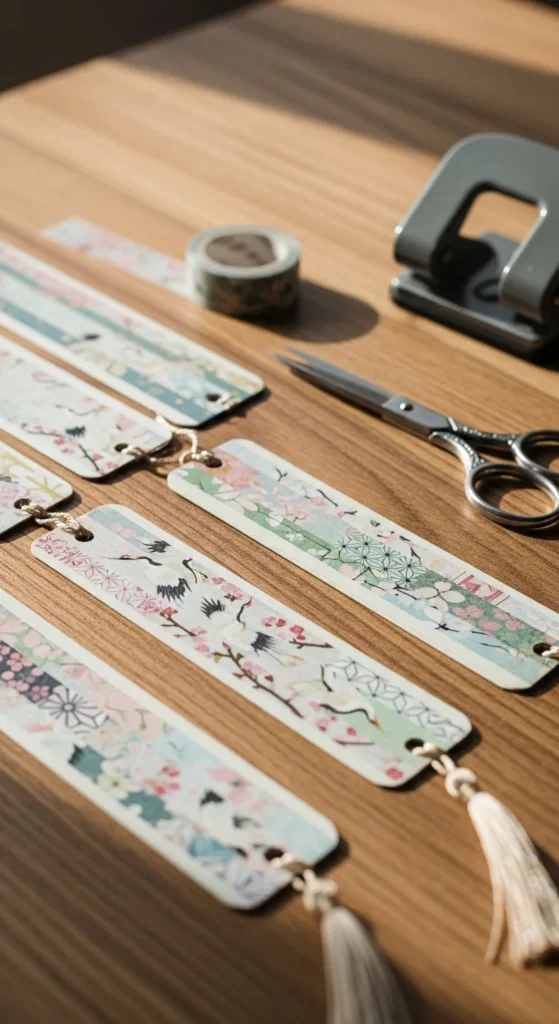
Bookmarks are quick, useful, and perfect for using tiny scraps. Cut cardstock into strips, then layer washi tape pieces like a mini collage. Mix a bold pattern with a calm solid so each bookmark feels balanced. If you don’t have cardstock, cereal-box cardboard works well once you cover it fully. Press the tape down firmly with a spoon to smooth bubbles. For extra durability, wrap the bookmark in clear tape or brush on a thin coat of glue-water mix and let it dry flat under a book. Punch a hole at the top and add a yarn tassel for a finished look. Want a clean theme? Do a set like “indigo + cream,” “spring florals,” or “gold accents.” Keep the edges neat by trimming with scissors after you finish the layers. This is also a great craft to do while watching a show because it’s forgiving and low-mess. If you’re making gifts, bundle three bookmarks with twine and a small tag made from leftover paper. The best part is you can build a little stack in one sitting, and you’ll actually use them all week.
3) Simple Origami Lucky Star Jar
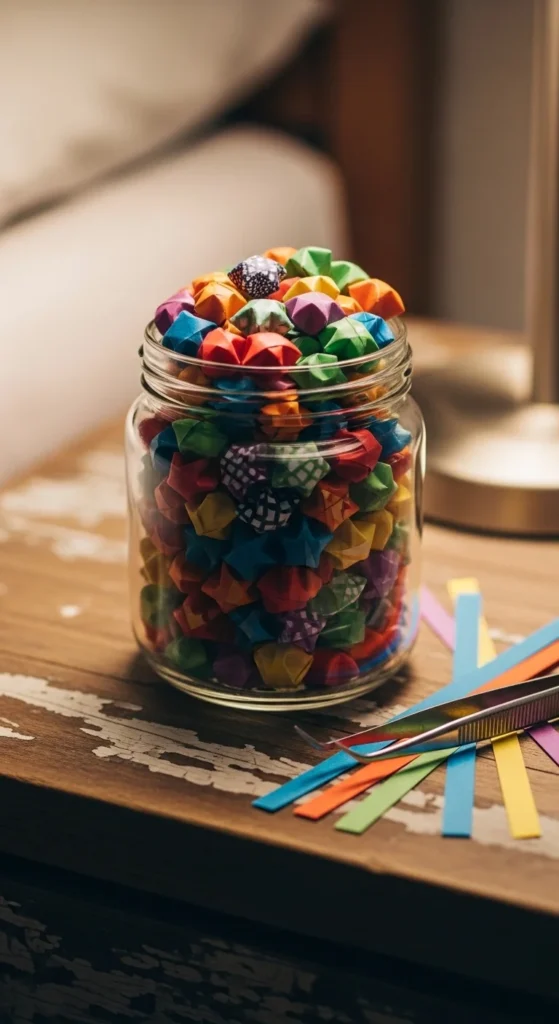
Lucky stars are tiny, satisfying, and great for stress crafting. You’ll need paper strips, which you can buy or cut from patterned paper. Wrap a strip into a knot, flatten it into a pentagon, then wrap the tail around until it’s used up. The final step—pinching the sides to puff the star—is the fun part. If your fingers get tired, use tweezers for the small pinches. Make a jar as a desk decoration, or turn it into a “week jar” where you make a few stars each day. Keep it affordable by cutting strips from magazine pages or thin colored paper. For a more Japanese look, use washi patterns or muted colors like sage, cream, and indigo. You can also write a tiny note on the strip before folding, but keep it on the inside so no text shows outside. Stars look extra cute in clear containers with a cork lid, but any clean jar works. If you want to gift it, add a ribbon and a small paper tag cut from scrap. This project is small enough to carry in a pouch, so it’s perfect for waiting time during the week.
4) Origami Waterbomb Paper Lantern Cluster
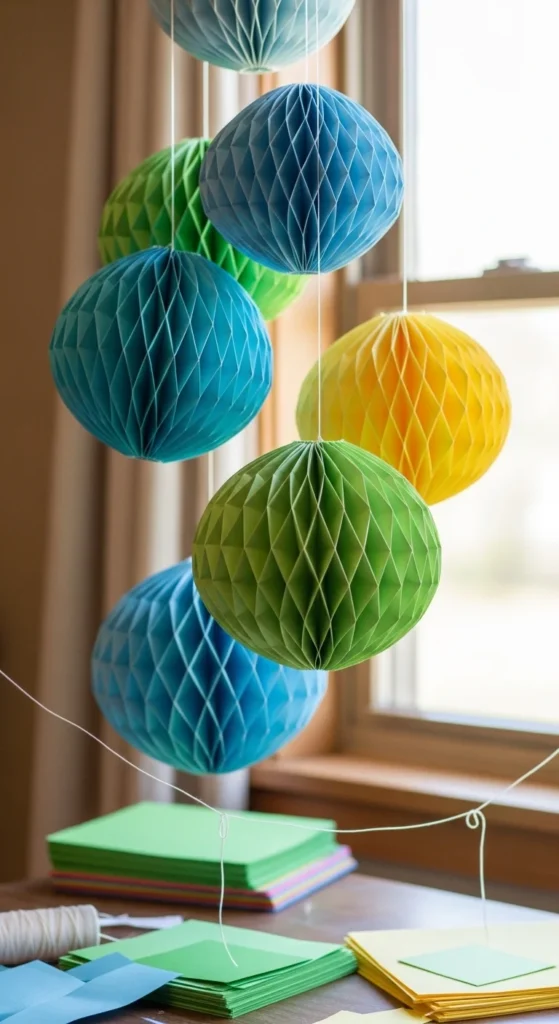
These lantern-like folds (often called waterbombs) add instant charm to a room. Fold each lantern from a square, then gently puff it into shape. Hang them with thread, or string them like a mini mobile. If you want them to hold shape longer, use slightly thicker paper or lightly mist the finished lantern and let it dry while puffed. Keep the design calm by choosing one main color and one accent pattern. To hang, poke a tiny hole at the top corner and knot the string. If you’re nervous about tearing, reinforce the inside with a small scrap glued behind the hole area. You can hang them above a craft corner, over a bed, or along a wall shelf. For a cozy look at night, don’t put candles inside. Instead, hang them near a small lamp so they catch the light safely. If you’re short on time, make three lanterns and call it done. It still looks intentional when grouped. This is also a fun way to use leftover origami squares that don’t match anything else. The lantern folds teach you clean creases without feeling complicated.
5) Kusudama Flower Ball (Easy Modular Version)
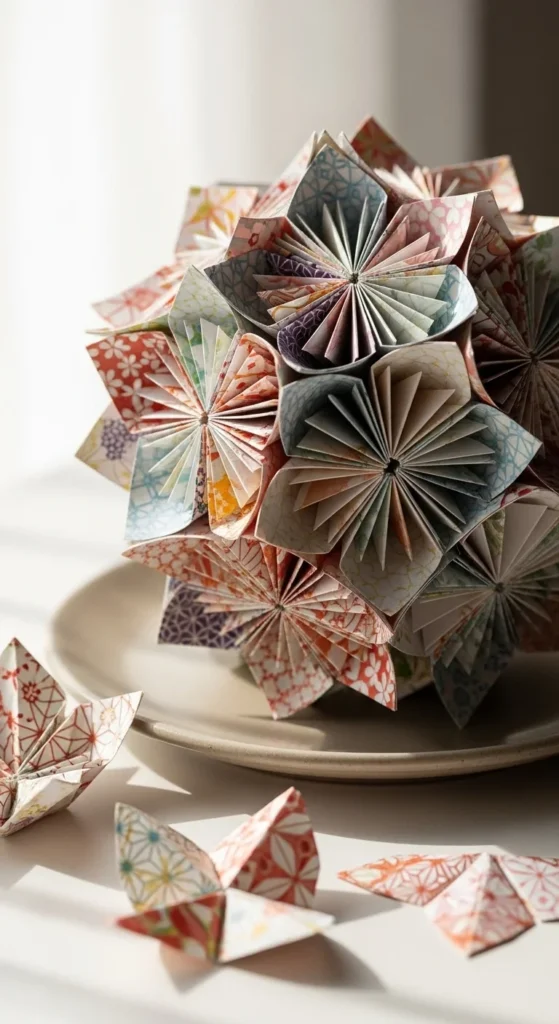
A kusudama ball looks fancy, but you can keep it simple with an easy modular flower unit. The trick is repetition. Fold one module, then repeat it in the same way until you have enough to assemble. Use a glue stick to join modules if you don’t want to fuss with locking tabs. Pick paper that’s colored on both sides so the petals look finished from every angle. If you’re on a budget, use single-color paper and add contrast by alternating shades. Once assembled, hang it with a ribbon, set it in a bowl, or use it as a gift topper. A smart way to do it this week is to fold a few modules each evening, then assemble on the weekend. If your ball feels uneven, rotate it in your hands and adjust the spacing before the glue fully sets. Work on a tray so small parts don’t slide away. You can also make a mini version with fewer modules as a practice round. The final piece adds a strong “Japanese paper craft” feel to a room without taking up much space. And once you learn one module, you can reuse it forever.
6) Origami Samurai Kabuto Hat (Mini Decor)
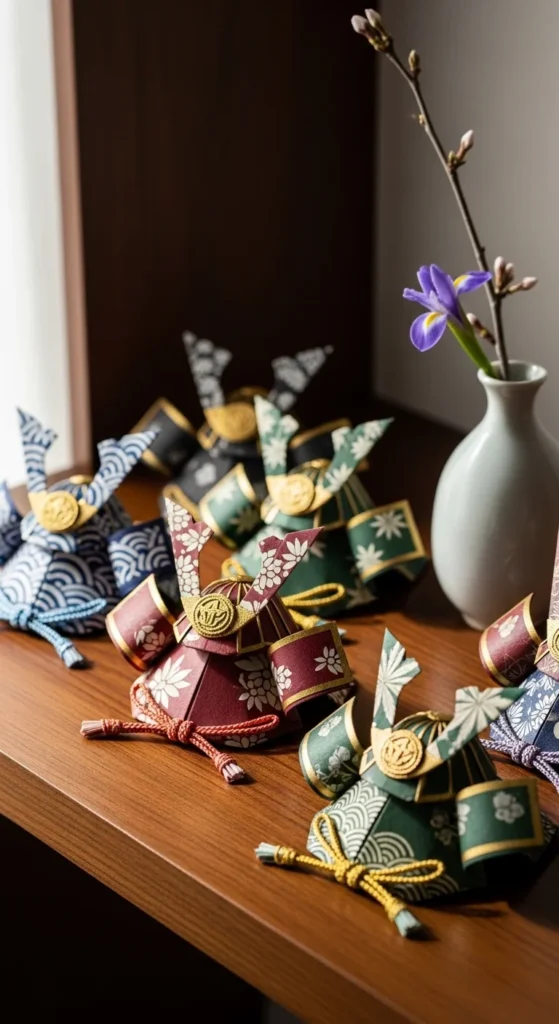
The kabuto hat is a classic fold that feels bold and playful. Make it small for shelf decor, or scale it up for a fun photo prop. Use paper with strong patterns—waves, cranes, or geometric prints—so it reads from across the room. If you only have plain paper, color one side with markers for a two-tone look. The fold has crisp angles, so take your time pressing each crease flat. To display, make a few hats in matching colors and line them up on a tray. If you want to gift them, tuck a small treat inside the hat like a wrapped candy, then place it in a tiny bag. For kids, use bigger paper and soften the sharp points with a tiny piece of tape inside. This project is great for building fold confidence because the shape becomes clear quickly. If one side looks off, flip it around and treat it as the “back.” It still looks cute. A set of three mini kabuto hats is fast to finish and gives you a satisfying result in one sitting.
7) Washi-Wrapped Tea Light Holder Sleeve (No Flame Inside)
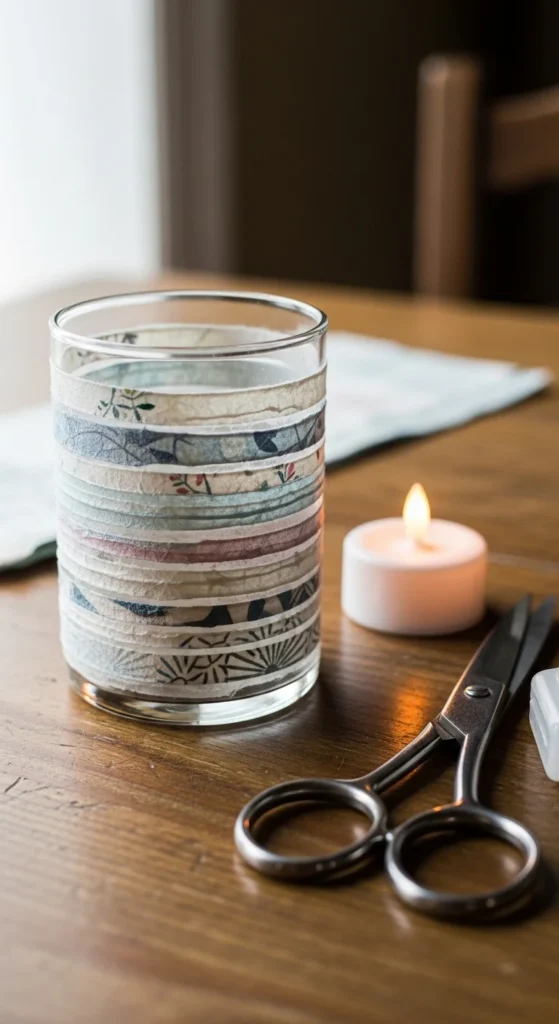
This is a simple decor project that uses paper like fabric. Wrap a clean glass jar or votive holder with washi paper strips using glue or double-sided tape. Overlap the edges a little so the layers look intentional. Add a thin twine band around the middle for a finished detail. Use a battery tea light inside, not a real flame, so it stays safe and paper-friendly. If you don’t have washi sheets, tear strips from patterned gift wrap or thin paper and layer them like a patchwork. Keep it looking tidy by smoothing each piece down before adding the next. For a Japanese vibe, choose indigo patterns, rice-paper textures, or soft florals. If you want a cleaner seam, place the overlap at the back and cover it with a single vertical strip. Make a pair for a shelf, or create a set of three in different heights using jars you already have. This is also great for “leftover paper day” because scraps still look good when layered.
8) Paper Sashiko-Inspired Pattern Tiles (Pen + Paper)
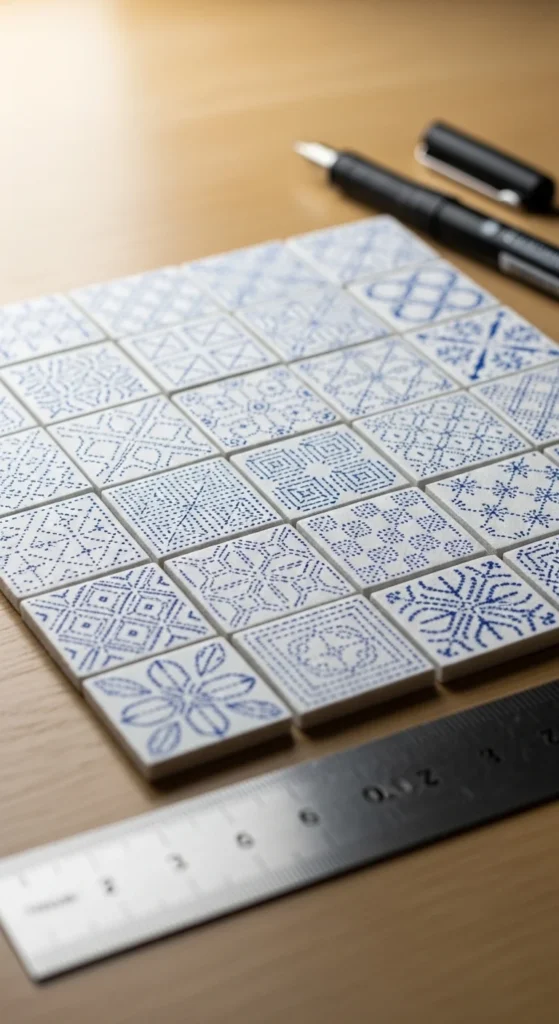
If you want a calm craft without cutting and gluing, make pattern tiles inspired by sashiko geometry. Use small squares of thick paper and a fine pen. Lightly pencil a grid, then draw repeating shapes—diamonds, waves, or simple crosses. Keep it easy by choosing one motif and repeating it across a set of tiles. You can mount the tiles on a larger sheet to create wall art, or use them as gift tags. If you don’t have fancy pens, a basic black marker works. For a softer look, use dark blue ink. A budget trick is to cut squares from cardstock packaging and cover them with plain paper before drawing. If you make a mistake, turn the tile into a “messy” one and place it in the center where your eye won’t catch it first. These tiles feel satisfying because the lines build up fast, and the end result looks tidy. They also pair well with other paper projects in this list—use them as backgrounds for bookmarks, envelope liners, or small frames.
9) Origami Photo Corner Frames
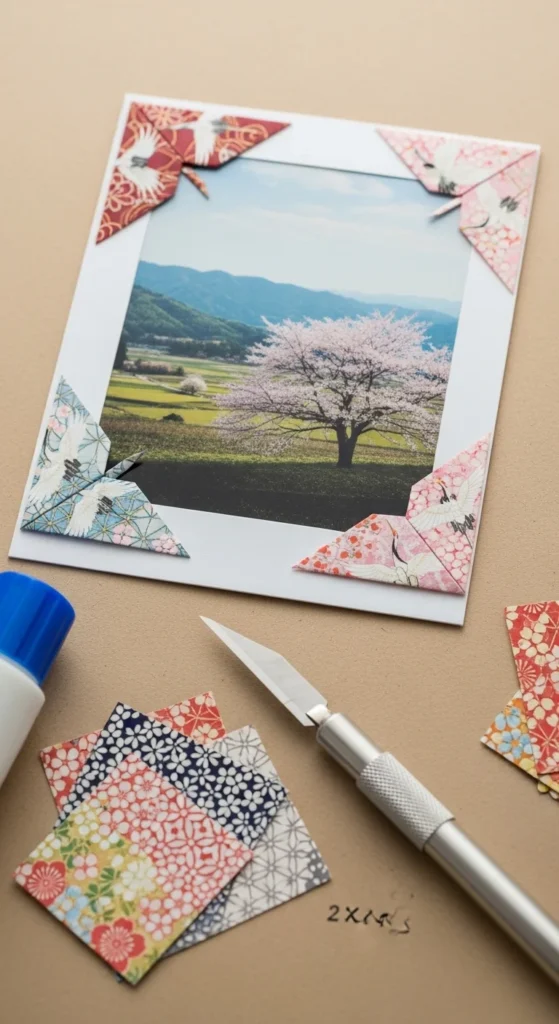
Photo corners are a neat way to display prints without heavy frames. Fold small squares into triangle corners, then slide them onto the corners of a photo or postcard. You can glue the corners to a backing sheet and let the photo sit inside them, so you can swap it later. Choose paper that contrasts with your photo so the corners show clearly. If you’re printing photos at home, try a small collage sheet and mount it on a larger kraft page for a scrapbook-style look. For extra strength, use slightly thicker paper or double up by gluing two squares together before folding. This is budget-friendly because it uses tiny pieces and still looks “designed.” You can also use these corners to hold recipe cards, notes, or small art prints on a pinboard. Make a set of 12 corners and store them in an envelope so you can frame things quickly all week. The corners are also a great place to use bold patterns you normally avoid on bigger projects.
10) Chiyogami Gift Bow (Folded Paper Ribbon)
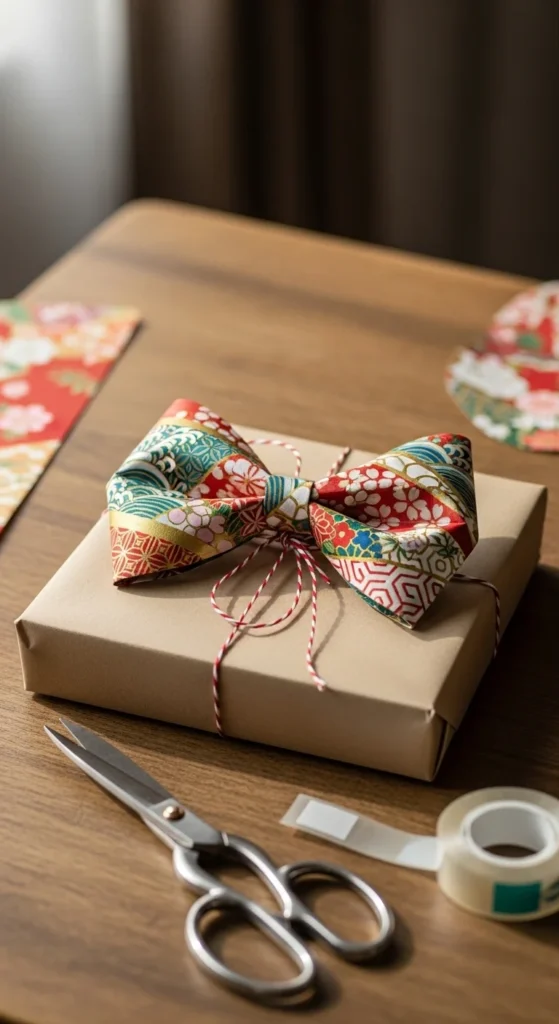
A paper bow is a great way to make simple wrapping look special. Use patterned paper for the bow and plain kraft paper for the gift wrap so the bow stands out. Fold strips into loops, pinch the center, and secure with glue or a small paper band. If you want it sturdier, use double-sided tape inside the loops. For small gifts like soap, candles, or cookies, scale the bow down so it doesn’t overpower the package. If you don’t have gift boxes, wrap a small item in tissue and tie the bow directly around it with string. To keep the bow from flattening, store finished bows in a shallow box. You can also pre-make a few and keep them ready for quick gifting. This project is perfect for using chiyogami-style prints that feel “too loud” for bigger crafts. Because the bow is small, it reads as cheerful, not busy. Add a tiny tag cut from scrap cardstock for the final touch.
11) Origami Accordion Fold Mini Album
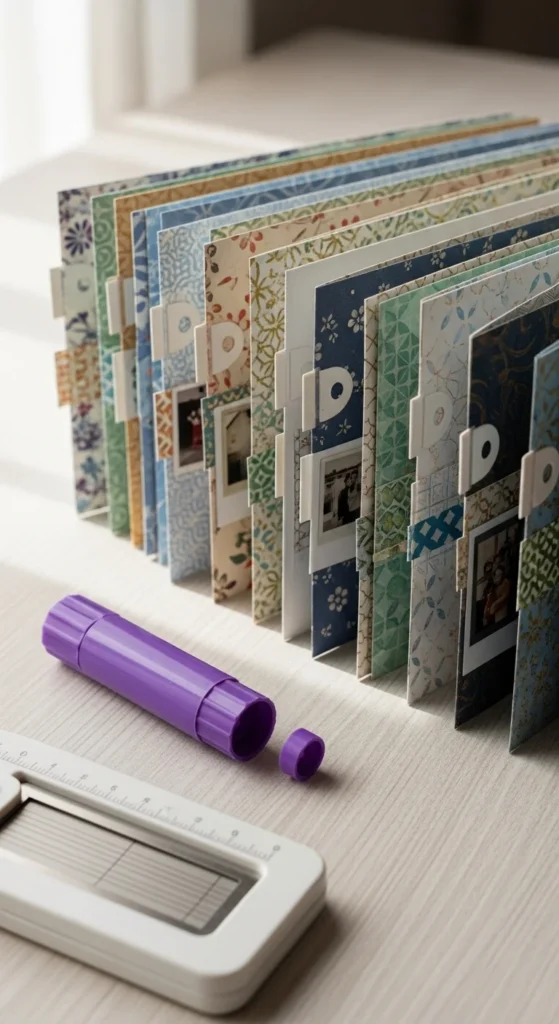
An accordion mini album is easy to make and fun to fill. Cut a long strip of paper and fold it back and forth into even panels. Use thicker paper for the base so it holds shape. Then add covers using cardboard wrapped in washi paper. Inside, you can attach small photos, ticket stubs, or tiny sketches. Keep it low-cost by printing photos in wallet size or using trimmed phone prints. If you want a clean look, use one pattern for the base and one pattern for accents. Add photo corners or washi strips to hold items without heavy glue. This is a great “try this week” project because you can build the album in one session, then fill it over several days. Use it as a weekly memory book, a travel mini, or a gift for a friend. If you make a mistake on a panel, cover it with a patterned square and call it a feature. Small albums are forgiving, and the finished piece feels personal without taking much time.
12) Paper Fan Wall Accent (Sensu-Inspired)
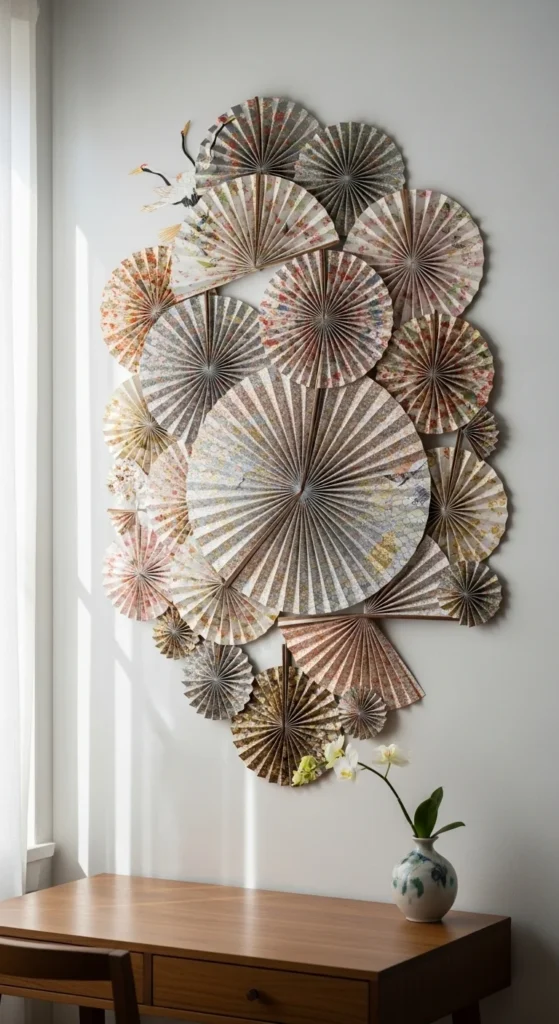
Paper fans look dramatic on a wall, but they’re simple once you learn the accordion fold. Fold a sheet back and forth, pinch the base, and secure with glue or a small staple hidden under a paper wrap. Make three fans in different sizes and cluster them together. For a calmer look, stick to a tight palette like cream, indigo, and one soft floral. If you only have plain paper, add pattern with a marker border or light paint wash before folding. Use removable wall hooks or sticky putty so you don’t damage paint. Fans also work as party decor, photo backdrops, or shelf accents. A budget trick is to use large scrapbook paper or even brown kraft paper and decorate it with washi strips. If the fan won’t stay open, add a small hidden strip of tape on the back side to lock the circle shape. Make one fan per day this week and you’ll have a full wall cluster without feeling like a big project.
13) Origami Shuriken (Star Throwing Shape) Desk Scatter
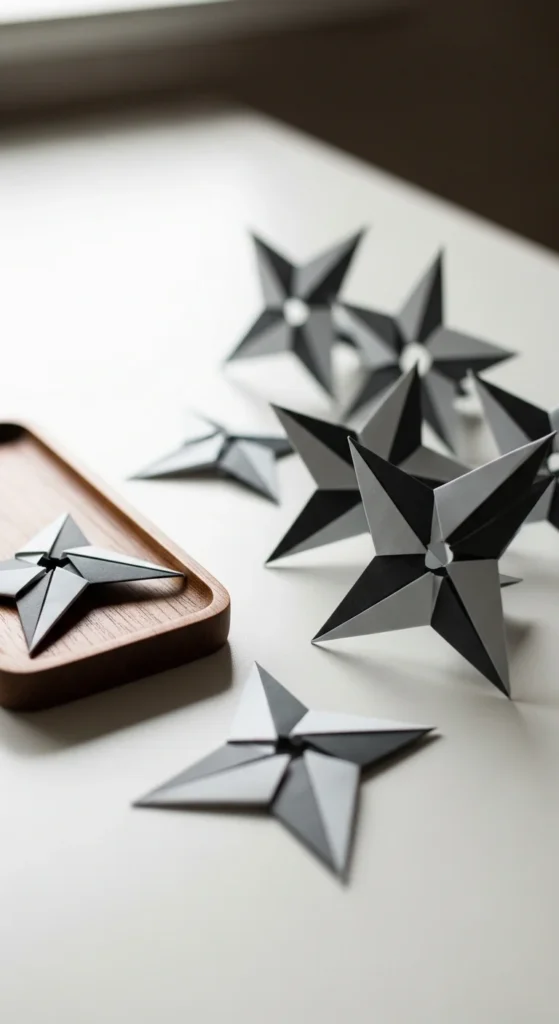
Origami shuriken are quick, satisfying, and great for using small paper squares. They also make cute “desk scatter” decor in a bowl or tray. Each star uses two squares, so it’s perfect for mixing patterns—pair a bold print with a solid color. If you’re new to folding, this one teaches clean alignment because the pieces lock together. Make a small batch, then store them in a dish by your keys or on a shelf. For gifting, add a few into a tiny envelope made from scrap paper. If you want them to feel more like decor and less like toys, use muted colors and keep the shapes crisp. You can also attach one to a gift tag as a little extra detail. A practical tip is to fold on a hard surface and press edges with a ruler for sharper lines. If the points look uneven, rotate the finished star until the best side faces up. This is a good “five minutes here and there” project for a busy week.
14) Washi Paper Envelope Set (Handmade Look)
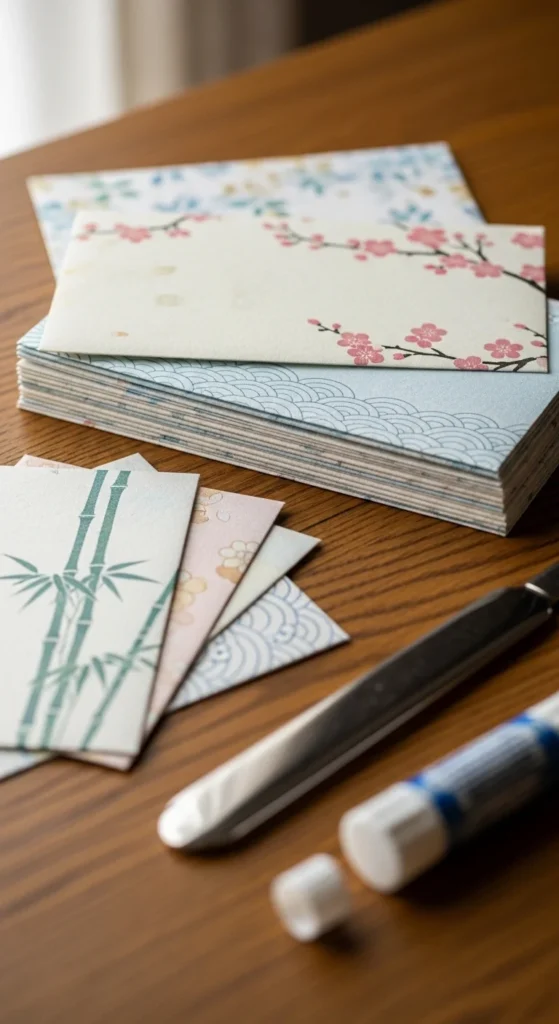
Handmade envelopes make any note feel special. Use a simple envelope template (trace an existing envelope onto paper) and cut it out. If your washi paper is thin, back it with a light sheet of plain paper using a glue stick so it feels sturdy. Fold along the lines and press creases well. Seal the bottom flaps with glue, then add a small washi strip as a closure detail. Pair the envelopes with plain note cards so the pattern stays the star. If you don’t have a printer for templates, draw one by hand with a ruler. Small imperfections still look charming because it’s clearly handmade. Make a set of five so you can write quick notes during the week. These envelopes also work for holding small items like stickers, seeds, or tiny craft parts. Keep them flat under a book while the glue dries to avoid warping. If you want a “Japanese stationery” feel, stick to soft florals, simple geometrics, and lots of breathing room.
15) Paper Hanko-Style Stamp Pattern Tags (DIY Stamp Look)
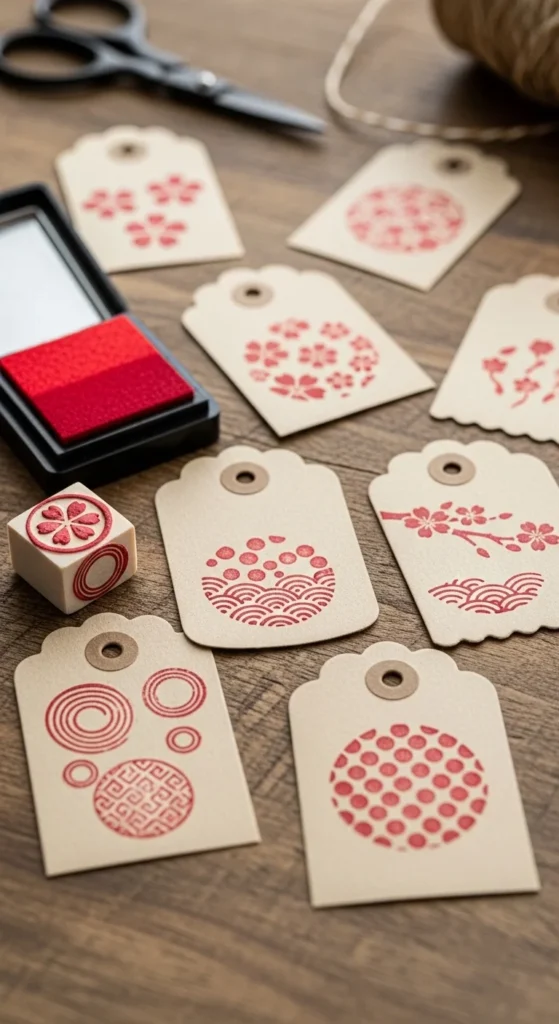
If you like the look of Japanese hanko stamps, you can make a paper tag set with a simple DIY stamp. Carve a tiny motif into an eraser (a circle, flower, or simple mark), then stamp it in red ink onto plain tags. Keep it minimal so it looks clean. If you don’t want to carve, use the end of a pencil eraser to stamp dots into a circle pattern. Cut tags from cardstock scraps, punch a hole, and add twine. These tags make gifts look thoughtful without extra spending. Try stamping in a repeat pattern down one side, leaving blank space for names. Use a scrap sheet under your work so ink doesn’t transfer. If your ink smudges, let tags dry for a few minutes, then stack them. Make a small bundle and keep it in a drawer so you’re ready for quick gifting. This project is perfect when you want something “Japanese-inspired” without complex folding. It’s also easy to do with kids or friends.
16) Origami Leaf Wreath (Seasonal Table Decor)
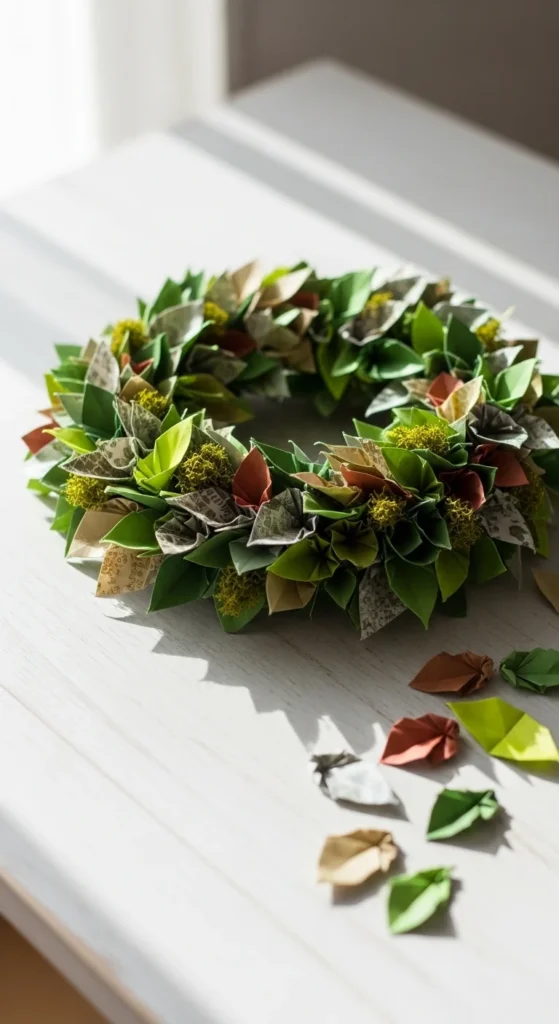
A paper leaf wreath adds seasonal charm without buying decor. Fold a bunch of simple origami leaves, then glue them onto a cardboard ring. Use greens for a spring look, warm browns for autumn, or mixed neutrals for year-round style. If you’re short on supplies, cut the ring from a cereal box and cover it with plain paper before attaching leaves. The wreath can sit flat as a table center, hang on a wall, or decorate a gift bag. A trick for a fuller look is to vary leaf sizes. Use small leaves to fill gaps and larger leaves for the main shape. If you want a cleaner design, pick two shades and repeat them. Add a simple twine loop for hanging. This project also breaks nicely into short sessions: fold leaves whenever you have time, then assemble at the end of the week. Even if the leaves aren’t perfect, the layered effect makes it look intentional. It’s a great way to practice folds and end up with something you’ll actually display.
17) Washi-Layered Paper Coasters (Sealed)
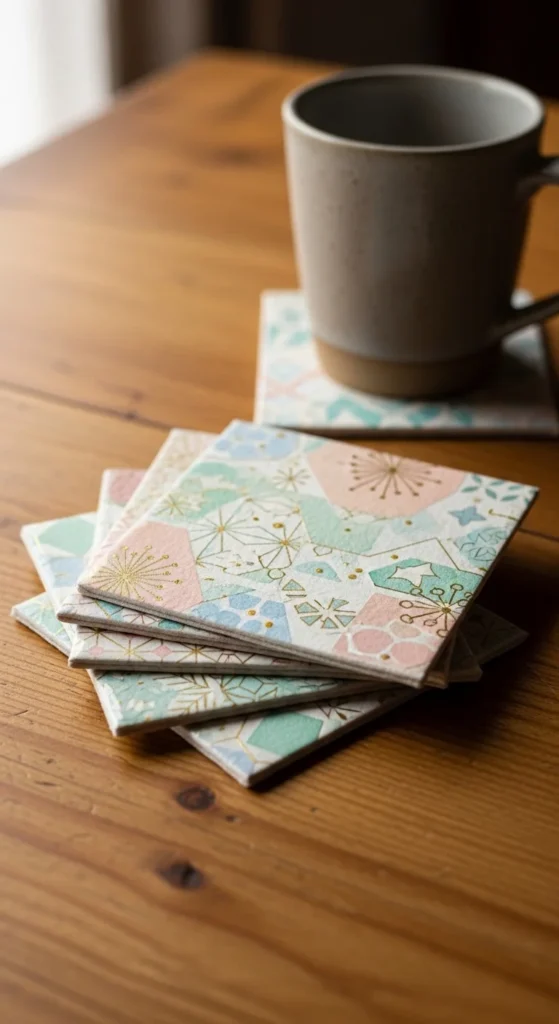
Paper coasters can work if you seal them well and treat them like “light-use” pieces. Cut circles or squares from thick cardboard, then cover the top with washi paper. Wrap the edges neatly to the back and glue them down. Seal the top with clear packing tape or a thin brush-on glue-water coat, letting it dry fully. If you want extra strength, add a second layer of sealant. Choose patterns that look good in sets, like one floral and one geometric, all in the same color family. These coasters are great for mugs, small plants, or candles (battery candles are best near paper crafts). You can also use them as small trays for jewelry or keys. A budget trick is to use packaging cardboard and cover it completely so it looks clean. Keep your sealant smooth so the surface wipes easily. Make four coasters and tie them with twine for a simple handmade gift. They’re quick, useful, and a fun way to use favorite washi designs without committing to a big project.
18) Origami Tato Box (Tiny Storage Box)

A small origami box is perfect for holding paper clips, beads, or little scrap pieces. Make the base and lid from two squares, with the lid slightly larger. If your lid is too tight, use thinner paper or adjust your fold size by a few millimeters. These boxes look best when you use paper with a pattern outside and a solid inside. If your paper is only patterned on one side, choose the outside pattern you want showing and fold carefully. Keep a few boxes on your desk to stop tiny clutter from spreading. This is also an easy gift idea: make a box, fill it with candy or a tiny note, and wrap it with string. If you’re practicing, use cheap paper first, then make your final box with nicer washi or chiyogami paper. Press all folds flat so the box corners sit crisp. Once you learn one box style, you’ll keep making them because they’re so handy.
19) Paper Koinobori (Carp Streamer) Mini Hanging Decor
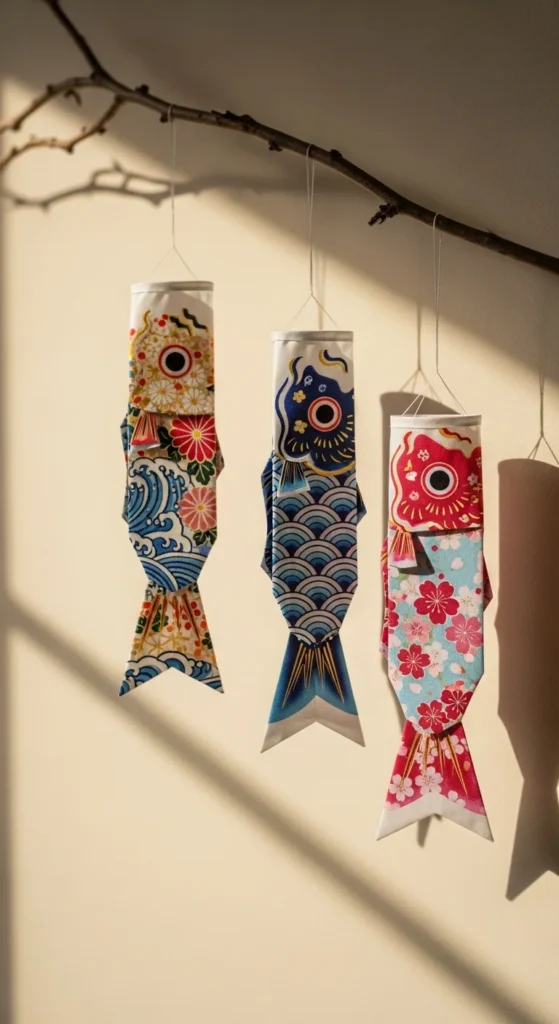
Mini koinobori streamers make cheerful hanging decor and are easy to customize. Cut a rectangle of paper, roll it into a tube, and glue the edge. Pinch one end slightly to shape the “tail,” and add small cut fins if you want. Use a hole punch at the top and thread them onto string. If you don’t want cutting details, let the pattern do the work—choose paper with waves, scales, or bold geometrics. Hang them from a small branch, a hoop, or a simple dowel. This project is great for using longer scraps that don’t fit other folds. Keep it budget-friendly by using gift wrap or magazine pages and backing them with plain paper for strength. Make three to five carp in matching colors so it looks like a set. They’re light, so even basic tape can hold the hanger. If you want a calmer look, use muted colors and keep the shapes simple. A little cluster near a window looks especially nice when it moves slightly with air.
20) Washi Paper Patchwork Wall Print (Framed Look)
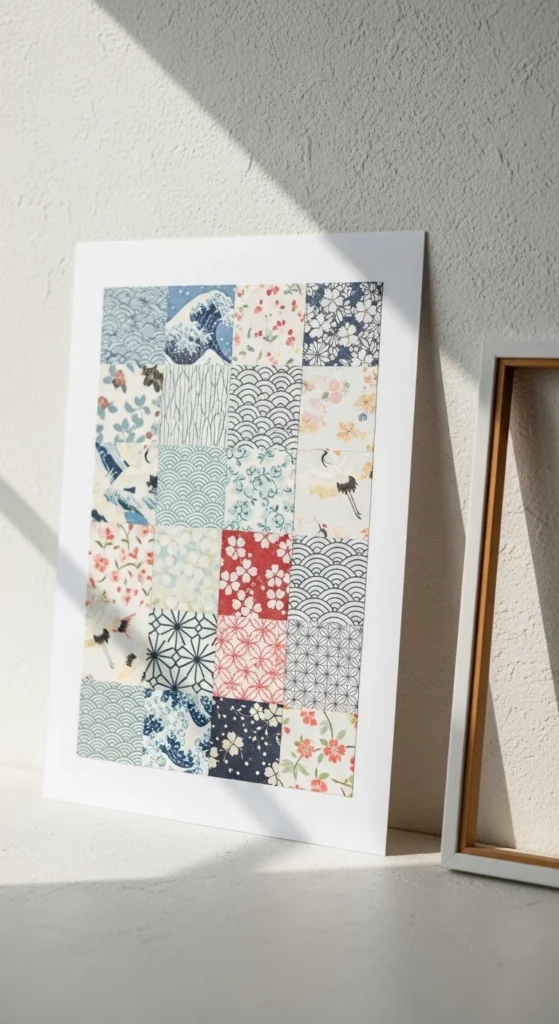
A patchwork wall print is an easy way to make paper art that looks clean. Cut small squares of washi paper and arrange them in a grid on white cardstock. Keep spacing consistent and align edges using a ruler. Pick a color theme—like blues and creams—or a seasonal mix. Glue each square down one by one, smoothing as you go. If you don’t have washi sheets, cut squares from patterned paper and add a thin border line with a pen to unify the look. This craft is budget-friendly because you can use scraps and still get a polished result. Once dry, slide it into a simple frame or hang it with clips. Make it small for a desk corner or larger for a blank wall spot. A smart trick is to lay everything out first, take a quick photo, then glue so you don’t forget your layout. If any square looks “too loud,” swap it with a calmer one. The finished piece gives you Japanese pattern vibes without advanced folding.
21) Origami Cherry Blossom Branch (Paper Flowers on Twigs)
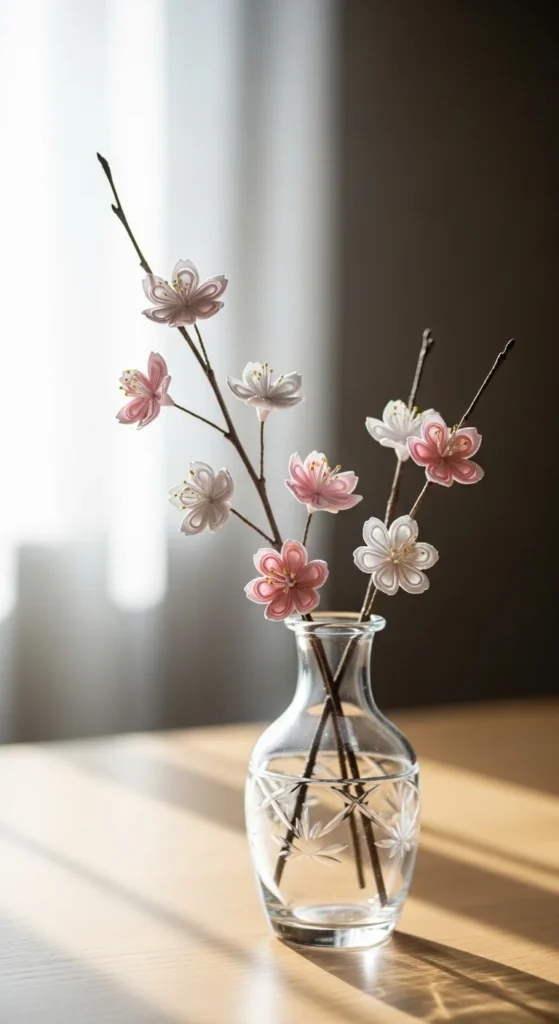
Paper blossoms on twigs make a simple centerpiece that lasts. Use thin twigs from outside (clean and dry), then fold small blossoms from light paper. Attach them with glue dots or a tiny dab of glue. For a soft sakura feel, use pale pink, white, and a touch of light green for leaves. If you’re short on origami paper, cut small squares from plain paper and lightly tint edges with watercolor or marker. Keep the blossoms small so the branch looks airy, not heavy. Place the twigs in a jar with stones or rice to hold them upright. This decor works on a desk, entry table, or shelf. It’s also a great “week project” because you can fold flowers in short sessions and add them whenever you have time. If you want it to look more natural, vary flower sizes and space them unevenly. Even a handful of blossoms makes the branch look special. And if a flower looks messy, tuck it toward the back where it becomes part of the cluster.
22) Paper Mizuhiki-Inspired Knot Gift Wrap (Paper Strips)
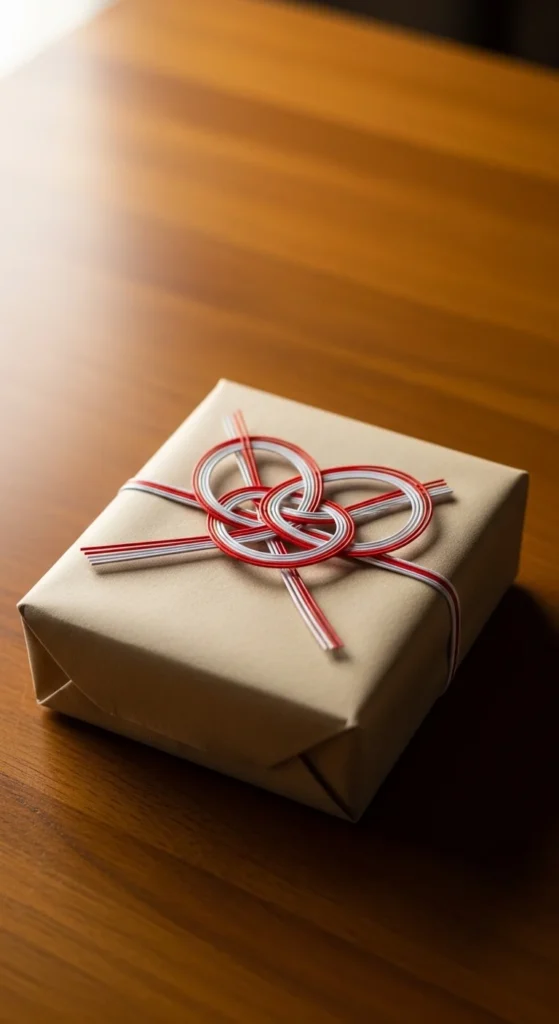
Mizuhiki knots are traditionally made with special cord, but you can capture the look using twisted paper strips. Cut long thin strips, twist them gently, and shape a simple knot on top of a wrapped gift. Secure the back with tape or glue. Use red and white for a classic look, or try gold and cream for a softer vibe. If your paper tears, switch to slightly thicker paper or reinforce the strip with a thin layer of glue and let it dry before twisting. This is a great way to decorate small gifts like cookies, candles, or stationery. Keep the wrap plain so the knot stands out. If you’re making multiple gifts, prepare a handful of twisted strips ahead of time and store them flat. You can also add a small folded paper accent, like a tiny crane or leaf, next to the knot. This project feels special without extra spending. It’s also a fun alternative to plastic ribbon. And once you practice one knot shape, you can repeat it quickly all week.
23) Origami Paper “Washi” Bead Bracelet
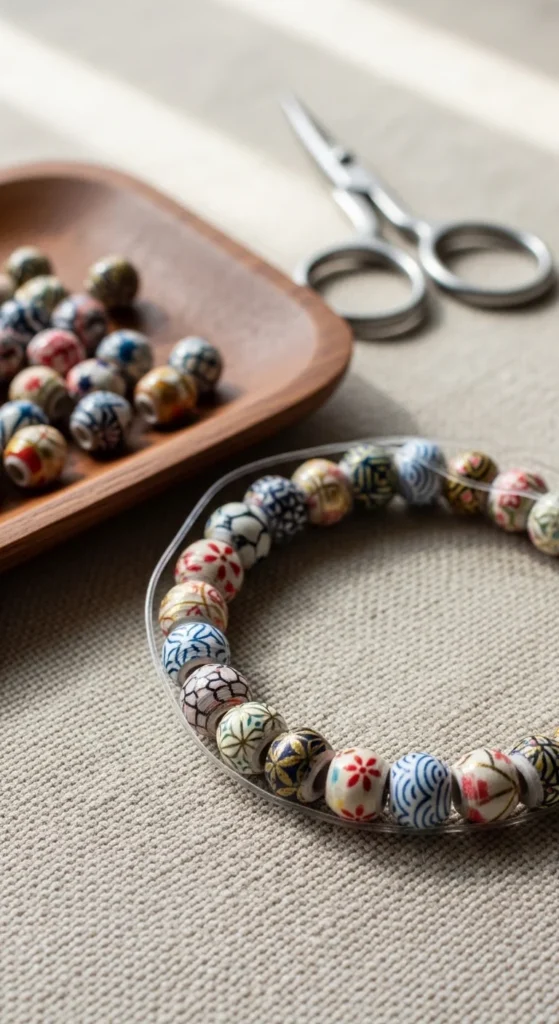
Paper bead jewelry is surprisingly fun and uses scraps well. Cut long triangle strips from patterned paper, then roll each strip tightly around a toothpick, gluing the end to seal it. Slide the bead off, let it dry, then seal it with clear glue or a thin brush-on coat so it holds up better. String beads on elastic cord for a simple bracelet. For a Japanese look, use paper with wave patterns, tiny florals, or indigo prints. Mix in a few plain beads if you have them, but paper-only still looks cute. Keep your beads consistent by cutting strips the same size. If you want larger beads, use wider strips. This craft is budget-friendly because it turns leftovers into something wearable. Make a bracelet for yourself and one for a friend in the same color theme. If you’re worried about durability, make it a “craft bracelet” for photos or light wear. Store it in a small origami box from earlier in this list and you’ve got a full handmade set.
Conclusion
If you want a creative week without spending much, Japanese-inspired paper crafts are a perfect choice. You can fold something small in minutes, or build a bigger piece across a few evenings. Try one project for quick joy, then repeat your favorite style with new colors and patterns. By the end of the week, you’ll have handmade decor, gifts, and a calmer craft routine you can return to anytime.

Lily Summers is a digital artist and creative storyteller who loves bringing colorful characters to life. With a passion for cartoons, fan art, and playful sketches, she inspires others to explore their imagination through art. When she’s not sketching, you’ll find her dreaming up new ideas for CraftedWizard.com to spark creativity in every artist. 🌈✨