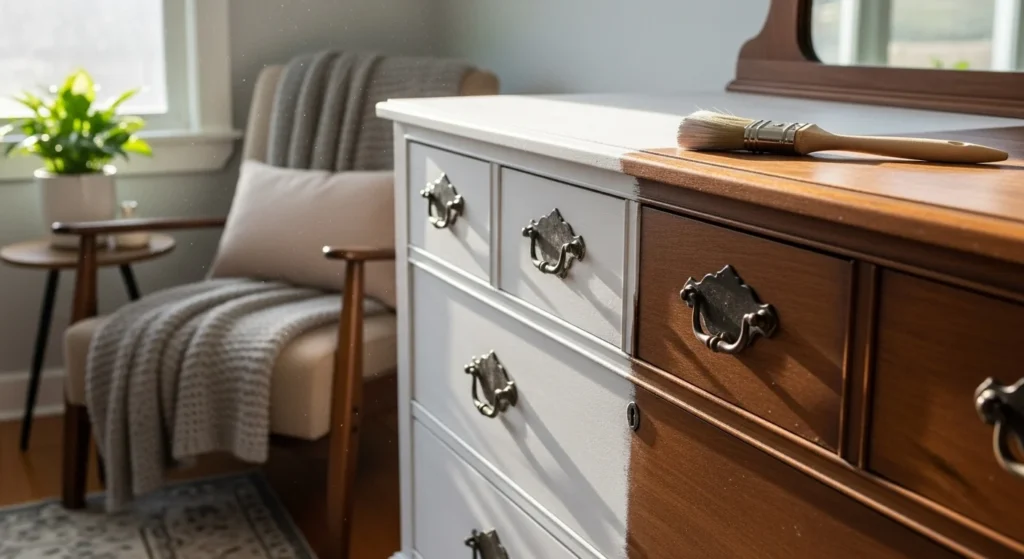
There’s something deeply satisfying about taking a tired, forgotten piece of furniture and giving it a whole new life. Chalk paint makes that transformation easy—even if you’ve never picked up a paintbrush before. No heavy sanding. No complicated prep. Just instant charm and visible results.
Chalk paint has become a Pinterest favorite for a reason. It’s forgiving, beginner-friendly, and perfect for creating everything from farmhouse charm to modern matte finishes. Let’s walk through the process step by step so you can confidently refresh your own furniture at home.
Why Chalk Paint Is Perfect for Furniture Makeovers
Chalk paint is different from regular paint. It has a matte, velvety finish and sticks to most surfaces without primer.
Here’s why people love it:
- Works on wood, laminate, metal, and even glass
- Minimal prep required
- Dries quickly
- Easy to distress for a vintage look
- Creates a soft, high-end finish
If you’re short on time or patience, chalk paint is your best friend.
What You’ll Need Before You Start
Before you dive in, gather your supplies. Keeping everything ready makes the process smooth and enjoyable.
You’ll need:
- Chalk paint (any color you love)
- A good-quality paintbrush or small roller
- Clean cloth or paper towels
- Mild soap and water
- Clear or dark wax (optional but recommended)
- Sandpaper (medium and fine grit)
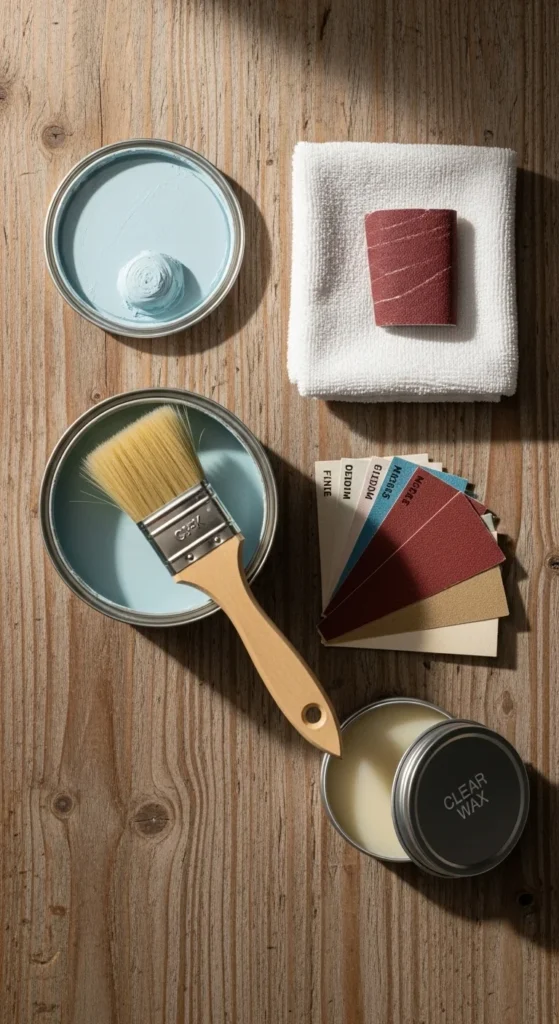
Tip: Natural bristle brushes work beautifully with chalk paint and help avoid streaks
Step 1: Clean and Lightly Prep the Furniture
Even though chalk paint doesn’t need sanding, cleaning is essential.
Start by:
- Removing dust and grime with soap and water
- Wiping the surface dry completely
- Lightly sanding rough spots or peeling finishes
You don’t need to strip old paint or stain. Just make sure the surface is clean and smooth to the touch.
This step ensures the paint sticks evenly and lasts longer.
Step 2: Apply Your First Coat of Chalk Paint
Now comes the fun part.
Dip your brush lightly into the paint and apply in long, smooth strokes. Don’t overwork it—chalk paint likes to settle naturally.
Helpful tips:
- Paint in the direction of the wood grain
- Thin coats are better than thick ones
- Don’t panic if brush strokes show—they add character
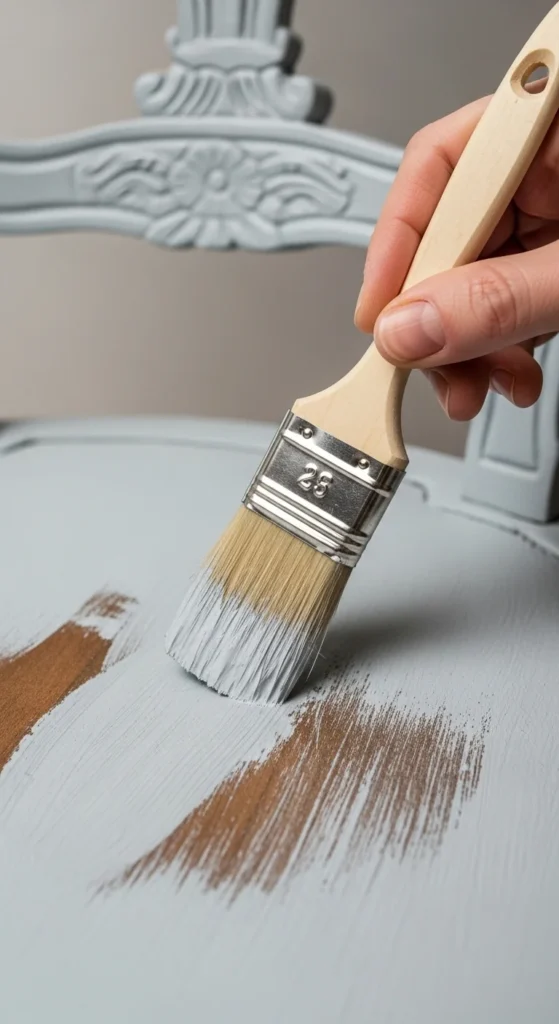
Let the first coat dry completely. This usually takes 30–45 minutes.
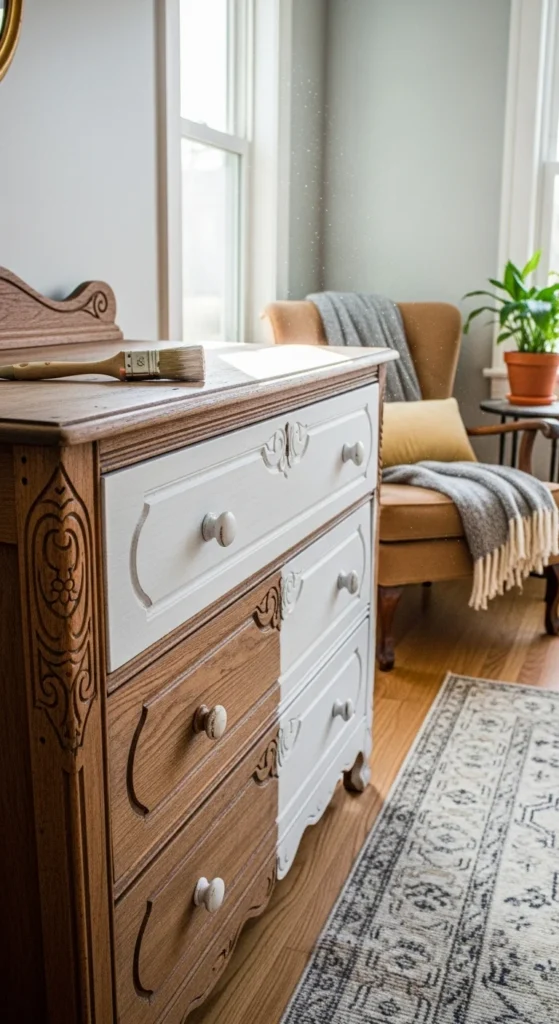
Step 3: Add a Second Coat for Coverage
Most furniture pieces need two coats for full, even coverage.
Once the first layer is dry:
- Apply a second coat the same way
- Touch up corners and edges
- Let the paint cure for at least an hour
At this stage, your piece already looks dramatically different. But we’re not done yet.
Step 4: Optional Distressing for a Vintage Look
If you love that aged, farmhouse style, distressing is where the magic happens.
Use fine-grit sandpaper to gently rub:
- Edges
- Corners
- Raised details
Go slowly. A little distressing goes a long way.
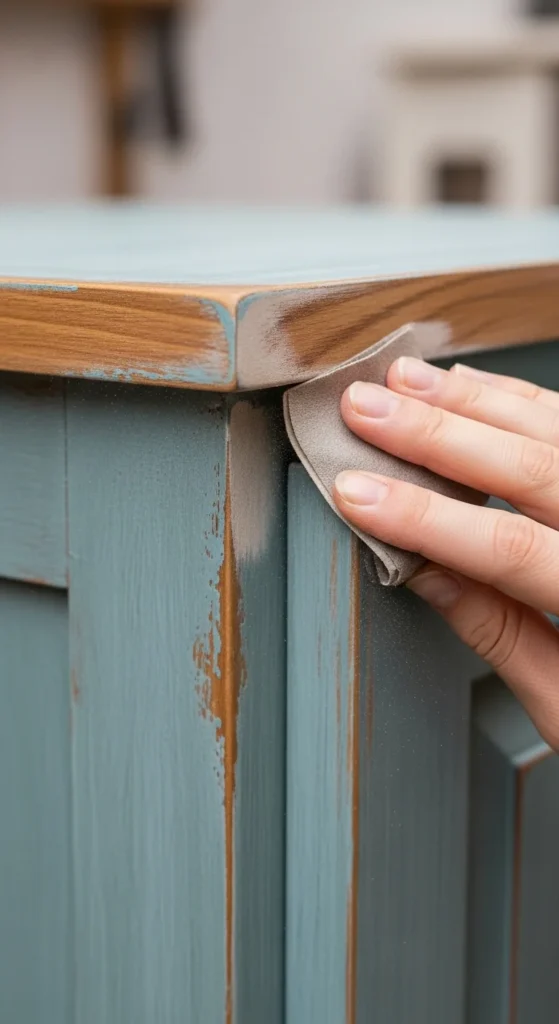
If you prefer a clean, modern look, you can skip this step entirely.
Step 5: Seal and Protect Your Finish
Chalk paint needs sealing to stay durable, especially on furniture that gets daily use.
You have two main options:
- Clear wax for a soft, natural finish
- Dark wax to add depth and antique character
Apply wax with a cloth or brush, working it into the paint. Buff gently after a few minutes.
This final step locks in your hard work and gives the piece a professional look.
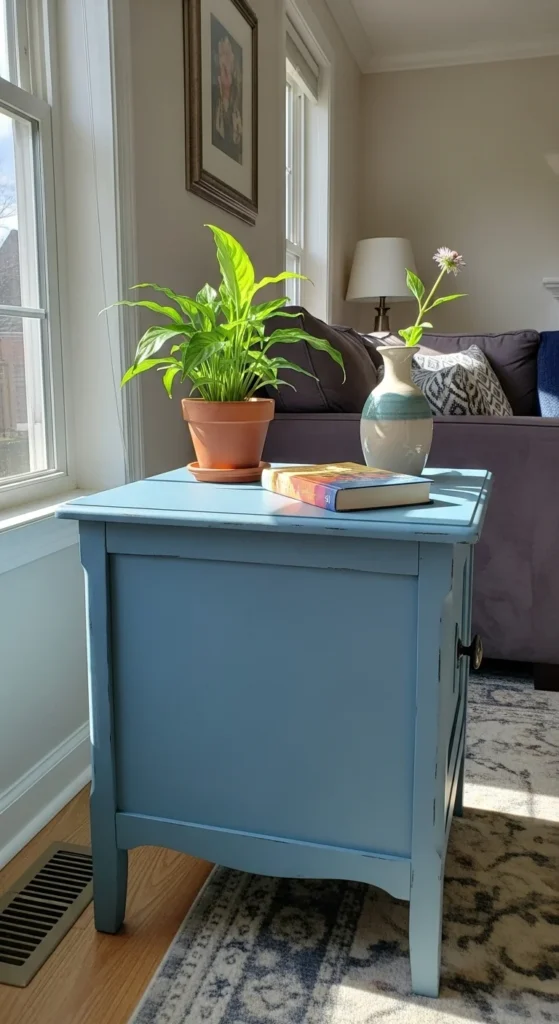
Styling and Enjoying Your Transformed Piece
Once sealed, your furniture is ready to use within 24 hours.
Style it with:
- Neutral décor for a calm look
- Bold accents for contrast
- Natural textures like baskets or greenery
The best part? Every chalk-painted piece has its own personality. No two finishes ever look exactly the same.
Final Takeaway
Chalk paint turns furniture makeovers from intimidating to completely doable. With minimal tools and a little creativity, you can refresh almost any piece in a single weekend.
If you’ve been waiting for a sign to start your next DIY project—this is it.
Save this guide for later and start transforming your furniture today.

Lily Summers is a digital artist and creative storyteller who loves bringing colorful characters to life. With a passion for cartoons, fan art, and playful sketches, she inspires others to explore their imagination through art. When she’s not sketching, you’ll find her dreaming up new ideas for CraftedWizard.com to spark creativity in every artist. 🌈✨