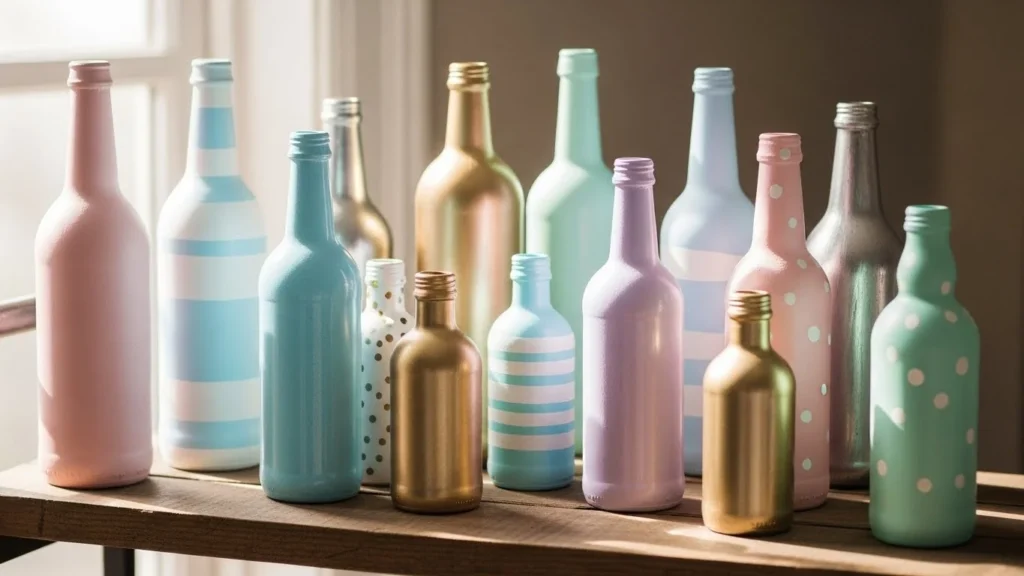
Old glass bottles are everywhere on kitchen shelves, in recycling bins, or tucked away after a special drink. What if those simple bottles could become beautiful home décor pieces? With a little paint and creativity, glass bottles can turn into elegant vases, cozy lanterns, or statement accents that instantly elevate your space. This is one of those DIY projects that looks expensive but is surprisingly easy and very satisfying.
Whether you’re decorating on a budget, love upcycling, or want to add a handmade touch to your home, painting glass bottles is a perfect place to start.
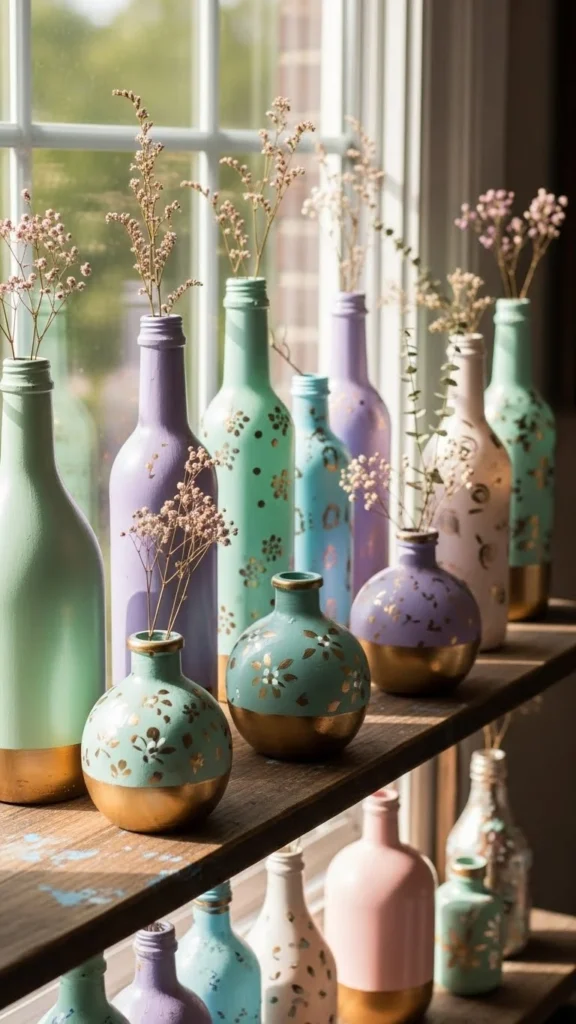
Choose the Right Glass Bottles
Not all bottles create the same visual impact. The shape, size, and texture matter more than you might think.
Look for:
- Wine bottles for tall vases or floor décor
- Small soda or juice bottles for tabletop accents
- Clear bottles if you want translucent effects
- Textured or embossed bottles for a vintage look
Before painting, remove labels by soaking bottles in warm water with dish soap. Sticky residue can be removed with cooking oil or rubbing alcohol.
Make sure the bottles are completely dry before moving on.
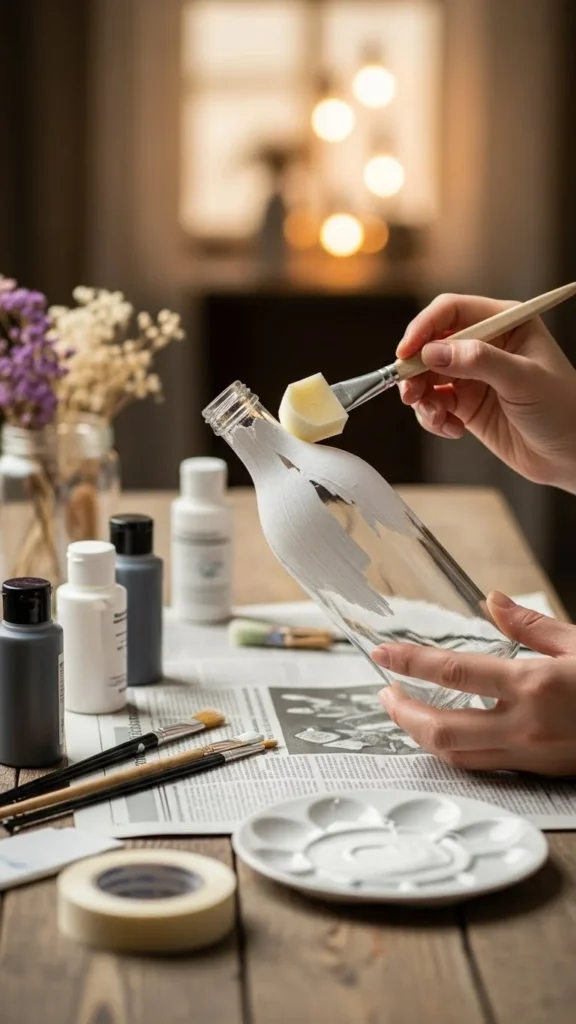
Gather Your Painting Supplies
You don’t need fancy tools to get beautiful results. Most supplies are affordable and easy to find.
Basic supplies:
- Glass bottles (clean and dry)
- Acrylic paint or glass paint
- Paintbrushes or sponge brushes
- Primer or gesso (optional, but helpful)
- Rubbing alcohol or vinegar
- Old newspaper or drop cloth
Optional extras:
- Metallic paint for a luxe finish
- Chalk paint for a matte, farmhouse look
- Spray paint for smooth, modern coverage
- Clear sealant for durability

Prep the Bottles for Best Results
Preparation is the secret to paint that actually sticks to glass.
Follow these steps:
- Wipe each bottle with rubbing alcohol or vinegar to remove oils.
- Let the surface air dry completely.
- Apply a thin layer of primer if using acrylic paint (optional but recommended).
Skipping prep can cause paint to peel or streak, so don’t rush this part.
Paint Your Glass Bottles Like a Pro
Now comes the fun part painting.
There are a few popular techniques, depending on the look you want:
Solid color finish
- Apply thin coats instead of one thick layer
- Let each coat dry before adding the next
- Use sponge brushes for fewer brush marks
Frosted or translucent look
- Mix a little water into acrylic paint
- Apply lightly and evenly
- This works beautifully with light colors
Textured or artistic designs
- Dab paint with a sponge for a rustic feel
- Use stencils for patterns
- Try color blocking for a modern style
Allow the bottles to dry fully—usually 1–2 hours between coats.
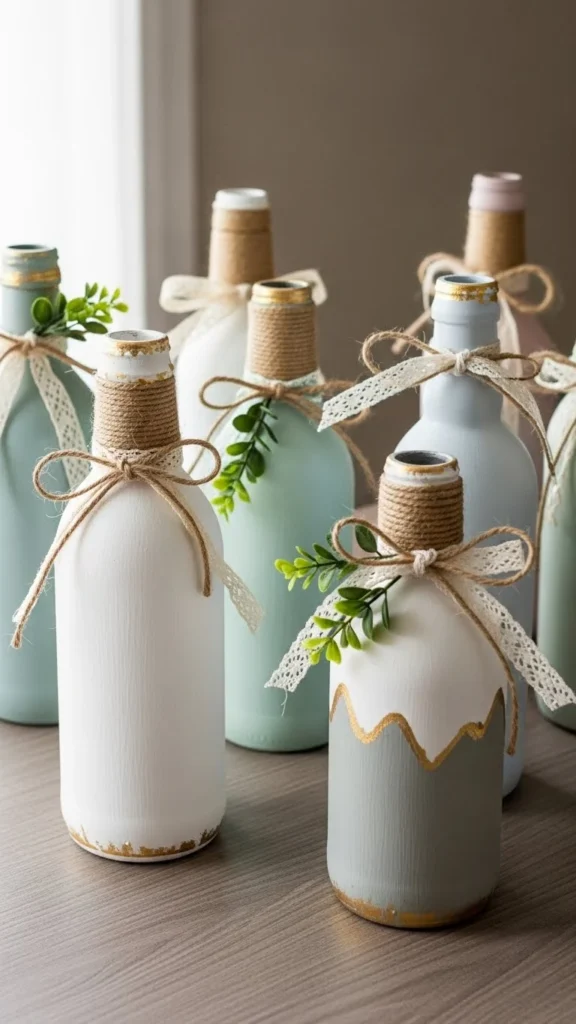
Add Decorative Details (Optional but Stunning)
Once the base paint is dry, you can take your bottles to the next level.
Easy decoration ideas:
- Wrap twine or jute around the neck
- Tie on lace, ribbon, or faux greenery
- Use gold or silver paint for light accents
- Lightly sand edges for a distressed look
These small details make painted bottles feel intentional and styled rather than “just painted.”
Seal and Protect Your Finished Bottles
Sealing helps protect your work, especially if the bottles will be handled often.
Use:
- Clear acrylic spray sealant for most finishes
- Matte sealant for chalk-painted bottles
- Gloss sealant for a shiny, ceramic-like look
Spray in light, even coats and let dry fully before decorating or displaying.
Style Painted Bottles Around Your Home
Painted glass bottles are incredibly versatile.
Try these ideas:
- Use tall bottles as floor décor near a fireplace
- Group small bottles as a dining table centerpiece
- Add fairy lights inside for soft evening glow
- Display on open shelves or window sills
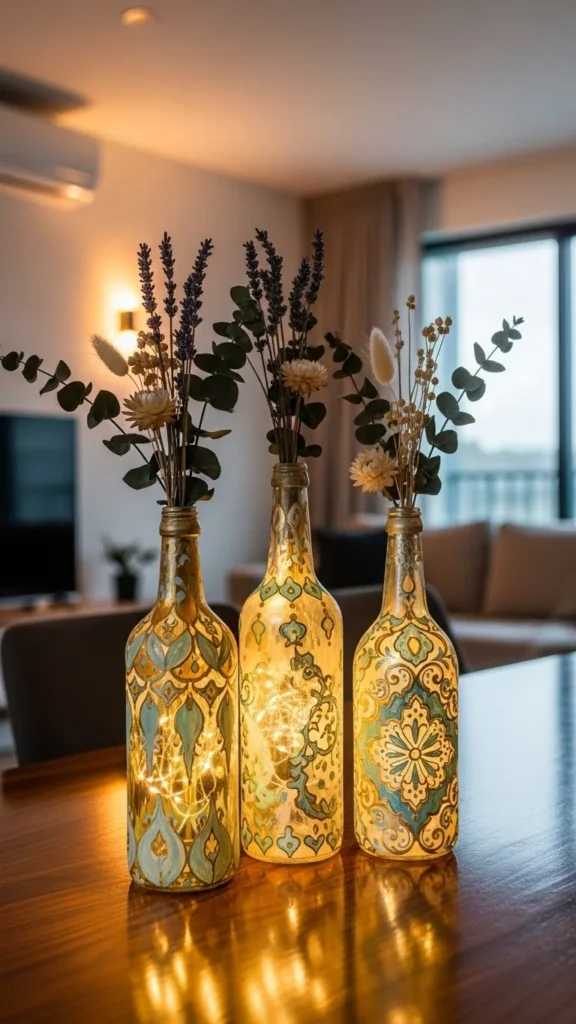
Mix different heights and colors for a collected, designer feel.
Final Thoughts
Painting glass bottles is one of those DIY projects that proves beautiful home décor doesn’t need to be expensive or complicated. With simple supplies and a little creativity, you can turn everyday items into custom pieces that reflect your style.
Experiment with colors. Try different finishes. Most importantly, enjoy the process.

Lily Summers is a digital artist and creative storyteller who loves bringing colorful characters to life. With a passion for cartoons, fan art, and playful sketches, she inspires others to explore their imagination through art. When she’s not sketching, you’ll find her dreaming up new ideas for CraftedWizard.com to spark creativity in every artist. 🌈✨