
There’s something instantly calming about wind chimes—the gentle clink, the soft sway, the little reminder to slow down. And the best part? You don’t need a fancy store-bought set to get that peaceful sound. With a few recycled items you probably already have, you can make wind chimes that look beautiful, sound soothing, and feel extra satisfying because they’re zero-waste.
Choose Your “Sound Style” (Because Materials Matter)
Not all wind chimes sound the same. Before you build, decide what kind of vibe you want.
Common sound styles
- Soft + wooden: warm, gentle clicks (best for quiet spaces)
- Bright + bell-like: clear, higher-pitched tones (more noticeable)
- Mixed + natural: a balanced, “handmade” sound (most forgiving)
Quick material sound guide
- Metal (spoons, keys, washers): brighter, more “chimey”
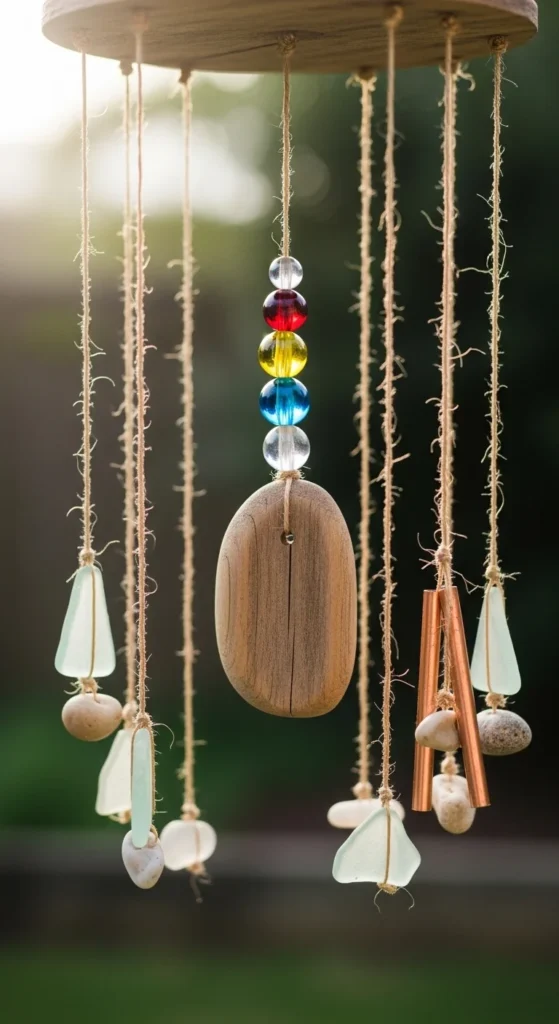
- Glass (bottle pieces, beads): light, delicate tinks (can be fragile)
- Wood (driftwood, sticks): soft taps, calming, low volume
- Ceramic (old beads, broken jewelry): mellow clinks
Tip: If you want the most soothing sound, aim for fewer pieces with space between them. Too many pieces can sound chaotic instead of calming.
Gather Recycled Materials (Simple, Safe, and Cute)
You can make this craft super budget-friendly by “shopping” your home first.
Great recycled chime pieces
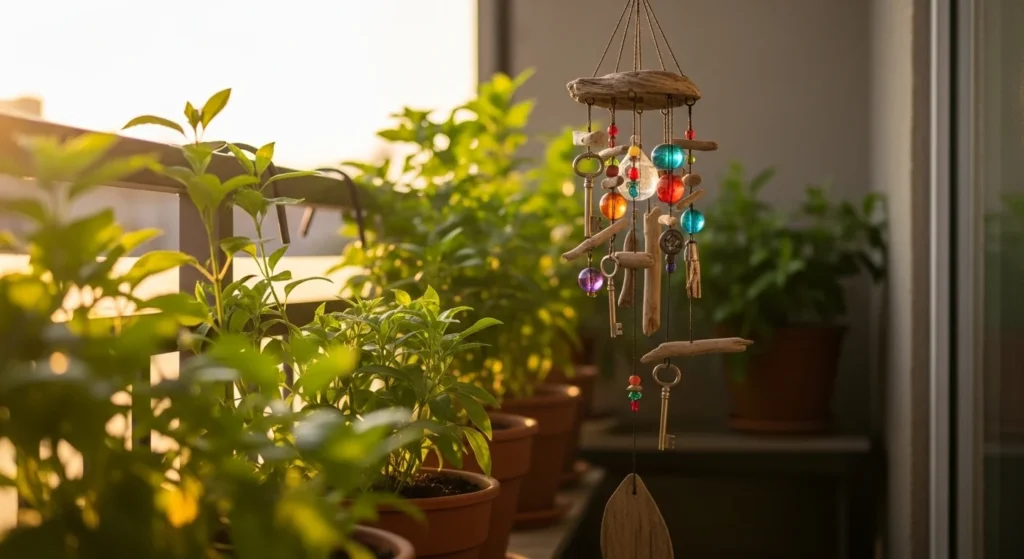
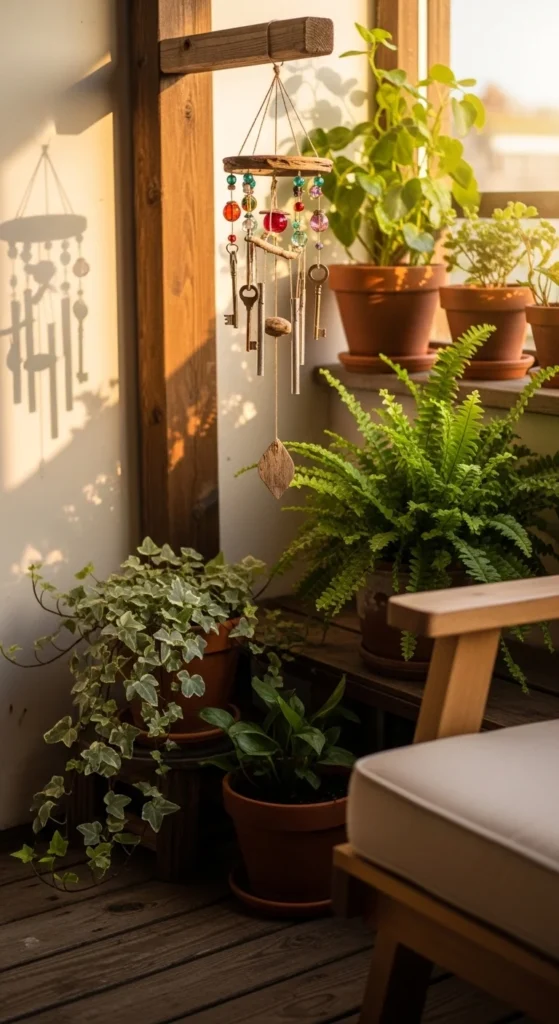
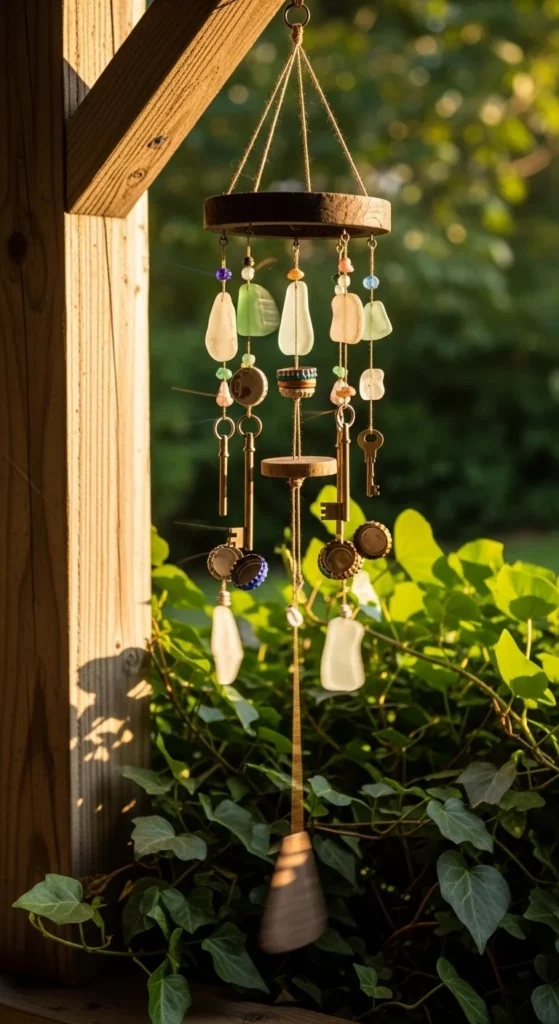
- Old keys
- Metal bottle caps (flattened edges if sharp)
- Old spoons or mismatched cutlery
- Washers, nuts, bolts
- Shells you already have
- Broken jewelry beads
- Small pieces of bamboo or wood scraps
Best recycled top hangers
- A sturdy stick, driftwood, or old wooden hanger
- A metal ring from an old lamp shade
- A jar lid (makes a cute base if reinforced)
- A small embroidery hoop
You’ll also need
- Strong string or fishing line
- Scissors
- Hot glue or strong craft glue (optional)
- A nail + hammer OR a small hand drill (for holes)
- Optional: paint, twine, ribbon, clear sealant

Step-by-Step: Build Your Wind Chimes
This is the easiest structure that looks clean and sounds great.
Step 1: Prep your hanging base
- Wipe it down (especially driftwood or a found stick).
- If you want, wrap part of it with twine for a cozy handmade look.
- Tie a strong hanging loop at the top center.
Step 2: Sort pieces by size and weight
Lay out your chime pieces and group them:
- light (beads, small caps)
- medium (keys, small spoons)
- heavier (larger spoons, thicker hardware)
This helps you balance the final chime so it hangs straight.
Step 3: Create 5–7 hanging strands
Cut strings in different lengths for a “waterfall” look. A good beginner set:
- 2 short strands
- 2 medium strands
- 1–3 longer strands
Step 4: Attach pieces to each strand
Tie one piece at a time using tight knots. If pieces have no holes, see the next section.
Tip: Leave 1–2 inches of space between pieces for a softer sound and cleaner look.

How to Add Holes to Recycled Items (Without Stress)
Some recycled pieces already have holes (keys, washers), but others don’t (caps, spoons). Here are safe, simple methods.
Bottle caps
- Use a nail and hammer to punch a hole (place cap on scrap wood).
- Sand or flatten sharp edges if needed.
Old spoons
- If the handle has a hole, perfect.
- If not, use a small drill bit and go slowly.
No-drill option
- Use wire wrapping: wrap thin craft wire tightly around the item and create a loop.
- Works great for smooth items like shells and thick beads.
Safety note: If anything has sharp edges, sand them lightly or skip that piece.
Make the Sound More “Soothing” (Not Noisy)
This is the difference between wind chimes that feel relaxing… and ones that sound like a junk drawer.
Sound-softening tips
- Use fewer metal pieces for a gentler tone.
- Add wood beads between metal items to soften collisions.
- Keep strands spaced out so they don’t clump.
- Mix in a few soft elements (wood, shells) for balance.
Placement matters too
- Hang in a spot with light airflow, not intense wind.
- If it’s too windy, it will clatter nonstop.
Add a Center “Wind Catcher” for Better Movement
A wind catcher is the piece that catches the breeze and makes everything move.
Easy recycled wind catcher ideas:
- A small flat piece of cardboard sealed with glue + wrapped in paper
- A shell cluster
- A flattened bottle cap cluster
- A small piece of driftwood hanging lower than the strands
Aim to hang it slightly lower than the lowest chime pieces so it pulls motion downward.
Decor Ideas That Still Look “Natural” and Minimal
You can decorate without making it look busy.
Pinterest-friendly finish ideas
- Wrap the top base in twine or neutral ribbon
- Paint bottle caps matte white, beige, or soft pastel
- Add a few wooden beads for warmth
- Seal driftwood with a clear matte sealant (optional)
Try to keep a simple palette: natural wood + metal + one accent color.
Hang It Up and Test the Sound
Before you commit to a final spot:
- Hang it temporarily outdoors.
- Listen for 1–2 minutes.
- If it’s too loud, remove one strand or add more spacing.
- If it’s too quiet, add one metal piece or move to a breezier spot.
Final Takeaway
Recycled wind chimes are one of those crafts that feel relaxing to make and relaxing to enjoy. Once you understand the basics of balanced strands, spaced pieces, and a simple wind catcher you can create endless versions with whatever you have at home.

Lily Summers is a digital artist and creative storyteller who loves bringing colorful characters to life. With a passion for cartoons, fan art, and playful sketches, she inspires others to explore their imagination through art. When she’s not sketching, you’ll find her dreaming up new ideas for CraftedWizard.com to spark creativity in every artist. 🌈✨


