There is something so satisfying about turning old newspapers into something pretty and useful. Instead of tossing yesterday’s pages into the recycling bin, you can roll, weave, and shape them into handmade storage baskets that look charming on shelves, desks, or craft tables. It is one of those DIY projects that feels both creative and practical, which makes it perfect for anyone who loves budget-friendly home organization.
The best part is that newspaper basket weaving looks far more impressive than it actually is. Once you learn the basic method, you can make baskets for small household items, stationery, makeup, craft supplies, or even pantry odds and ends.
Why Newspaper Baskets Are Such a Smart DIY
Newspaper baskets are a great project if you want something low-cost but still stylish.
They help you reuse materials you already have at home, and they are surprisingly sturdy once woven and sealed. You also get that handmade, textured look that feels warm and creative in a space.
A few reasons people love this craft:
- it is budget-friendly
- it reuses old newspaper in a practical way
- the finished baskets are lightweight and useful
- you can paint or decorate them to match your home
- it is relaxing once you get the weaving rhythm
This is also a good craft if you enjoy slow, hands-on projects. Rolling the paper tubes and weaving them together takes a little time, but the process is simple and satisfying.
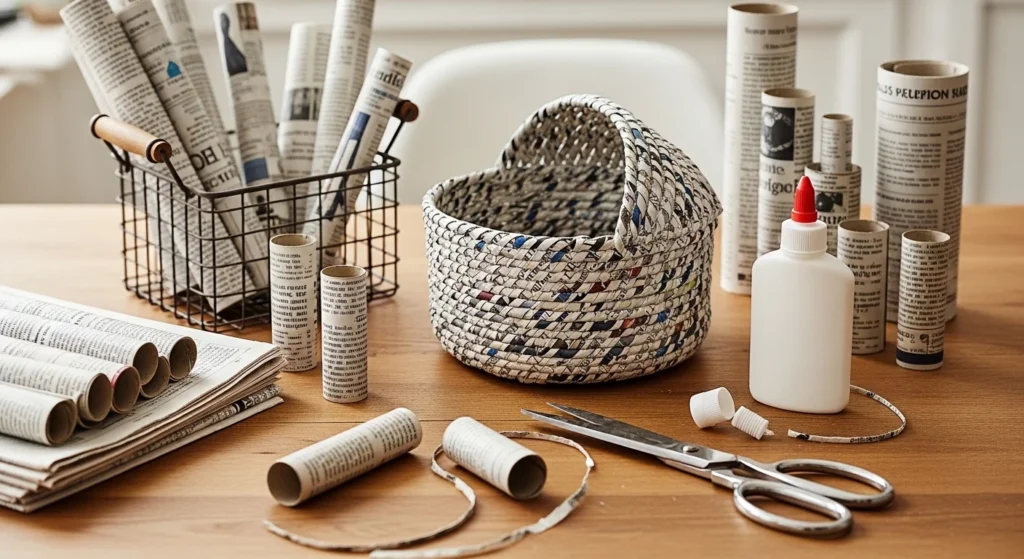
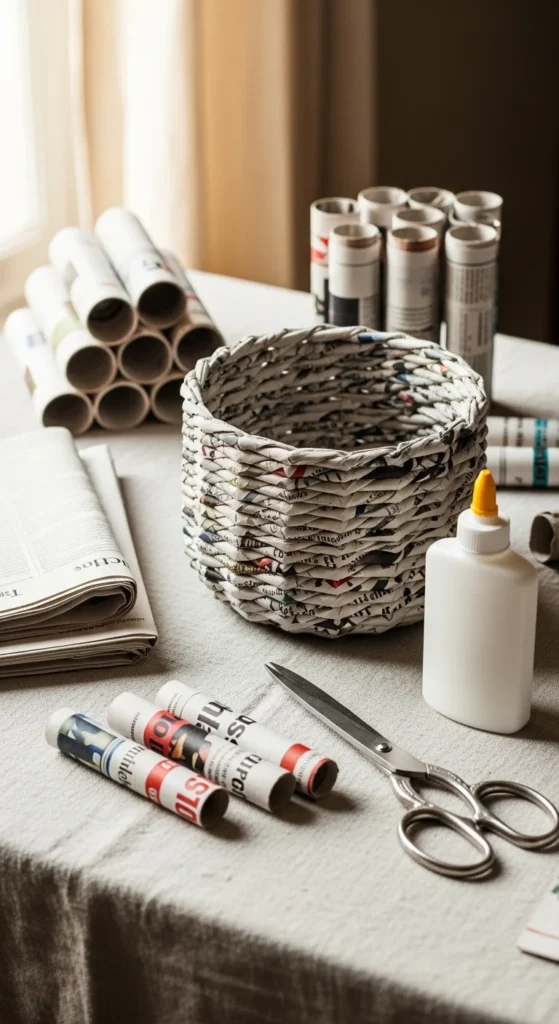
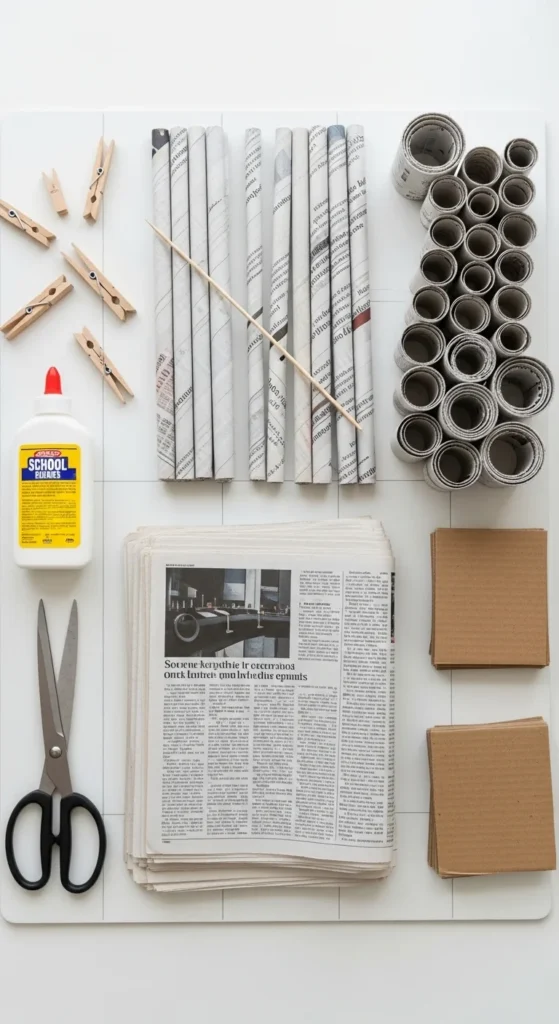
Gather Your Supplies First
Before you start weaving, it helps to set everything out in one place.
You will need:
- old newspapers
- a wooden skewer, knitting needle, or thin stick
- glue stick or white craft glue
- scissors
- cardboard for the base
- clothespins or paper clips
- ruler
- paint or acrylic sealer if desired
- paintbrush
The most important material is the newspaper tubes. These tubes act like the “reeds” of your basket, so you will need quite a few. For one small basket, it is smart to make extra tubes ahead of time so you do not have to stop in the middle.
Step 1: Roll the Newspaper Tubes
This is the foundation of the whole basket.
Take a full newspaper sheet and cut it into long strips. Many people cut each page into 3 or 4 vertical strips, depending on the size of the paper. Then place your skewer at one corner of the strip and begin rolling the paper diagonally around it.
As you roll:
- keep the tube tight
- angle the skewer so the tube stays long and thin
- add a dab of glue at the final corner to hold it closed
- slide the skewer out gently
Repeat this process until you have a good pile of tubes.
Do not worry if your first few are uneven. That is normal. After a few tries, your hands get used to the motion and the tubes become much neater.
If some tubes look slightly loose, you can still use them for weaving layers inside the basket.
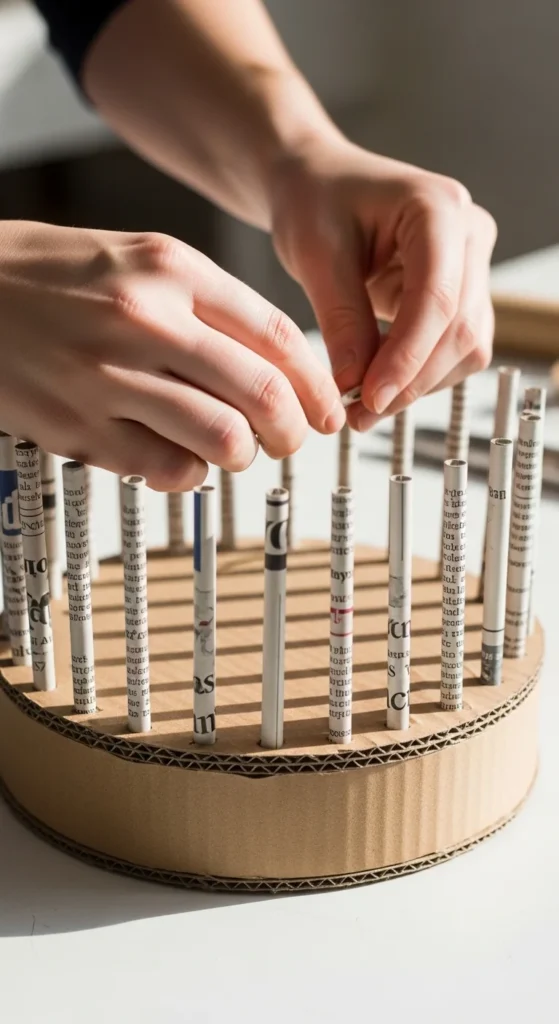
Step 2: Make a Strong Basket Base
Once your tubes are ready, start with the bottom of the basket.
Cut two matching pieces of cardboard in the shape you want for your base. A rectangle is easiest for beginners, but you can also do a square or oval. Then glue newspaper tubes side by side around the edges of one cardboard piece so they stick out like spokes.
Place the second piece of cardboard on top and glue it down to sandwich the ends of the tubes in place.
This gives you:
- a neat base
- upright spokes for weaving
- more strength and stability
Let the glue dry a little before moving on. Once it feels secure, bend the standing tubes upward. These will form the sides of your basket.
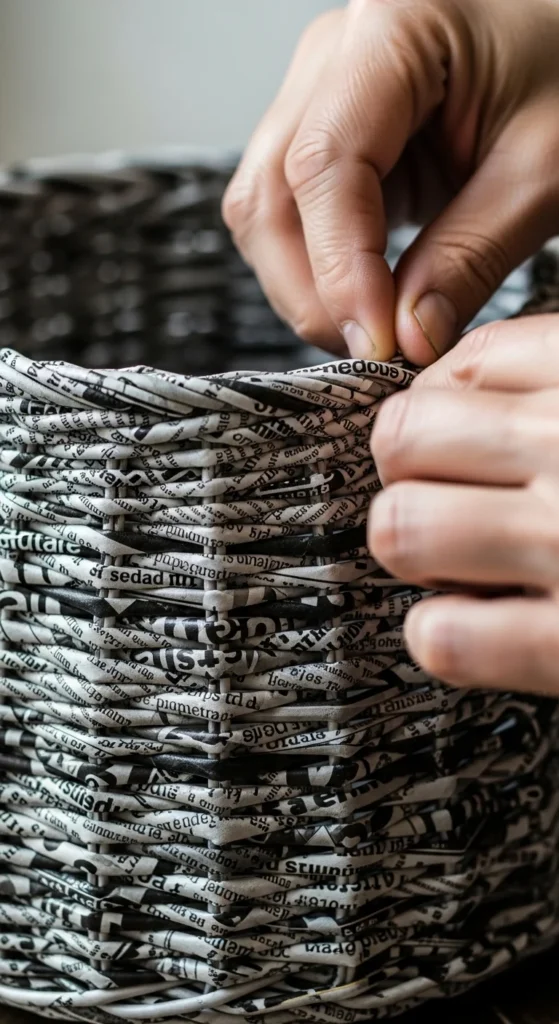
Step 3: Start Weaving the Sides
Now the basket really begins to take shape.
Take one newspaper tube and weave it over and under the upright spokes around the base. When you reach the end of the tube, attach another by slipping the narrow end of one tube into the wider end of the next with a tiny bit of glue.
Keep weaving in a steady pattern:
- over one spoke
- under the next
- repeat all the way around
As you build upward, gently push the woven rows downward so they sit tightly together. This makes the basket stronger and gives it a neater finish.
Clothespins can help hold things in place while you work, especially if the spokes want to lean or shift.
At first, it may feel a little awkward. After a few rows, the pattern becomes much easier to follow.
Step 4: Shape and Finish the Top Edge
When your basket reaches the height you want, it is time to finish the rim.
Trim any very long or uneven upright spokes. Then fold the spokes inward or outward, tucking the ends into the woven rows. Add glue where needed to secure them.
This step helps the basket look finished and polished. A clean top edge can make even a simple newspaper basket feel much more professional.
If you want a more decorative look, you can braid or twist the top ends before tucking them in, but a simple folded edge is perfect for beginners.
Paint or Seal for a More Stylish Look
At this stage, your basket is usable as is, but painting or sealing it can make a huge difference.
A coat of paint helps hide the newspaper print and gives the basket a more decorative, home-friendly finish. White, beige, brown, grey, or soft pastel shades work especially well for a Pinterest-style look.
You can also use a clear acrylic sealer if you want to keep some of the newspaper texture visible.
Popular finish options include:
- white paint for a clean farmhouse look
- tan or brown for a natural woven look
- black for a modern style
- pastel colors for a cute craft-room vibe
- clear sealer for a rustic recycled look
Let the basket dry fully before using it.
Easy Tips for Better Results
A few simple tricks can make your woven basket look cleaner and hold together better.
Keep these in mind:
- roll extra newspaper tubes before you begin
- keep the tubes tight when rolling
- space the spokes evenly around the base
- weave snugly, but not so tight that the basket bends
- use glue lightly so the basket does not get soggy
- push each row down as you go for a tighter weave
It also helps to start with a small basket. A smaller shape is easier to control and gives you a chance to practice before trying a larger storage bin.
Ways to Use Your Newspaper Storage Basket
Once finished, your basket can be both decorative and functional.
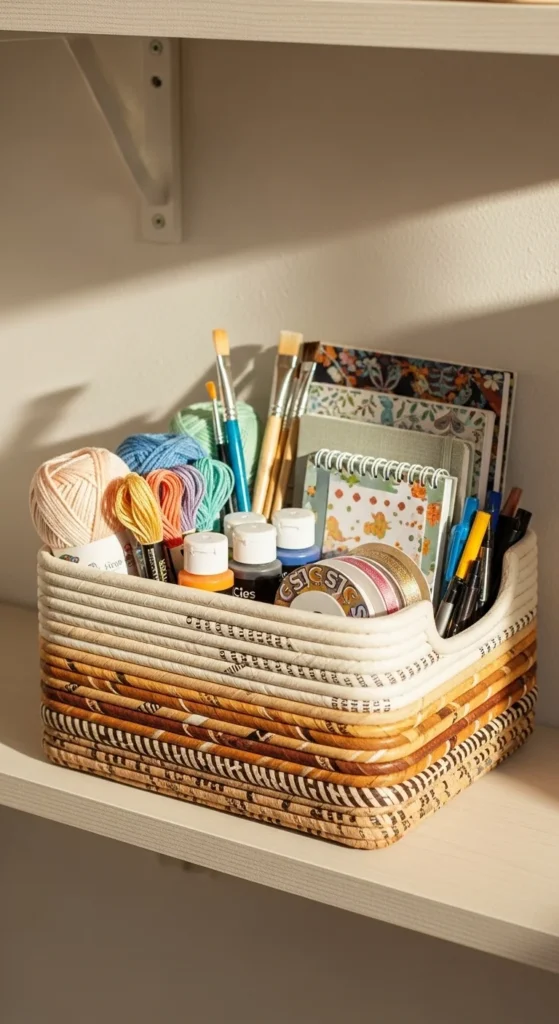
You can use it for:
- pens and stationery
- makeup brushes
- craft supplies
- folded washcloths
- small toys
- keys and everyday items
- mail or notebooks
These baskets are perfect for organizing little things without spending much money. They also make thoughtful handmade gifts for anyone who loves creative home decor.
Final Thoughts
Learning how to weave storage baskets from newspaper is one of those DIY skills that feels surprisingly rewarding. You start with old paper that might have been thrown away, and you end up with something useful, handmade, and full of character.
It takes a little patience at first, but once you get the hang of rolling and weaving, it becomes a relaxing craft you will want to try again.
Save this DIY for later and turn your old newspapers into stylish storage baskets this weekend!

Lily Summers is a digital artist and creative storyteller who loves bringing colorful characters to life. With a passion for cartoons, fan art, and playful sketches, she inspires others to explore their imagination through art. When she’s not sketching, you’ll find her dreaming up new ideas for CraftedWizard.com to spark creativity in every artist. 🌈✨