
Resin art is that mesmerizing, glossy craft you’ve probably seen all over Pinterest — rich swirls of color, glimmering gold accents, and a glass-like finish that makes every piece look like magic. The best part? You can easily make it yourself at home, even if you’re a total beginner. Whether you want to create coasters, wall art, or jewelry, resin lets you transform your creativity into something truly stunning.
With the right tools, a little patience, and a dash of color, you’ll soon be pouring your way to professional-looking resin pieces. Let’s dive into the step-by-step process of making gorgeous resin art at home!
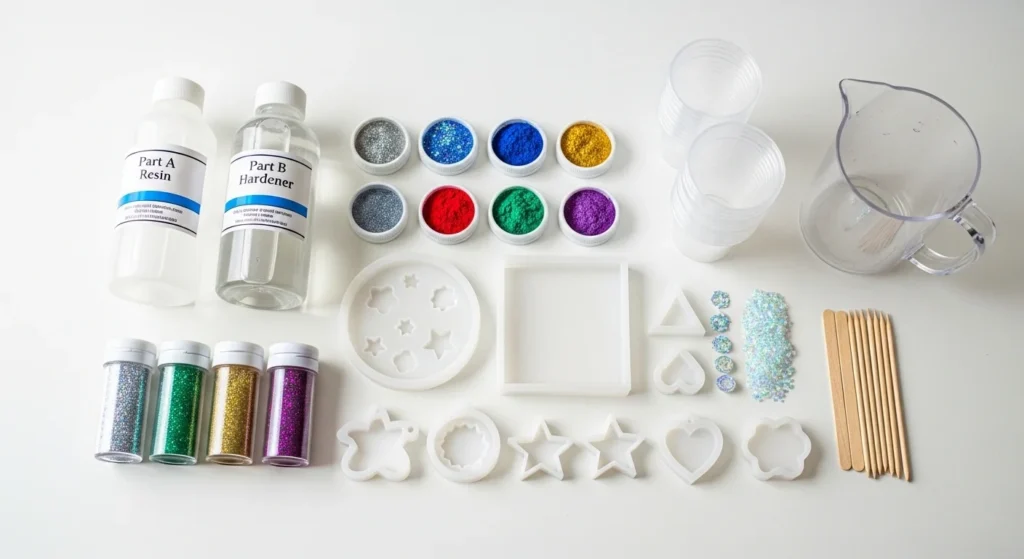
Step 1: Gather Your Resin Art Supplies
Before you start pouring, make sure your workspace is clean, dust-free, and protected with plastic or paper — resin can get messy!
Here’s what you’ll need:
- Epoxy resin and hardener: Choose a beginner-friendly brand with clear mixing instructions.
- Mixing cups and stir sticks: Plastic or silicone cups are best.
- Protective gear: Gloves, apron, and a mask to avoid fumes.
- Pigments and mica powder: For beautiful colors and shimmer effects.
- Silicone molds or art panels: Depending on what you’re creating.
- Heat gun or torch: To pop air bubbles for a smooth finish.
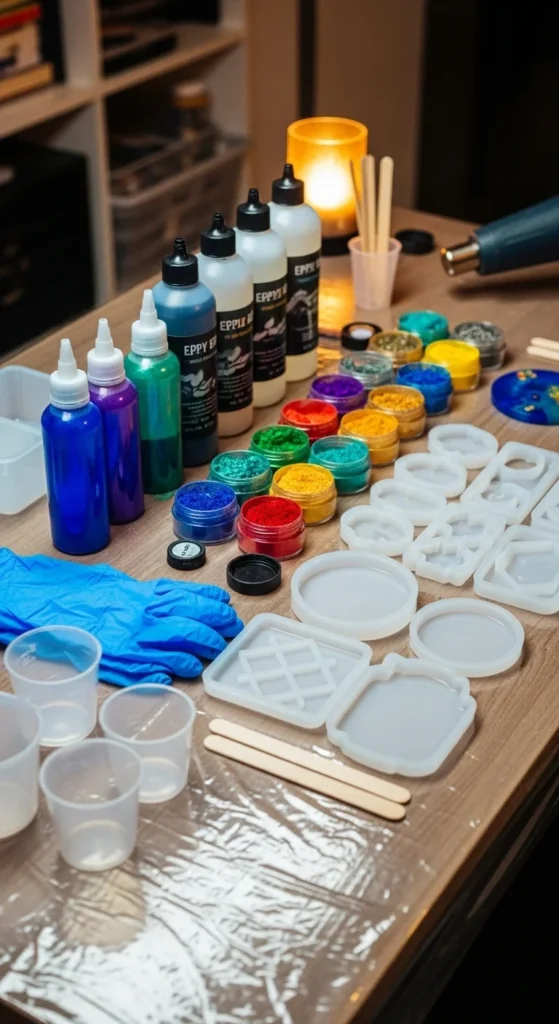
Pro tip: Always work in a well-ventilated room and wear gloves — safety first, always!
Step 2: Mix Your Resin Perfectly
Mixing resin is the most crucial step — it’s what determines how well your piece hardens and shines.
- Read the instructions on your resin kit carefully. Most require equal parts of resin and hardener.
- Pour both components into your cup and stir slowly for 3–5 minutes, scraping the sides and bottom as you mix.
- Keep stirring until the mixture turns clear with no streaks — that means it’s ready to use!
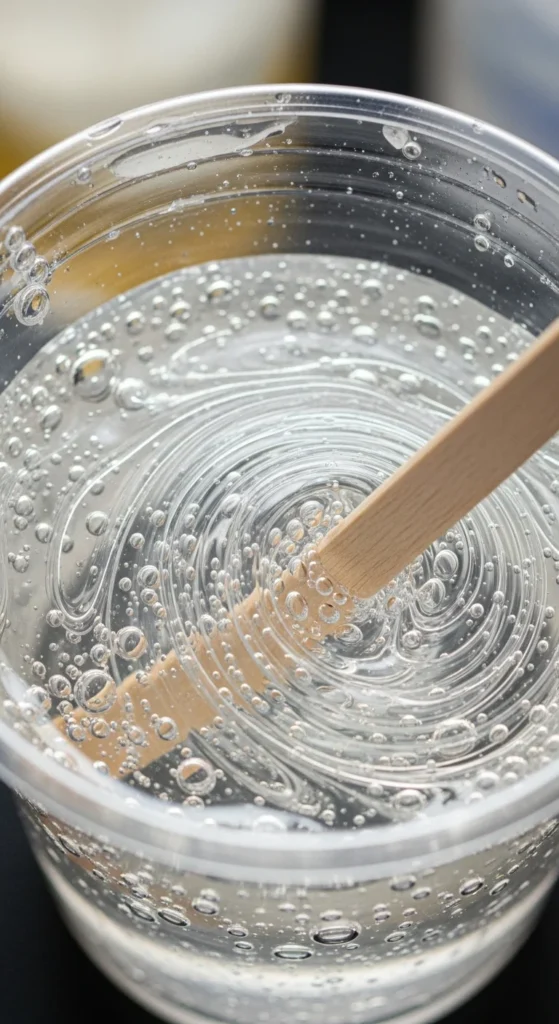
Quick tip: Stir slowly to avoid creating too many air bubbles. If bubbles form, don’t worry — we’ll fix that later!
Step 3: Add Colors, Pigments, or Glitter
Now comes the fun part — coloring your resin!
- Divide your resin mixture into smaller cups for multiple colors.
- Add a few drops of alcohol ink, resin dye, or mica powder to each cup.
- Stir gently until the color is evenly blended.
- Want some sparkle? Sprinkle in fine glitter or metallic flakes for that dazzling Pinterest look.
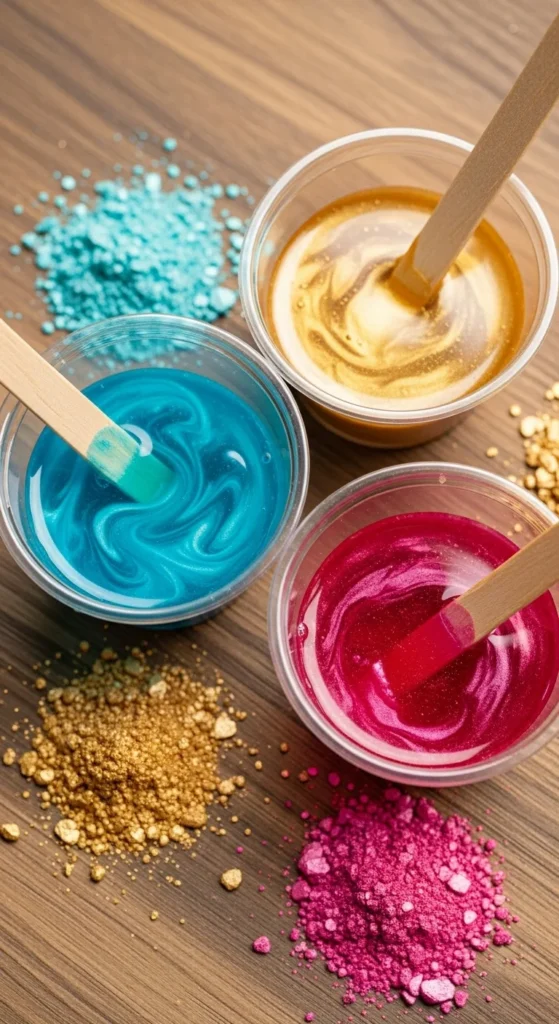
Creative idea: Try blending two or more shades in one pour for a beautiful marble or ocean effect.
Step 4: Pour and Design Your Artwork
Once your colors are ready, it’s time to pour and play!
- Pour the colored resins into your mold or canvas slowly, one section at a time.
- Use a popsicle stick or gloved finger to swirl and blend the colors slightly.
- For ocean waves, add a bit of white pigment and use a heat gun to create soft foamy textures.
- Tap the mold gently to release trapped bubbles or use a torch to pop them.
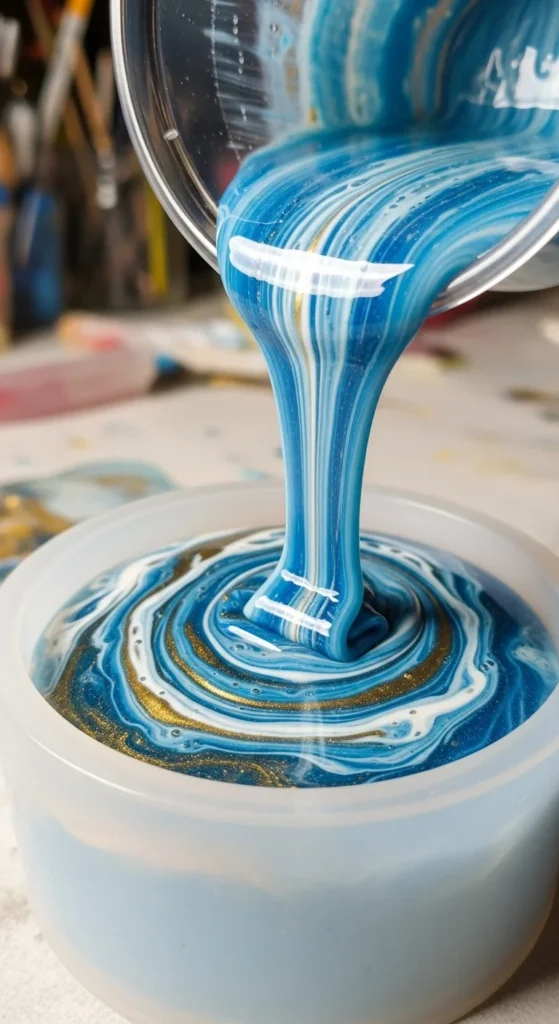
Pro tip: Don’t overmix once you pour — gentle blending creates those dreamy, natural patterns you see in professional resin art.
Step 5: Let It Cure (Patience Pays Off!)
This step takes time, but it’s where the magic happens.
- Cover your resin piece with a box or lid to prevent dust from settling.
- Let it cure for 24–48 hours at room temperature without moving it.
- Once hardened, carefully remove it from the mold or surface.
Troubleshooting tip: If your resin still feels tacky after curing, it may need a few more hours — or your resin wasn’t mixed in equal parts.
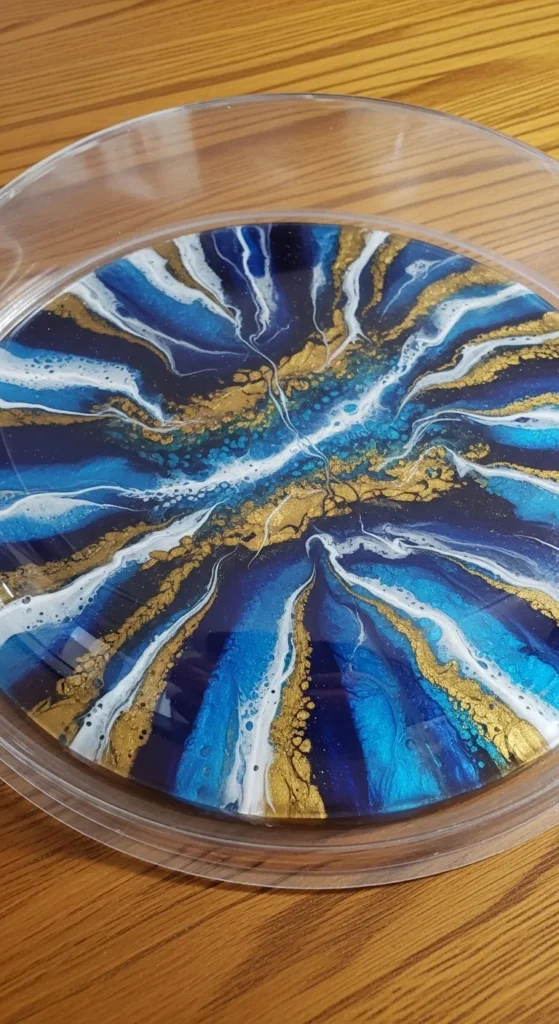
Step 6: Finish and Polish for a Professional Look
Once cured, it’s time to give your masterpiece the finishing touch.
- Sand the edges: Use fine-grit sandpaper to smooth rough spots.
- Polish: Apply a small amount of resin polish or mineral oil for an extra glossy shine.
- Frame or display: Mount your art on a wall, turn it into coasters, or add hooks to create resin keychains.
[Image Prompt] A finished resin art piece with glossy ocean-inspired colors (blue, white, and gold) shining under soft light, surrounded by small decorative shells.
Pro tip: For wall art, mount your resin piece on a wooden panel — it adds a chic, gallery-style finish.
Bonus Ideas for Resin Lovers ✨
Once you master the basics, try these creative resin projects:
- Geode coasters with gold leaf edges.
- Ocean wave trays using blue, turquoise, and white resin.
- Pressed flower keychains or jewelry.
- Resin bookmarks with dried petals or glitter accents.
Each piece you make will be completely unique — no two resin pours ever look the same!
Your Turn to Shine
Resin art is the perfect mix of science and creativity — and now you have everything you need to start your own project. From swirling colors to glossy finishes, it’s a craft that’s both relaxing and deeply satisfying.
So grab your supplies, put on your gloves, and start creating your first resin masterpiece today.
✨ Save this step-by-step guide for your next DIY weekend and let your creativity pour! ✨

Lily Summers is a digital artist and creative storyteller who loves bringing colorful characters to life. With a passion for cartoons, fan art, and playful sketches, she inspires others to explore their imagination through art. When she’s not sketching, you’ll find her dreaming up new ideas for CraftedWizard.com to spark creativity in every artist. 🌈✨


