

Photo magnets are practical, affordable, and meaningful. Unlike framed photos that sit on shelves, magnets become part of daily life. They also make great gifts for birthdays, holidays, or housewarmings.
Here’s why many people love them:
- They use photos you already have
- They cost far less than custom-ordered versions
- They can be made in one afternoon
- They’re easy to personalize for any style
You can keep them minimal or dress them up. Either way, the result feels special.
Gather Your Supplies
Before you start, set everything out on a table or counter. Having supplies ready makes the process smooth and enjoyable.
You’ll need:
- Printed photos (wallet-size or smaller work best)
- Blank magnets or magnetic sheets
- Scissors or a craft knife
- Strong glue or adhesive dots
- Optional: clear acrylic sealer, resin domes, washi tape
For photos, regular printer paper works, but photo paper gives richer color. Matte finishes reduce glare and fingerprints.

Choose the Right Photos
This step sets the tone for your magnets. Pick images that feel clear and emotionally meaningful, even at a small size.
Good photo choices include:
- Close-up faces
- Pets
- Travel highlights
- Simple backgrounds
- High-contrast images
Avoid busy group shots where details disappear when cut small. If needed, crop photos before printing so the main subject stays centered.
Printing multiple copies of the same photo is helpful. It gives you flexibility if a cut doesn’t go perfectly.
Cut and Prepare Your Photos
Once photos are printed, let the ink dry fully. Then start cutting.
You can go with:
- Squares or rectangles for a clean look
- Circles or ovals for a softer style
- Polaroid-style frames for a playful feel
Take your time cutting. Clean edges make a big difference in how finished the magnet looks.
If you want extra durability, lightly brush a thin layer of clear sealer over the photo and let it dry. This protects against moisture and fingerprints, especially in kitchens.
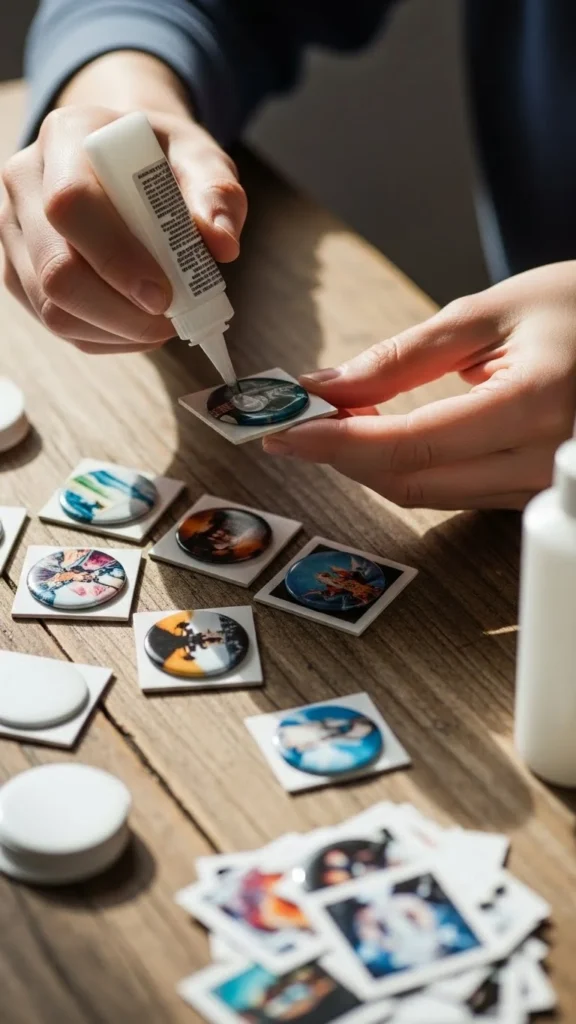
Attach the Magnets
Now it’s time to turn photos into actual magnets.
If you’re using pre-made blank magnets, glue the photo directly on top. Press firmly and let it dry according to the adhesive instructions.
If you’re using magnetic sheets, glue the photo to the sheet first, let it dry, then cut around the photo shape.
Tips for strong results:
- Use a glue that dries clear
- Press under a book for even adhesion
- Let magnets dry fully before using
Optional Upgrades for a Polished Look
If you want your magnets to look extra refined, a few simple additions go a long way.
Try these ideas:
- Add resin domes for a glossy, professional finish
- Outline photos with washi tape for color contrast
- Use wooden shapes as a base for rustic charm
- Seal everything with a clear spray for longevity
None of these steps are required, but they can elevate the final look if you’re making magnets as gifts.
Styling and Display Ideas
Once your magnets are ready, think about how to display them. Grouping them intentionally can make even simple magnets feel curated.
Display ideas:
- Arrange in a loose grid on the fridge
- Mix with handwritten notes or postcards
- Group by theme, such as family or travel
- Rotate photos seasonally

Magnets can also be used beyond the fridge. Try them on filing cabinets, lockers, or metal memo boards.
Make Photo Magnets as Gifts
Custom photo magnets make thoughtful, low-cost gifts. A small set tied with ribbon feels personal without being overwhelming.
Gift ideas:
- Grandparents with family photos
- Teachers with classroom memories
- Friends with shared travel moments
- Party favors with themed images
Pair magnets with a handwritten note or small envelope to complete the presentation.
Final Thoughts
Making custom photo magnets at home is one of those projects that feels rewarding from start to finish. You’re turning everyday photos into something functional, personal, and lasting. The process is simple, flexible, and easy to repeat whenever new memories are made.
Save this project for a quiet afternoon, pull out your favorite photos, and start creating. Your fridge will thank you—and so will anyone lucky enough to receive a set as a gift.

Lily Summers is a digital artist and creative storyteller who loves bringing colorful characters to life. With a passion for cartoons, fan art, and playful sketches, she inspires others to explore their imagination through art. When she’s not sketching, you’ll find her dreaming up new ideas for CraftedWizard.com to spark creativity in every artist. 🌈✨


