If you love books, you know the quiet joy of slipping a bookmark between the pages and returning exactly where you left off. Now imagine that bookmark is something you made yourself—using paper that might otherwise end up in the trash. Personalized bookmarks from scrap paper are easy, creative, and surprisingly satisfying.

This project is perfect for quiet afternoons, gift-giving, or creative breaks. You don’t need fancy tools or art skills—just scraps, a little imagination, and a love for simple DIY crafts.
Why Scrap Paper Makes the Best Bookmarks
Scrap paper already has character. Old notebooks, wrapping paper, magazine pages, and even brown paper bags bring texture and story into your bookmarks.
Here’s why scrap paper works so well:
- It’s free and eco-friendly
- Each piece is naturally unique
- It encourages creativity without pressure
- Mistakes don’t matter
Using scraps also removes the fear of “ruining” good supplies. You’re free to experiment.
Gather Your Supplies
Before you begin, collect a small pile of materials. Keep it simple.
You’ll need:
- Scrap paper (cardstock, magazine pages, notebooks, kraft paper)
- Scissors or a craft knife
- Glue stick or white glue
- Hole punch (optional)
- Ribbon, yarn, or twine (optional)
- Markers, pens, stamps, or stickers

Tip: Thicker paper lasts longer, but thin paper works too if layered.
Step 1: Choose and Cut Your Bookmark Shape
Start by deciding the size and shape of your bookmark.
Classic bookmark size:
- About 2 inches wide
- About 6 inches tall
You can also experiment with:
- Rounded corners
- Angled tops
- Tag-style shapes
- Slim strips for minimalist designs
Cut slowly and cleanly. Don’t stress about perfection—handmade charm is part of the appeal.
Step 2: Layer Scrap Paper for Strength and Style
Layering is where scrap bookmarks really shine.
Try these ideas:
- Glue a patterned paper onto a plain backing
- Mix textures (magazine + kraft paper)
- Tear edges instead of cutting for a soft look
Press layers flat and let them dry for a few minutes.
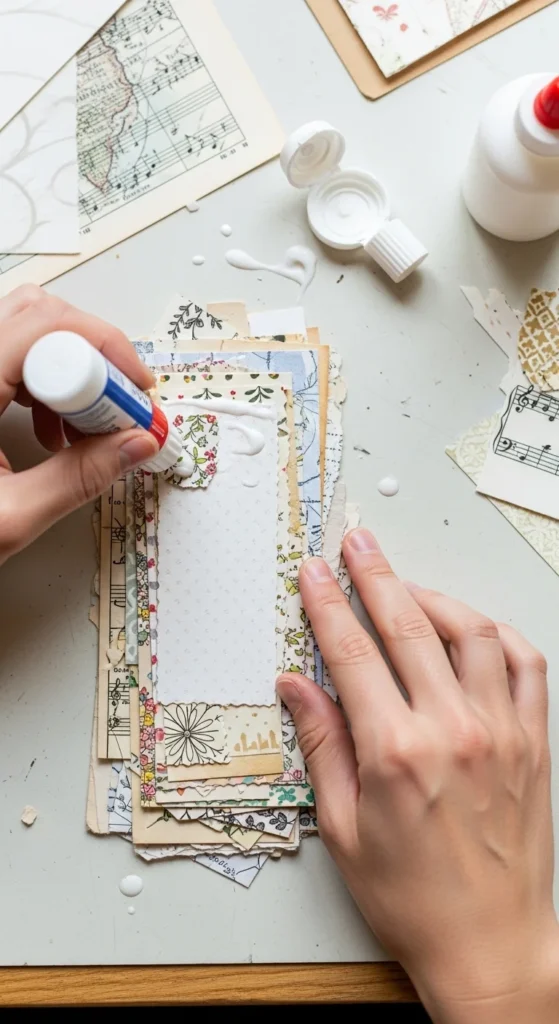
Layering not only makes bookmarks sturdier—it adds depth and personality.
Step 3: Personalize With Simple Decorations
This is your chance to make each bookmark feel truly yours.
Easy personalization ideas:
- Handwritten quotes or names
- Simple doodles or line art
- Stamps or washi tape accents
- Minimal color blocking with markers
Keep designs simple so the bookmark doesn’t become bulky.
If you’re making gifts, match the style to the reader:
- Floral for romantic readers
- Minimal shapes for nonfiction lovers
- Bold colors for kids

Step 4: Add a Tassel or Ribbon (Optional)
A tassel makes bookmarks easier to grab and adds a polished finish.
To add one:
- Punch a hole at the top center
- Thread ribbon, yarn, or twine through
- Tie a knot or small bow
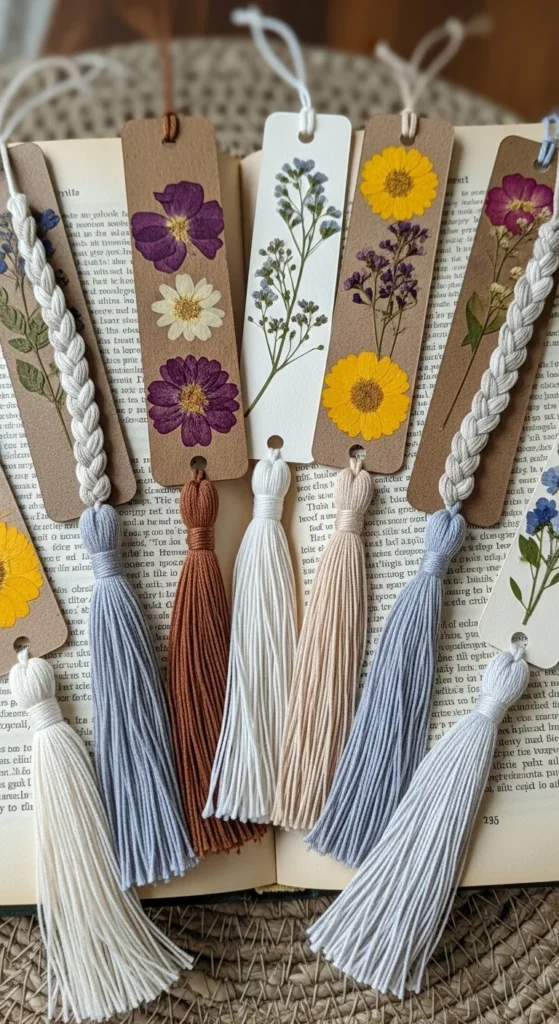
This step is optional, but it instantly upgrades the look.
Step 5: Seal and Strengthen Your Bookmark
If you want your bookmark to last longer, consider sealing it.
Simple options:
- Clear-drying glue brushed lightly over the surface
- Matte Mod Podge for durability
- Transparent tape on the back only
Let it dry completely before using.
This step is especially helpful if the bookmark will be used daily or gifted.
Creative Bookmark Ideas Using Scrap Paper
If you want inspiration, try one of these styles:
- Collage bookmarks using tiny paper pieces
- Minimalist bookmarks with one color and a small symbol
- Nature-inspired bookmarks with pressed leaves (sealed)
- Memory bookmarks made from old letters or notes
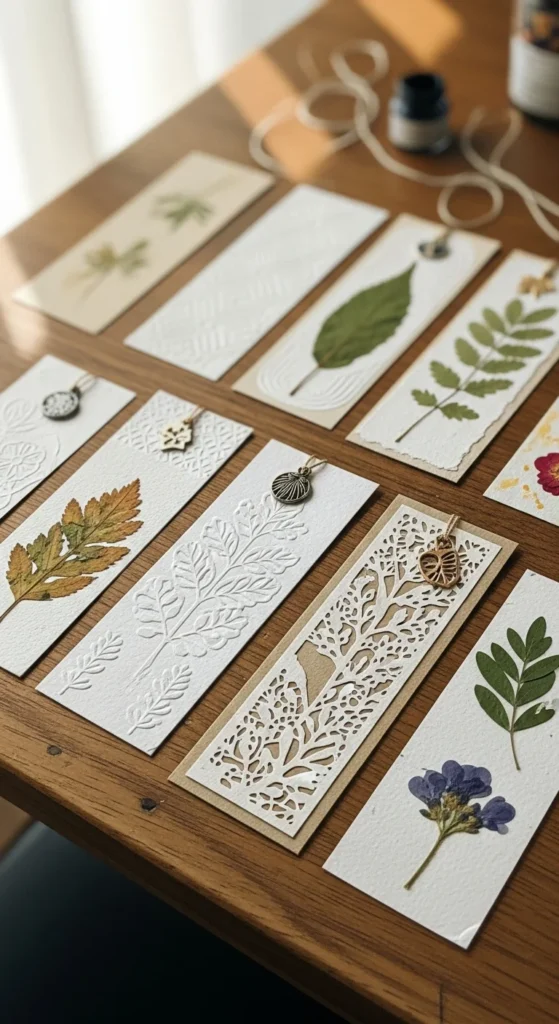
These make wonderful gifts for birthdays, holidays, or teacher appreciation.
Make It a Relaxing Creative Habit
This project isn’t about speed or perfection. It’s about slowing down.
Try making bookmarks:
- While listening to music
- With kids or friends
- As a screen-free evening activity
You’ll be surprised how calming it feels to create something small and useful.
Final Takeaway
Personalized bookmarks from scrap paper prove that creativity doesn’t require expensive supplies. With just a few leftover materials, you can make something meaningful, practical, and beautiful.
Save this idea for your next creative break—and turn your scrap paper into something worth bookmarking.

Lily Summers is a digital artist and creative storyteller who loves bringing colorful characters to life. With a passion for cartoons, fan art, and playful sketches, she inspires others to explore their imagination through art. When she’s not sketching, you’ll find her dreaming up new ideas for CraftedWizard.com to spark creativity in every artist. 🌈✨