
Want beautifully scented, skin-loving soap bars without handling harsh chemicals? You’re in the right place. Making soap from scratch with lye can feel intimidating, especially for beginners. The good news: you can still create gorgeous, all-natural soaps at home without ever touching lye — thanks to the melt-and-pour method. It’s safe, beginner-friendly, and insanely fun.
Whether you want to gift handmade soaps, start a small craft business, or simply treat your skin to chemical-free pampering, this guide will walk you through everything you need to know.
Why Choose Lye-Free Soap Making?
Lye (sodium hydroxide) is required to technically make soap — but with melt-and-pour soap bases, the saponification process is already done for you. So you get to skip the risky part and get straight to customizing!
Here’s why melt-and-pour soap is a favorite:
- Beginner-friendly: No chemical handling or curing time required.
- Customizable: Add herbs, oils, colors, and scents your way.
- Fast results: Ready to use within a few hours.
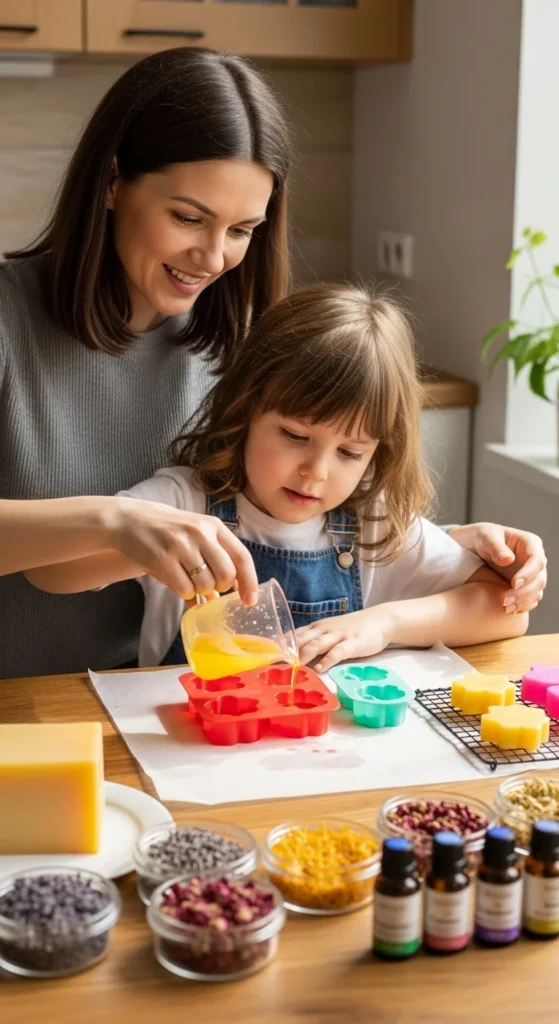
- Kid-safe craft: Perfect for parents, teachers, or fun DIY weekends.
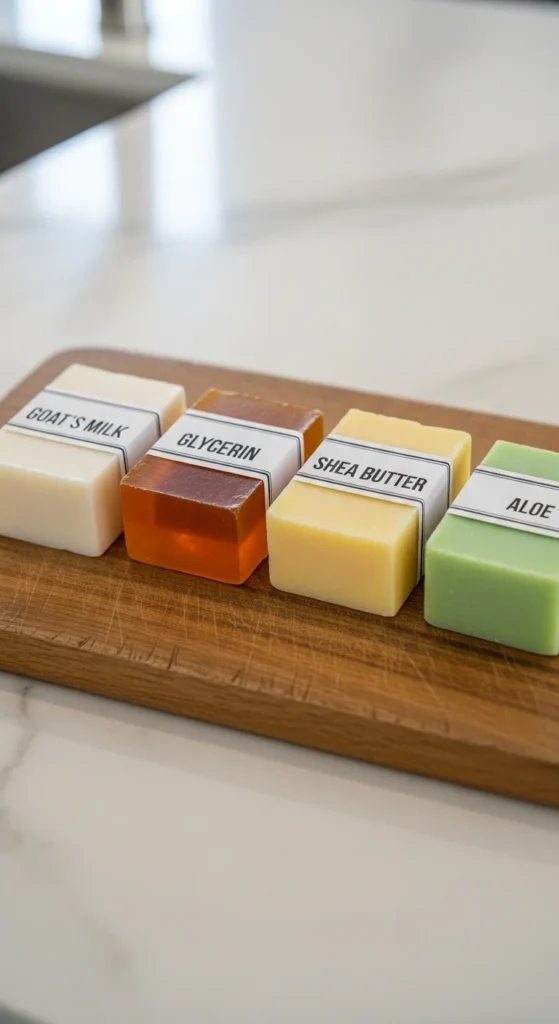
Choose Your Natural Soap Base
Before you begin, pick the right base for the skin benefits you want. You’ll find these bases online or at craft stores:
- Shea Butter Base: Creamy, moisturizing, great for dry or sensitive skin.
- Goat’s Milk Base: Gentle and nourishing with vitamins A and E.
- Glycerin (Clear) Base: Ideal for colorful, decorative, or layered soaps.
- Coconut Milk Base: Ultra-hydrating with a luxurious lather.
- Aloe Vera Base: Perfect for soothing and calming irritated skin.
Tip: Start with 1 lb of soap base if you’re making small batches.
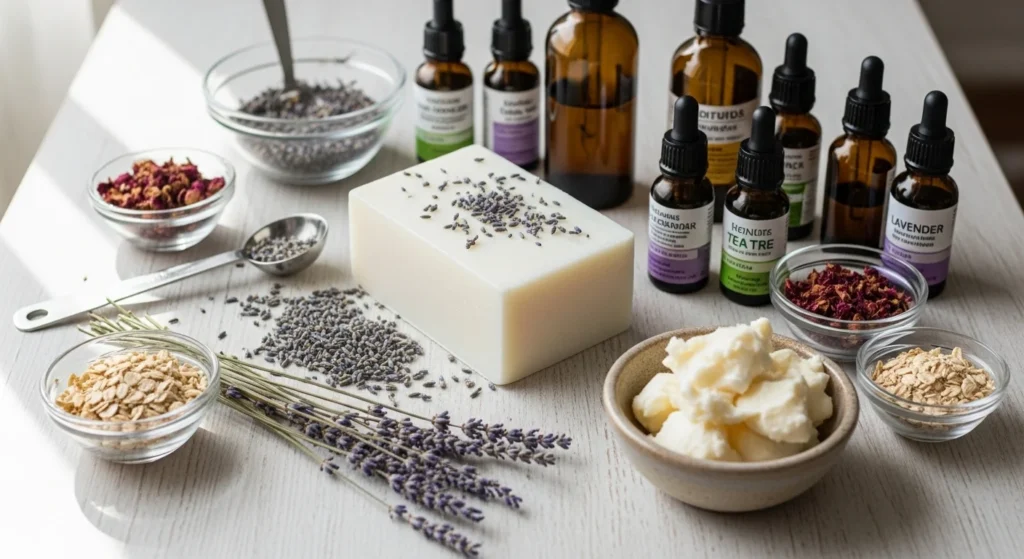
Natural Add-Ins to Boost Skin Benefits
This is where you get creative! Add nature-powered ingredients to nourish the skin and personalize your soap.
Here are some popular, all-natural options:
Essential Oils (Fragrance + Benefits)
- Lavender for relaxation and calm
- Tea tree for acne-prone skin
- Peppermint for an energizing cleanse
- Orange or lemon for a fresh, bright scent
- Eucalyptus for a spa-like aroma
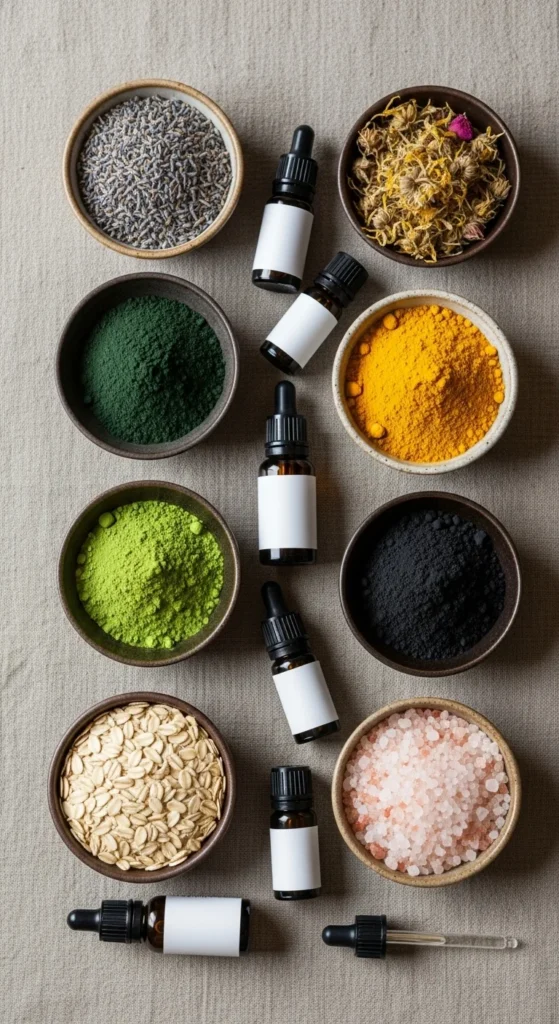
Herbs and Botanicals
- Dried lavender buds
- Rose petals
- Calendula flowers
- Chamomile
- Rosemary
Natural Colorants
- Turmeric → warm golden yellow
- Beetroot powder → soft pink
- Spirulina → pastel green
- Activated charcoal → detoxifying black
Skin-nourishing Add-ins
- Honey
- Aloe gel
- Oatmeal
- Shea or cocoa butter
Step-by-Step: How to Make All-Natural Soap Without Lye
Follow this simple melt-and-pour method for a safe, quick, and satisfying DIY soap-making experience.
Step 1: Chop and Melt the Soap Base
Cut your soap base into small cubes for quicker melting.
You can melt it using:
- Microwave: Heat for 30 seconds at a time and stir between intervals.
- Double boiler: Melt gently on low heat to avoid burning.
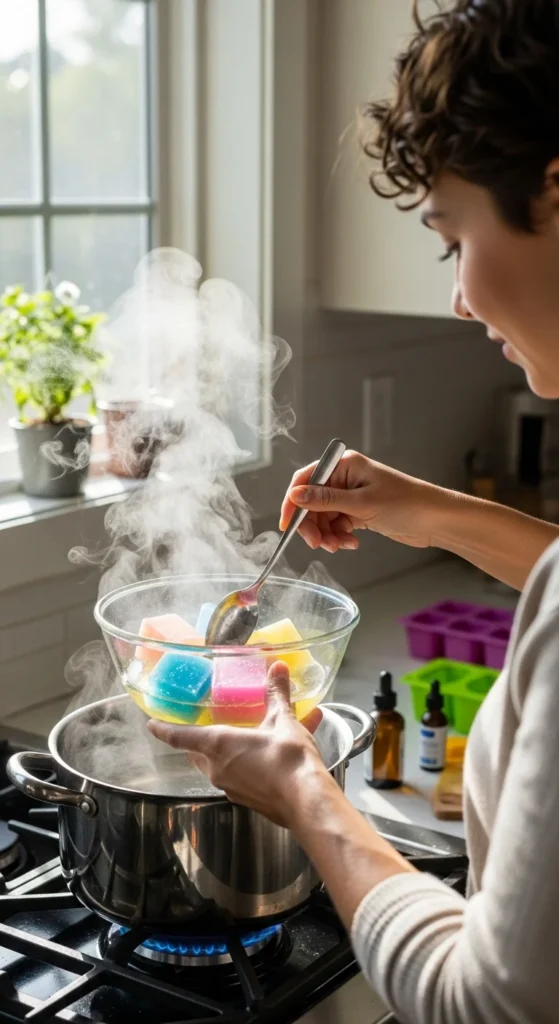
Step 2: Add Skin-Friendly Oils & Ingredients
Once melted, remove from heat and stir in your add-ins.
Suggested add-ins per 1 lb of base:
- 1–2 tbsp natural oils (jojoba, almond, coconut, or olive)
- 10–15 drops essential oils
- 1–2 tsp herbs, clays, or natural colorants
Stir slowly to prevent bubbles.
Step 3: Pour into Molds
Carefully pour your mixture into silicone molds. Lightly spritz the top with rubbing alcohol to remove bubbles (optional).
Choose mold shapes like:
- Floral designs
- Honeycomb pattern
- Heart or star shapes
- Simple rectangular bars
Step 4: Let It Set
Allow your soap to harden for 2–4 hours at room temperature. Once firm, pop out the bars from the mold.
No curing time needed — your soap is ready to use the same day!
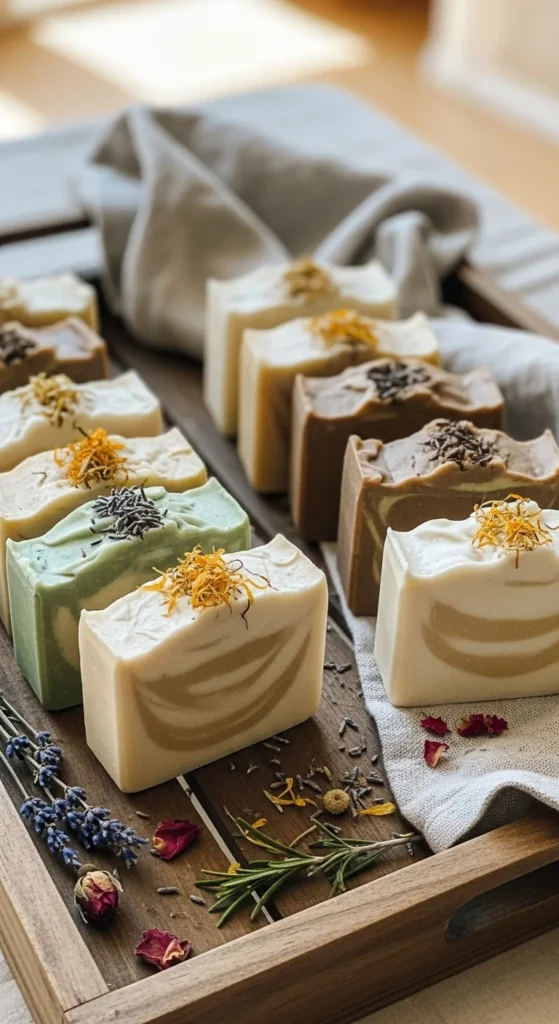
Beautiful Natural Soap Combinations to Try
Here are some beginner-friendly recipes to inspire your first batch:
Lavender Oatmeal Calm Bar
- Shea butter base
- Lavender essential oil
- Dried lavender + ground oatmeal
Perfect for a soothing nighttime shower.
Citrus Sunshine Refresh Bar
- Glycerin clear base
- Orange + lemon essential oils
- A pinch of turmeric for warm color
Bright, zesty, and uplifting.
Detox Charcoal Tea Tree Bar
- Aloe or goat’s milk base
- Tea tree essential oil
- Activated charcoal

A great choice for oily or acne-prone skin.
Tips for Perfect, Natural Soap Every Time
- Avoid adding fresh fruit or herbs — they may mold. Use dried only.
- Start small and increase additives slowly to prevent separation.
- Store finished soaps in a cool, dry place.
- Wrap them in parchment or wax paper if gifting.
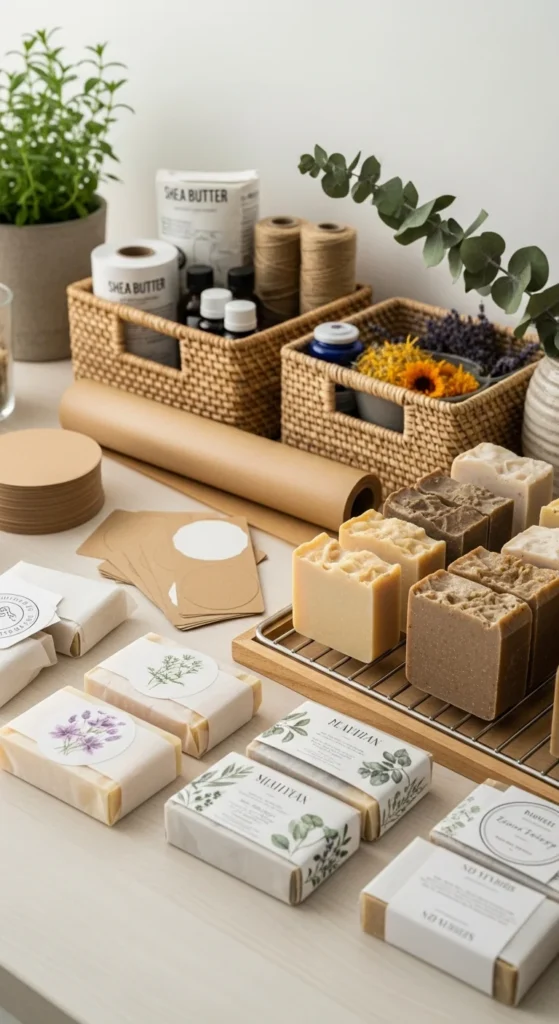
Ready to Make Your First Batch?
Creating your own all-natural soap bars without lye is rewarding, safe, and a fun creative outlet. With endless scent blends and natural ingredient options, you can craft soaps that match your skin needs and personal style.
Save this guide for your next DIY day — and feel free to experiment until you find your signature soap recipe. Happy soap-making!

Lily Summers is a digital artist and creative storyteller who loves bringing colorful characters to life. With a passion for cartoons, fan art, and playful sketches, she inspires others to explore their imagination through art. When she’s not sketching, you’ll find her dreaming up new ideas for CraftedWizard.com to spark creativity in every artist. 🌈✨


