
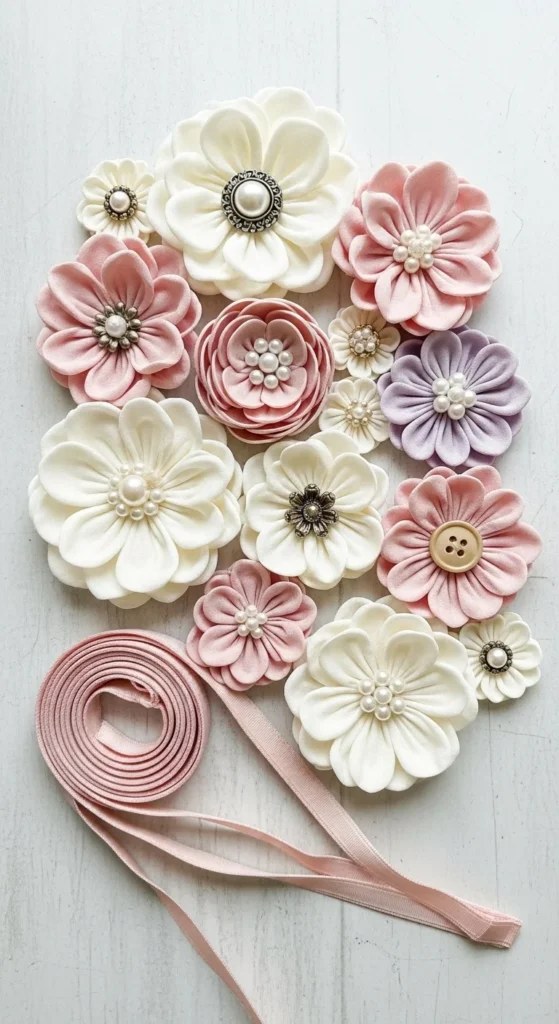
There’s something so charming about handmade fabric flowers—they’re soft, timeless, and endlessly versatile. Whether you’re dressing up a headband, decorating a wrapped gift, or adding flair to a bag, these little blooms can make anything look special. And the best part? They’re simple to make using scraps of fabric you probably already have at home.
With just a few folds, cuts, and stitches, you can create delicate flowers that last far longer than fresh ones. Here’s how to make beautiful fabric flowers that are perfect for any occasion—no fancy sewing skills required!
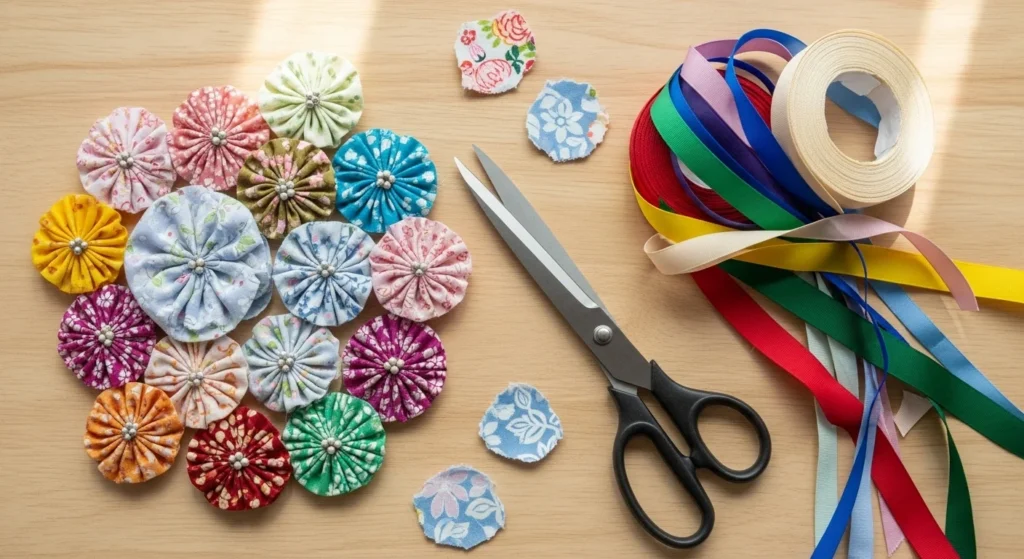
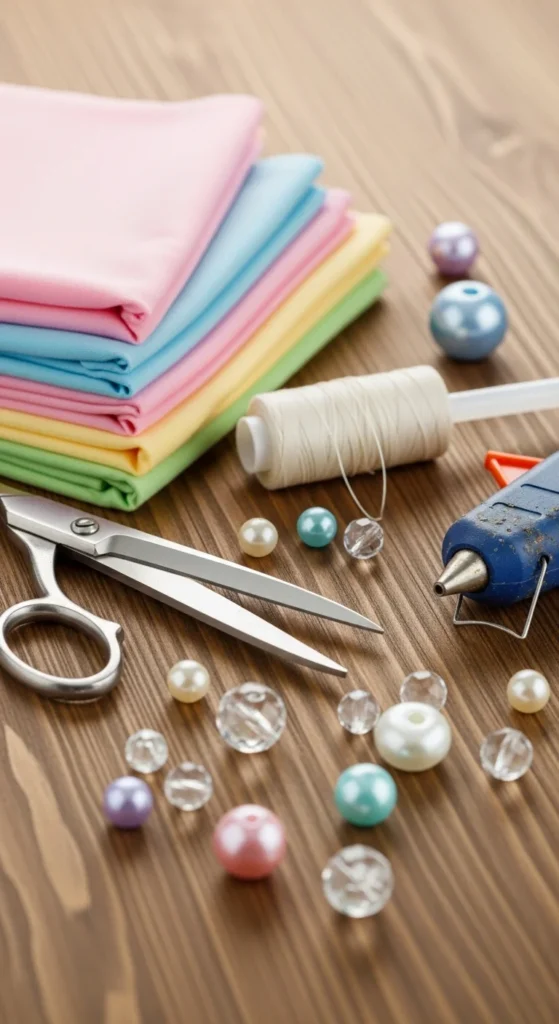
Gather Your Materials
Before you begin, set up a small workspace. You don’t need much to make your first batch of fabric flowers.
You’ll need:
- Fabric scraps (cotton, satin, felt, or chiffon all work beautifully)
- Scissors
- Needle and thread
- Hot glue gun (optional)
- Buttons, beads, or pearls for centers
- Headbands, clips, or ribbons for attaching your flowers
Pro tip: Mix textures for more dimension—pair a soft chiffon petal with a sturdier cotton one for a lovely layered effect.
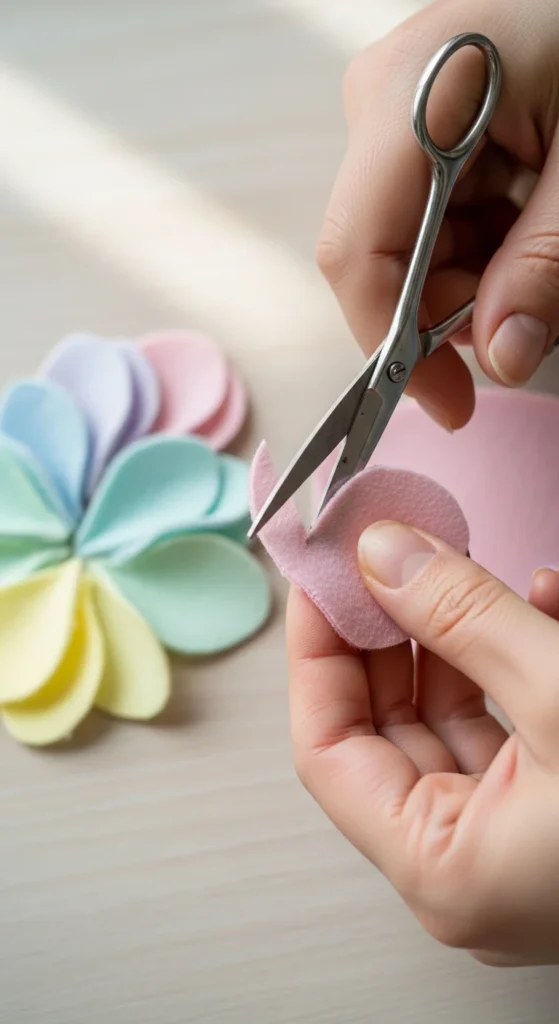
Choose Your Fabric and Shape
Different fabrics create different flower styles. Light, sheer materials like chiffon give you soft, airy petals, while cotton or felt makes bolder, structured flowers.
Decide what kind of bloom you want:
- Round petals for roses or peonies
- Pointed petals for daisies or sunflowers
- Layered circles for a ruffled look
Trace or freehand your petal shapes onto the fabric, then cut several identical pieces. For a full flower, you’ll need around 5–8 petals.
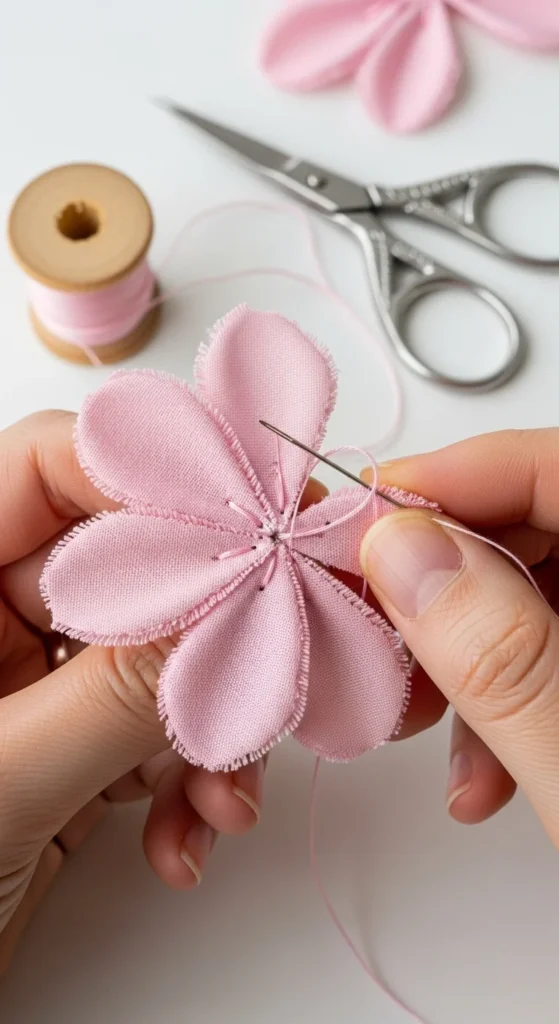
Assemble the Flower
Once you’ve cut your petals, it’s time to bring your flower to life.
- Thread your needle and tie a small knot at the end.
- Stitch through the base of each petal, one after another, on the same thread.
- Pull the thread gently to gather the petals into a circular shape.
- Secure the last petal to the first one with a few small stitches.
If sewing isn’t your thing, use a hot glue gun instead. Simply glue each petal around a small felt circle base, overlapping them slightly as you go.
Tip: Slightly curl the edges of your petals with your fingers or by carefully heating the edges (if using synthetic fabric) for a natural look.
Add the Finishing Touches
The center of your flower adds personality and sparkle. You can choose from:
- Buttons or pearls for a classic, elegant style
- Beads or sequins for a little shimmer
- Small fabric knots for a soft, handmade finish
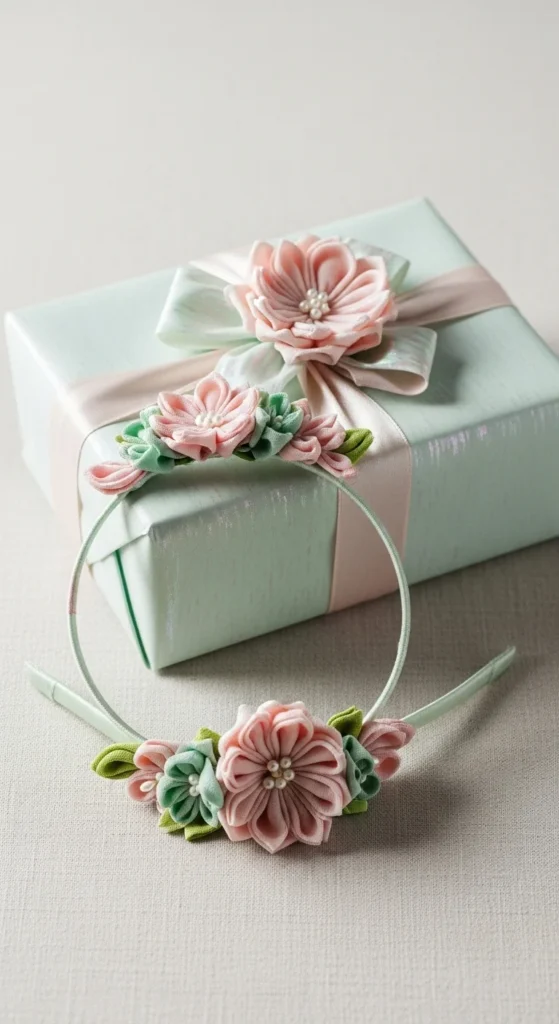
Secure your center using either thread or a drop of hot glue. Then, attach your flower to whatever you’d like—a headband, clip, or even a gift wrap bow.
Creative idea: Combine a few flowers of different sizes and colors on one headband for a fuller, garden-inspired look.
Turn Them Into Beautiful Gifts
Once you’ve made a few flowers, you’ll find endless ways to use them. Try these ideas:
- Glue them onto plain hair clips or elastic bands for pretty accessories.
- Attach them to gift boxes or cards for a thoughtful handmade touch.
- Sew a cluster onto tote bags or hats to add color and texture.
- Use them as table decorations for parties, weddings, or baby showers.
You can even make seasonal sets—think deep reds for winter, soft pastels for spring, or rustic neutrals for fall décor.
Simple Tips for Stunning Results
- Use contrasting fabrics for layered designs—like lace over linen or satin over cotton.
- Experiment with size—tiny flowers for clips, large ones for wall art.
- Batch-make petals—cut several shapes at once to speed up the process.
- Mix colors for a bouquet effect rather than sticking to one tone.
Each flower you make will be slightly unique, which is part of their handmade charm!
Final Thoughts
Making fabric flowers is a delightful DIY that combines creativity and practicality. You can customize them to fit any color scheme or occasion—and they never wilt! Whether you’re crafting for a gift, a headband, or home décor, these blooms bring warmth and personality to whatever they touch.
So grab your scissors, pick your favorite fabrics, and start stitching your own little garden of handmade beauty.
🌸 Save this tutorial for later and share your creations with someone who loves a good DIY!

Lily Summers is a digital artist and creative storyteller who loves bringing colorful characters to life. With a passion for cartoons, fan art, and playful sketches, she inspires others to explore their imagination through art. When she’s not sketching, you’ll find her dreaming up new ideas for CraftedWizard.com to spark creativity in every artist. 🌈✨


