
Seasonal wreaths add instant charm to any door and they’re one of the easiest ways to refresh your home décor throughout the year. But if you’ve ever browsed a craft store or Etsy shop, you know professional-quality wreaths can get expensive. The good news? You can make one yourself that looks just as beautiful, for a fraction of the price.
Whether you love cozy fall tones, winter sparkle, spring florals, or summer botanicals, this guide shows you exactly how to design like a pro no floral design experience needed!
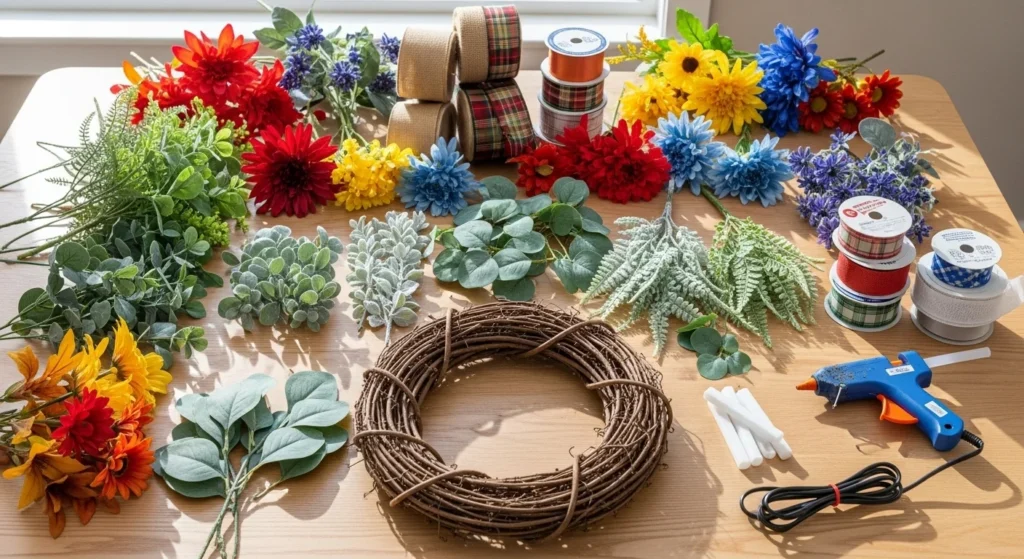
1. Gather Quality Materials for a Luxe Look
The right materials are key for that polished, store-bought vibe.
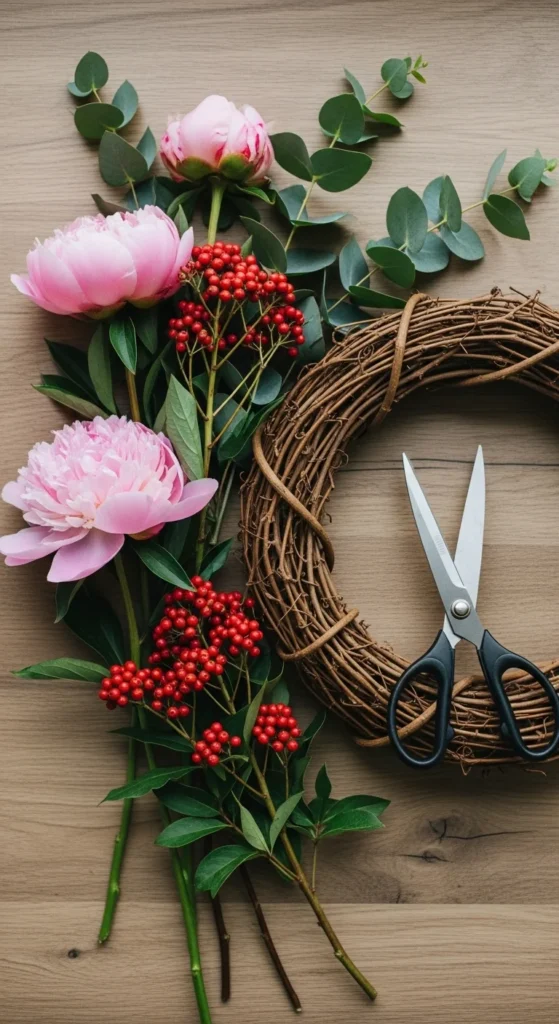
Start with a sturdy wreath base:
- Grapevine for rustic farmhouse style
- Wire floral frame for structured, full wreaths
- Foam wreath for lightweight indoor décor
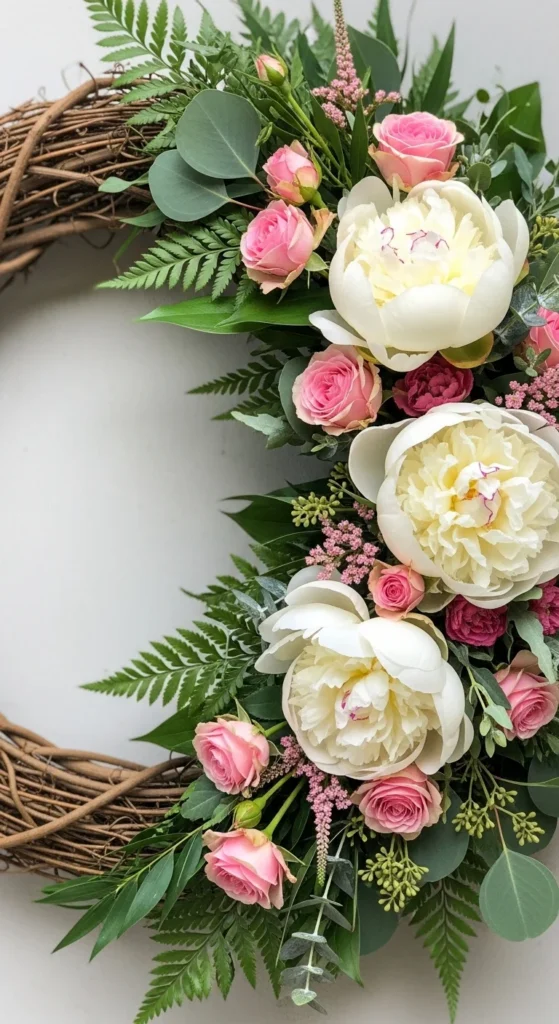
1. Pick your greenery and focal florals:
- Faux eucalyptus, cedar, ferns, or boxwood
- Seasonal florals (sunflowers, peonies, poinsettias, etc.)
- Berries, pinecones, pumpkins, or ornaments for accents
Pro tip: Choose realistic greenery with varied textures—it makes even budget stems look custom and high-end.
2. Choose a Theme to Guide Your Design
Before you start attaching anything, think about the season and style.
Popular seasonal vibes:
- Fall: pumpkins, burnt orange leaves, plaid ribbon
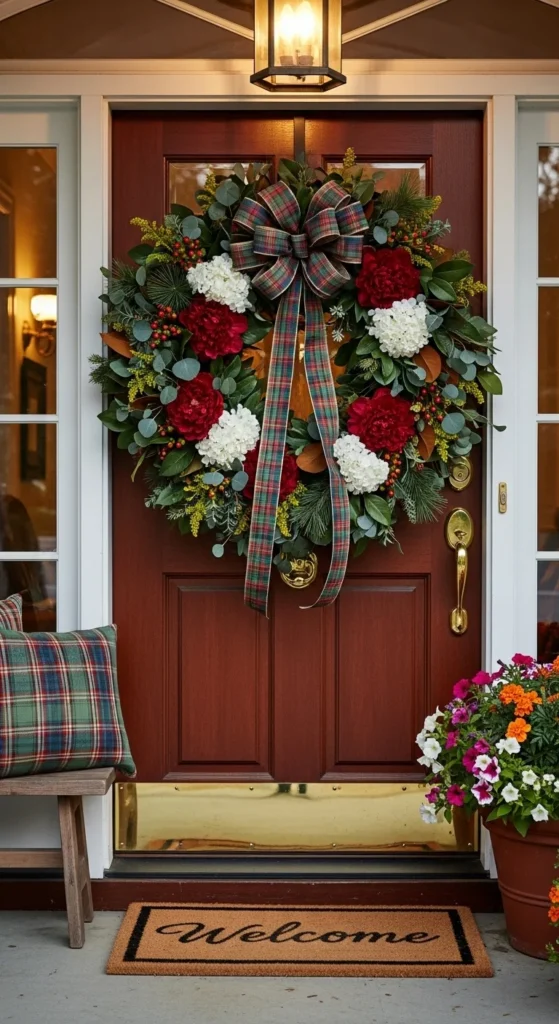
- Winter: pine branches, red berries, velvet bows
- Spring: tulips, pastel blossoms, cheerful ribbons
- Summer: lemons, bright florals, vibrant greens
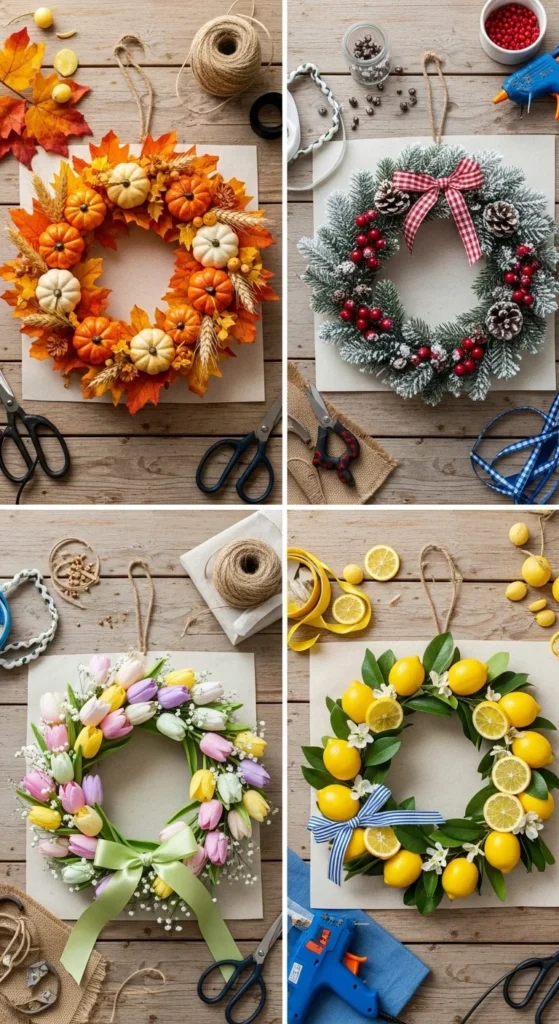
Keep your color palette simple—2–3 main colors with one pop accent.
Decide on a layout:
- Asymmetrical: Greenery around part of the frame with a bold cluster of florals
- Full coverage: Leaves and stems completely around the base
- Minimalist: Subtle greenery with one statement bow or floral bunch
Planning your design now saves you time (and glue burns!) later.
3.Build the Greenery Foundation
Greenery gives the wreath fullness and life. Work in one direction for a clean flow.
How to build the base:
- Trim stems into manageable pieces.
- Tuck greenery into the frame and secure with floral wire or hot glue.
- Layer different leaf textures—broad leaves in back, wispy stems on top.
- Step back occasionally to check balance and fullness.
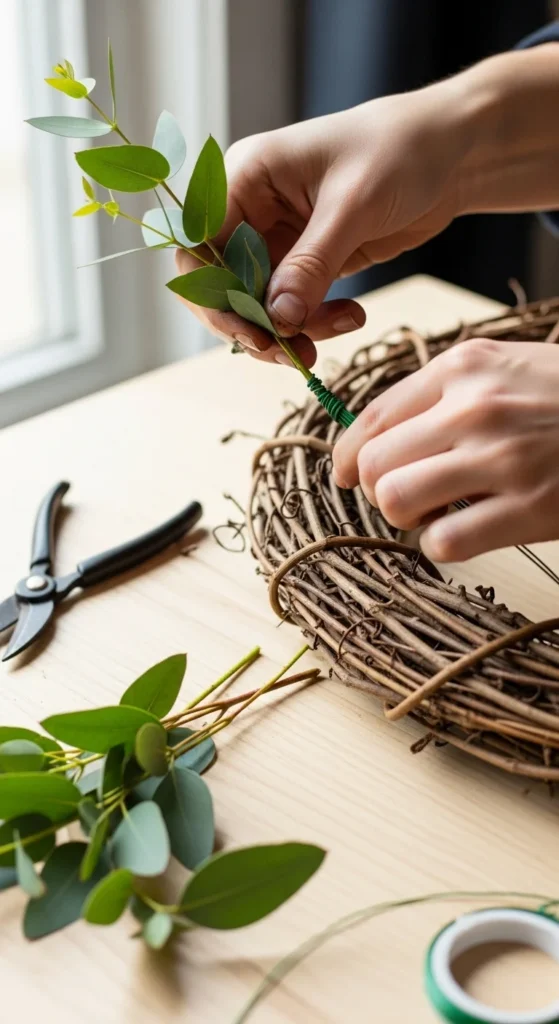
Don’t worry if it’s not perfect yet—the flowers will cover any bare spots.
4.Add Statement Florals and Seasonal Accents
This is where the wreath comes alive!
Place 3–5 focal florals in a cluster for visual impact. Odd numbers always look more natural to the eye.
Then, add accents:
- Small blooms to fill gaps
- Seasonal picks (tiny pumpkins, pinecones, lemon slices)
- Berries or baby’s breath for added texture
Build in layers:
- Start with large blooms
- Add medium-sized accents
- Finish with tiny filler pieces
Vary stem angles to create depth instead of a flat look.
Take a few steps back every now and then—this helps you instantly see where it needs more balance.
5. Finish With Ribbon and Final Touches
Ribbons instantly elevate a wreath from homemade to polished boutique décor.
Choose ribbon that matches your style:
- Burlap for rustic farmhouse
- Velvet or satin for elegant holidays
- Gingham for spring and summer cheer
How to attach:
- Make a fluffy bow with 3–4 loops per side
- Secure with floral wire
- Tuck ribbon tails into the greenery for movement
Final polish:
- Trim any glue strings
- Add subtle texture with twine or decorative picks
- Ensure the top portion has a clear hanging point
If you want an outdoor wreath, spray a light coat of UV-protectant sealer to help prevent fading.
6. Hang, Style, and Swap for Every Season
You just created your own professional-quality wreath—way to go! Seasonal wreaths are perfect for:
- Porches and front doors
- Mantels and gallery walls
- Kitchen hoods or dining hutches
- Gifts for loved ones (everyone loves them!)
Rotate with each season and store carefully in a wreath box to keep your design fresh year after year.
Try Your Next Seasonal Style!
Once you make your first wreath, you’ll want one for every season. They’re affordable, fun to customize, and give your home major charm without a major budget.
Pin or save this tutorial so you’ll always have inspiration on hand! Happy crafting, and enjoy decorating your space with something you made yourself. 🌿✨

Lily Summers is a digital artist and creative storyteller who loves bringing colorful characters to life. With a passion for cartoons, fan art, and playful sketches, she inspires others to explore their imagination through art. When she’s not sketching, you’ll find her dreaming up new ideas for CraftedWizard.com to spark creativity in every artist. 🌈✨


