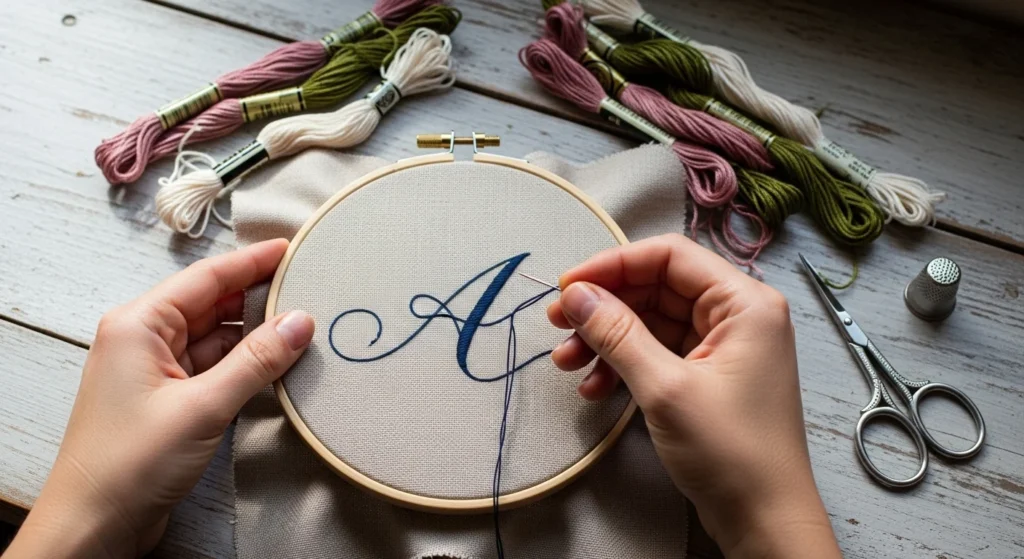
A plain tote bag, baby onesie, hoop art piece, or linen napkin can go from simple to deeply personal with just a few stitched letters. That is the magic of embroidered lettering. It feels handmade, thoughtful, and charming without asking for a huge budget or advanced sewing skills. Whether you want to stitch a name, initials, a short word, or a sweet phrase, learning how to embroider letters is one of the easiest ways to make gifts and decor feel more meaningful.

The best part is that you do not need a big craft setup to get started. With a few supplies, a simple font, and some patience, you can make beautiful personalized pieces for birthdays, baby gifts, weddings, holidays, or your own home.
Choose the Right Fabric, Floss, and Tools
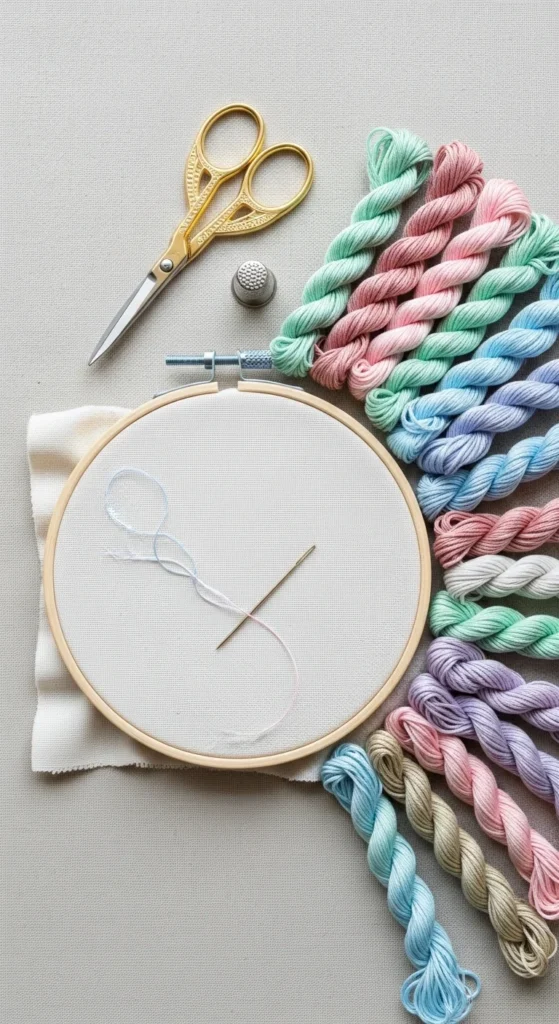
Before you start stitching, gather a few basic materials. Keeping things simple at the beginning makes the whole process easier.
Here is what you will need:
- Embroidery hoop
- Cotton or linen fabric
- Embroidery floss
- Embroidery needle
- Small scissors
- Water-soluble pen, pencil, or transfer method
- Printed or hand-drawn lettering design
For beginners, cotton and linen are the easiest fabrics to work with. They hold the stitches well and make the letters easier to see. If the fabric is very thin, add a second layer or use stabilizer underneath.
When choosing floss, start with colors that stand out clearly against the fabric. Dark thread on light fabric is easier to follow than pale thread on pale fabric. You can always try softer tone-on-tone looks later.
A medium hoop helps keep the fabric tight, which is important for neat lettering. Loose fabric can make your lines look shaky.
Pick a Letter Style That Is Easy to Stitch
Not all fonts are equally easy to embroider. Some look beautiful on screen but feel frustrating once the needle is in your hand.
For your first project, go with one of these:
- Simple block letters
- Clean uppercase letters
- Rounded lowercase script with smooth curves
- Short words instead of long quotes
Thin script fonts can work, but they are easier when the lines are smooth and not overly detailed. Very fancy calligraphy can become tricky because of tight loops and sudden line changes.
A smart way to begin is to choose initials or a short word like “home,” “love,” “joy,” or a name with only a few letters. That gives you enough practice without making the project feel too big.
If you are making decor, think about the overall mood. Block letters feel modern. Soft script feels romantic. Tiny lowercase letters feel delicate and handmade.
Transfer the Letters Onto Your Fabric
Once you pick your design, the next step is getting the letters onto the fabric clearly.
You can do this in a few easy ways:
- Trace the design with a washable fabric pen
- Use a window during daylight as a light source
- Print the word and transfer it with tracing paper
- Draw the letters freehand if the design is simple
Keep your lettering large enough to stitch comfortably. Tiny letters are much harder to embroider cleanly, especially when you are still learning stitch control.
Place the fabric tightly in the hoop before tracing if you can. That helps the lines stay more accurate. If you are stitching a gift like a napkin corner, tote bag, or baby bib, double-check placement before you start. Centering matters more than people think, especially on personalized projects.
Use Beginner-Friendly Stitches for Clean Letters
You do not need a huge stitch library to embroider beautiful lettering. A few basic stitches can take you very far.
The most useful stitches for letters are:
- Backstitch for clean outlines and print letters
- Split stitch for slightly textured lines
- Stem stitch for smooth cursive lettering
- Satin stitch for filled-in block letters
Backstitch is often the best place to begin. It gives you crisp, controlled lines and works well for names, initials, and simple words. Stem stitch is great when your letters have curves, since it flows more smoothly around bends.
If you are making bold block letters, satin stitch can fill the shapes for a thicker look. This takes more time but gives a polished finish.
A few helpful tips while stitching:
- Use 2 to 3 strands of floss for most lettering
- Keep stitch length short on curves
- Do not pull too tightly
- Step back often and check the letter shape
If one line looks uneven, do not worry. Handmade lettering has personality. Small imperfections often add charm.
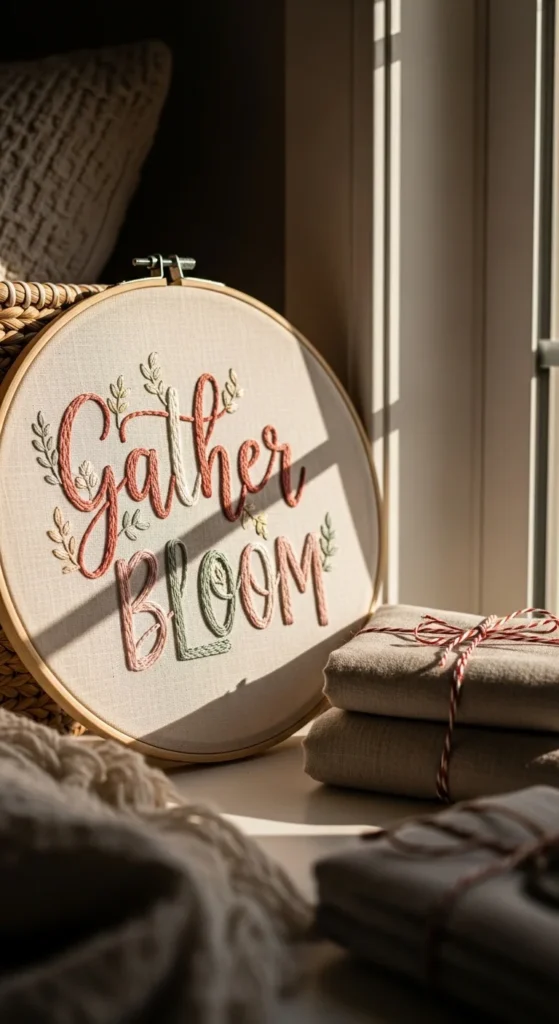
Personalize Your Project in a Creative Way
Once you know how to stitch letters, you can use them on all kinds of gifts and home decor pieces.
Popular ideas include:
- Monogrammed hand towels
- Personalized baby clothes
- Initialed tote bags
- Name hoops for nursery decor
- Linen napkins with stitched initials
- Small quote art for gallery walls
- Cosmetic pouches with names or short words
Think about the person or space you are making it for. Soft floral colors feel sweet for nursery gifts. Neutral thread on linen works beautifully for home decor. Bright thread on denim or canvas gives a more playful look.
You can also dress up the lettering with simple extras like tiny flowers, stars, hearts, or leafy stems around the word. These details make the piece feel fuller without taking attention away from the letters.

Finish It Neatly for a Gift-Worthy Look
The stitching is the star, but the finishing matters too. A neat back side, trimmed threads, and pressed fabric can make the whole project look much more polished.
After you finish stitching:
- Remove any visible transfer marks
- Trim loose threads carefully
- Press the fabric gently from the back
- Mount it neatly if it is hoop art
- Wash only if your materials allow it
If you are giving the piece as a gift, presentation makes it even sweeter. Fold the item neatly, wrap it in tissue, or tie it with ribbon. Even a simple embroidered name feels special when it is packaged with care.
For hoop art, you can leave it in the hoop for an easy display piece. For fabric items like tote bags or napkins, a quick press helps the stitching sit nicely and makes the finished piece look ready to use.
Simple Tips That Make Letter Embroidery Easier
If you are just starting out, these small tricks can help a lot:
- Start with larger letters
- Use simple fonts first
- Practice one letter on scrap fabric
- Keep your fabric tight in the hoop
- Use fewer floss strands for finer detail
- Slow down on curves and corners
It also helps to remember that embroidery gets better with repetition. Your second word will usually look better than your first. Your fifth project will feel much easier than your second.
That is why personalized embroidery is such a satisfying craft. You can start small, improve naturally, and create things that feel thoughtful from the very beginning.
Final Thoughts
Embroidering letters is one of the easiest ways to make handmade gifts and decor feel personal, warm, and memorable. A few stitches can turn everyday fabric into something someone will want to keep. Start with a simple word, a basic stitch, and a fabric you love. Then build from there.
Save this idea for later and try stitching a name, monogram, or favorite word on your next handmade project.

Lily Summers is a digital artist and creative storyteller who loves bringing colorful characters to life. With a passion for cartoons, fan art, and playful sketches, she inspires others to explore their imagination through art. When she’s not sketching, you’ll find her dreaming up new ideas for CraftedWizard.com to spark creativity in every artist. 🌈✨