
Plain glass or ceramic vases are easy to overlook. They sit on shelves, do their job, and fade into the background. But with a bit of rope and some paint, those same vases can turn into warm, handmade decor pieces that instantly change the feel of a room.
This project is simple, affordable, and very forgiving. You don’t need perfect lines or advanced skills. The mix of texture from rope and color from paint makes even small mistakes look intentional. Let’s walk through it step by step.
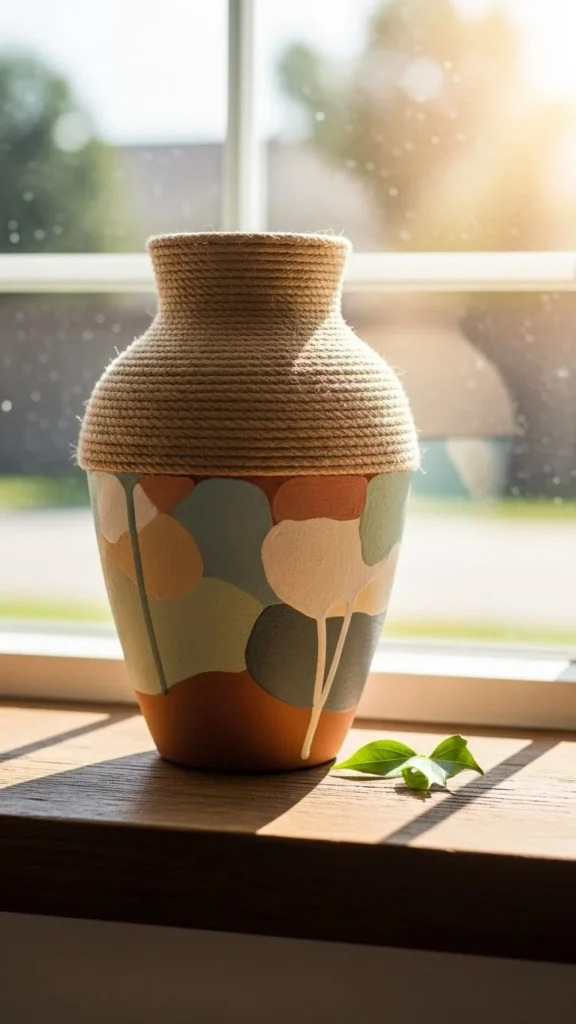
Why Rope and Paint Work So Well Together
Rope brings texture. Paint adds color. Together, they balance each other.
This combo works because:
- Rope adds warmth and a handmade feel
- Paint lets you match your room’s colors
- Both materials are easy to find and budget-friendly
You can go rustic, coastal, modern, or boho just by changing colors and rope thickness.
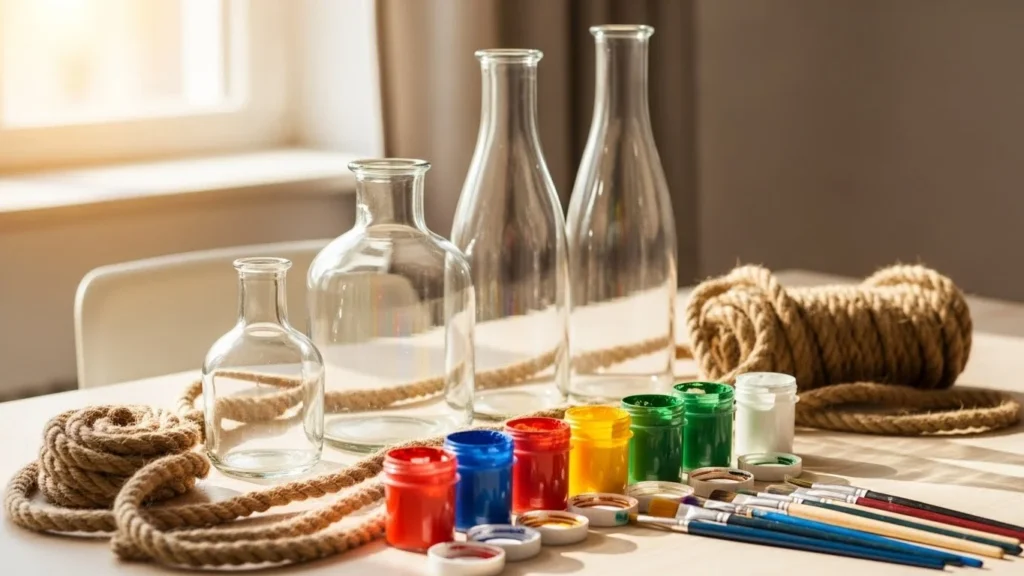
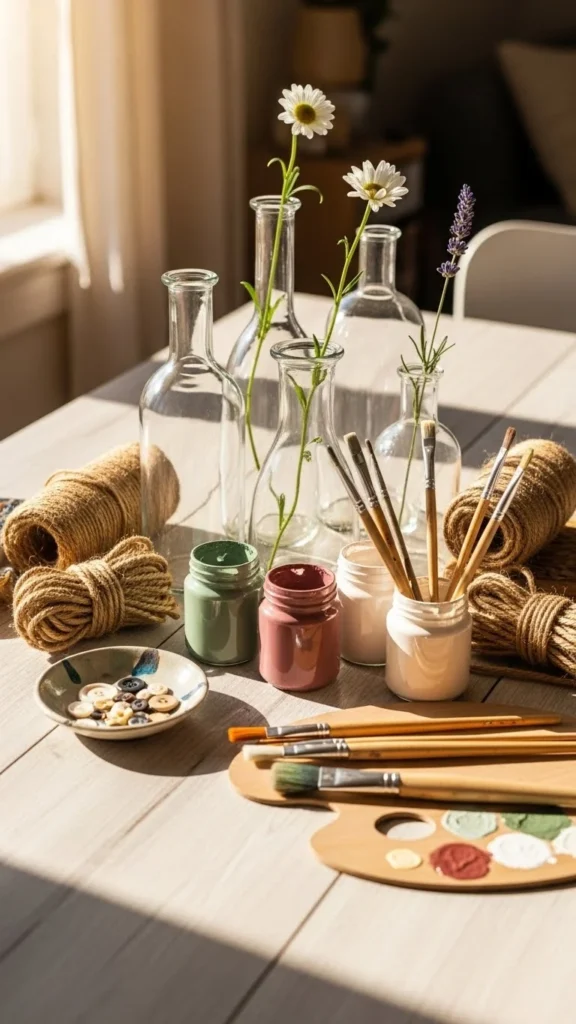
Supplies You’ll Need
Before starting, gather everything so the process feels smooth.
Basic supplies:
- Flower vases (glass, ceramic, or plastic)
- Jute or cotton rope
- Acrylic or chalk paint
- Paintbrushes or foam brushes
- Strong glue or hot glue gun
- Scissors
Optional extras:
- Painter’s tape
- Sealer spray or clear varnish
- Old newspaper for protection
Tip: Thrift stores are great places to find vases cheaply.
Step 1: Prepare the Vase Surface
Clean vases work better for both glue and paint.
Do this first:
- Wash the vase with warm water
- Dry it fully
- Wipe with rubbing alcohol if it feels slick
If the vase is very shiny, lightly sanding it helps paint stick better.
This step takes just a few minutes but makes the rest easier.
Step 2: Adding Rope for Texture
Now comes the fun part—wrapping the rope.
Start at the base:
- Add a small line of glue
- Press the rope firmly into place
- Wrap tightly around the vase
Work your way up slowly.
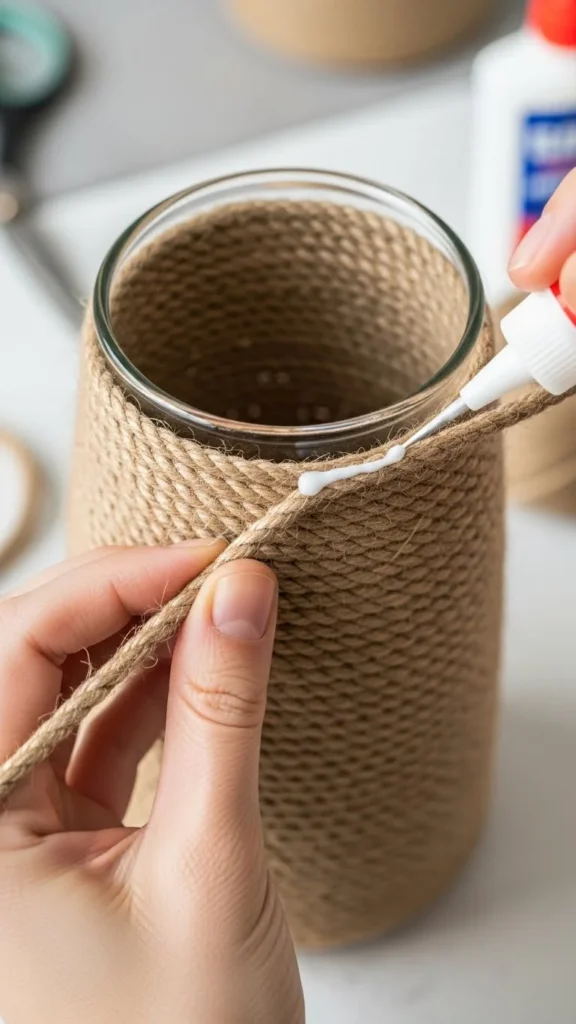
Helpful tips:
- Add glue in small sections to avoid mess
- Keep tension even for a clean look
- Trim rope neatly when finishing
Design ideas:
- Wrap the entire vase
- Create thick rope bands
- Leave gaps for painted sections
Let the glue dry completely before painting.
Step 3: Painting the Vase and Rope
Once the rope is secure, it’s time for color.
You can paint:
- Just the rope
- Just the vase
- Both for a layered look
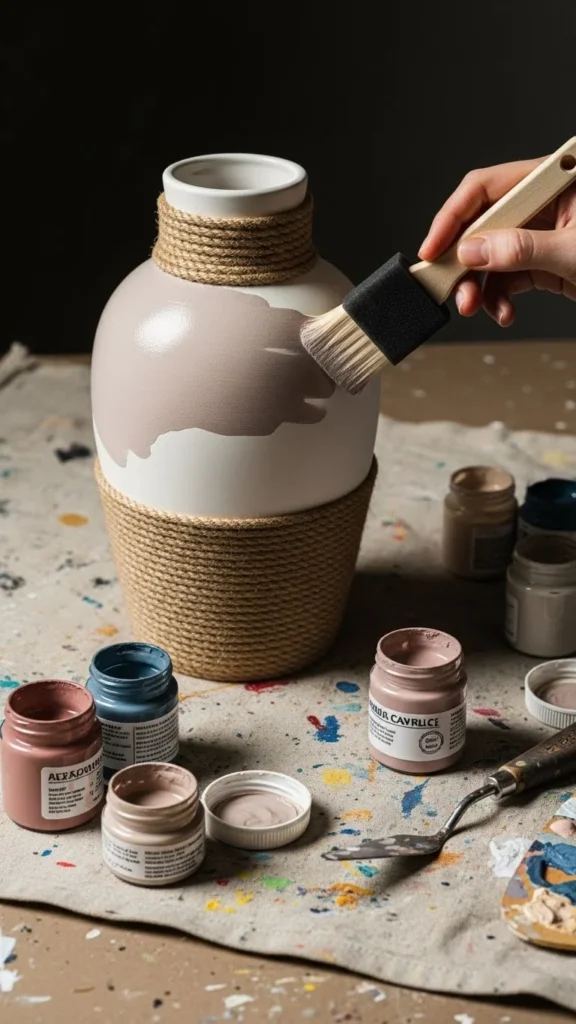
Painting tips:
- Use dabbing motions on rope
- Thin layers work better than thick ones
- Let each coat dry before adding another
Popular color ideas:
- White or cream for farmhouse style
- Terracotta and beige for earthy tones
- Soft blues for coastal decor
- Black for a modern look
Don’t worry about full coverage on rope. Slight variation adds character.
Step 4: Creating Simple Design Variations
Once you’re comfortable, try mixing things up.
Easy variations:
- Paint only the top half
- Use two paint colors
- Leave rope natural and paint the vase
- Add thin painted stripes between rope sections
You can also:
- Use painter’s tape for clean lines
- Try sponge painting for texture
Each vase can look different while still working together as a set.
Step 5: Sealing and Drying
Sealing helps protect the paint, especially if the vase will be handled often.
Options include:
- Clear spray sealer
- Brush-on varnish
Let everything dry fully before sealing. Work in a ventilated area.
If the vase will hold water:
- Avoid sealing the inside
- Use a glass insert if needed
Styling Your Finished Vases
Once done, styling brings everything together.
Try placing them:
- On shelves with books
- On dining tables with dried flowers
- In bathroom corners with greenery
- Grouped in sets of three
Styling tips:
- Mix heights
- Stick to one color family
- Leave space around each vase
Even empty, these vases work as decor.
Common Mistakes to Avoid
A few small things can trip people up.
Watch out for:
- Too much glue showing
- Painting before glue dries
- Using rope that’s too thin
- Rushing drying time
Slow and steady gives better results.
Final Thoughts
Decorating flower vases with rope and paint is an easy way to add texture, color, and personality to your space. Each piece turns out a little different, which makes them feel personal and handmade.
Save this project for later, grab a few old vases, and try it out this weekend. A simple craft can make a big difference in how your home feels.

Lily Summers is a digital artist and creative storyteller who loves bringing colorful characters to life. With a passion for cartoons, fan art, and playful sketches, she inspires others to explore their imagination through art. When she’s not sketching, you’ll find her dreaming up new ideas for CraftedWizard.com to spark creativity in every artist. 🌈✨


