

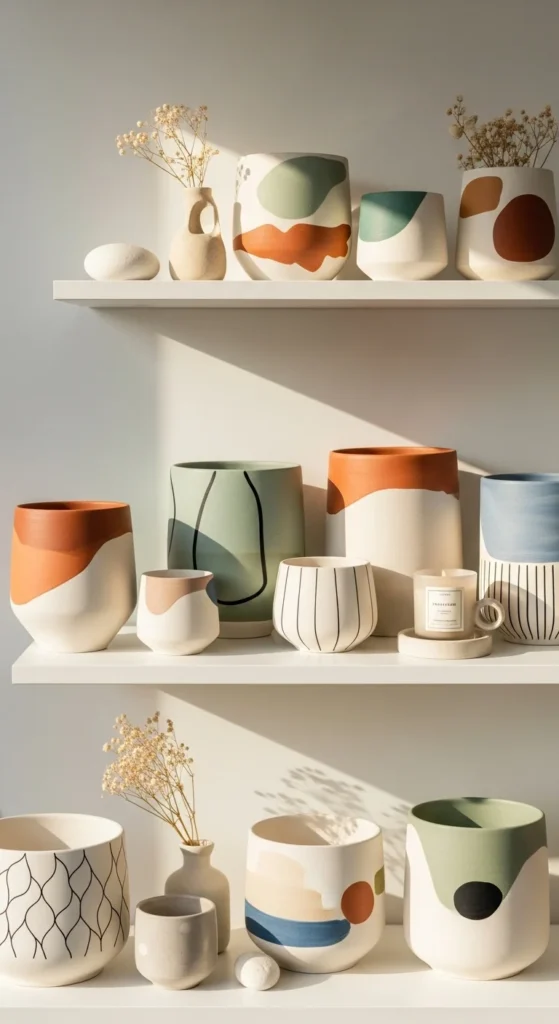
Looking for a fun and creative weekend project that instantly upgrades your home décor? Decorating clay pots is an easy and budget-friendly craft that transforms plain terracotta into gorgeous statement pieces. Whether you love boho florals, bold geometric patterns, or minimal neutral designs, painted clay pots add personality to any shelf, balcony garden, or indoor plant corner.
The best part? You don’t need fancy art skills—just a few supplies and some inspiration. Let’s walk through how to design stunning clay pots step-by-step!
Why Customize Clay Pots?
Clay pots have a rustic, earthy charm on their own, but decorating them takes them to the next level. Here’s why DIY lovers adore painting clay pots:
- Budget-friendly décor: A cheap pot + paint = a designer look.
- Fully customizable: Choose colors, patterns, themes, or seasonal styles.
- Gift-worthy: Perfect for birthdays, housewarmings, or Mother’s Day.
- Therapeutic craft: Relaxing, creative, and suitable for all skill levels.
From botanical illustrations to modern patterns, the possibilities are endless!
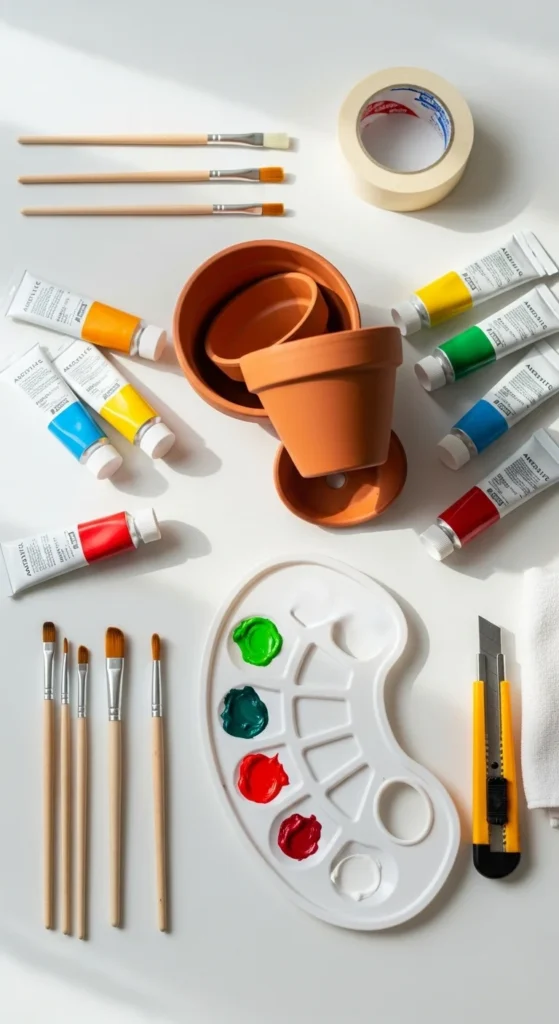
Supplies You’ll Need
You don’t need much to get started. Here are the essentials:
- Terracotta or clay pots (any size)
- Acrylic paint or outdoor paint (if pot will be outside)
- Paintbrushes (small + medium sizes)
- Painter’s tape (for clean lines)
- Pencil for sketching designs
- Clear sealant or varnish (to protect your artwork)
Optional add-ons:
- Sponge brushes for smooth base coats
- Stencils for easy patterns
- Metallic paints or paint pens for fine details
Tip: Clean pots with a damp cloth before painting so the surface is dust-free.
Step-by-Step: Painting Your Clay Pots
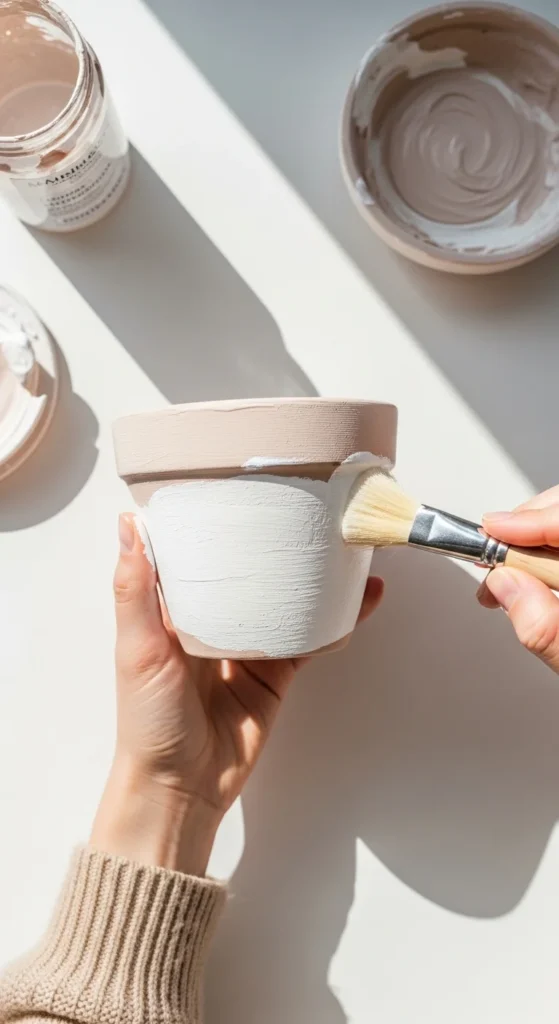
Step 1: Apply a Base Coat
Start by painting a solid base layer. This gives your design a smooth starting point and helps colors pop.
- Choose a neutral base like white, beige, or soft pastel for a modern look.
- Use a sponge brush or wide brush for even coverage.
- Let it dry completely before adding designs—usually 20–30 minutes.
Step 2: Sketch or Map Out Your Design
Before painting directly on the pot, lightly sketch your pattern with a pencil.
Design ideas you can try:
- Simple stripes or polka dots
- Bold geometric shapes
- Floral or leafy botanical patterns
- Abstract or boho line art
- Half-and-half dipped paint effect
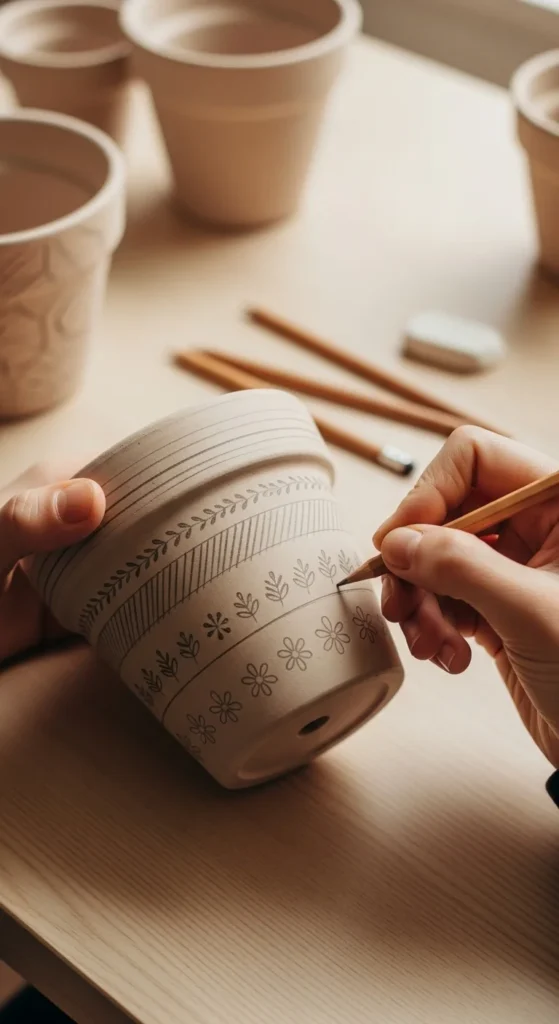
If you want crisp shapes, use painter’s tape to section areas and create clean lines.
Step 3: Add Color and Details
Time to bring your pot to life! Paint your chosen design slowly and layer colors for a neat finish. For tiny details, use a fine brush or paint pen.
[Image Prompt] A close-up of hands painting botanical leaf patterns in green on a clay pot, with a paint palette and brushes on a table in natural light.
Some fun pattern ideas to experiment with:
- Boho Floral: Soft florals and leafy vines with muted tones
- Modern Geometric: Triangles, stripes, and color blocks
- Southwestern Style: Terracotta tones, suns, moons, and zig-zag lines
- Mediterranean Tiles: Blue and white intricate designs
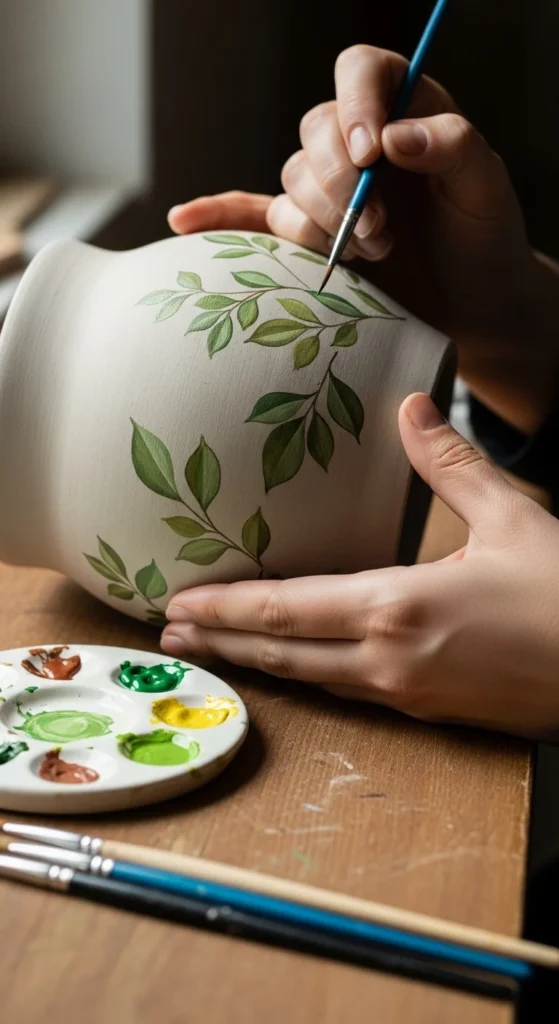
Allow each color layer to dry before adding another to avoid smudging.
Step 4: Seal Your Artwork
Once your design is completely dry, seal the pot with a clear varnish or spray sealant.
Why seal?
- Protects paint from water and fading
- Makes the pot last longer indoors or outdoors
- Gives a polished and professional finish
Let the sealant dry fully before placing plants inside.
Creative Themes You Can Try
Want to take your decorating to the next level? Try crafting a themed pot set!
- Herb Garden Set: Paint each pot with the herb name and a tiny illustration (Mint, Basil, Rosemary)
- Seasonal Pots: Spring flowers, summer citrus, fall pumpkins, winter snowflakes
- Kids’ Craft Pots: Let kids paint smiley faces, animals, or rainbow themes
- Neutral Aesthetic: Beige, white, gold accents, and simple brush strokes
- Boho Chic: Earthy tones, moons, stars, and dotted borders
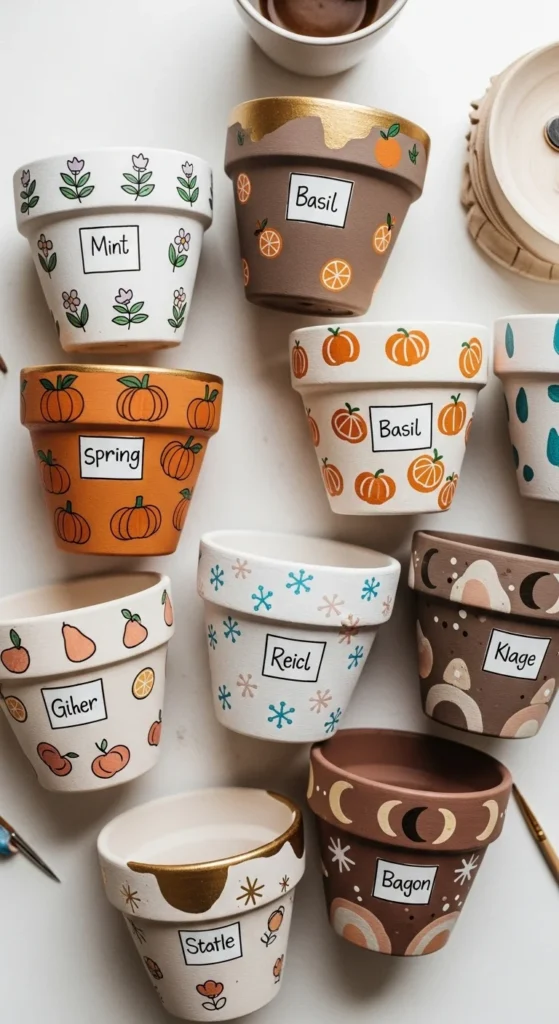
These sets make great gifts and add cohesive charm to your home.
Tips for Beautiful and Long-Lasting Designs
Use these tricks to keep your clay pots looking fresh and vibrant:
- Prime the pot with white paint if the surface absorbs color too much
- Paint inside the rim to avoid water stains showing
- Choose outdoor paint or seal heavily if placing outside
- Mix a little water into acrylic paint for a smoother application
- Add metallic touches (gold or copper) for a luxe finish
Ready to Paint Your First Clay Pot?
Decorating clay pots is a simple DIY that brings creativity and color into your living space. With just a few materials and your imagination, you can turn ordinary pots into unique art pieces that brighten your shelves, window sills, and garden corners.
Save this guide for your next crafting day—and get ready to show off your beautiful hand-painted clay pots!

Lily Summers is a digital artist and creative storyteller who loves bringing colorful characters to life. With a passion for cartoons, fan art, and playful sketches, she inspires others to explore their imagination through art. When she’s not sketching, you’ll find her dreaming up new ideas for CraftedWizard.com to spark creativity in every artist. 🌈✨


