
Macramé wall hangings have taken over Pinterest boards and cozy homes for a reason they bring warmth, texture, and an artistic touch to any space. What’s even better? You don’t need to be a professional crafter to make one yourself. With just a few knots, some soft cotton cord, and a little creativity, you can turn a plain wall into a boho masterpiece.
Whether you’re decorating your bedroom, living room, or even a nursery, macramé wall hangings can instantly transform the space. Let’s walk through an easy step-by-step guide to creating one that looks boutique-worthy no experience required!
Step 1: Gather Your Macrame Essentials
Before you start tying knots, let’s make sure you have everything you need. The right materials make your project easier and your design cleaner.
You’ll need:
- Macramé cord: Cotton cord (3–5 mm thick) works best for beginners.
- Wooden dowel or driftwood: This will hold your design — pick a length that fits your wall space.
- Scissors: Sharp ones to get neat edges.
- Measuring tape: For accurate cord lengths.
- Optional: Beads, feathers, or wooden rings for added detail.
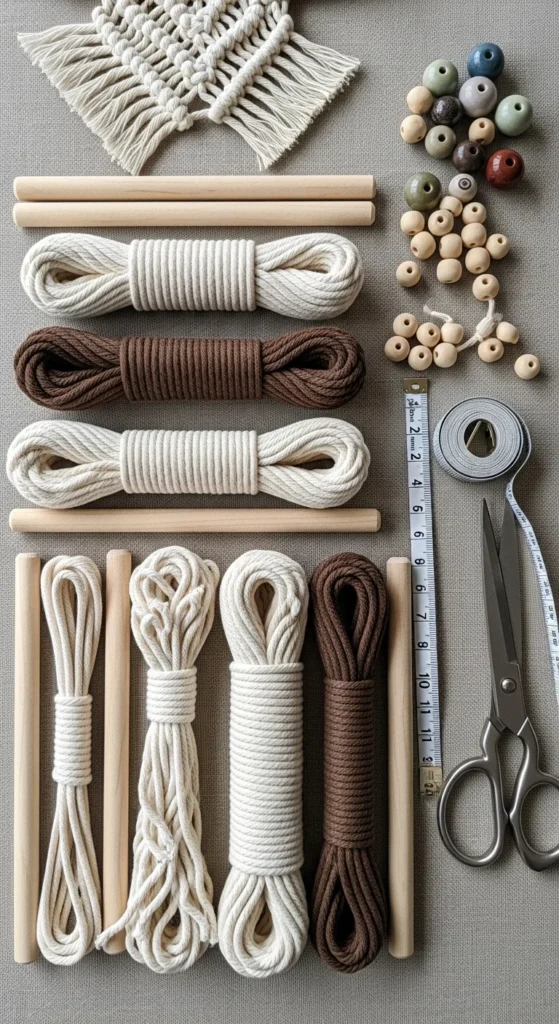
Pro tip: Choose a soft, natural cord in cream or beige for a classic boho vibe, or try dusty pink, mustard, or sage green for a trendy twist.
Step 2: Measure and Cut Your Cords
Getting the right cord length is key to creating a balanced design.
- Measure about 8–10 cords, each 4–6 times longer than your desired wall hanging length. (It’s always better to have extra than run short!)
- Fold each cord in half to find the midpoint.
- Use a lark’s head knot to attach each folded cord to your dowel — simply loop the folded end around the dowel and pull the loose ends through.
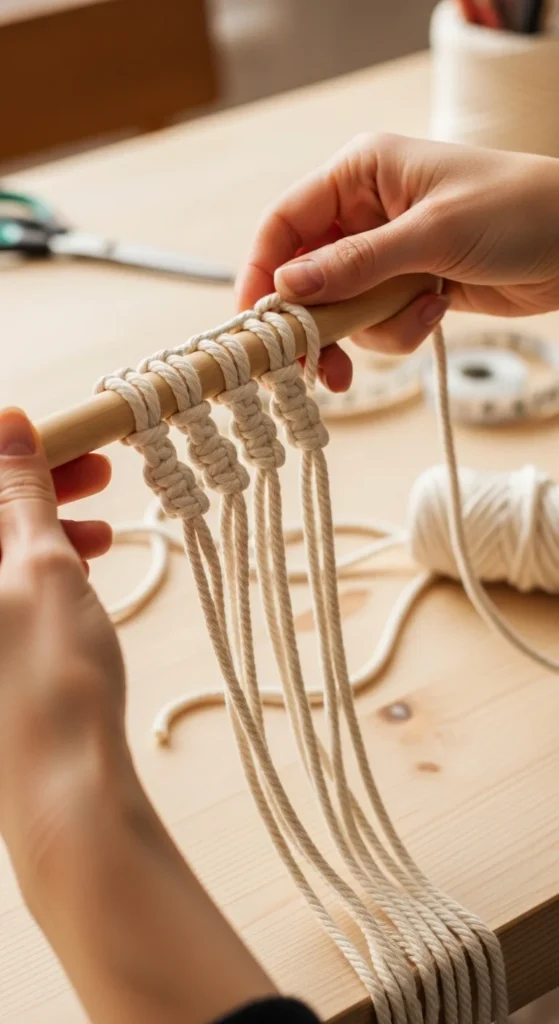
Once all cords are attached, spread them out evenly you’re now ready to start knotting!
Step 3: Learn the Basic Macramé Knots
Don’t worry — macramé isn’t as complicated as it looks. Most wall hangings use only two or three main knots. Master these, and you can create endless designs:
- Square Knot: The most popular knot, perfect for creating patterns. Take four cords — cross the left cord over the two middle cords, then bring the right cord over and under to complete the knot. Repeat on the opposite side.
- Half Hitch Knot: Ideal for diagonal lines and fringe details. Wrap one cord over another to create smooth, angled rows.
- Double Half Hitch Knot: Gives you a sturdy, structured look — great for borders.

Pro tip: Practice each knot on a small piece first — once you get the rhythm, it feels like second nature.
Step 4: Create Your Pattern
Now that you know the basic knots, it’s time to design! Start simple — you can always add more layers later.
Here’s an easy beginner-friendly pattern idea:
- Begin with four square knots in a row.
- On the next row, start between the previous knots to create a diamond pattern.
- Continue this alternating pattern until you reach the desired length.
- Add a few diagonal double half hitches for a stylish geometric finish.

Style tip: Mix knot types and add beads or small wooden rings between rows for texture and uniqueness.
Step 5: Trim and Add Fringe
The fringe is what gives your macramé that soft, free-flowing look.
- Once your main pattern is complete, use scissors to trim the ends into a V-shape, U-shape, or straight line, depending on your style.
- Comb out the ends gently with a wide-tooth comb for a fuller, fluffier fringe.
- Optional: Add a few colored threads or feathers at the ends for a boho accent.
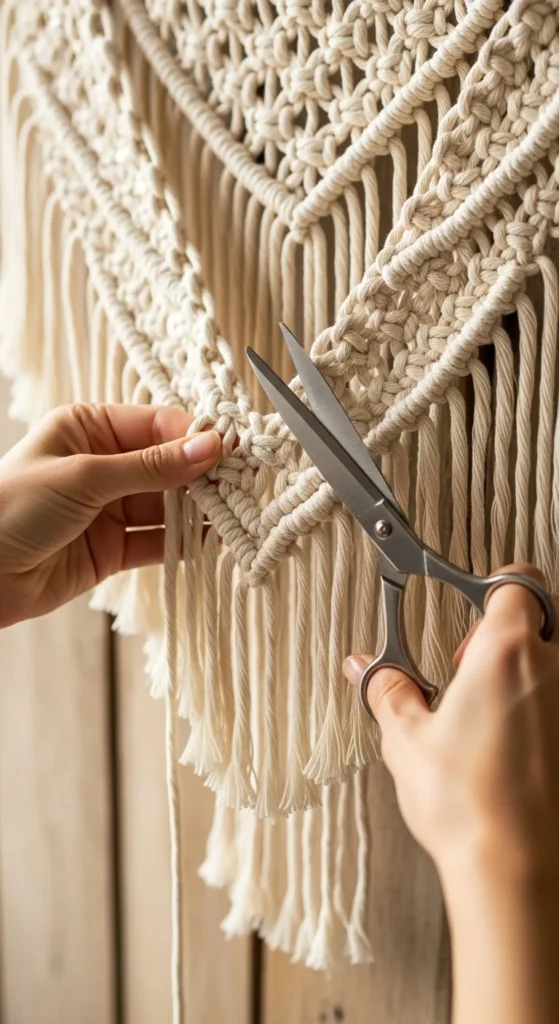
Pro tip: Spray a little fabric stiffener on the fringe if you want it to keep its shape over time.
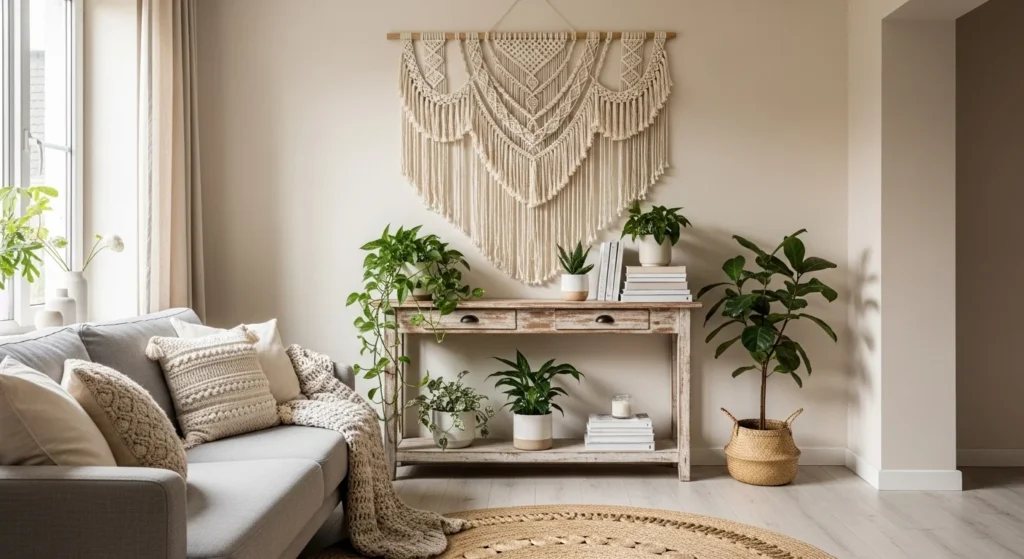
Step 6: Hang and Admire Your Work
Once your macramé wall hanging is done, it’s time to show it off!
Here are a few ideas on where to display it:
- Above your bed as a bohemian headboard alternative.
- In your living room to add warmth and texture to a blank wall.
- Near a reading nook or workspace for cozy, creative vibes.
- In a nursery or entryway for a soft, handmade touch.
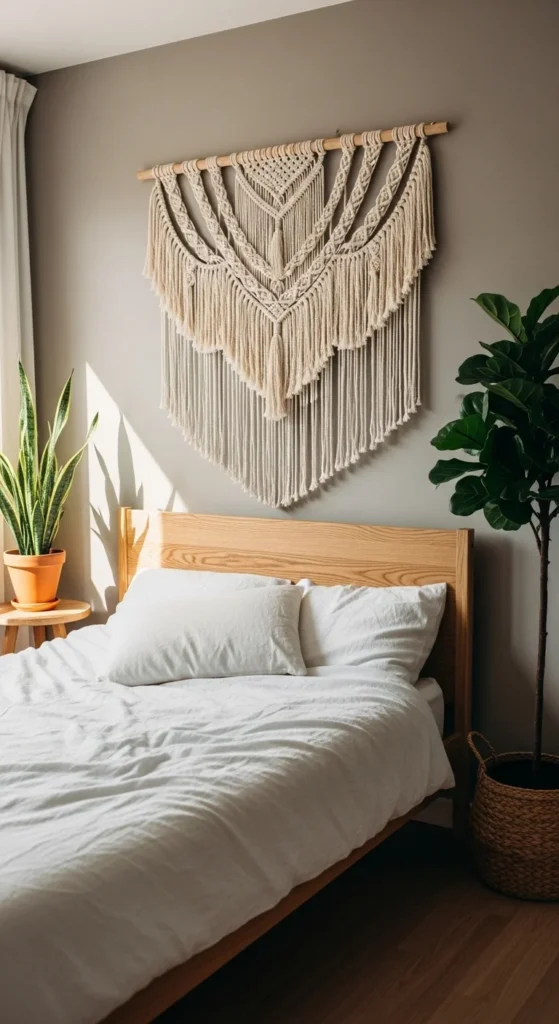
Decor tip: Pair your wall hanging with other natural textures like woven baskets, wooden shelves, or rattan furniture for a cohesive look.
Keep Creating and Experimenting 🌿
The beauty of macramé lies in its versatility. Once you master the basics, you can create plant hangers, curtains, keychains, or even lampshades. Every knot tells a story — and each design adds personality to your home.
So grab your cords, put on your favorite playlist, and start knotting your next masterpiece today.
✨ Save this macramé guide for your next DIY weekend project! ✨

Lily Summers is a digital artist and creative storyteller who loves bringing colorful characters to life. With a passion for cartoons, fan art, and playful sketches, she inspires others to explore their imagination through art. When she’s not sketching, you’ll find her dreaming up new ideas for CraftedWizard.com to spark creativity in every artist. 🌈✨


