
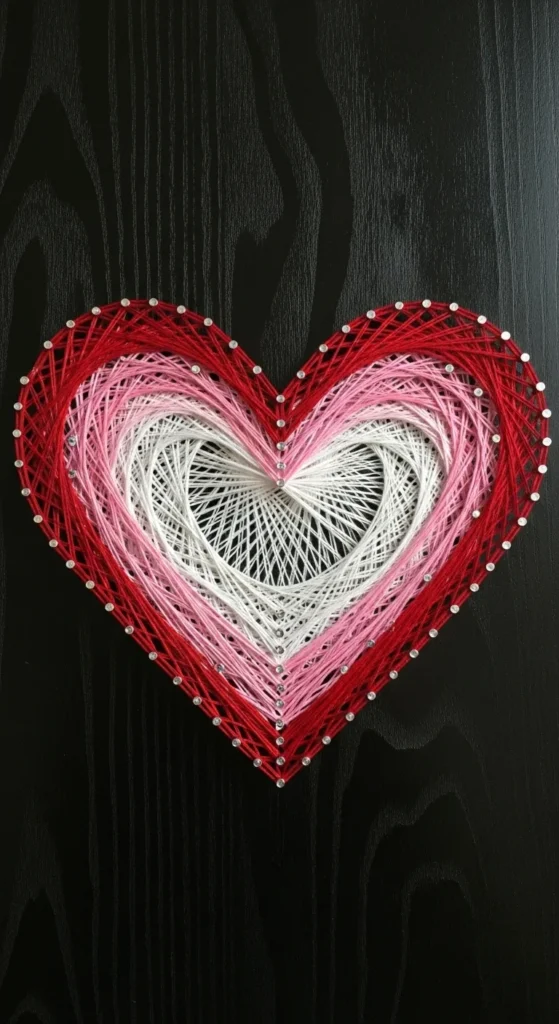
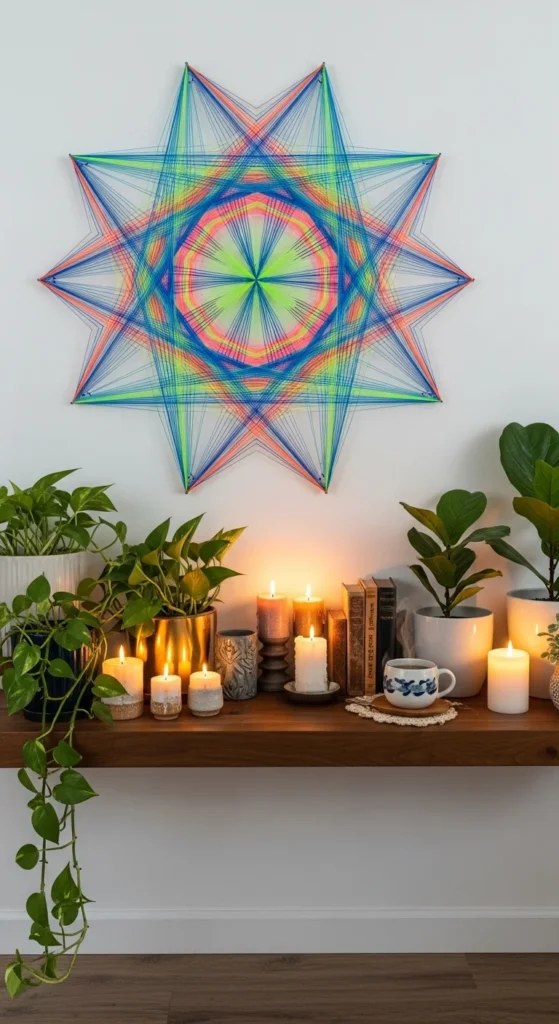
There’s something magical about turning a plain wooden board into a vibrant work of art with just nails and thread. String art combines creativity, precision, and a dash of patience to create geometric designs, hearts, stars, or even your favorite words. Whether you’re looking for a fun DIY project or a handmade gift idea, string art is a perfect choice—even for beginners.
Gather Your Materials
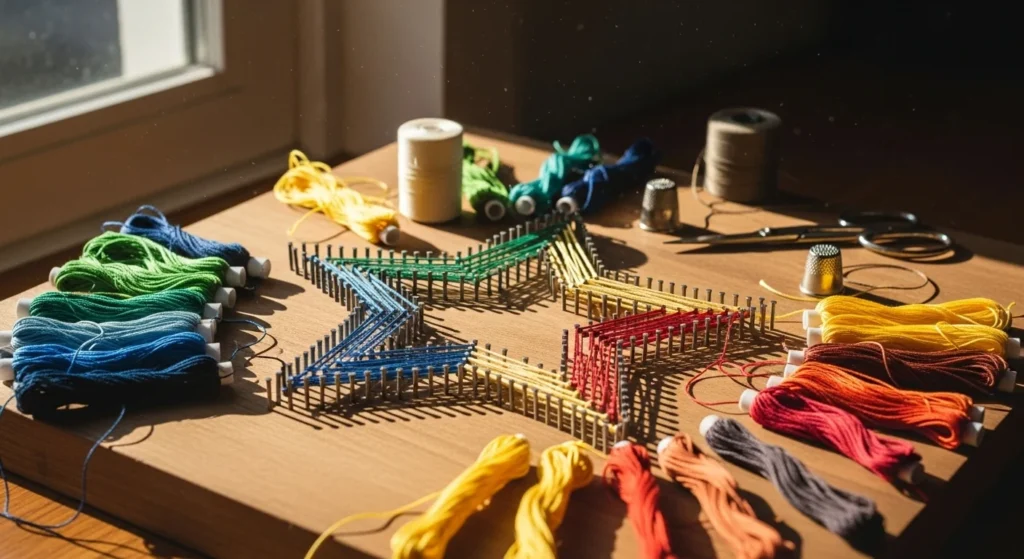
Before you start weaving magic, it’s important to have the right tools on hand. Don’t worry, string art doesn’t require anything fancy.
You’ll need:
- Wooden board (smooth, untreated is best)
- Nails or pins with flat heads
- Embroidery thread, yarn, or thin string
- Hammer
- Pencil and ruler for marking your design
- Optional: printed template for complex designs
Tips for beginners:
- Bright, contrasting thread colors make designs pop.
- Embroidery thread is perfect for detailed patterns, while yarn gives a bolder look.
- Keep nails small and evenly spaced for cleaner results.

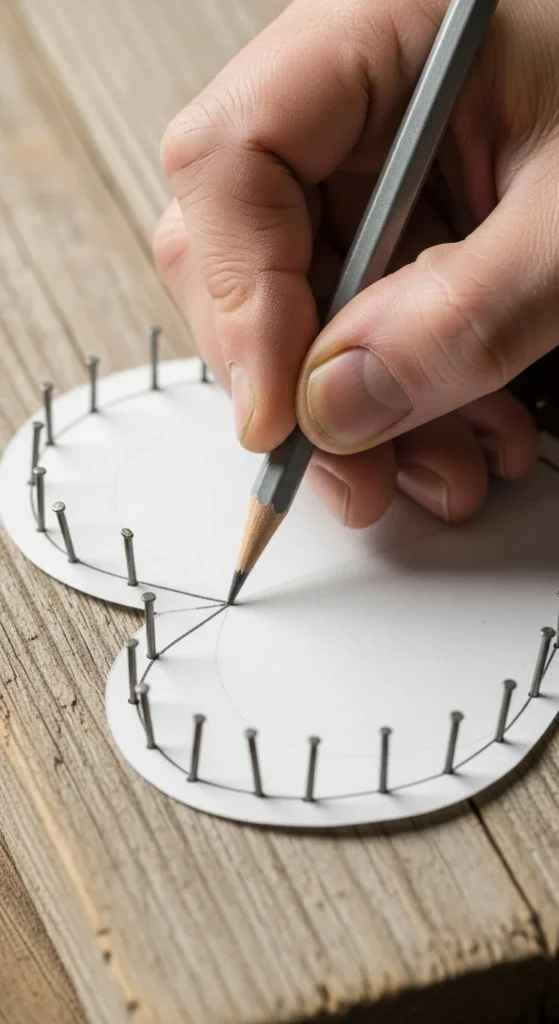
Step 1: Plan Your Design
The secret to striking string art is a well-thought-out design. Start simple and grow from there.
- Sketch your design lightly with a pencil or use a printed template.
- Mark nail positions along the outline, spacing them evenly (0.5–1 inch apart works well).
- Double-check spacing and symmetry before hammering to avoid frustration later.
Pro Tip: Geometric shapes like triangles, diamonds, or circles are great for beginners because the lines are easy to follow.
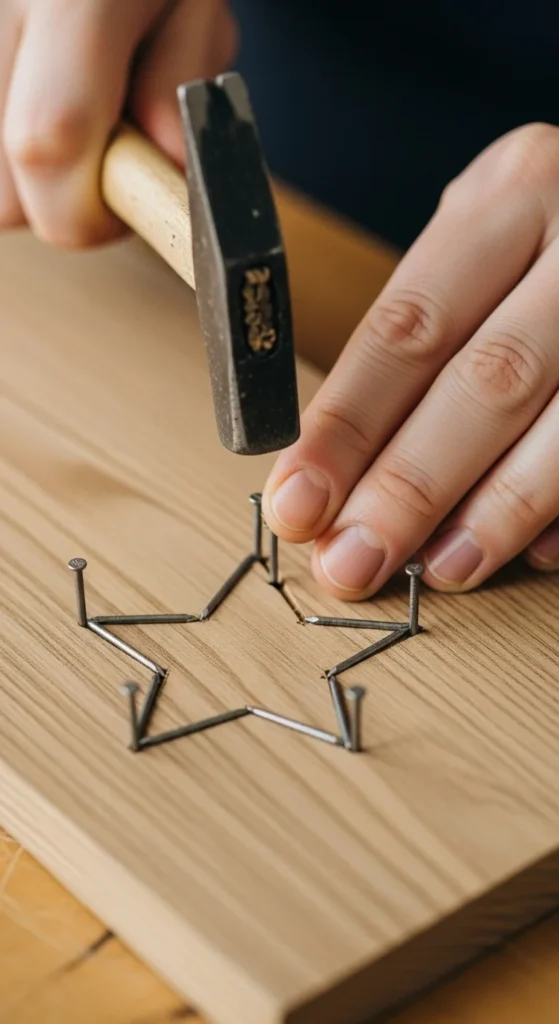
Step 2: Hammer the Nails
Once your design is ready, it’s time to start hammering. This is where patience matters most.
- Hold the nail steady and gently tap until it’s secure, leaving enough length to wrap the string.
- Ensure nails are straight; crooked nails make stringing tricky.
- Work from the center outward if the design is large to avoid crowding your workspace.
Safety Tip: Use a clothespin or nail cap to hold tiny nails, keeping fingers safe from the hammer.
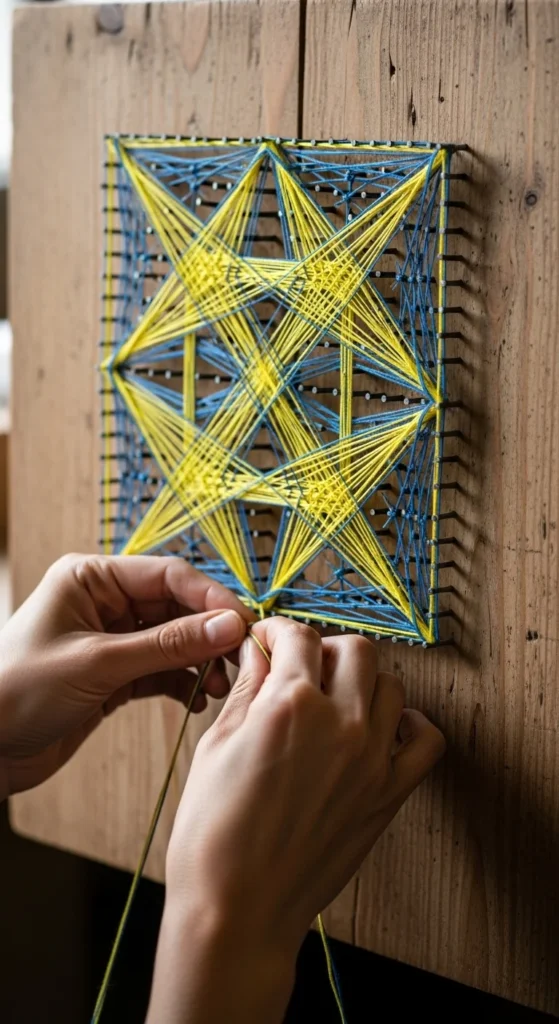
Step 3: Weave the Thread
Here’s where your design truly comes to life. Wrapping thread around the nails creates that mesmerizing string art effect.
- Tie the thread securely to the first nail.
- Stretch it to another nail and loop around.
- Continue weaving, creating layers, crisscrosses, or radial patterns.
- Once satisfied, tie off the string and trim excess.
Tips for smooth stringing:
- Keep thread taut but not overly tight to avoid bending nails.
- Mix colors for depth or patterns.
- Use a ruler or straight edge for precise lines in geometric designs.
Step 4: Add Creative Details
Once your basic design is done, you can elevate it with extra flair:
- Layer multiple colors for gradients or rainbow effects.
- Add beads, sequins, or tiny charms along the thread.
- Paint or stain the wooden board before stringing for a personalized background.
- Combine different thread textures for a dynamic, tactile look.
Step 5: Display Your Masterpiece
After all the effort, your string art deserves to shine.
- Hang with a sawtooth hanger or picture wire.
- Lean against shelves or mantles for a relaxed display.
- Gift it as a personalized, handmade present for friends or family.
Pro Tip: Lightly erase pencil marks for a clean finish before showing off your art.
String art is simple, relaxing, and endlessly customizable. Once you master the basics, you can explore new patterns, colors, and textures—creating unique pieces for your home or as thoughtful gifts.
Save this guide and start your first string art project today—watch a few nails and threads transform into stunning, eye-catching art!

Lily Summers is a digital artist and creative storyteller who loves bringing colorful characters to life. With a passion for cartoons, fan art, and playful sketches, she inspires others to explore their imagination through art. When she’s not sketching, you’ll find her dreaming up new ideas for CraftedWizard.com to spark creativity in every artist. 🌈✨


