
There’s something magical about wearing jewelry that feels uniquely yours. Beaded bracelets with personalized charms are not only trendy and aesthetic — they’re meaningful, gift-worthy, and incredibly fun to make. Whether you want a bracelet that reflects your personality, tells a story, or carries a tiny charm of good luck, this DIY craft is perfect for all ages and skill levels.
This guide will walk you through everything you need to create beautiful, custom bracelets — from choosing materials to designing, stringing, and adding those special charm details.
Why Personalized Charm Bracelets Are So Popular
Handmade charm bracelets are trending on Pinterest, Etsy, and TikTok — and for good reason! They’re:
- Customizable: Add initials, birthstones, symbols, or meaningful messages.
- Budget-friendly: Create luxe-looking jewelry at home for a fraction of the price.
- Giftable: Perfect for birthdays, bridesmaid gifts, friendship bracelets, or party favors.
- Therapeutic: Crafting can be calming and creatively fulfilling.
Whether you prefer boho, minimal, glam, or aesthetic styles, you can design bracelets that match your vibe.
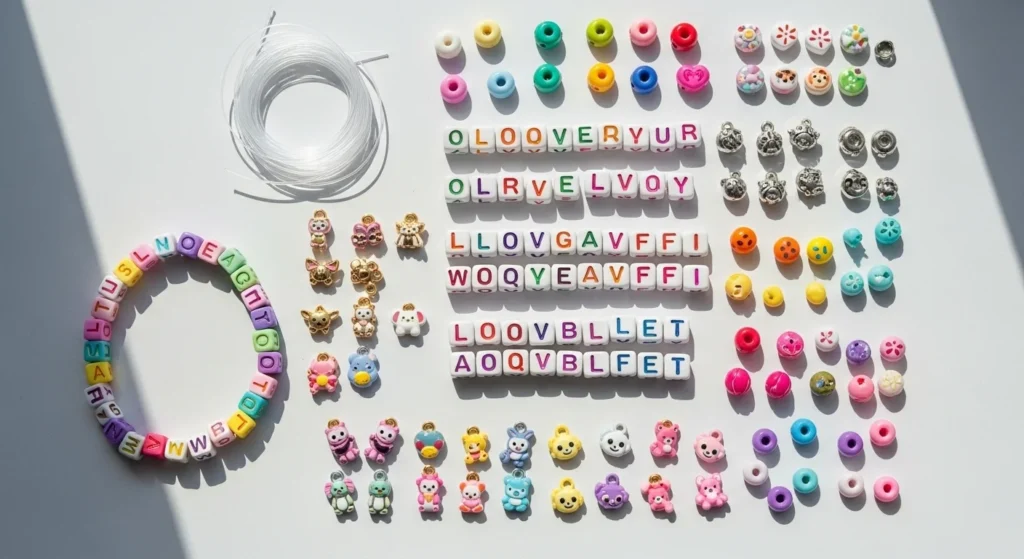
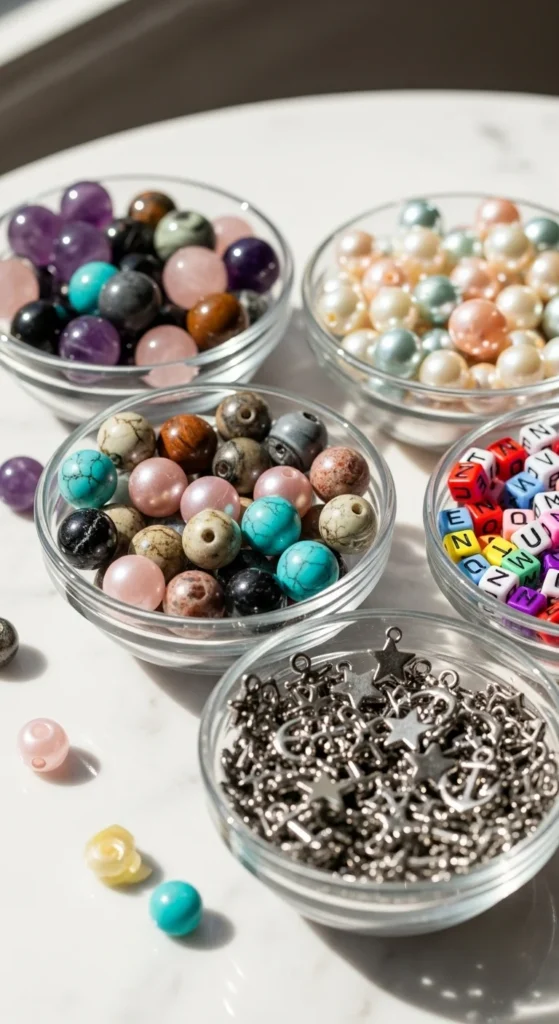
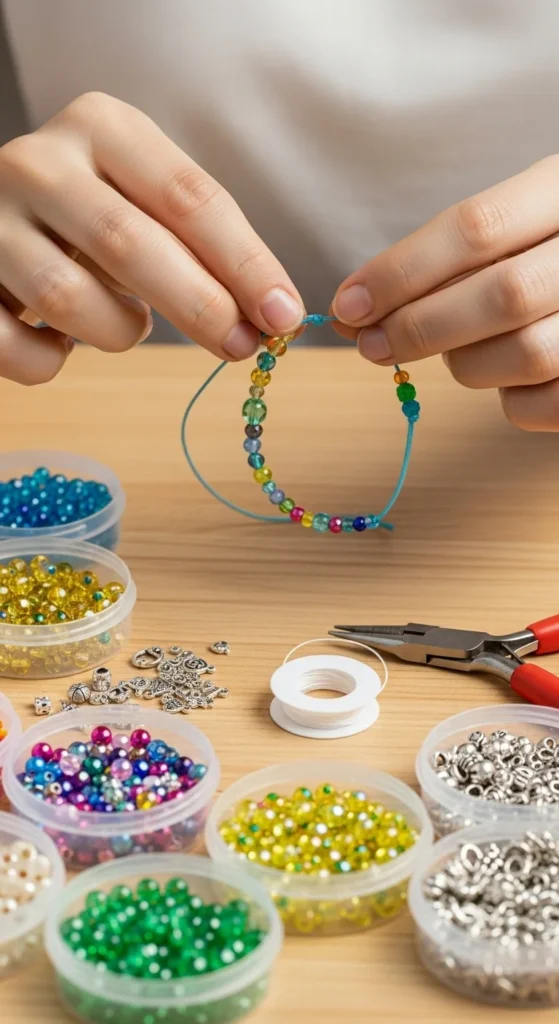
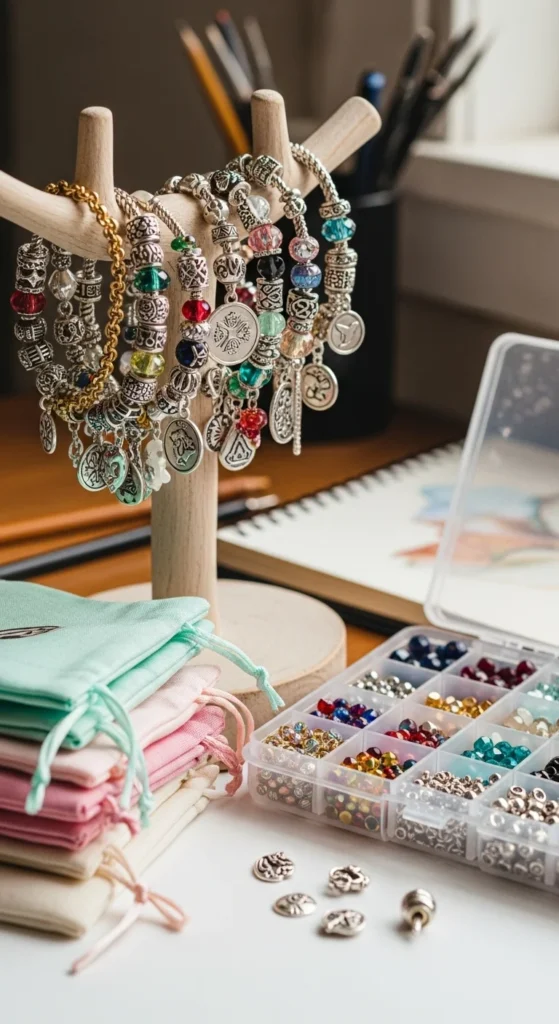
Supplies You’ll Need
Gather these basic materials before getting started. You can find them at craft stores or online.
- Elastic beading cord (0.6–1 mm for durability)
- Assorted beads: glass, seed, acrylic, wooden, pearl, gemstone, or polymer clay
- Alphabet beads (for names and words)
- Charms: initials, zodiac, hearts, butterflies, birthstones, or meaningful symbols
- Jewelry glue or clear nail polish (to seal knots)
- Scissors
- Optional: bead stopper or tape to prevent slipping
Tip: Choose a color palette before starting to keep your bracelet cohesive.
Step-by-Step: How to Make a Personalized Charm Bracelet
Follow these simple steps to create a stylish beaded bracelet with your signature touch.
Step 1: Plan Your Design
Before stringing beads, think about the overall look.
Ask yourself:
- Do you want a single charm or multiple charms?
- Should it include a name, a word, or a date?
- Will you follow a color theme or a random bead pattern?
Popular design themes you can try:
- Pastel Dream: baby pink, lilac, mint + heart charm
- Boho Earthy: wooden beads + leaf charm
- Glam Gold: pearl and gold beads + initial charm
- Friendship Style: matching bead pattern + two-name beads
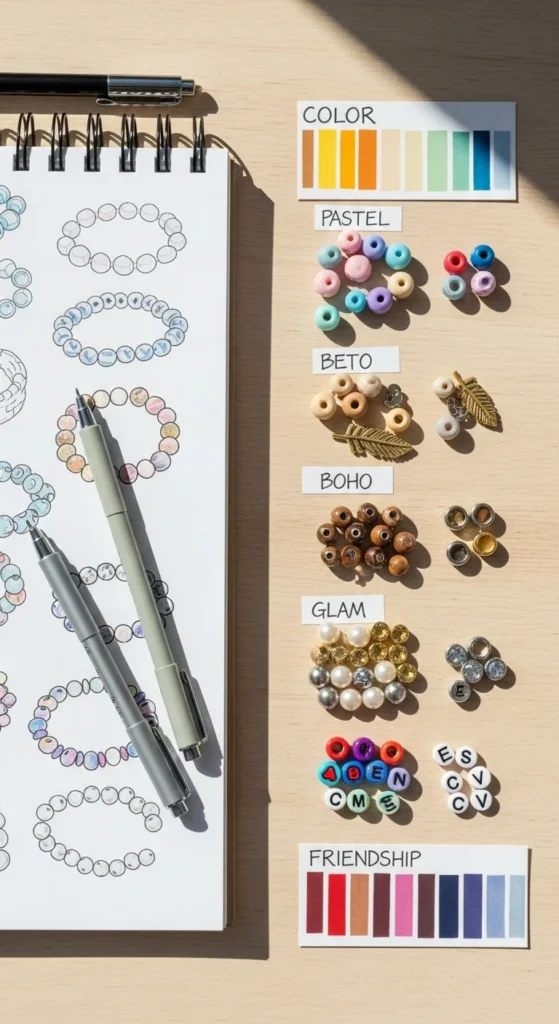
Taking a few minutes to plan helps you avoid mistakes and keeps your design intentional.
Step 2: Measure and Cut Your Cord
Wrap the cord around your wrist to measure the size. Add 2–3 extra inches to tie the knot easily.
Standard sizing guide:
- Small wrists: 6–6.5 inches
- Medium wrists: 7–7.5 inches
- Large wrists: 8–8.5 inches
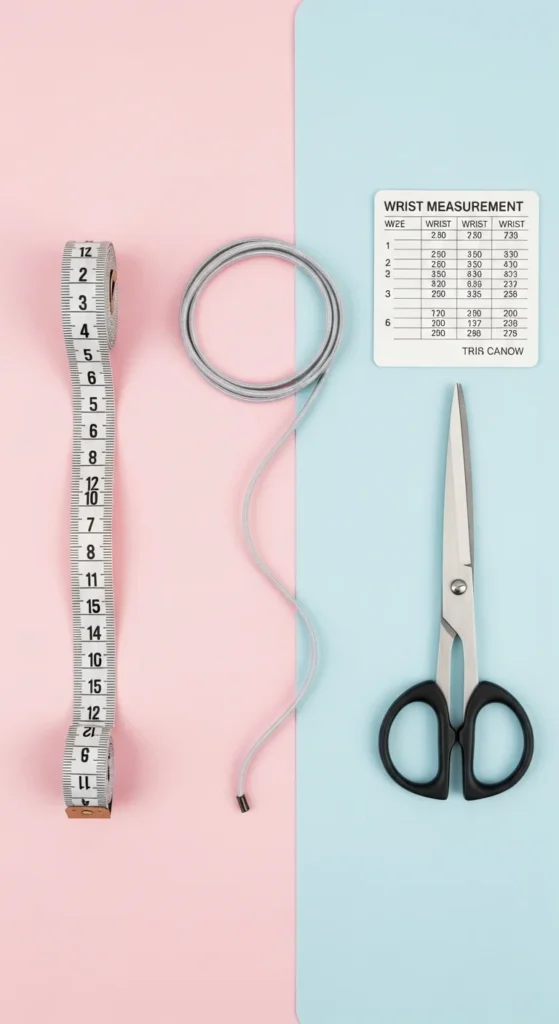
Cut the cord using sharp scissors so the ends don’t fray. Secure one end with a bead stopper or tape.
Step 3: Start Beading
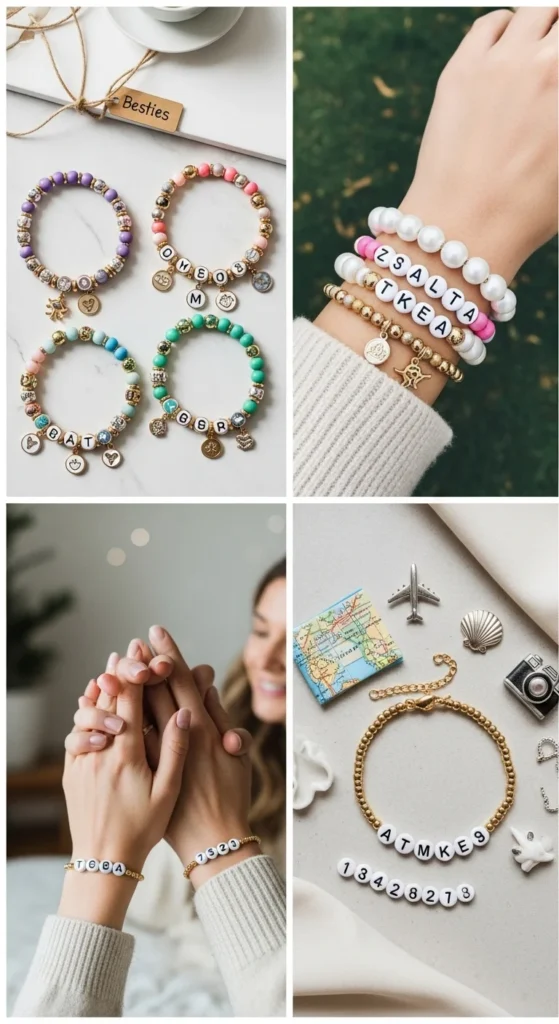
Slide your beads onto the cord in your chosen pattern. Add alphabet beads to spell names, messages, or positive words like “LOVE,” “LUCK,” “BREATHE,” or “DREAM.”
Here are some cute ideas:
- Your initials with a mini heart charm
- Birth month gemstone + zodiac charm
- “Bestie” or matching bracelets for friends
- Power word like “FEARLESS,” “PEACE,” or “GROW”
Tip: Alternate bead sizes for a more aesthetic, balanced look.
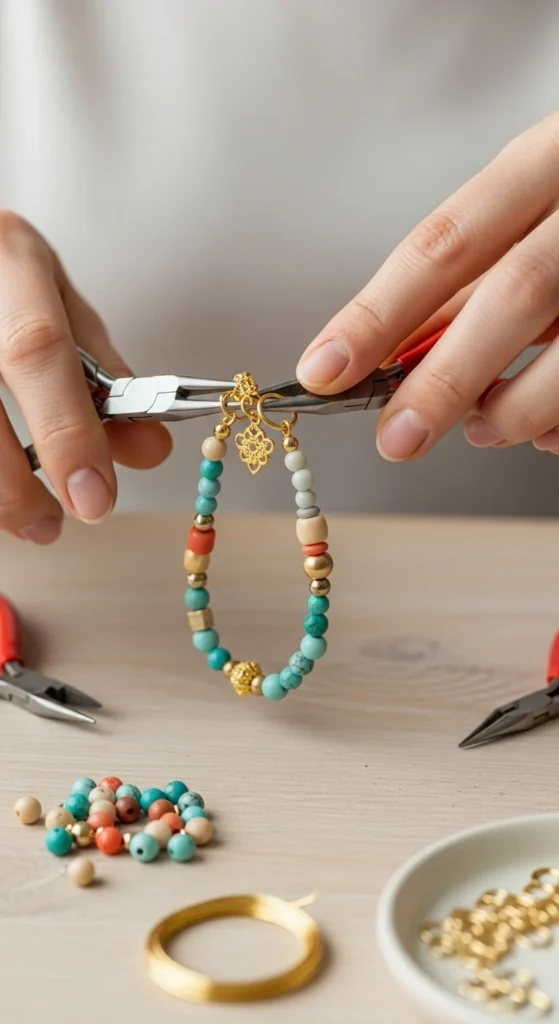
Step 4: Add Your Charms
Charms are the heart of personalization. You can attach them in two ways:
- Directly on the cord: Slide the charm bead onto the bracelet like a regular bead.
- Using jump rings: Attach the charm to a ring, then loop it onto the bracelet for more movement.
Popular charm choices and meanings:
| Charm | Meaning |
|---|---|
| Heart | Love & care |
| Evil eye | Protection |
| Butterfly | Growth & transformation |
| Moon & star | Dreams & intuition |
| Initial | Personal identity |
| Birthstone | Personalized touch |
Choose a charm that feels special — it makes the bracelet more meaningful.
Step 5: Tie and Seal the Knot
Once all beads are in place, tie a secure knot.
Try the surgeon’s knot for extra durability:
- Tie a basic knot.
- Loop through again before tightening.
- Pull gently but firmly until secure.
Add a tiny drop of jewelry glue or clear nail polish to seal. Let it dry for 2–3 minutes.
Pull the beads over the knot so it hides inside the nearest bead.
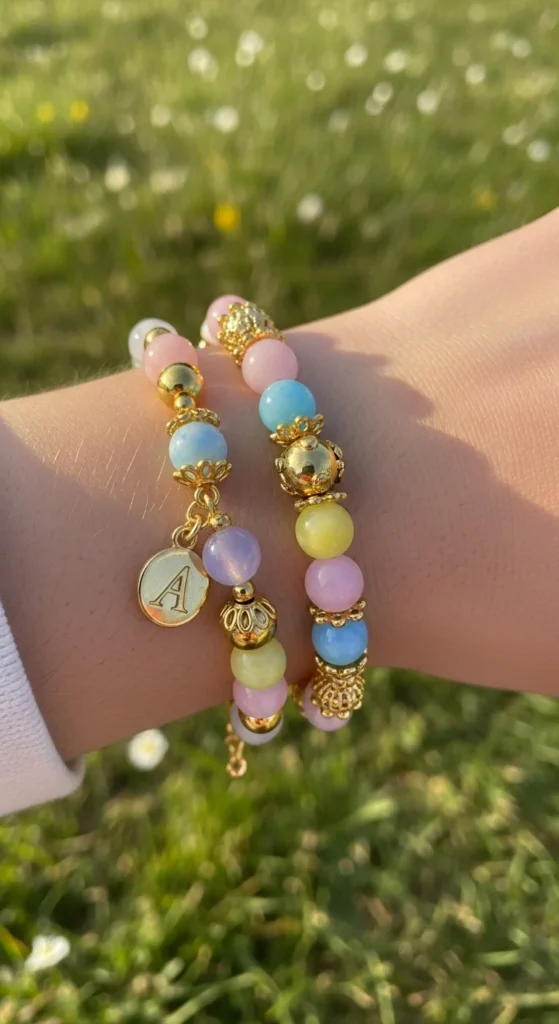
Fun Customization Ideas
Want your bracelet to stand out even more? Try these creative add-ons:
- Make a matching set: Create best-friend, mother–daughter, or couple bracelets.
- Add multiple charms: Use one main charm and two mini side charms for layered meaning.
- Layered bracelet stacks: Mix different styles — one pearl, one colorful, one beaded with charms.
- Memory bracelets: Use beads that symbolize places, events, or milestones.
Crafting Tips for Long-Lasting Bracelets
- Don’t overload the bracelet with heavy charms — it weakens the cord.
- Keep 1/4 inch of stretch space to avoid snapping.
- Store them in a small jewelry pouch to prevent scratches.
- Remove before showering, swimming, or gym workouts to preserve elasticity.
Ready to Craft Your First Personalized Bracelet?
Creating beaded bracelets with personalized charms is the perfect mix of creativity, style, and meaning. Whether you’re decorating your own jewelry box, making friendship sets, or preparing handmade gifts, these bracelets carry stories worth sharing.
Save this tutorial for your next DIY craft session — and get ready to design a bracelet that truly feels like you!

Lily Summers is a digital artist and creative storyteller who loves bringing colorful characters to life. With a passion for cartoons, fan art, and playful sketches, she inspires others to explore their imagination through art. When she’s not sketching, you’ll find her dreaming up new ideas for CraftedWizard.com to spark creativity in every artist. 🌈✨


