
There’s something timeless about flowers; they brighten rooms, lift moods, and make every celebration special. But what if you could enjoy that beauty forever? That’s where paper flowers come in. These handmade blooms look incredibly realistic, last indefinitely, and can be customized for any event from weddings to birthdays or even everyday décor.
If you’ve ever wanted to try your hand at DIY paper florals, you’re in for a treat. Let’s walk through how to make stunning, realistic paper flowers that could easily fool the eye.
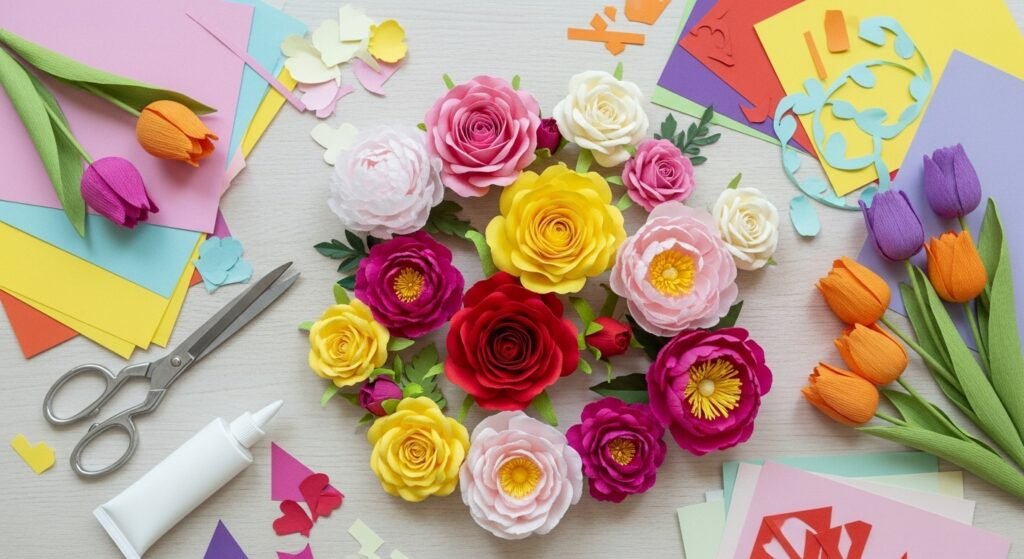
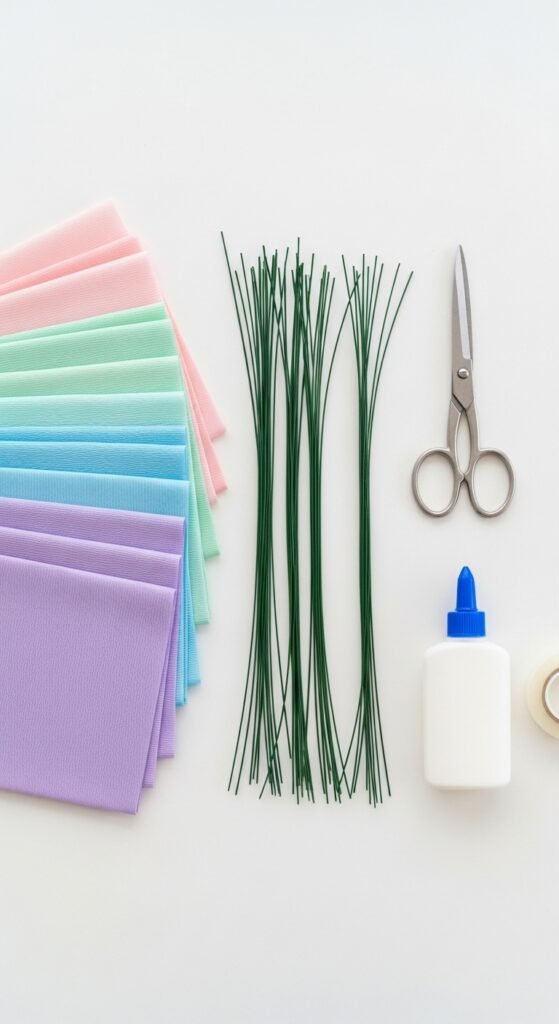
Step 1: Gather Your Supplies
Before you start, make sure you have everything you need. The right tools and materials make a big difference in how realistic your flowers will look.
You’ll need:
- Crepe paper or cardstock: Choose colors that match your desired flowers (peach, blush, ivory, green).
- Floral wire and tape: For stems and structure.
- Scissors and glue: Precision scissors work best for smooth petal edges.
- Pencil or petal templates: To trace uniform shapes.
- Optional: Pastel chalks or watercolor paints for shading petals.
Pro tip: Use double-sided crepe paper — it gives natural variations and texture that mimic real petals beautifully.
Step 2: Choose Your Flower Type
Before you start cutting, decide which flower you’d like to make. Different flowers have different petal shapes and layers, so it helps to start simple and work your way up.
Beginner-friendly flowers:
- Daisies
- Peonies
- Roses
Advanced projects:
- Orchids
- Tulips
- Ranunculus
Style idea: Mix and match different flower types for a more natural-looking bouquet or centerpiece.
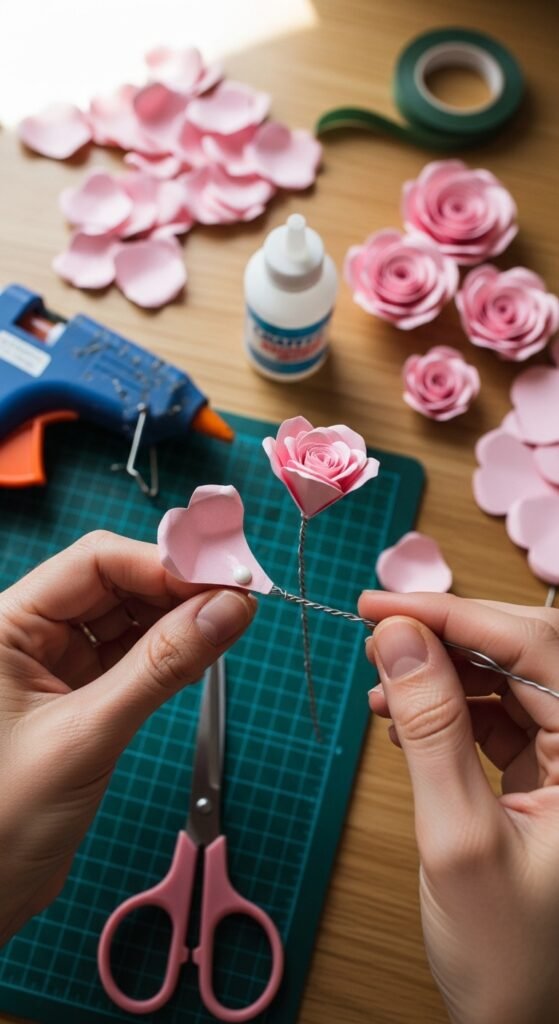
Step 3: Cut and Shape the Petals
This step brings your flower to life! The key to realism is in the shape and curl of each petal.
- Trace and cut: Use your template or draw freehand petal shapes. Each flower usually needs 5–12 petals, depending on fullness.
- Stretch and curl: Gently stretch the crepe paper in the center of the petal to give it a natural curve. Use a pencil or your fingers to curl the edges outward.
- Layer and shade: Add a touch of pastel or watercolor near the base or tips of the petals for depth and realism.
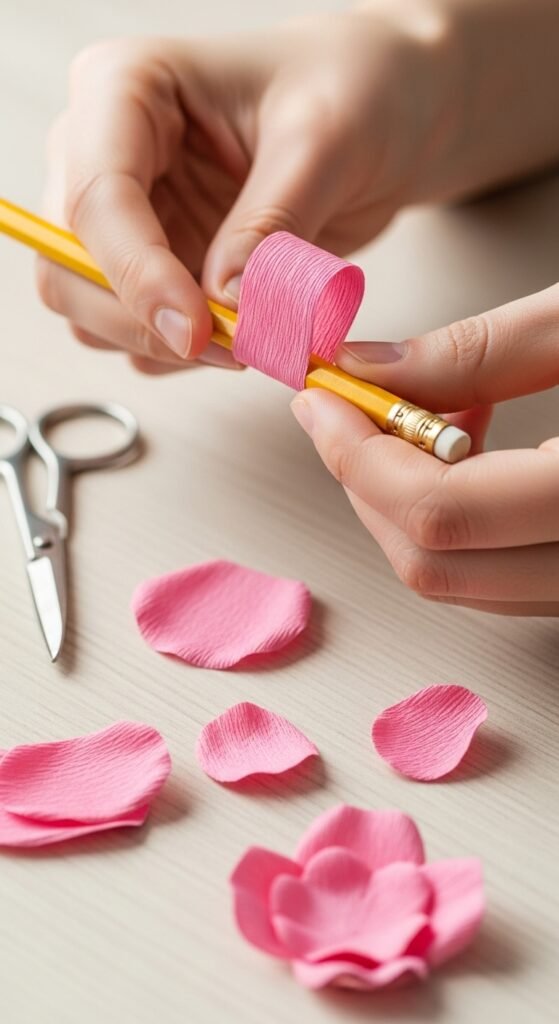
Pro tip: Don’t aim for perfect symmetry — real flowers have subtle imperfections that make them look alive.
Step 4: Assemble the Bloom
Once your petals are ready, it’s time to put everything together.
- Start with the center: Roll a small piece of crepe paper into a tight bud and glue it to the tip of a floral wire.
- Attach petals: Begin gluing or taping petals around the bud, overlapping slightly as you go. Alternate layers to build volume.
- Wrap the stem: Once your bloom is full, cover the wire with floral tape, stretching it slightly to make it stick.
- Add leaves: Cut green crepe paper into leaf shapes and attach them to the lower part of the stem.
Quick tip: For an ultra-realistic touch, use darker green paper for the leaves and lighter shades for the stems — just like in nature.
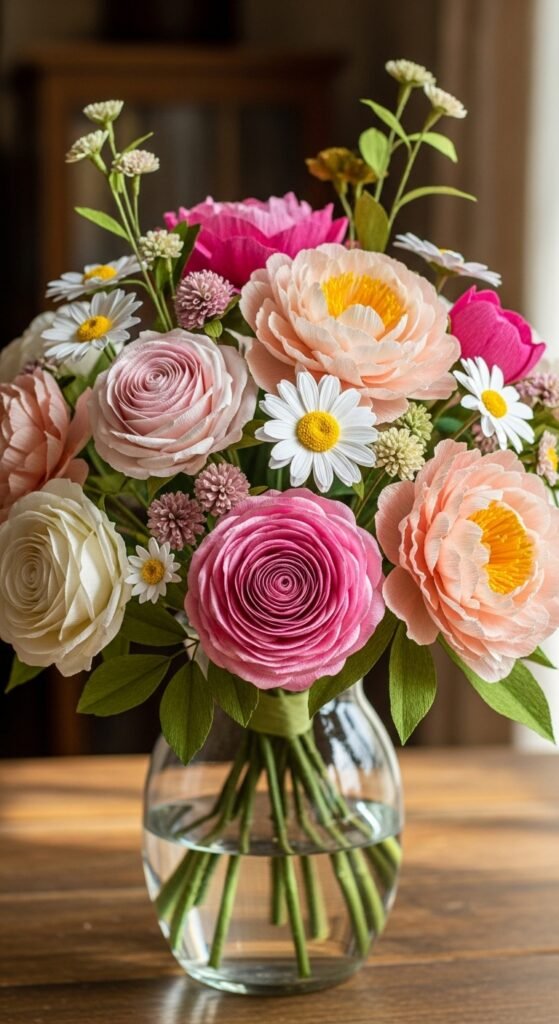
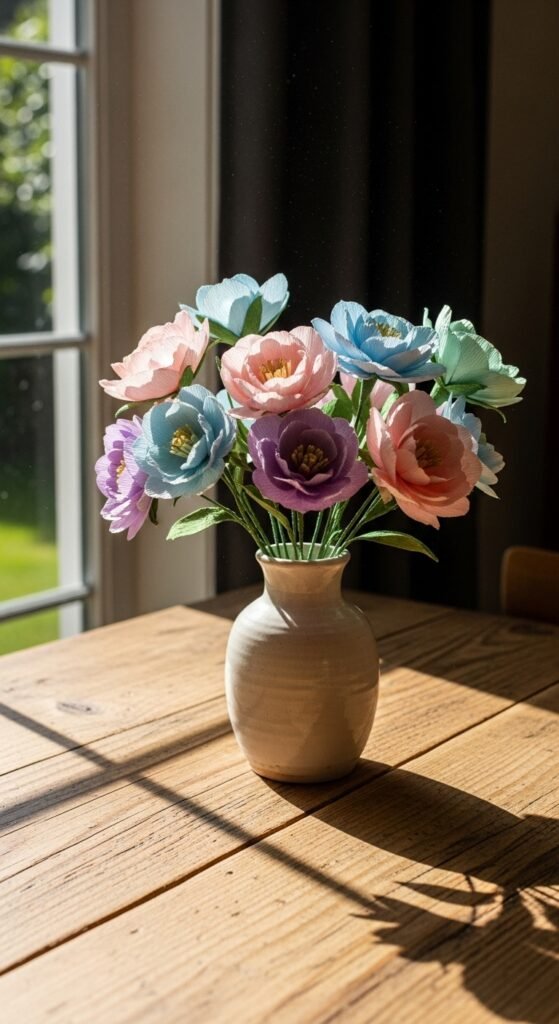
Step 5: Arrange and Display Your Paper Flowers
Now that you’ve crafted your blossoms, show them off!
Here are a few creative ideas:
- Bouquets: Combine different paper flowers and wrap them in tissue or kraft paper for a gift.
- Table centerpieces: Arrange them in glass jars, vases, or ceramic pitchers for a cozy display.
- Wall décor: Create a paper flower wall for parties, weddings, or photography backdrops.
- Gift toppers: Add a single bloom on wrapped presents for an elegant touch.
Decor tip: Spritz your finished flowers lightly with a floral perfume for a delightful surprise that adds another layer of realism.
Step 6: Store and Care for Your Paper Flowers
Paper flowers last for years with a little care. Keep them looking fresh by:
- Dusting gently with a soft brush or blow dryer on low.
- Avoiding direct sunlight to prevent color fading.
- Storing them upright in a vase or box with tissue paper for protection.
Bonus idea: If you love seasonal decorating, make sets of paper flowers for different times of year — spring pastels, autumn oranges, or holiday reds and whites.
Create, Share, and Inspire 🌸
Making realistic paper flowers is a beautiful mix of art, patience, and creativity. Each bloom you craft becomes a lasting symbol of joy and care — perfect for gifting, decorating, or simply brightening your workspace.
So grab your scissors, choose your colors, and start crafting your own bouquet today.
✨ Save this guide for your next DIY day and fill your home with flowers that never fade! ✨

Lily Summers is a digital artist and creative storyteller who loves bringing colorful characters to life. With a passion for cartoons, fan art, and playful sketches, she inspires others to explore their imagination through art. When she’s not sketching, you’ll find her dreaming up new ideas for CraftedWizard.com to spark creativity in every artist. 🌈✨


