
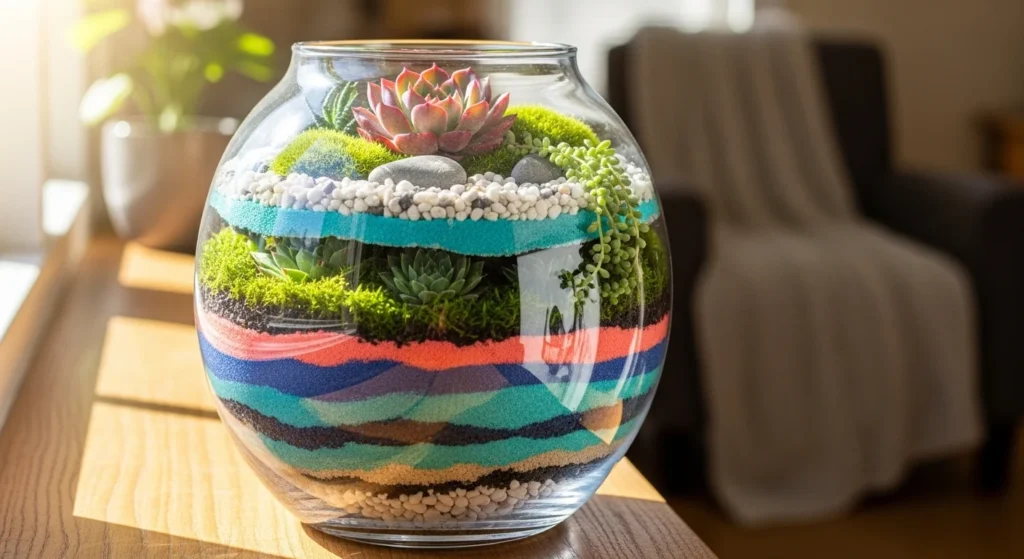
There’s something magical about creating a tiny, self-contained garden inside a glass jar. Mini indoor terrariums bring a touch of nature indoors, brighten up your desk, and make for charming handmade gifts. Even if you don’t have a green thumb, building a terrarium is simple, fun, and incredibly satisfying. With just a few materials and some creativity, you can craft a little ecosystem that thrives on its own.
Gather Your Materials
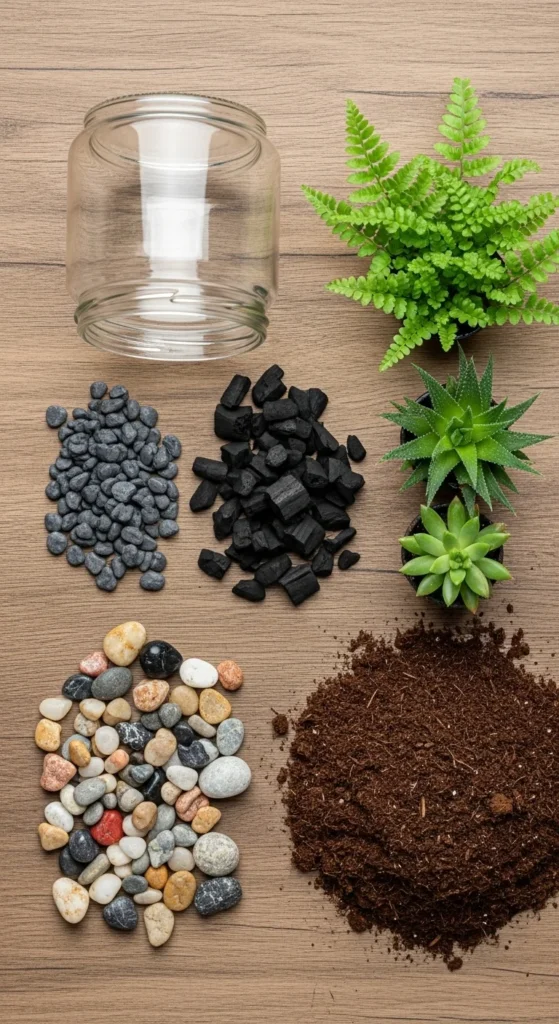
Before you start layering soil and plants, it’s important to have all your materials ready. This ensures a smooth, stress-free process.
You’ll need:
- A clear glass jar with a wide opening
- Small pebbles or gravel for drainage
- Activated charcoal (keeps water fresh and prevents odors)
- Potting soil suited for your plant type
- Small plants (succulents, ferns, or moss work well)
- Decorative items (mini figurines, shells, or colored sand)
- Tweezers or a small spoon for precise placement
Tips:
- Choose a jar that’s big enough for your plants to grow slightly.
- Succulents need less water, ferns thrive in more humid conditions.
- Layering properly is key for a healthy terrarium.
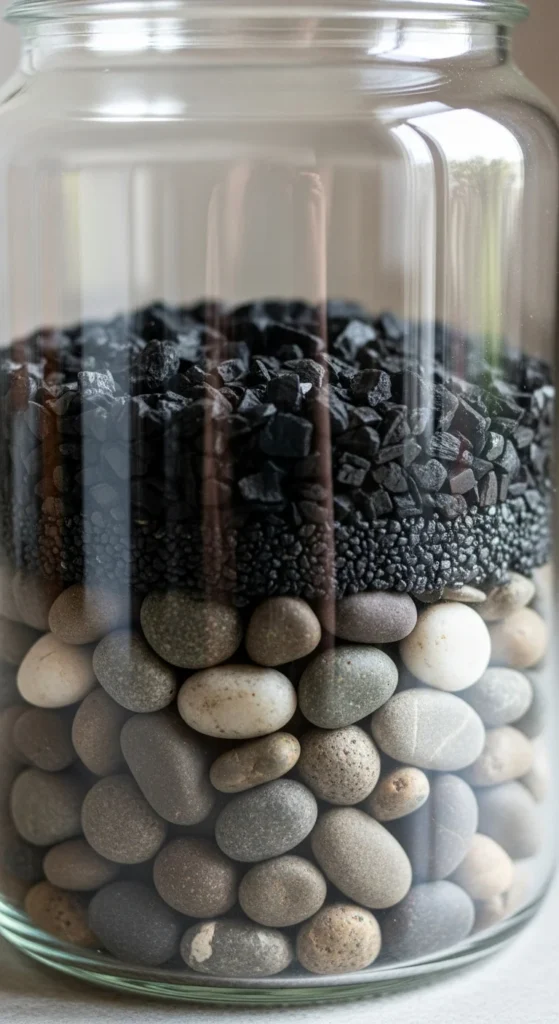
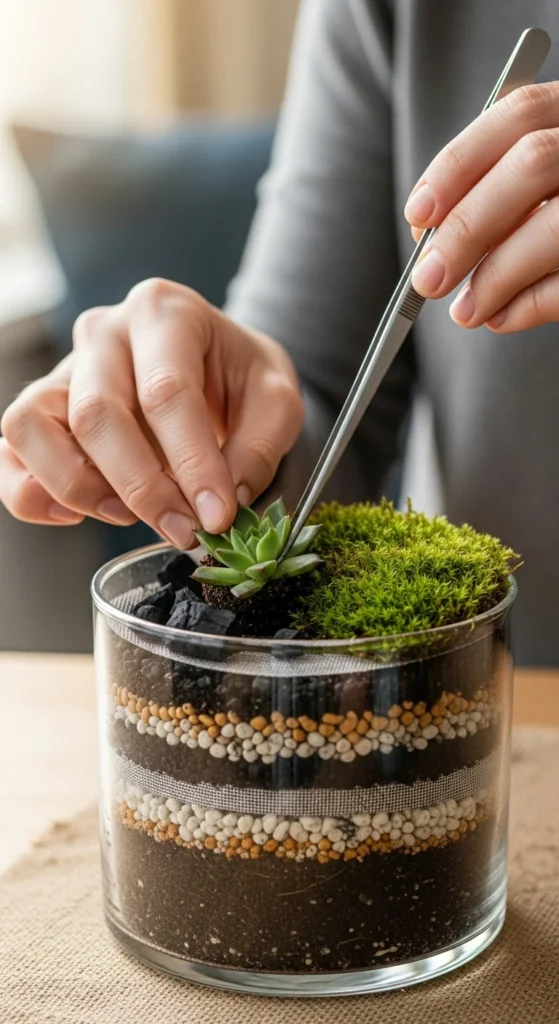
Step 1: Create a Drainage Layer
Even in a small jar, proper drainage prevents plant roots from rotting.
- Add a 1–2 inch layer of pebbles or gravel to the bottom of the jar.
- Sprinkle a thin layer of activated charcoal over the pebbles. This keeps water from stagnating and prevents odors.
Pro Tip: Use a spoon or funnel to add materials neatly without spilling.
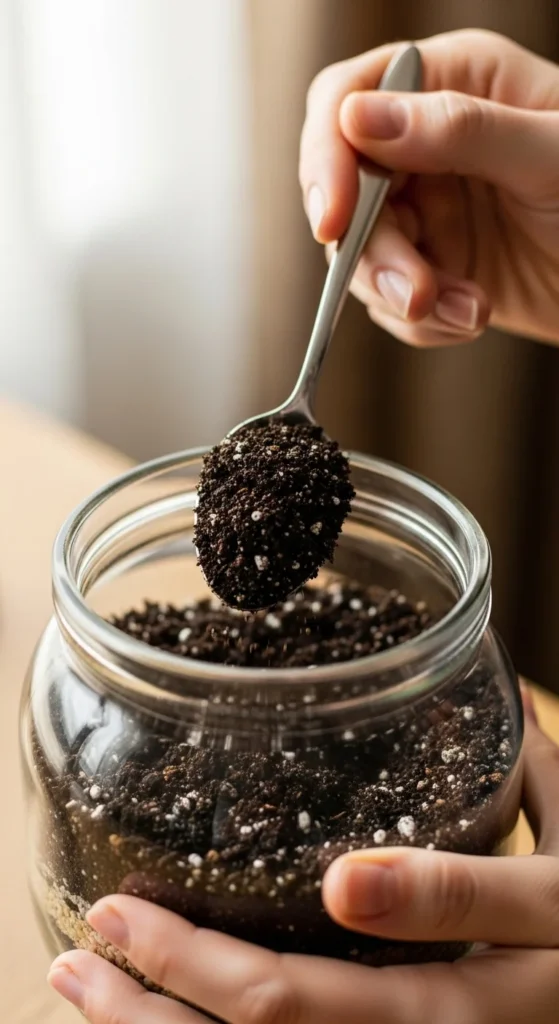
Step 2: Add Potting Soil
Next, it’s time to give your plants a base to grow in.
- Pour in a layer of potting soil appropriate for your plants.
- The soil should be deep enough to cover plant roots but leave space at the top for decorative layers.
- Smooth the surface gently with a spoon or small stick.
Tip: Avoid compacting the soil too tightly; roots need room to breathe.
Step 3: Plant Your Mini Greenery
Now comes the most fun part—adding your plants!
- Start with the largest plant first, placing it slightly off-center.
- Add smaller plants or moss around it to create balance.
- Use tweezers or a small spoon for precise placement in tight spaces.
- Press soil gently around roots to stabilize plants.
Tips for Success:
- Leave some space between plants for airflow.
- Group plants with similar water and light needs together.
- Avoid overcrowding; each plant should have room to grow.
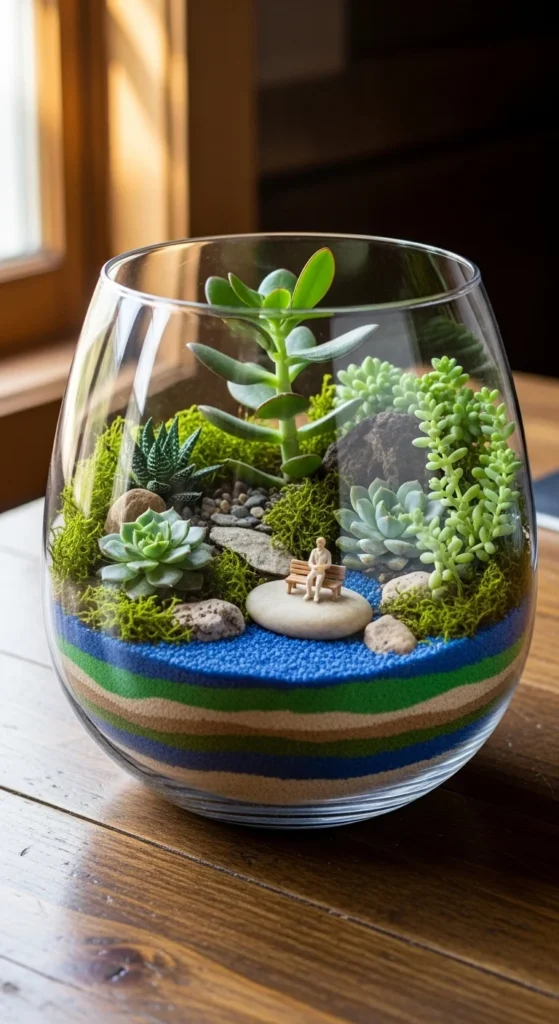
Step 4: Decorate Your Terrarium
Once your plants are in place, add decorative touches to make your terrarium unique.
- Sprinkle colored sand or small stones on top of the soil for a layered effect.
- Add tiny figurines, shells, or miniature furniture for whimsy.
- Arrange elements in a visually balanced way without overcrowding the jar.
Tip: Keep decorations light to avoid disturbing plant roots or soil layers.
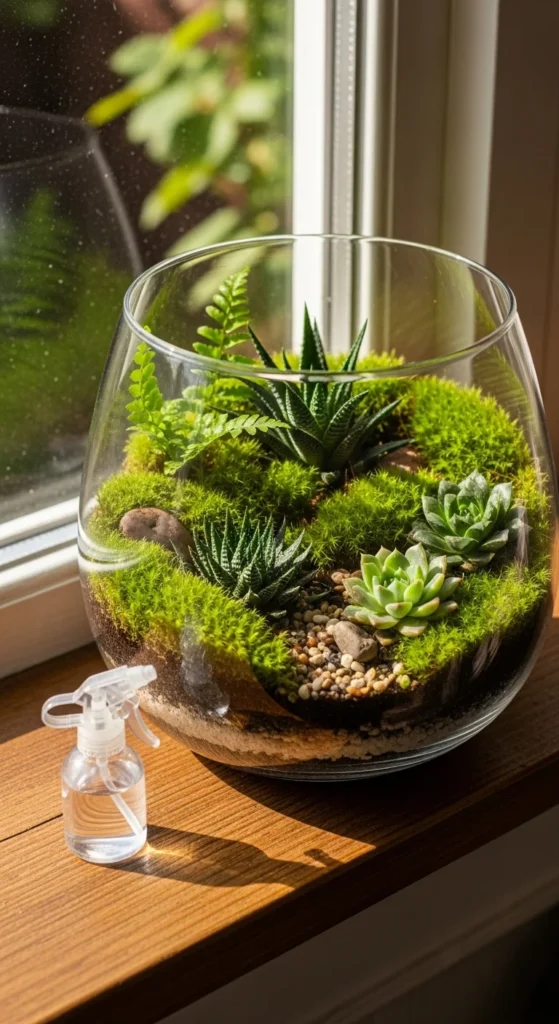
Step 5: Care and Placement
A terrarium is easy to care for, but a few simple steps ensure your mini garden thrives.
- Place your terrarium in bright, indirect sunlight.
- Water sparingly—succulents need less water, moss and ferns need slightly more.
- Mist closed terrariums lightly to maintain humidity.
- Rotate occasionally to ensure even growth.
Pro Tip: Observe your terrarium regularly; yellowing leaves or mold are signs of overwatering.
Creating a mini indoor terrarium is a rewarding project that adds a touch of nature to any space. With careful layering, thoughtful plant selection, and a dash of creativity, you can craft a tiny ecosystem that’s both beautiful and low-maintenance.
Save this guide and start building your own glass jar terrarium today—your desk, shelf, or windowsill will thank you!

Lily Summers is a digital artist and creative storyteller who loves bringing colorful characters to life. With a passion for cartoons, fan art, and playful sketches, she inspires others to explore their imagination through art. When she’s not sketching, you’ll find her dreaming up new ideas for CraftedWizard.com to spark creativity in every artist. 🌈✨


