
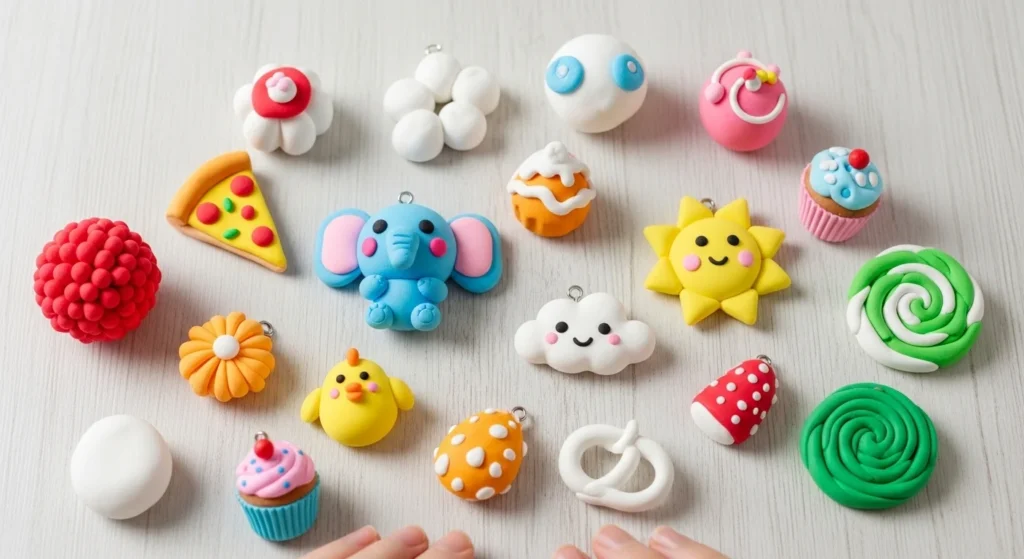
Foam clay is soft, squishy, and incredibly fun to work with. It dries lightweight and slightly flexible, which makes it perfect for kids, beginners, and adults who want a relaxing craft session without special tools. You can shape it with your hands, mix colors easily, and decorate everyday items in playful ways. These foam clay ideas focus on simple techniques, creative freedom, and projects that look impressive while staying easy to make at home.
1. Cute Panda Figurine
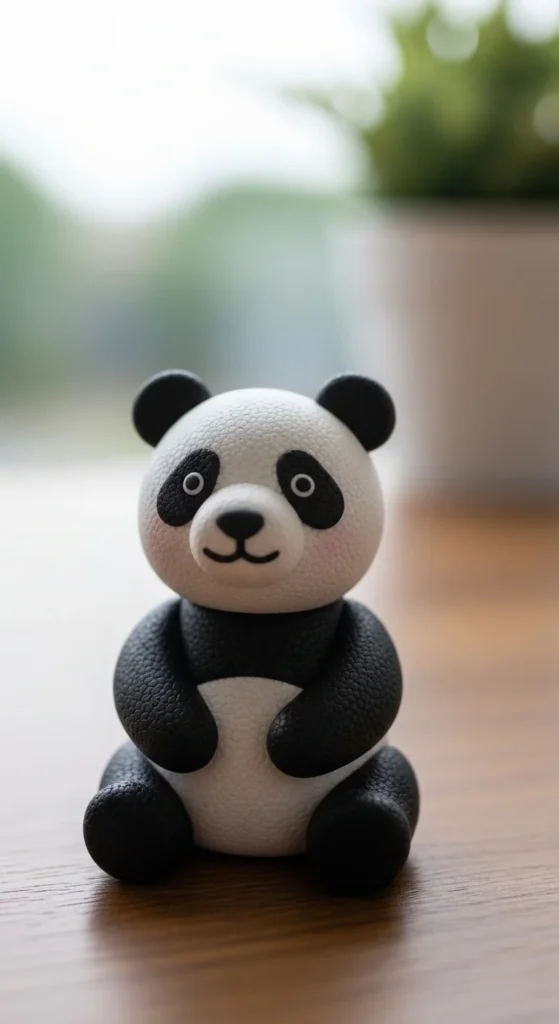
Pandas are perfect starter characters because their color pattern is simple and easy to recognize. Roll a white oval for the body and a smaller ball for the head, then press them together gently. Add black pieces for ears, arms, legs, and eye patches, smoothing the edges lightly so they blend. Use a toothpick to mark tiny eyes and a nose instead of adding very small clay pieces. Let the figurine dry on a flat surface so it keeps its balance. This project helps beginners practice attaching parts and working with two-color designs.
2. Mini Burger Charm
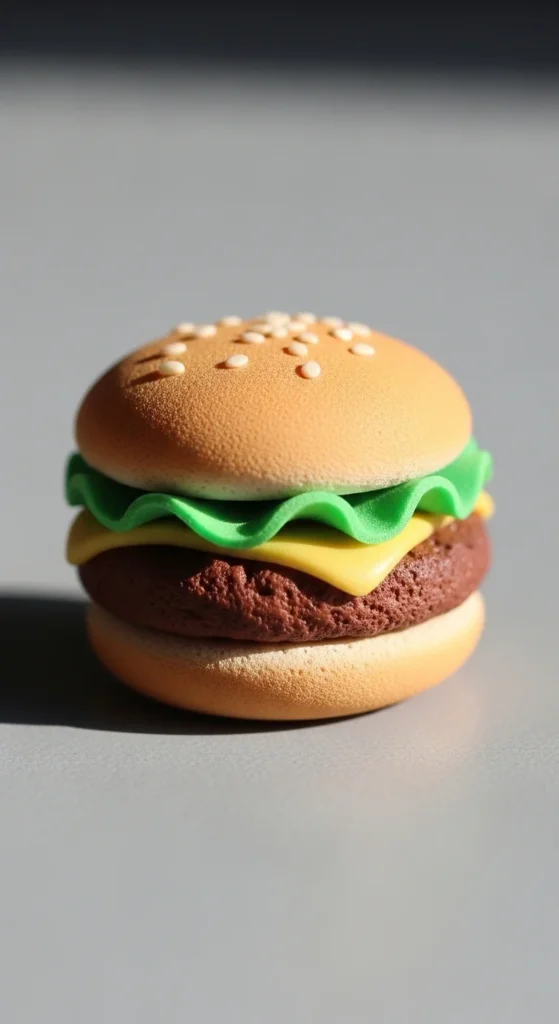
Mini burgers are fun because they are made from stacked layers that are easy to shape. Form two small beige discs for the buns and a thin brown layer for the patty. Add tiny green and red strips to represent lettuce and tomato, pressing gently so everything sticks. Use a toothpick to press little sesame seed dots into the top bun. If you want a keychain, poke a small hole before drying. This craft teaches layering and keeps details simple and playful.
3. Silly Monster Faces
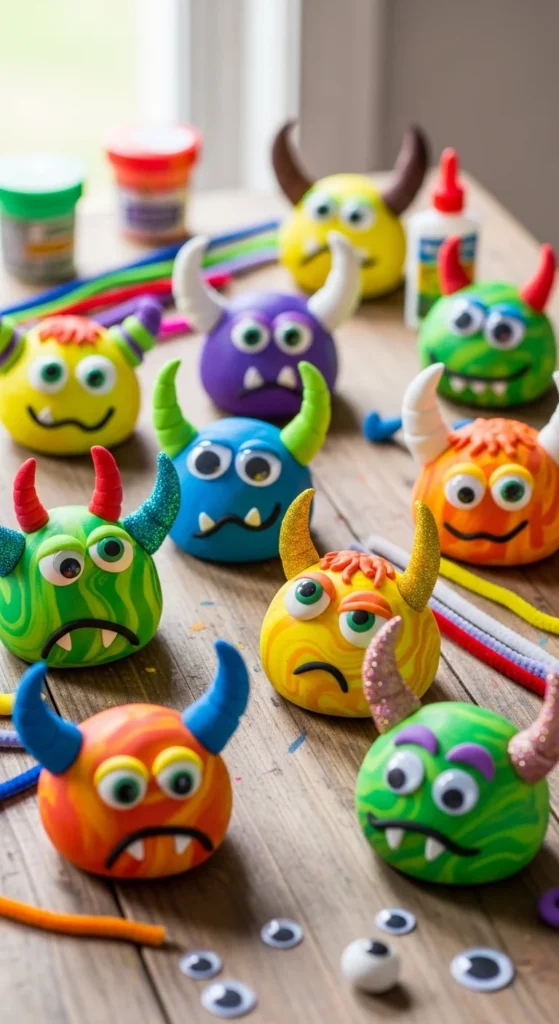
Monster faces are all about imagination and have no strict rules to follow. Start with a round or oval base and add horns, teeth, or extra bumps using small clay pieces. Press in googly eyes while the clay is still soft so they stay secure. You can texture the surface with a toothpick to create scales or bumps. Let the monsters dry flat before turning them into magnets or decorations. This idea encourages creativity and builds confidence in shaping fun, silly expressions.
4. Rainbow Color Blend Ball
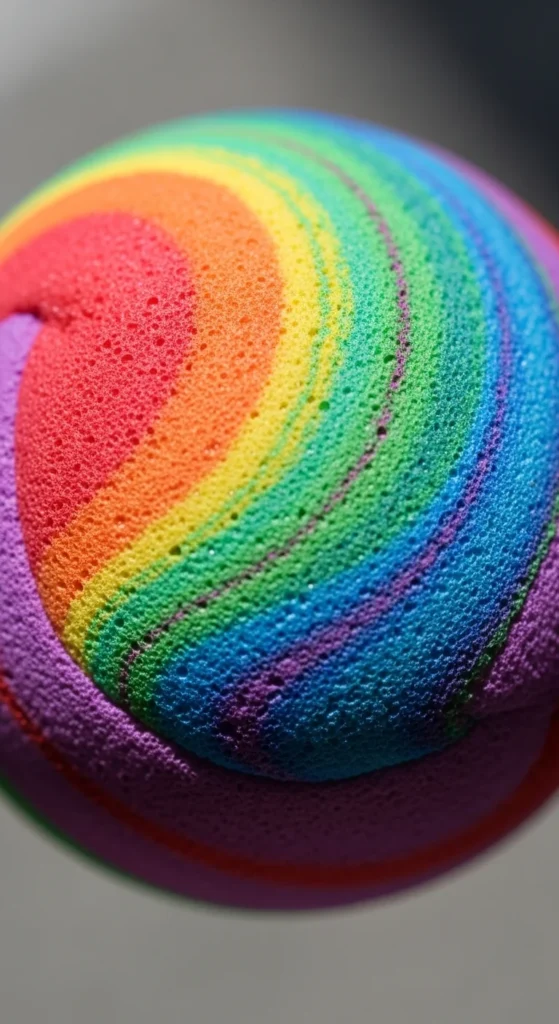
Foam clay mixes beautifully, which makes rainbow blends exciting to try. Take small pieces of different colors and knead them lightly so the streaks stay visible. Avoid overmixing so the colors do not turn into one shade. Roll the clay into a smooth ball or heart shape. The swirled pattern makes each piece look unique. This project is relaxing and helps both kids and adults explore color blending.
5. Frog Figurine
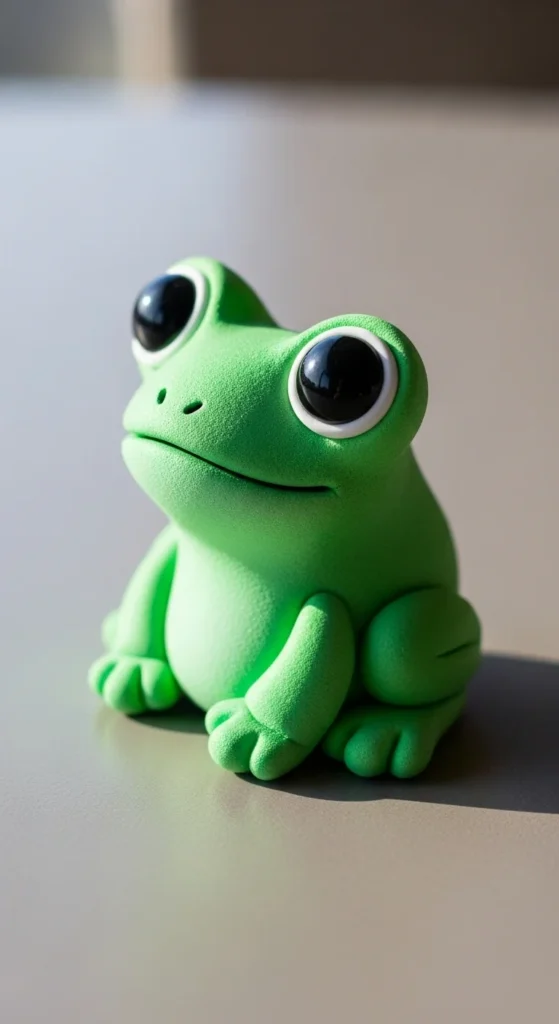
Frogs use simple rounded shapes that are easy for beginners to form. Start with a squat oval body and add four small legs pressed gently underneath. Create two raised bumps for the eyes and mark pupils with a tool. Keep the face simple with a curved line for a smile. Let the frog dry sitting upright so it keeps its pose. This project helps with balance and forming small details without complex tools.
6. Ice Cream Cone Model
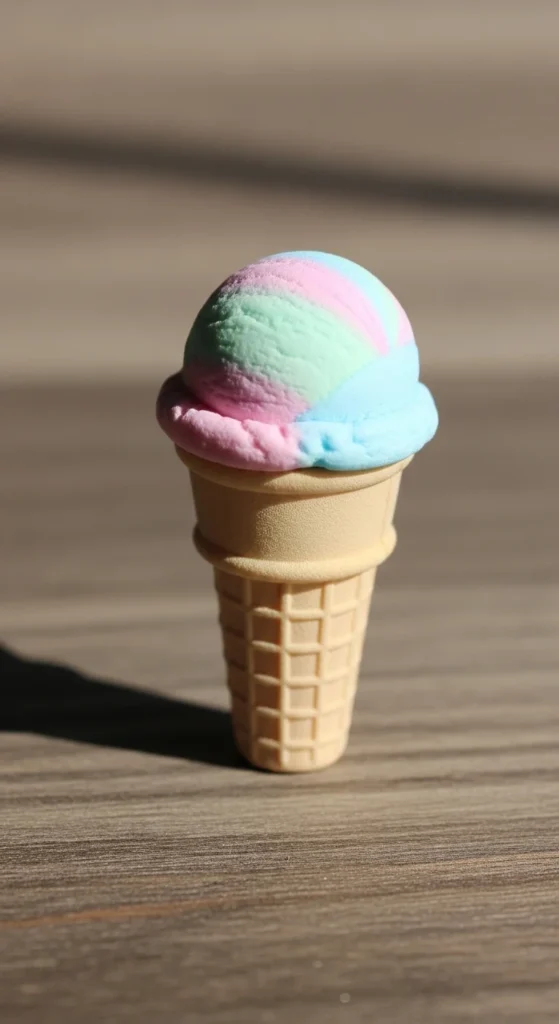
An ice cream cone combines texture and layering in a fun way. Shape a small cone base and press crisscross lines with a toothpick for waffle texture. Add a pastel scoop on top and smooth the join lightly. Press tiny sprinkle dots using contrasting colors. Keep the scoop round so it sits neatly. This craft is cheerful and helps practice adding surface details.
7. DIY Fridge Magnets
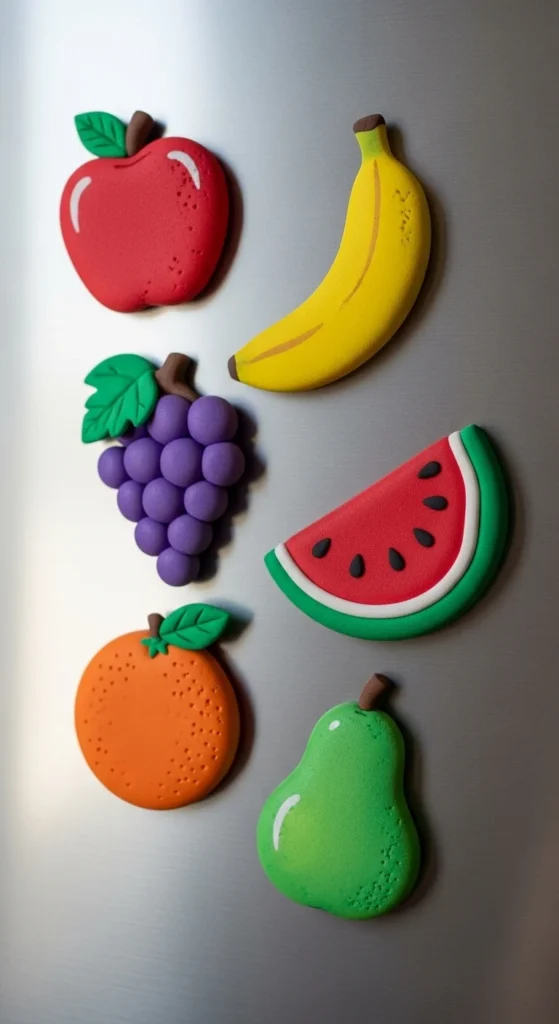
Fridge magnets are simple, flat shapes that work well with foam clay. Roll clay thin and cut basic forms like hearts, stars, or fruit slices. Press a small magnet into the back before drying. Smooth edges gently so they look neat. Once dry, you can paint small details if needed. These magnets are great gifts and help beginners practice flat designs.
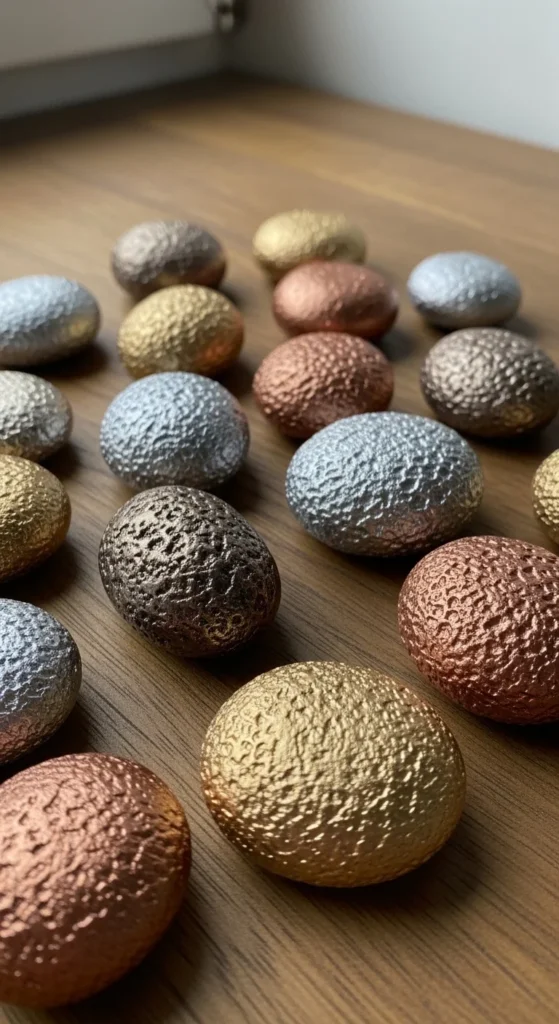
8. Fantasy Dragon Egg
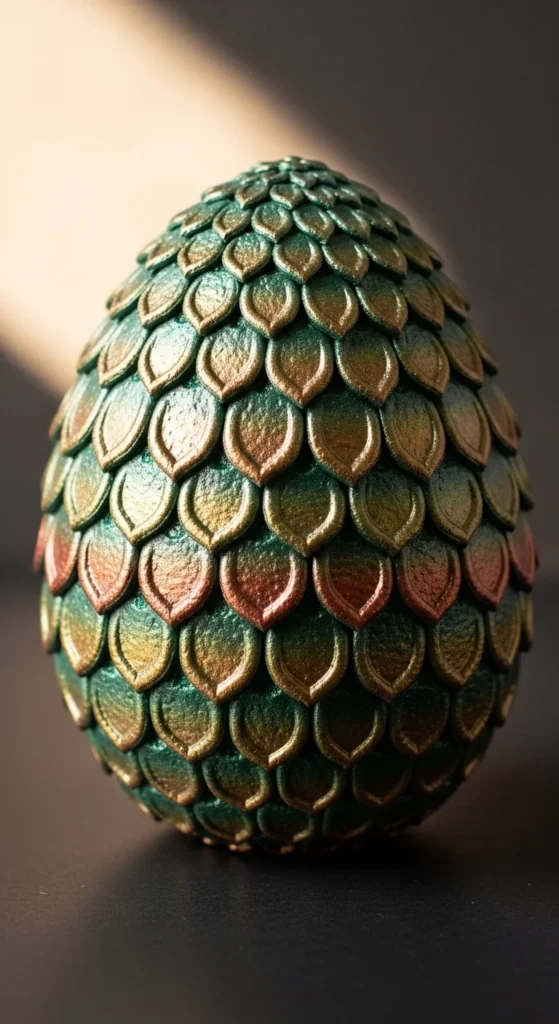
Dragon eggs are made from an oval shape with textured scales. Roll the clay into a smooth egg form and press scale patterns using a tool or the end of a pen. Keep the texture shallow so it does not crack while drying. Let the egg dry on a soft surface so it does not flatten. After drying, paint metallic or gradient tones. This idea introduces texture work in a simple way.
9. Flower Hair Clips
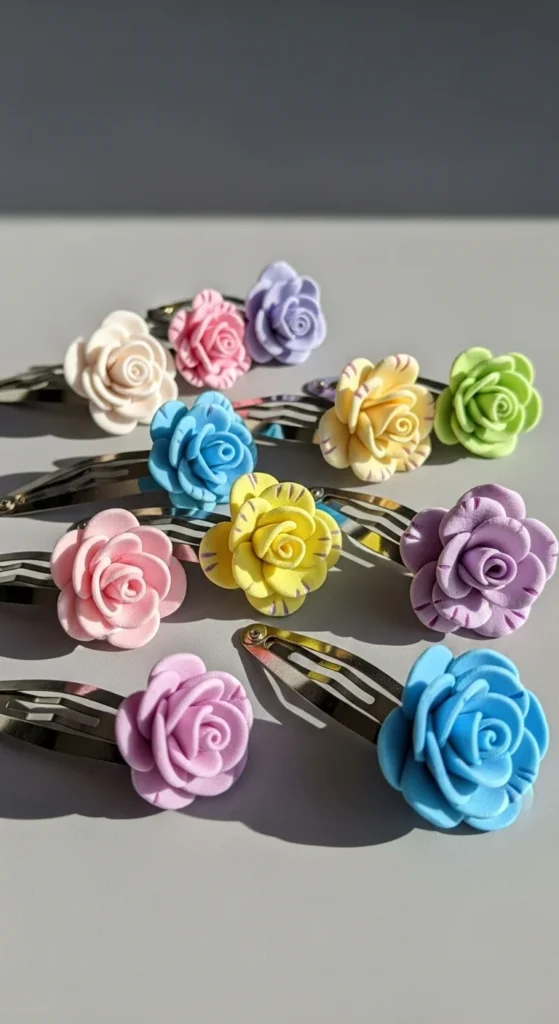
Foam clay flowers look sweet and are easy to make in layers. Shape small petals and press them together in a circle. Add a tiny center dot for detail. Let the flower dry completely before gluing it to a hair clip. Use lightweight shapes so the clip stays comfortable to wear. This project teaches layering and working with small decorative parts.
10. Mini Donut Keychain
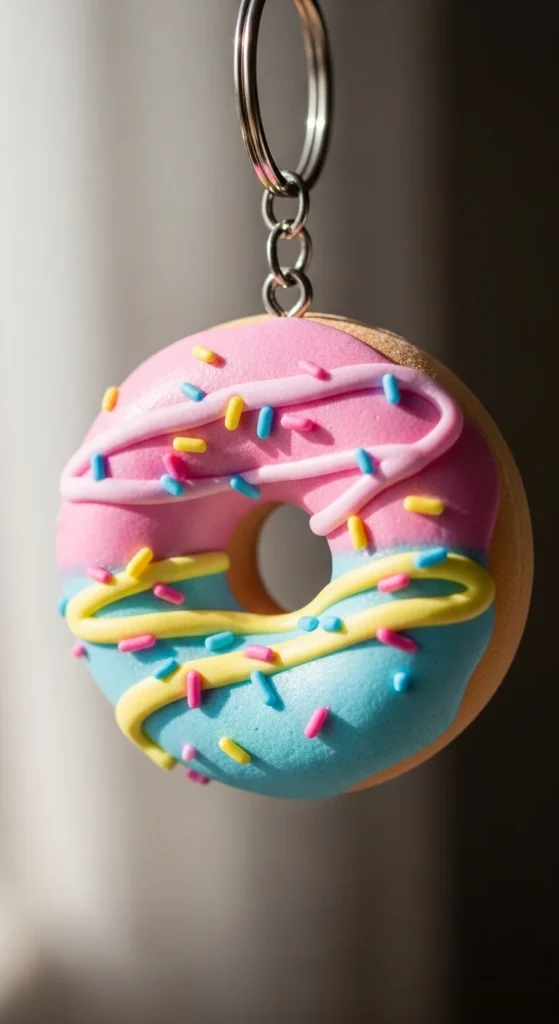
Donuts are simple ring shapes with fun toppings. Roll a small ball, flatten it slightly, and poke a hole in the middle. Add a thin icing layer on top and decorate with sprinkle dots. Insert a small loop before drying if making a keychain. Keep the icing slightly uneven for a playful look. This craft is great for practicing small decorative details.
11. Fox Figurine
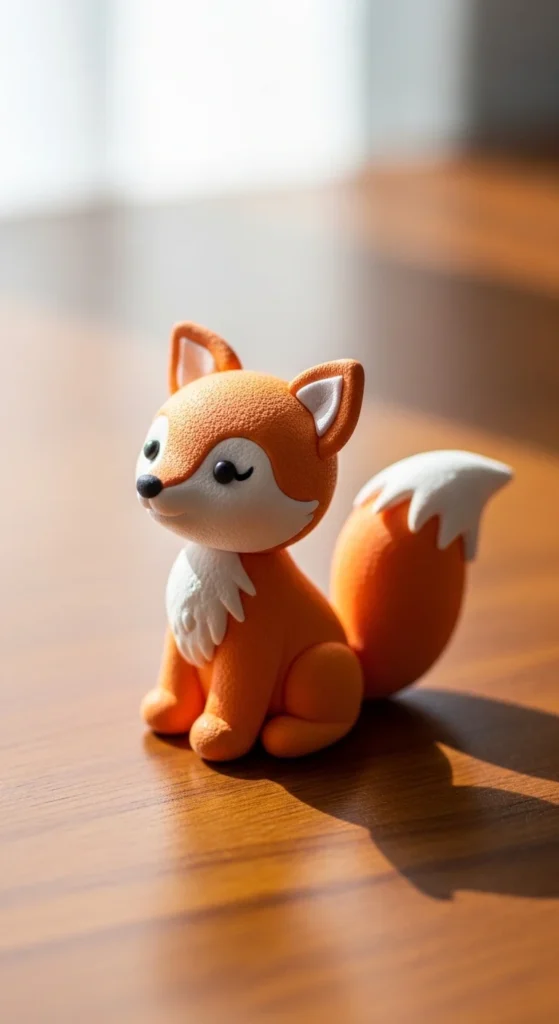
Foxes combine round and pointed shapes for a cute woodland look. Shape a small body and a slightly pointed head. Add triangle ears and a curled tail made from a thin clay strand. Press pieces together gently so they stick without cracks. Mark simple eyes and a nose with a tool. This project helps with forming pointed details while keeping shapes simple.
12. Pencil Topper Characters

Pencil toppers are small figures pressed onto the top of a pencil. Shape tiny animals or faces and gently push them onto the pencil end. Keep the design lightweight so it does not fall off. Add small details with a toothpick instead of extra clay pieces. Let the topper dry upright in a cup. This project is fun for school supplies and encourages creativity.
13. Mini Sushi Set
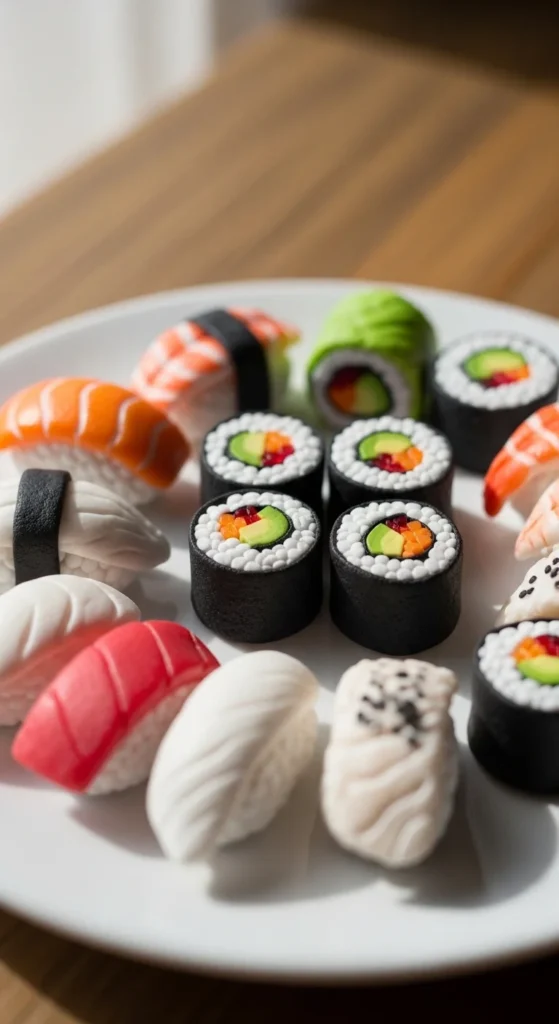
Mini sushi uses layered shapes that are simple to build. Form small white rice ovals and add thin colored strips for fish or seaweed. Press gently so layers stick together. Keep details flat so they dry evenly. Arrange pieces together on a small plate for display. This craft is playful and helps with shaping tiny food models.
14. Fairy House Mini
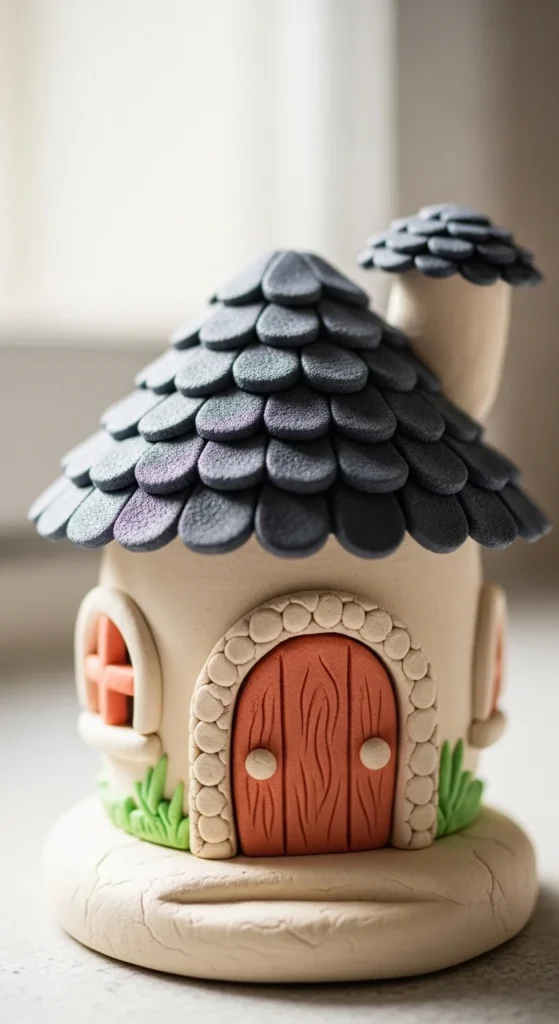
Fairy houses start with a small cylinder base and a rounded roof. Add tiny doors, windows, and mushrooms using small clay pieces. Texture the roof with a tool for a wood or leaf look. Keep decorations shallow so they hold while drying. Let the house dry upright on a flat surface. This idea builds imagination and layering skills.
15. Beaded Necklace Pieces
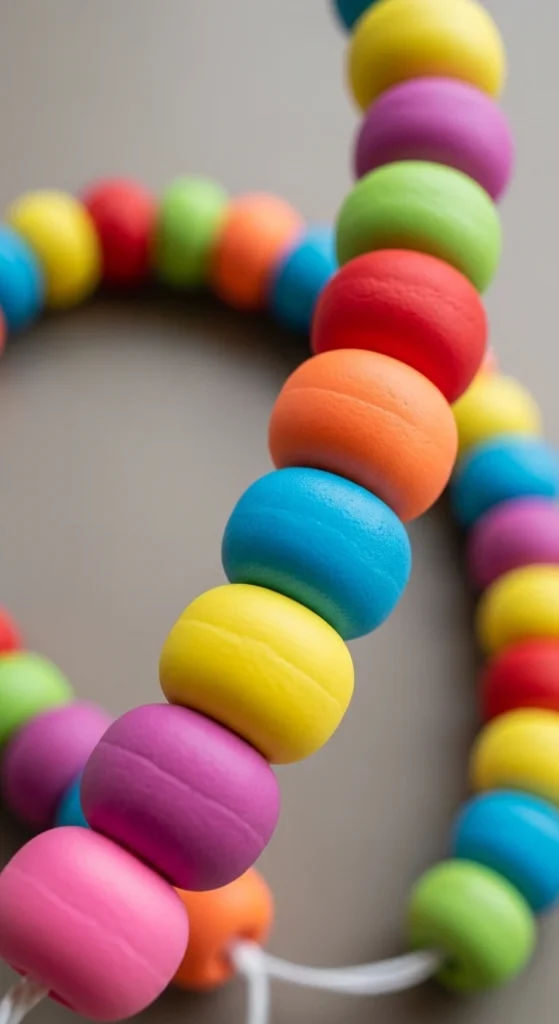
Foam clay beads are lightweight and comfortable to wear. Roll small balls or tubes and poke holes through the center with a toothpick. Rotate gently so the hole stays open. Keep bead sizes similar for a neat look. Let them dry before stringing onto cord. This project teaches shaping small, consistent forms.
16. Heart Phone Charm
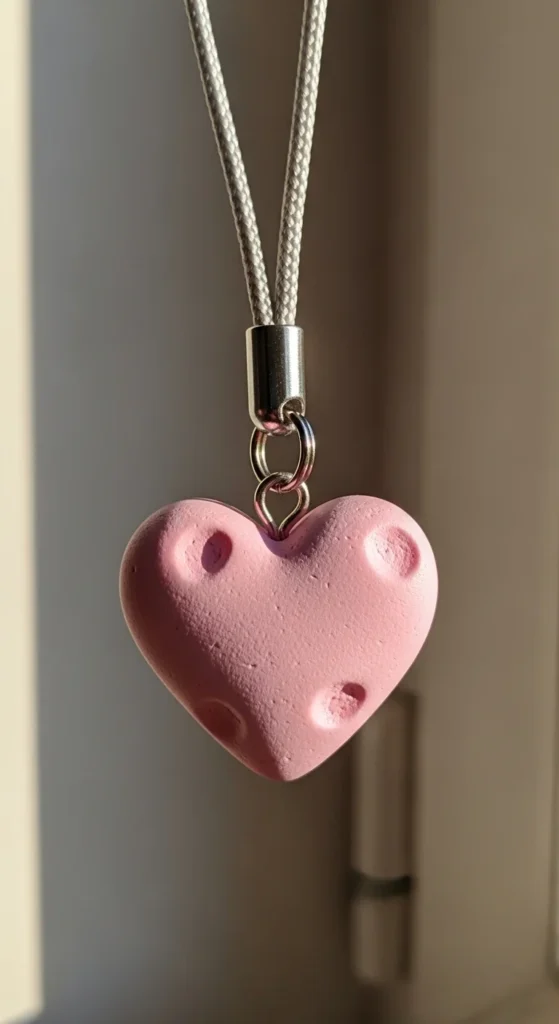
Heart charms are quick and meaningful crafts. Shape a small heart and smooth the edges gently. Insert a loop or poke a hole for string before drying. Keep the shape thick enough to stay sturdy. Paint tiny patterns if desired after drying. This simple project makes a cute personal accessory.
17. Gradient Sunset Lion
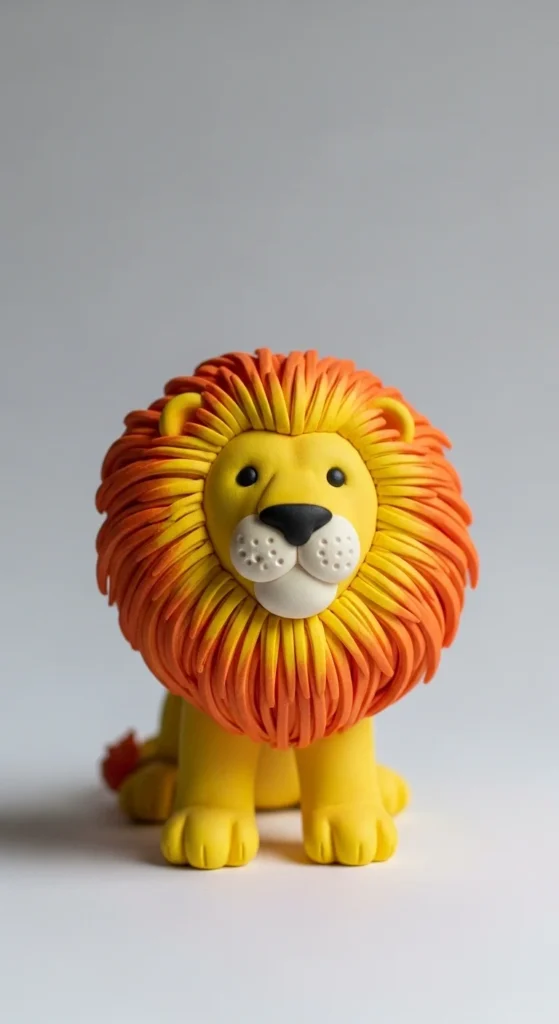
A lion figurine with blended colors looks warm and playful. Shape a small body and round head. Blend orange and yellow clay for the mane and press it around the head. Add tiny ears and a simple tail. Mark facial details lightly with a tool. This craft helps practice color blending and layering.
18. Mini Cupcake Charm
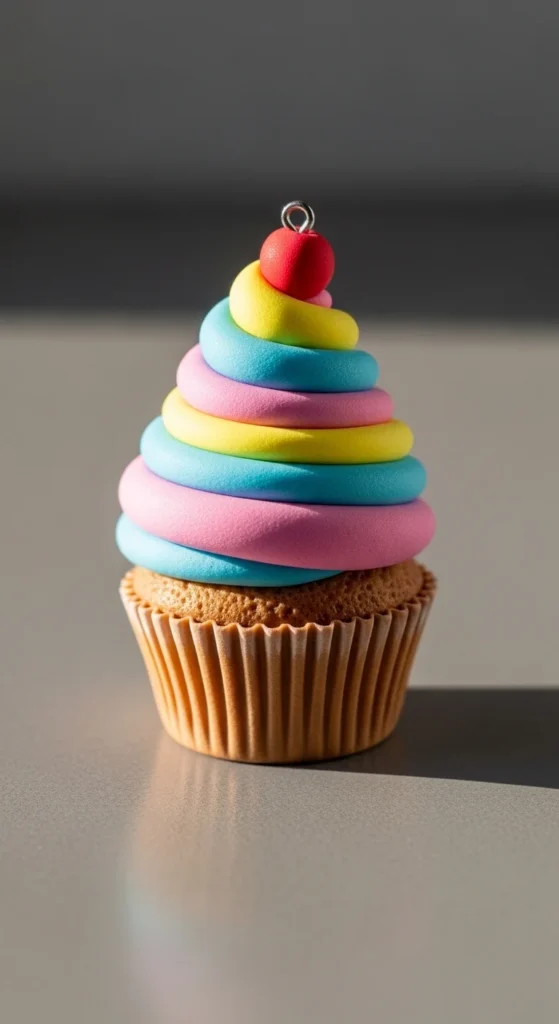
Cupcakes are made from a small base and a swirl top. Shape a cylinder for the cake and add vertical lines for texture. Roll a thin coil and swirl it on top for frosting. Add sprinkle dots or a tiny cherry. Insert a loop before drying for charm use. This idea teaches spiral shaping.
19. Bookmark Character
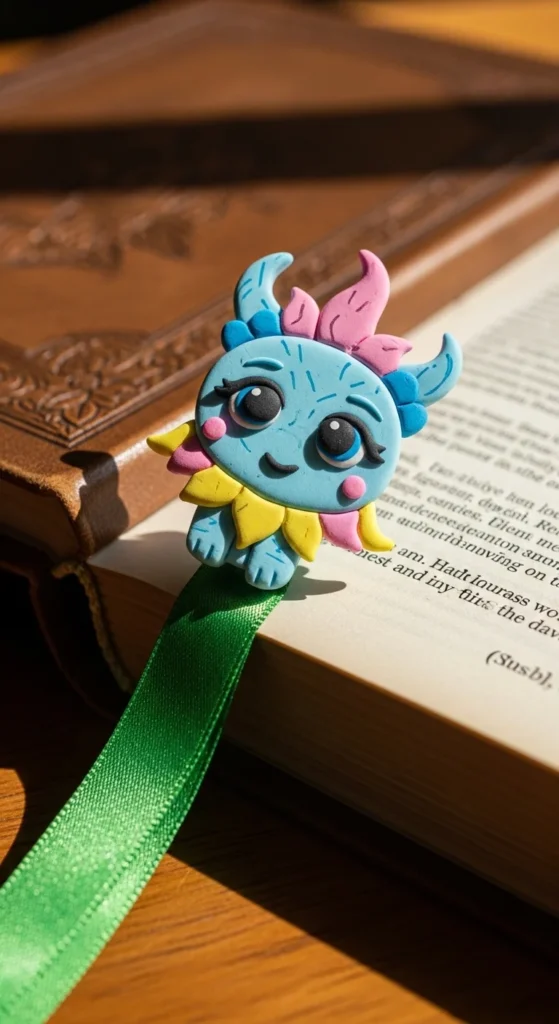
Bookmark characters are flat shapes glued to ribbon ends. Roll clay thin and cut a small animal or shape. Keep details pressed in rather than layered on. Let dry flat before attaching to ribbon. This makes reading more fun and helps with flat clay designs.
20. Googly Eye Creatures
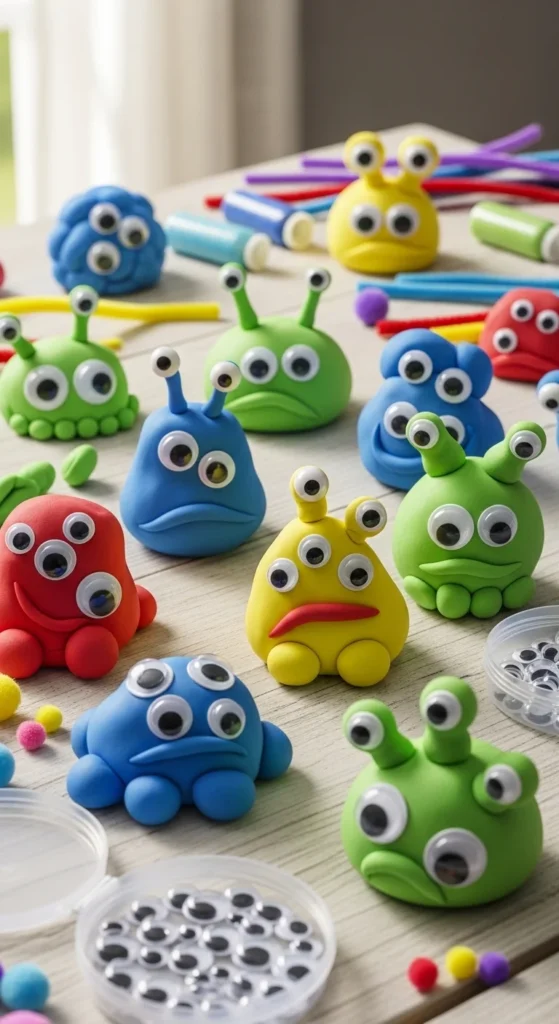
Googly eye creatures are silly and very easy to make. Roll blob shapes in bright colors and press several eyes into each one. Add tiny horns or feet if you like. Keep the design simple and round. Let dry on a flat surface. This project is great for quick, creative play.
21. Textured Treasure Stones
Treasure stones are smooth pebble shapes with pressed textures. Roll small stones and imprint patterns using fabric or tools. Let them dry fully before painting metallic or pearly shades. These decorative stones are relaxing to make and help practice surface textures.
Conclusion
Foam clay is lightweight, colorful, and welcoming for all ages. It allows easy shaping, playful color mixing, and creative freedom without complicated tools. From cute figurines to fun accessories, these projects turn craft time into relaxed, imaginative play. Try one idea, enjoy the soft texture, and let your creativity lead the way.

Lily Summers is a digital artist and creative storyteller who loves bringing colorful characters to life. With a passion for cartoons, fan art, and playful sketches, she inspires others to explore their imagination through art. When she’s not sketching, you’ll find her dreaming up new ideas for CraftedWizard.com to spark creativity in every artist. 🌈✨


