Lifelike clay people aren’t about making a “perfect” face on the first try. They’re about small choices that create believable human details. A relaxed posture. A slight tilt of the head. A wrinkle where fabric bends. If you’re sculpting with air-dry clay, polymer clay, or any basic sculpting clay, you can get realistic results with simple tools and a steady process. These ideas focus on poses, expressions, and tiny details that make your figures feel real, even if you’re still learning. Pick one concept, keep the scale small, and treat each figure like a practice study you can finish and display.
1) Mini Portrait Bust With Soft Facial Planes
A small bust is the fastest way to practice realism without worrying about the whole body. Keep it palm-sized so you can finish it in a few sessions. Start with a simple egg shape for the head and block in the big planes: forehead, cheekbones, jaw, and chin. Don’t chase pores. Focus on structure first. Use a damp brush or fingertip to smooth transitions if you’re using air-dry clay. Budget tip: you can sculpt with a toothpick and an old makeup brush. Add the neck and a hint of collarbones so the head doesn’t look like it’s floating. For a lifelike look, keep the eyes slightly set back instead of bulging. Make the lips soft, not sharp. A tiny shadow under the lower lip makes a big difference when you paint later. If you’re nervous about symmetry, sculpt one side, then match the other by measuring with your tool handle. Finish with subtle asymmetry, because real faces aren’t perfectly even. Display it on a bottle cap or small wooden disk to make it feel like a “real” sculpture.
2) Relaxed Smile Expression Study
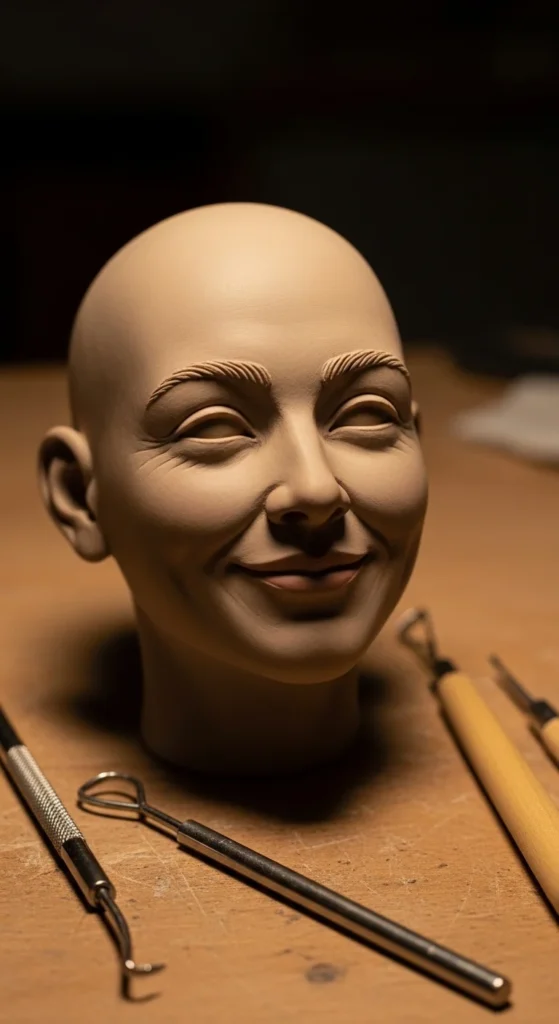
A believable smile is all about the cheeks and eyes, not just the mouth. Sculpt a simple head and lightly mark the mouth line first. Then lift the cheeks slightly so the smile feels connected to the face. Keep the lips soft. Sharp edges can look cartoonish. Add a tiny curve at the corners of the mouth and let it fade naturally. For the eyes, lower the upper eyelid a touch, as if the eyes are “smiling” too. Budget tip: use a rounded toothpick end to press gentle eyelid shapes. Don’t carve deep lines. Use shallow shaping and smooth it out. If you want extra realism, add one side a fraction higher than the other. It looks human. This is a great practice piece if you want to make gifts or figurines that feel warm and friendly. Keep the head small so you can redo it if needed. If you’re using polymer clay, bake in short stages so you don’t accidentally smudge details while working. Paint later with thin layers so the expression stays soft and natural.
3) Seated Figure With Natural Slouch
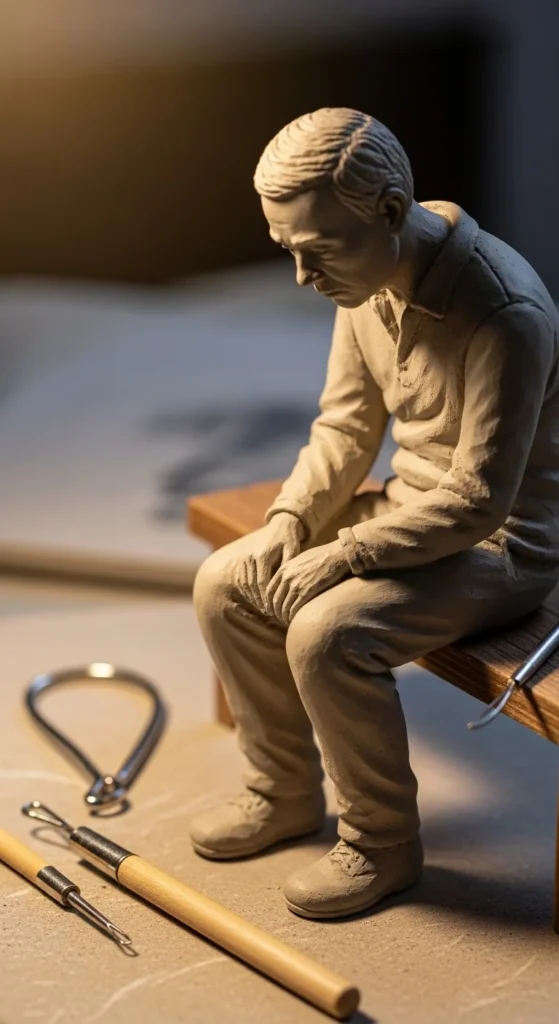
Posture makes a figure feel real instantly. A seated pose with a slight slouch is more lifelike than a stiff standing figure. Build a simple wire armature if you have it, or keep the figure small and use toothpicks inside for support. Sculpt the torso leaning forward a little, shoulders relaxed, and head tilted slightly down. Add hands resting on knees or holding something small. Even simple mitten hands can look believable if the pose feels right. Budget tip: use aluminum foil to bulk out the body under the clay so you use less material. For realism, pay attention to where clothing compresses. Add small folds at the waist, behind the knees, and around the elbows. Keep folds soft and uneven. A perfectly repeated fold pattern looks fake. If you’re using air-dry clay, let the body firm up before adding tiny finger details so you don’t squish the pose. This idea is perfect for a desk sculpture because it tells a story without needing a perfect face. A seated figure with good weight balance feels “alive” even with simple features.
4) Hands Holding a Book (Grip Practice)
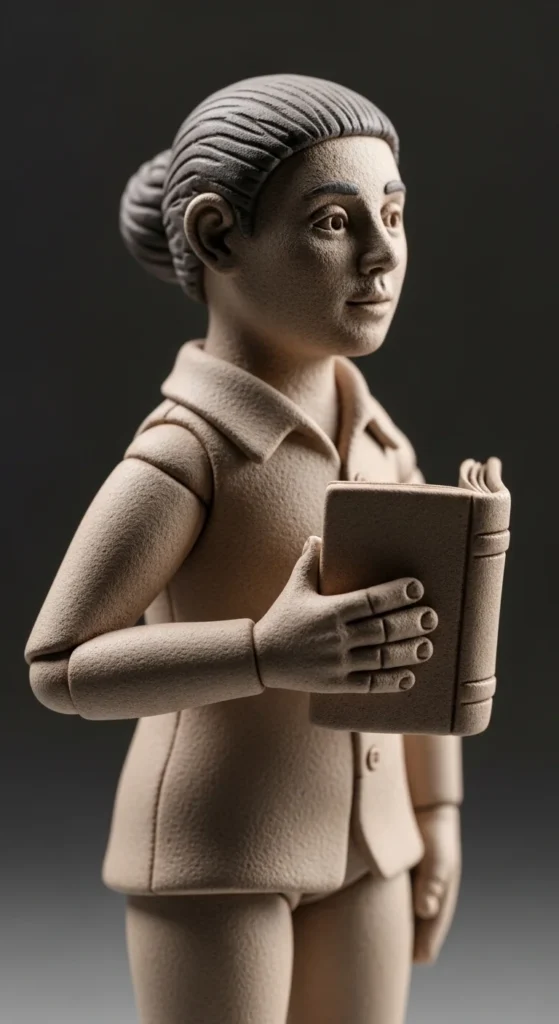
Hands are where realism lives, and a book grip is a great study. Make a tiny rectangle “book” from clay or foam, then sculpt the hands around it. Don’t sculpt hands separately and glue later if you can avoid it. When fingers wrap around an object, the contact points create believable tension. Keep the thumb pad fuller and the fingers slightly different lengths. Budget tip: use a toothpick to mark knuckle lines, then smooth them so they don’t look carved. Add a small bend at each finger joint. Straight fingers look stiff. If the scale is small, you can simplify by shaping the hand as a glove-like form and then separating fingers with shallow grooves. That still reads as fingers when the pose is right. To make it feel lifelike, tilt the book a little, not perfectly flat. Humans rarely hold items perfectly centered. This idea works well for student figurines, reading-themed decor, or mini dioramas. When you paint later, a tiny darker wash between fingers can bring the hand to life without needing perfect sculpted nails.
5) Braided Hair Study on a Small Head
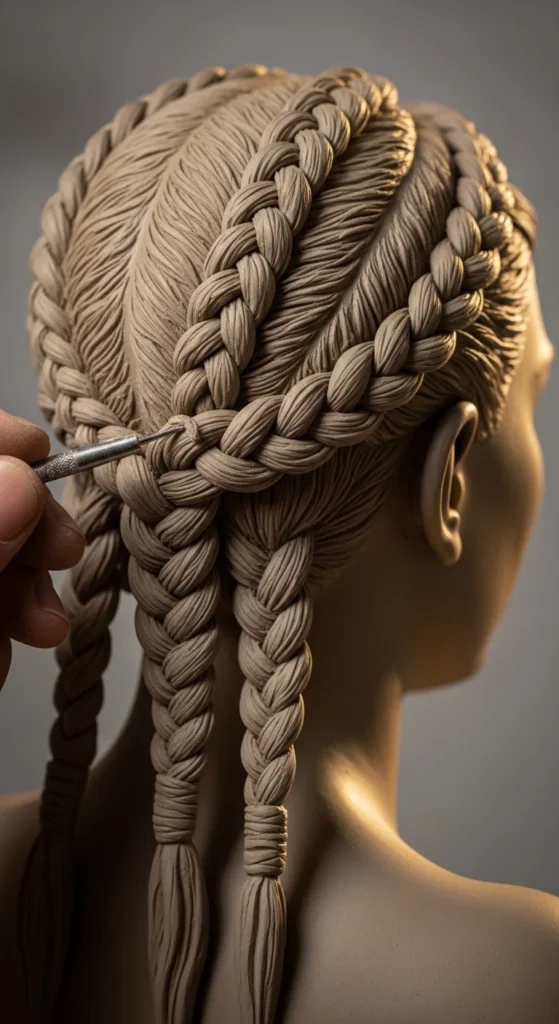
Hair can make a simple face feel real fast. Sculpt a small head and add a braided hairstyle. Keep it as big shapes first: hair mass, part line, braid path. Then press in braid segments with a small tool. Don’t try to carve every strand. Braids read well with repeating sections and soft edges. Budget tip: a plastic fork tine can press gentle texture into clay for hair. For realism, make the braid slightly uneven in thickness. Real hair isn’t perfect. Add a few loose flyaway strands near the hairline by rolling tiny clay threads and blending one end into the head. If you’re using air-dry clay, keep a damp brush nearby to smooth the hairline so it looks like it grows from the scalp. This style is great for lifelike figurines because it frames the face and adds character. You can also do a low bun, ponytail, or messy braid to match different vibes. When you paint later, use two close shades instead of one flat color. A little variation makes the hairstyle look natural and soft.
6) Hoodie Figure With Realistic Fabric Folds
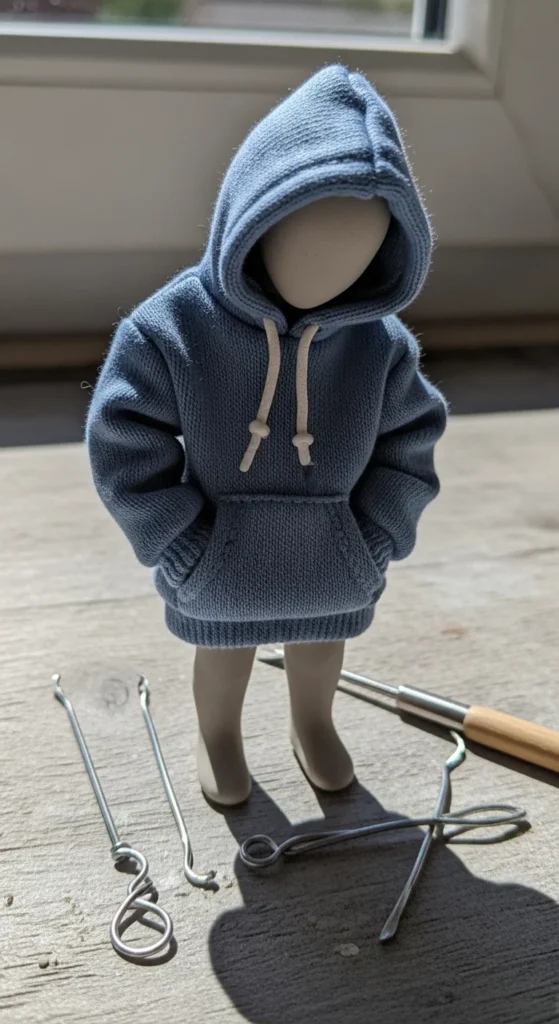
Clothing realism is about where fabric pulls and bunches. A hoodie is a great beginner-friendly outfit because it’s forgiving and still has clear fold zones. Sculpt the body shape first, then add a thin clay layer for the hoodie. Create folds where elbows bend, where the waist creases while sitting, and where the hood rests on the shoulders. Keep folds soft and varied. Budget tip: use a silicone makeup applicator or an old paintbrush handle to press folds without leaving sharp tool marks. Add a kangaroo pocket with slightly lifted edges for depth. Make the hood opening uneven and natural, not a perfect oval. If you add drawstrings, keep them slightly curved and not perfectly matched. That tiny imperfection makes it feel real. This is a fun style for modern figurines, desk decor, or custom gifts. When painting, use gentle shading under the hood and inside folds. That shadowing is what makes cloth feel thick. You’ll be surprised how lifelike a simple figure becomes when the hoodie folds look believable.
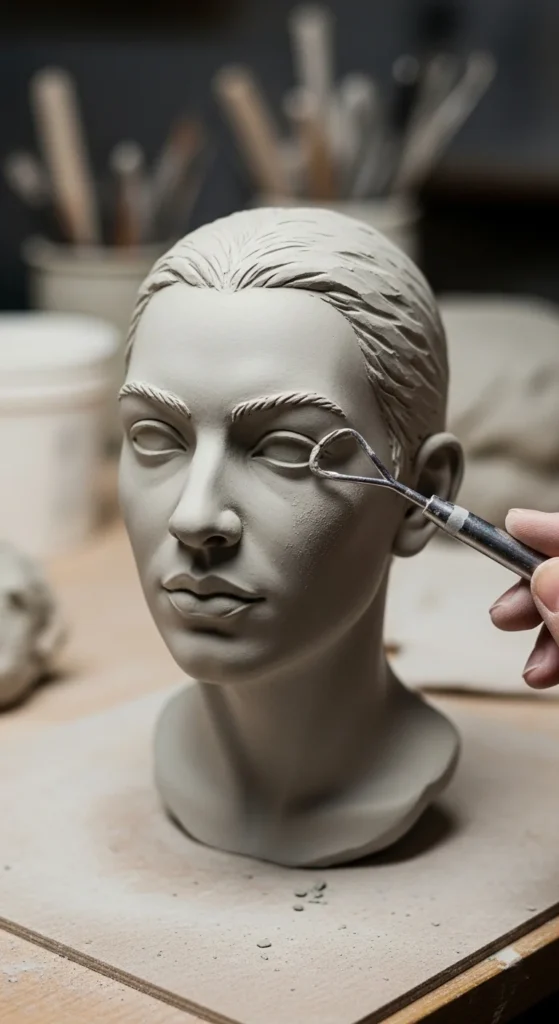
7) Realistic Ear Study (One Ear Only)
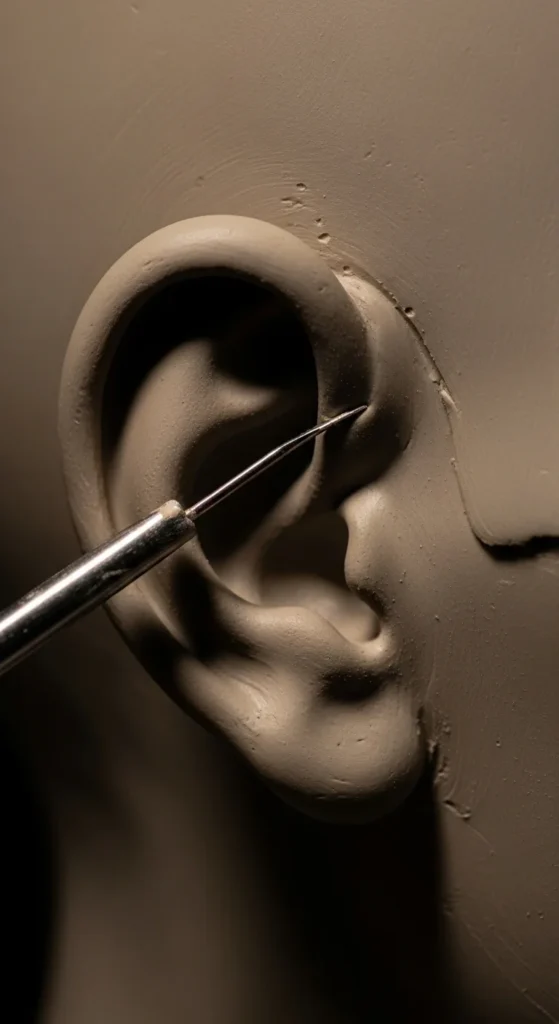
Ears are small but they instantly level up realism. Instead of doing a full figure, sculpt one ear on a small head or flat practice slab. Focus on the big ear shapes: outer rim, inner ridge, and the soft lobe. Keep it shallow. Overly deep cuts can look harsh. Budget tip: use a rounded toothpick end to press the inner curves, then smooth with a damp brush. Ears aren’t symmetrical, so you can practice making the top slightly thicker and the lobe softer. Pay attention to how the ear attaches to the head. That connection area is what often looks fake if it’s too sharp. Blend it gently. This is a great practice piece because you can repeat it quickly and improve fast. Once you can sculpt a believable ear, your faces start looking more human right away. If you plan to paint, a tiny dark wash in the inner ear adds depth, and a light highlight on the rim makes it feel like real skin catching light.
8) Walking Pose With Weight Shift
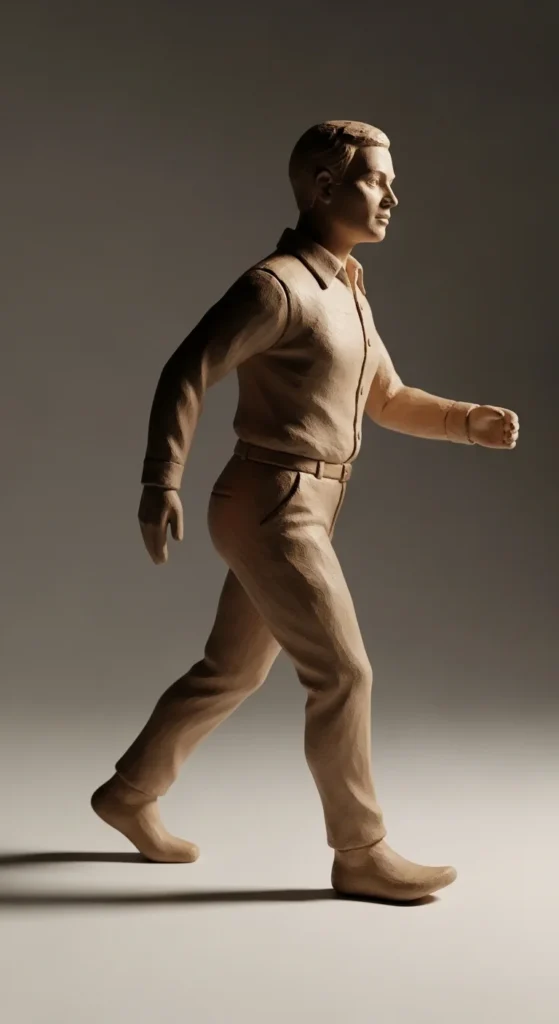
A walking pose feels lifelike because it shows motion. The key is weight shift. Put weight on the back leg, lift the front heel slightly, and tilt the hips a bit. Keep shoulders counter-rotated to the hips for a natural stride. Budget tip: use thin wire or a toothpick through the legs for support, then cover with clay. Don’t make the arms hang perfectly straight. Bend one arm slightly forward as if it’s swinging. Even a small bend sells the motion. Keep the head turned a little, like the figure is looking at something, not staring straight ahead. For realism, show small fabric tension around the knee of the weight-bearing leg. Add light folds at the ankle and hip. This is a great idea for mini street-scene dioramas or shelf figures. When you paint later, add subtle darker shading under the chin and in clothing folds to deepen the pose. A walking figure can look alive even with a simple face because the body language does most of the work.
9) Elderly Face Study With Soft Wrinkles

Older faces are a realism shortcut because small lines and sagging shapes add character. The trick is keeping wrinkles soft and placed where skin naturally folds: around the mouth, under the eyes, and across the forehead. Don’t carve harsh grooves. Press shallow lines and smooth them so they look like skin, not scratches. Budget tip: use a soft brush or cotton swab to blur wrinkle edges. Add slightly thinner lips and a softer jawline. Create a gentle “pouch” under the lower eyelid and a slight fold at the corner of the nose. Keep the expression calm. A neutral face with age details can look very lifelike. If you’re sculpting small, simplify. You only need a few key lines for the age effect to read. This idea works well for figurines of grandparents, wise characters, or story-based mini sculptures. When painting, use a warm base skin tone, then add very light shading in the folds. A tiny highlight on cheekbones brings back softness so the face doesn’t look muddy.
10) Jacket Collar and Lapel Detail Figure
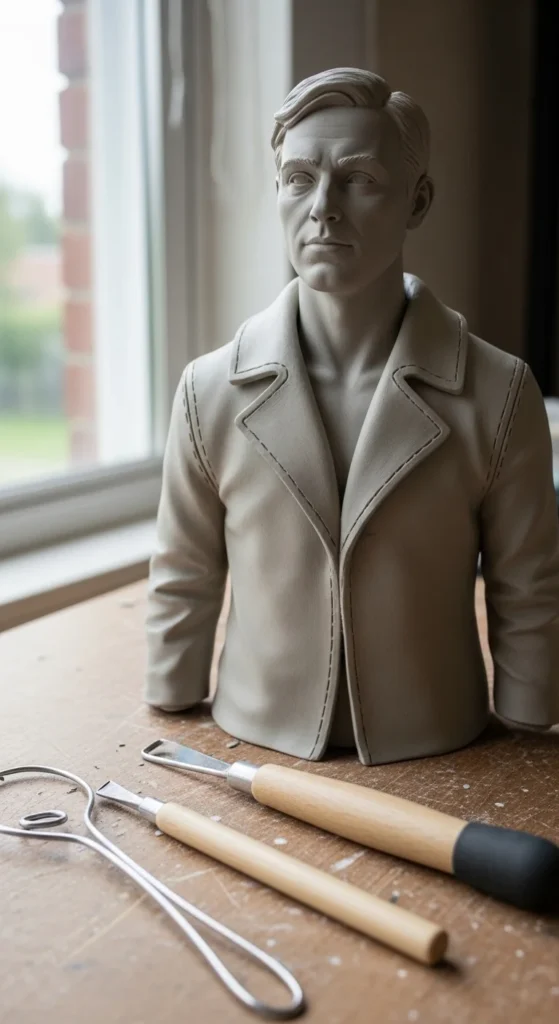
Collars make clothing feel real because they create structure around the neck. Sculpt a simple torso and add a jacket layer. Then build the collar as a separate thin piece and fold it over naturally. Make the collar edges slightly uneven. Real fabric isn’t perfectly sharp. Budget tip: roll clay thin using a pen barrel as a mini rolling pin on baking paper. Add seam-like edges by pressing a blunt needle tool along the borders, then soften it. Avoid deep lines. For lifelike form, add a slight overlap where the jacket closes, and a gentle fold where the lapel bends. This figure can be simple: no hands, just head and shoulders. The jacket details will carry it. If you’re making a gift sculpture, this outfit style feels timeless. Paint later with two close tones to create depth. A darker shade under the collar and inside the lapel makes it look layered and real. This is a great project if you want “realistic” without complex anatomy.
11) Realistic Sneakers on a Small Figure
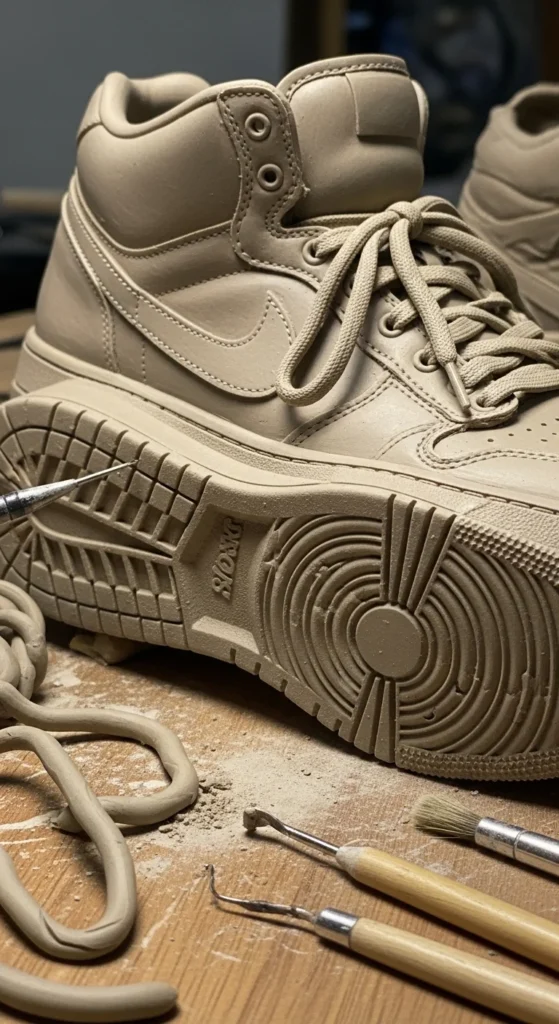
Shoes ground your figure in reality. Sneakers are perfect because they have clear shapes: sole, toe cap, tongue, and lace area. Start with a simple foot, then add the sole as a separate layer. Build the toe cap and tongue with small pieces. Budget tip: use a toothpick to press lace holes and a thin clay coil for laces. Keep the laces slightly uneven and curved, not perfectly straight. For lifelike feel, flatten the sole slightly on the bottom so it looks like weight is resting on it. Add subtle creases where the shoe bends near the toes. Sneakers can carry a figure even if the face is simple because viewers recognize them instantly. This idea is great for modern mini figures, desk decor, or character sculptures. When painting, add a tiny darker wash around the sole edge to create depth. A light dry brush on raised areas can mimic wear. Realistic shoes make the whole sculpture feel intentional and grounded.
12) Cross-Legged “Chill Pose” Figure
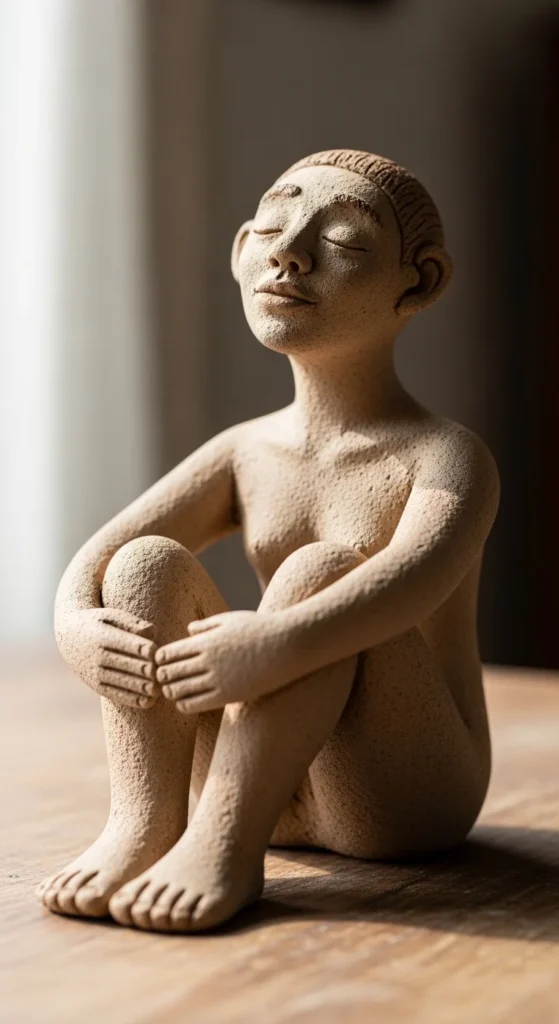
A cross-legged pose feels casual and human. Start with a small armature or foil base so the legs hold shape. Sculpt the thighs and calves with gentle curves, then bend them into a cross. The secret is overlap. One leg should sit slightly on top of the other. Add hands resting naturally on ankles or knees. Budget tip: if hands are hard, sculpt simple mitten hands and press finger separations lightly. It still reads as relaxed hands. Add clothing folds where legs compress: behind knees, at the hips, and where fabric bunches at the ankles. Keep folds soft and varied. This figure works great for shelf decor because it looks friendly and calm. You can add a small object like a mug, phone, or notebook to tell a story. Tilt the head slightly to make it feel like a real person pausing. When painting, add shading under the crossed leg overlap and under the chin. Those shadows bring the pose to life fast.
13) Two-Handed Mug Hold Pose
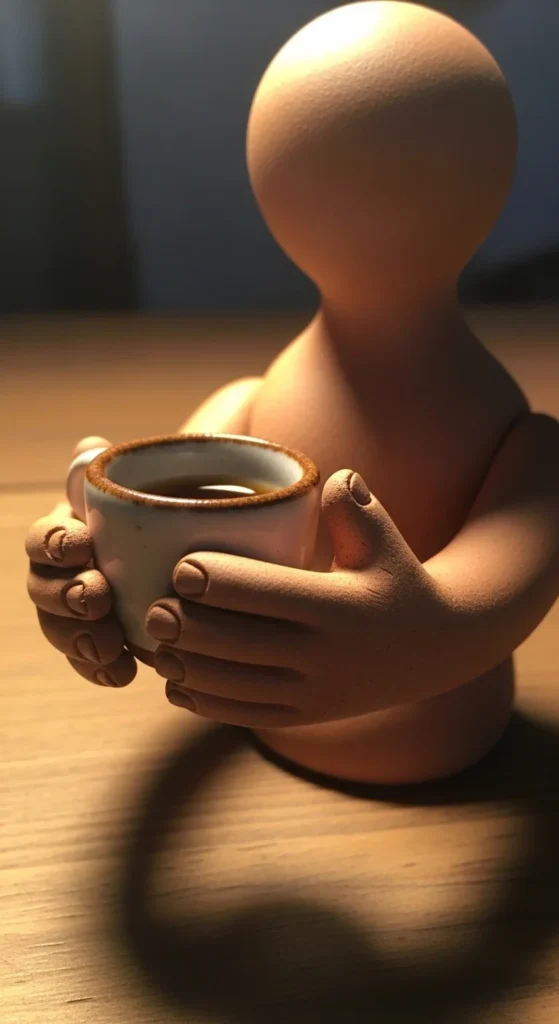
Holding a mug with both hands creates instant realism because it forces believable hand placement. Sculpt a small cup first and let it firm up a bit. Then build hands around it. Keep thumbs forward and fingers wrapping the sides. Hands should look like they’re warming up, not gripping hard. Budget tip: use a small bead or bottle cap as a mold to shape the mug evenly. For realism, add a slight bend in wrists and bring elbows closer to the body. That “huddled” posture feels human. Add a sweater or long sleeves so you can hide some hand complexity if you want. Sleeves also add fabric folds around the wrists which looks lifelike. This figure style is perfect for cozy desk decor or small gifts. Even if the face is simple, the mug pose tells a story. When painting later, add a darker shade inside the mug for depth. A tiny highlight on the rim makes it look like ceramic. This is a great piece to practice gesture and emotion without relying on perfect facial features.
14) Side Profile Head Study

Front faces can hide errors. Side profiles show structure clearly. Sculpt a small head and view it from the side as you work. Focus on the silhouette: forehead slope, nose projection, lip depth, and chin angle. A good side silhouette can make a figure feel real even with minimal details. Budget tip: use a coin edge or card to check the profile line by holding it near the head. Keep the eye socket slightly set back and the lips not too sharp. Add a gentle curve under the nose and a small dip above the top lip. That philtrum area, even simplified, helps realism. For ears, keep it simple if you’re not ready. You can add a basic ear shape later. The goal here is profile structure. This study is great because you can make multiple heads quickly and compare them. When you paint, side lighting will create natural shadows that make your sculpt look better. Display the profile head on a small base like a mini bust and it becomes a cool desk sculpture.
15) Beard and Mustache Texture Study
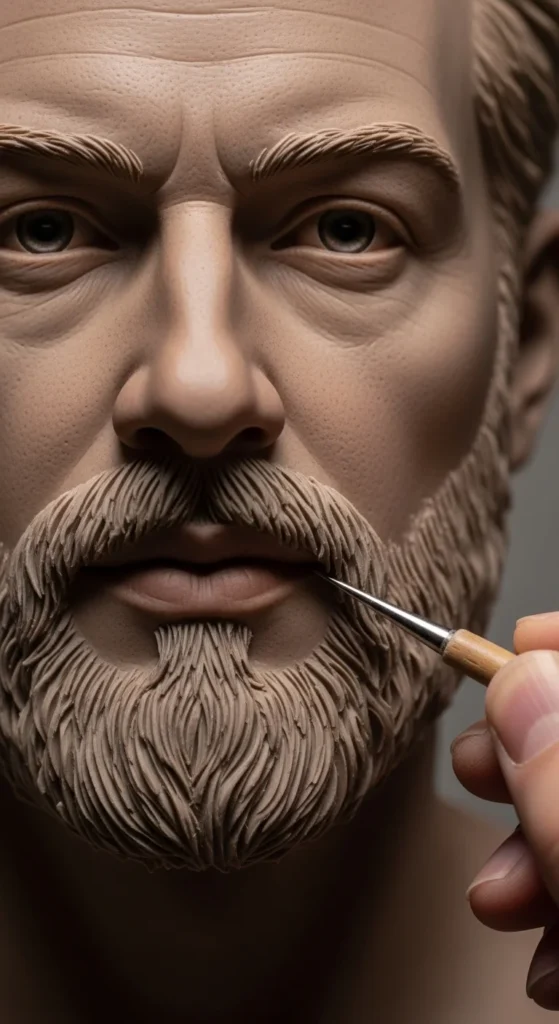
Facial hair can add realism and character fast. Sculpt a head and block in beard shape as a soft mass first. Then add texture with tiny taps or light strokes using a needle tool or toothpick. Keep it subtle. Over-texturing can look rough. Budget tip: use a stiff old toothbrush to press very gentle texture for stubble, then smooth lightly to soften it. For a mustache, keep edges feathered, not sharp lines. Blend the hair into the face so it looks like it grows naturally. Beard shapes should follow the jaw and chin, with a little volume under the chin area. This is a great idea for custom figures and gifts because hair style changes the whole personality. When painting later, use two close shades and a soft dry brush to avoid a flat look. A small highlight on cheekbones next to the beard edge makes the contrast feel real. Even a simple face becomes more lifelike when facial hair placement looks natural.
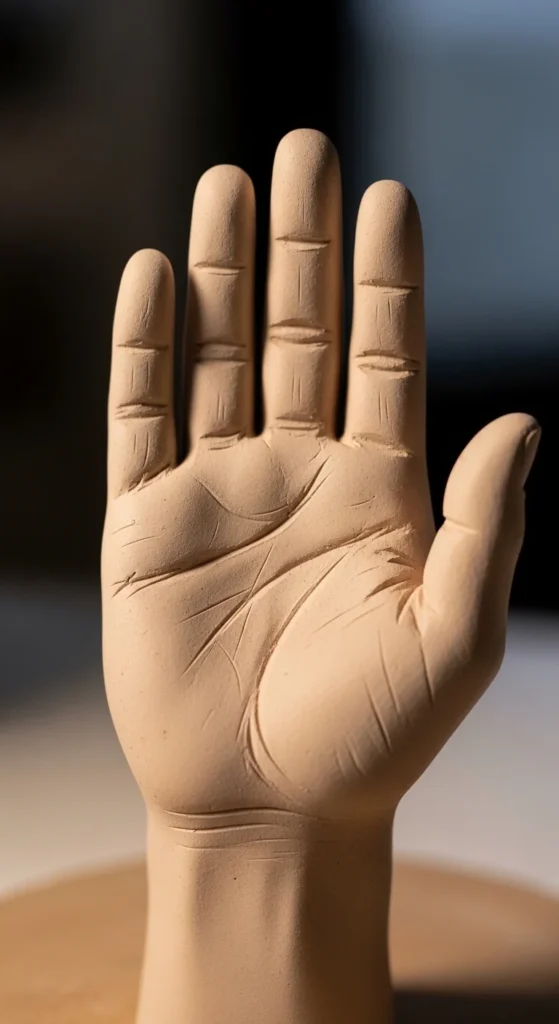
16) Close-Up Hand With Nails and Knuckles
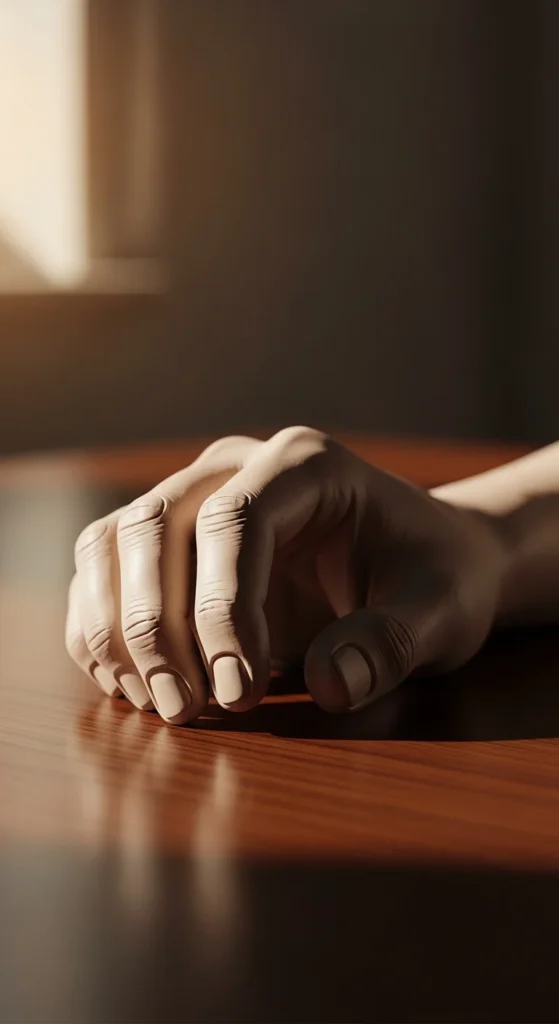
If you want lifelike results, do a hand study by itself. Sculpt a hand resting flat or slightly curled, then add subtle knuckles and nail plates. Nails should be thin and slightly curved, not thick blobs. Budget tip: use a thin piece of plastic (like a cut straw) to press a gentle nail curve. Keep finger pads fuller and add small creases where fingers bend. Don’t carve deep lines. Press and smooth. For realism, vary finger thickness slightly. Hands aren’t identical. This hand can become part of a full figure later, or you can mount it on a small base as a “study sculpture.” It’s also a great practice for making figurines hold objects. When painting, a tiny darker wash between fingers adds depth. A soft highlight across the knuckle ridge makes the skin feel like it’s catching light. If you only have time for one realism practice, do hands. Improving hands improves every figure you make.
17) Shirt With Subtle Tension Folds
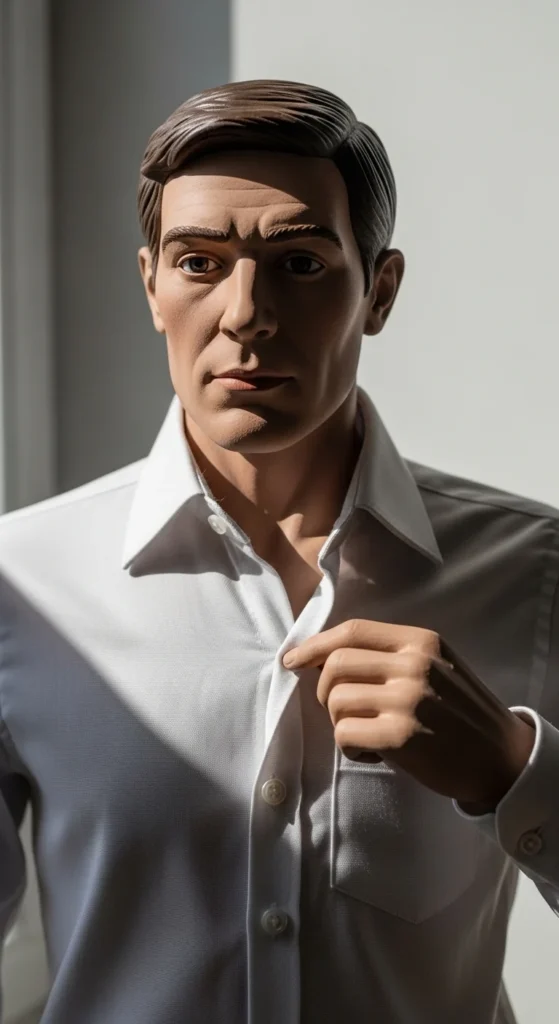
A shirt looks realistic when folds follow tension points. Sculpt a torso and add a thin shirt layer. Then create folds that pull from shoulders to chest, and from elbows to cuffs. Keep them light. The goal is believable fabric, not dramatic wrinkles. Budget tip: use a damp brush to smooth fold edges so they look like cloth. Add a button line as tiny raised dots or small indents, but don’t overdo it. Too many deep button holes can look like holes punched in clay. For realism, slightly stretch the shirt across the chest and let it bunch a little at the waist. That contrast sells fabric. This project is great because it teaches you how fabric “moves” on a body. It works for office figures, school figures, or casual characters. When painting, use gentle shading under fold ridges and under the collar. A highlight on the shoulder curve makes it feel like real fabric catching light.
18) Arms Crossed “Attitude Pose” Figure
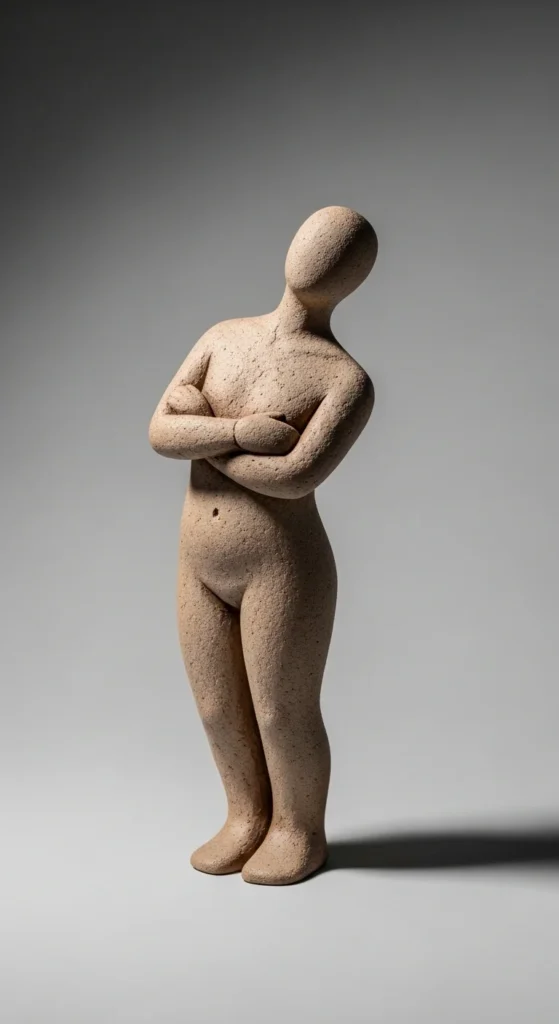
Arms crossed is a strong pose that reads human instantly. The trick is making the shoulders and torso twist slightly. One shoulder rises a bit. The elbows don’t sit perfectly even. Start with a basic body, then place the arms as tubes crossing the chest. Add hands later or tuck them under the arms if you want a simpler version. Budget tip: use foil inside arms so they hold shape and use less clay. For lifelike feel, push the upper arms into the torso slightly as if the arms are pressing against the body. Add small fabric compression at the elbows and under the arms. Tilt the head slightly to add personality. This pose works well for character figurines because it communicates mood without a perfect face. Even a simple neutral face can look confident when body language is strong. When painting, add shading where arms overlap the torso and under the chin. That depth makes the pose look real and grounded.
19) Eye Socket and Eyelid Depth Study
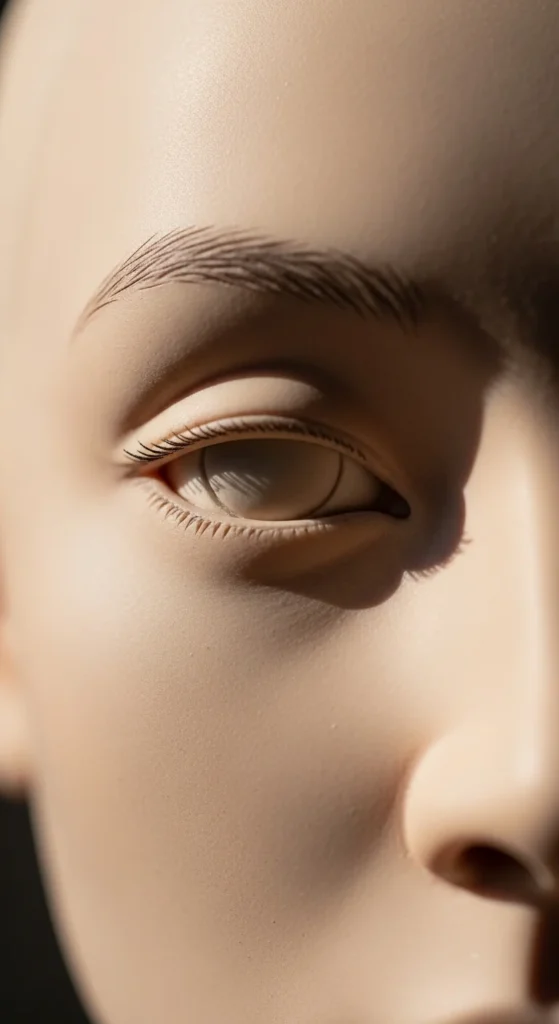
Eyes look lifelike when they sit inside the head, not on top of it. Sculpt a head and focus only on the eye area. Build the brow ridge, then press in sockets. Add eyeballs as tiny spheres, then place eyelids over them. Upper lid usually covers a bit more than the lower lid. Budget tip: roll tiny clay balls using your fingertips and a drop of water or clay softener to keep them smooth. Keep eyelids thin and blended. Avoid sharp cut lines. Add a small crease above the upper lid for realism. Don’t make both eyes identical. A tiny difference feels human. This study can be done on a half-face slab too, which saves time and clay. When painting, add a darker shade inside the socket corners and a tiny highlight on the eye surface. Even without painting, good eyelid depth makes a face look alive. This is one of the most high-impact realism practices you can do.
20) Kneeling “Tying Shoes” Action Pose
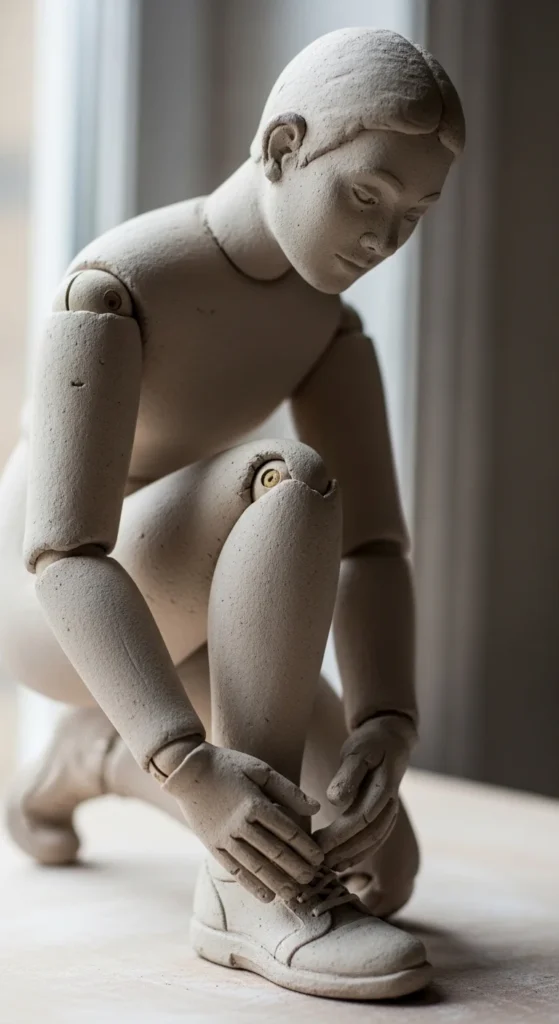
Action poses feel lifelike because they show purpose. A kneeling figure tying shoes is a great study of joints and compression. One knee on the ground, the other raised. The back curves slightly forward. Hands close to the shoe. Budget tip: build the body with foil bulk and add clay on top to save material and reduce cracking in air-dry clay. Focus on believable angles. Elbows bend naturally. Shoulders slightly forward. Add fabric folds where the leg bends and where the torso compresses. Keep the face simple if you want. The action will carry the realism. This pose also lets you hide tricky anatomy with clothing: pants, hoodie, jacket. Place the figure on a small base like a sidewalk tile or wooden disk so it feels like a scene. When painting, add shadows under the raised knee and under the arms. Those shadows make the action look grounded and real.
21) Open Palm Gesture Hand Study
An open palm feels expressive and human. Sculpt a hand with fingers slightly spread, like waving or showing something. Keep the palm slightly cupped, not flat like a pancake. Add subtle palm lines with shallow impressions, then smooth them so they look like skin creases. Budget tip: press palm lines using a blunt needle tool or the edge of a plastic card. Fingers should taper slightly toward the tips. The thumb should angle outward naturally. For lifelike feel, don’t spread fingers evenly. Make some closer together and one slightly apart. That natural irregularity helps a lot. This hand study works great for figures that gesture, wave, or hold attention. When painting, a light wash in the palm lines adds depth without making it look dirty. A tiny highlight on fingertips makes them look rounded. If you can sculpt expressive hands, your clay people will feel alive even if faces are simple.
22) Full Mini Figure With Soft Paint Shading
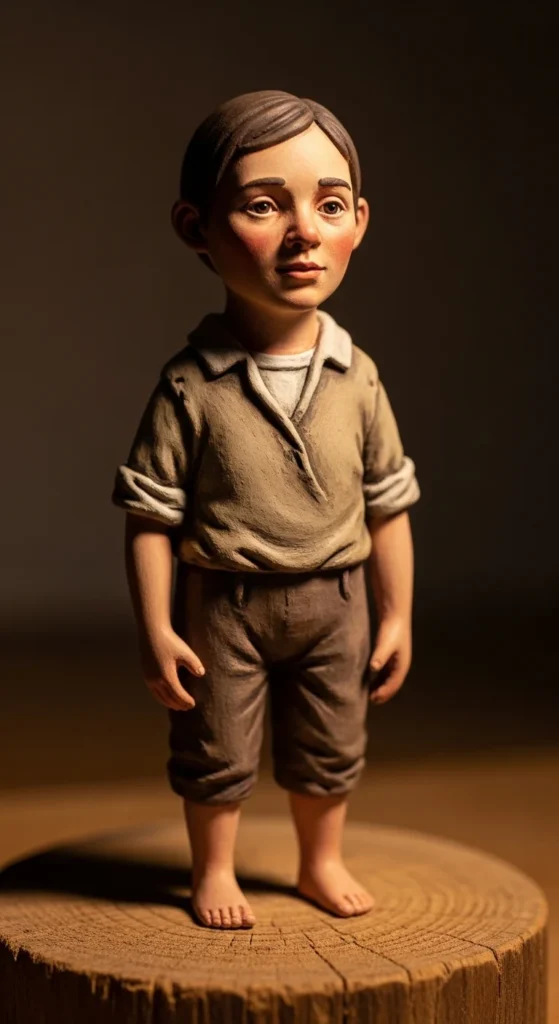
If you want a lifelike finish, plan for painting from the start. Sculpt a small full figure with simple clothing and a calm pose. Focus on clean forms and smooth surfaces. Then paint with thin layers. Use a base skin tone, then add gentle shading under the chin, around the nose, and under cheekbones. Avoid harsh lines. Budget tip: cheap acrylic paint works fine if you thin it with water and build layers slowly. For clothing, use two close shades to create soft folds. Add tiny highlights on raised areas like knuckles, nose tip, and cheekbones. This makes the figure catch light like real skin. Seal it with a matte finish if you can, because glossy skin can look toy-like. Keep details soft and believable. A figure doesn’t have to be hyper-detailed to feel real. When the proportions, pose, and shading work together, the result feels lifelike. This is a great “capstone” project after trying the smaller studies above.
Conclusion
Lifelike clay people come from small wings stacked together: believable posture, soft facial planes, hands that interact with objects, and clothing folds that follow movement. Pick one idea from this list, keep the scale small, and finish it fully so you learn the whole process. When you repeat that cycle a few times, your figures start looking more human. Grab your clay, choose one pose, and make your next sculpture feel like a real person caught in a real moment.

Lily Summers is a digital artist and creative storyteller who loves bringing colorful characters to life. With a passion for cartoons, fan art, and playful sketches, she inspires others to explore their imagination through art. When she’s not sketching, you’ll find her dreaming up new ideas for CraftedWizard.com to spark creativity in every artist. 🌈✨