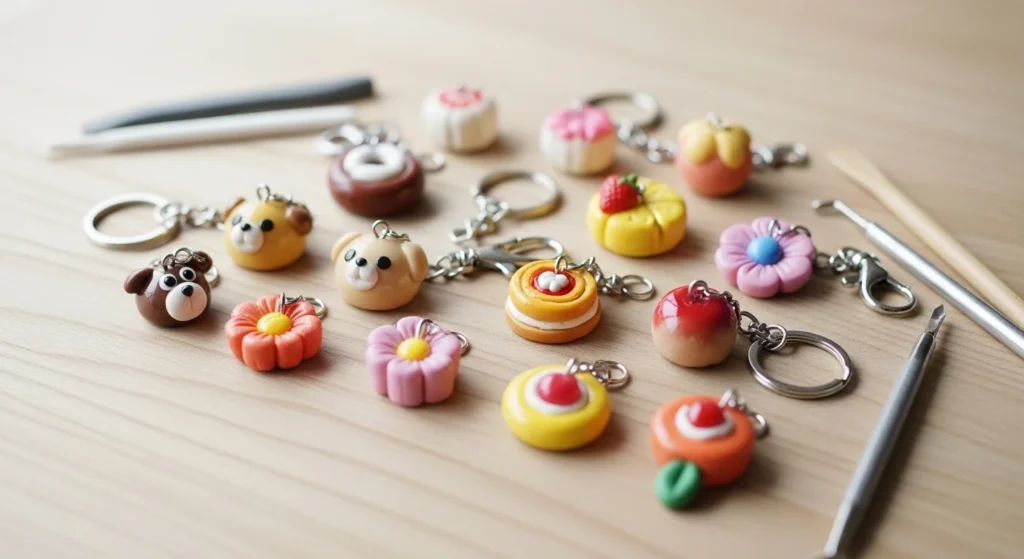
Clay keychains are one of the easiest handmade projects to start and one of the most giftable crafts to finish. They are small, cute, low-cost, and full of personality. You can shape them into tiny animals, mini food charms, flowers, hearts, letters, or playful abstract pieces without buying a long list of supplies. Many makers start with air dry clay for a no-oven option, while others use polymer clay when they want a firmer result and brighter color detail. This list shares clay keychain ideas that feel fun, practical, and easy to copy at home. You will also find simple tips for shaping, sealing, adding rings, and keeping each charm sturdy enough for daily use.
1. Tiny Cat Face Charms
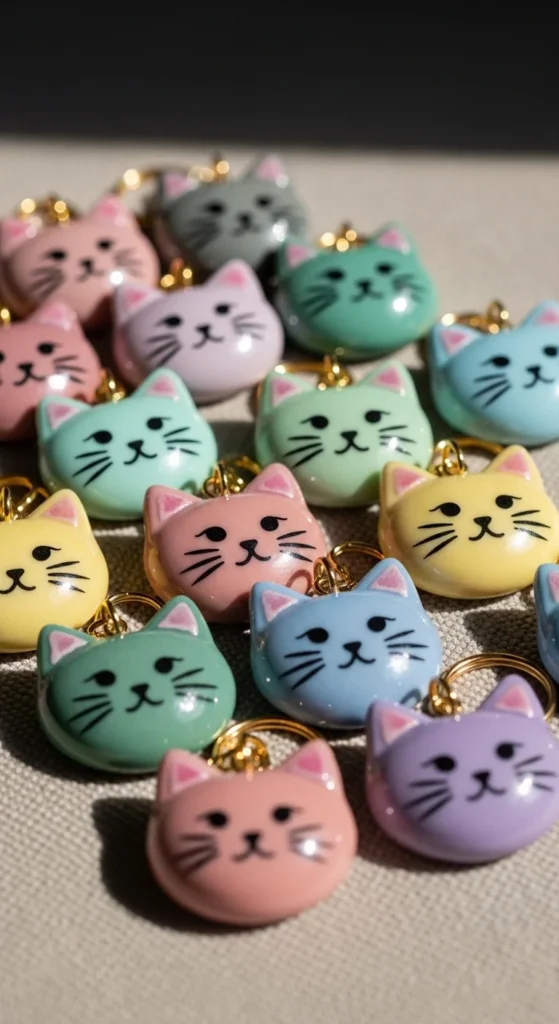
Tiny cat face charms are a safe place to start because the shape is simple and the result always looks cute. Roll the clay into small circles, pinch two ears at the top, and smooth the edges with a damp finger or soft tool. Once dry or baked, add a face with acrylic paint or fine paint pens. A soft pink nose and tiny whiskers go a long way. You do not need many colors either. White, black, cream, gray, and peach can give you several cat styles from one small pack of clay. If you want a low-cost shortcut, make a batch using the same base shape and only change the face details. That saves time and still gives variety. Add a gloss sealer after painting if you want that polished charm-shop look. These are great for gifts, party favors, or craft fair sets because people love animal keychains that feel sweet but not overly complicated. They are also small enough to make with leftover clay scraps.
2. Happy Frog Keychains
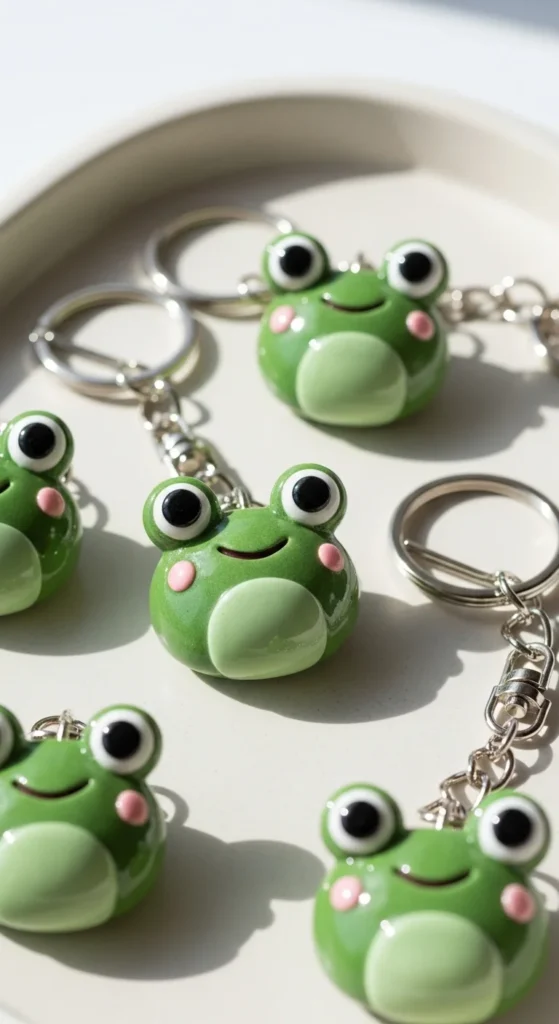
Frog keychains have become a favorite because they are playful, simple, and easy to stylize. Start with a rounded green shape for the face, then add two tiny raised circles for the eyes. Keep the mouth small and curved so the charm stays cute instead of cartoon-heavy. If you are using air dry clay, let the main shape firm up a bit before adding the eye pieces so they hold better. For polymer clay, press the parts together gently and smooth the seam with a finger. A budget-friendly trick is to mix white clay into green clay so you get more shades without buying extra packs. Frogs also look good with tiny blush dots, flower crowns, or little mushroom hats if you want a sweeter finish. Add the hole for the jump ring before drying or baking so you do not risk cracks later. A clear varnish or resin-like top coat helps protect the painted face and gives the charm a cleaner shine. These are fun for backpacks, keys, and handmade gift sets.
3. Mini Cow Head Charms
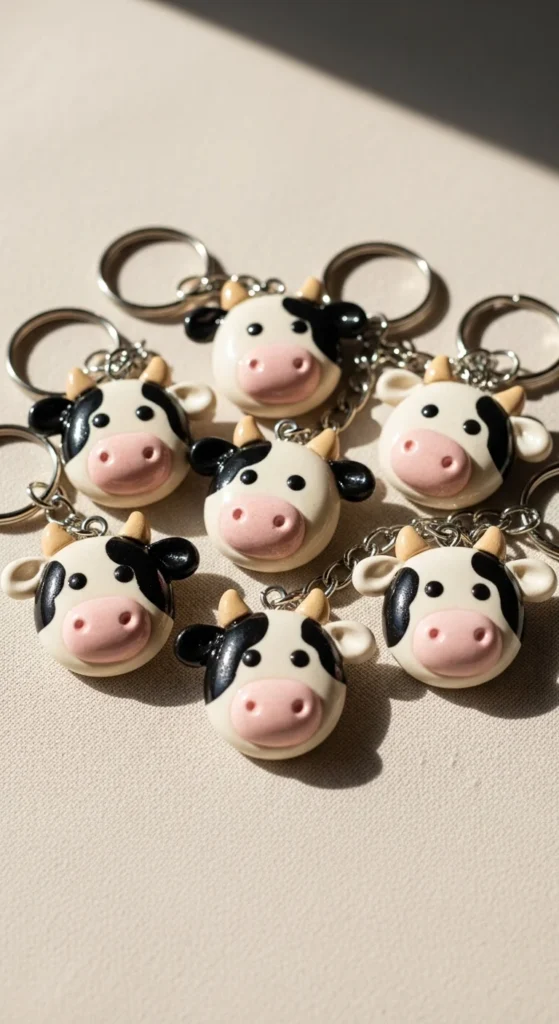
Mini cow head charms are easy to make and very popular because the patch pattern gives each one a different look. Form a rounded face shape first, then add ears and small horns. Use black or brown clay scraps for the spots so you do not waste larger pieces. If you only have white clay, paint the patches after the charm has dried. A tiny pink oval nose adds contrast and makes the whole design feel more finished. This idea works especially well for beginners because the shape does not need perfect symmetry to look charming. In fact, slightly uneven spots often make the cow more lovable. If you want to save money, keep the design flat instead of fully sculpted. A flatter keychain dries faster, uses less clay, and feels lighter on a key ring. Seal it once the paint is dry so the colors stay crisp. Cow charms also pair nicely with daisy beads or soft tassels if you want a farmhouse or cottage-style look without a complicated build.
4. Kawaii Sushi Pieces
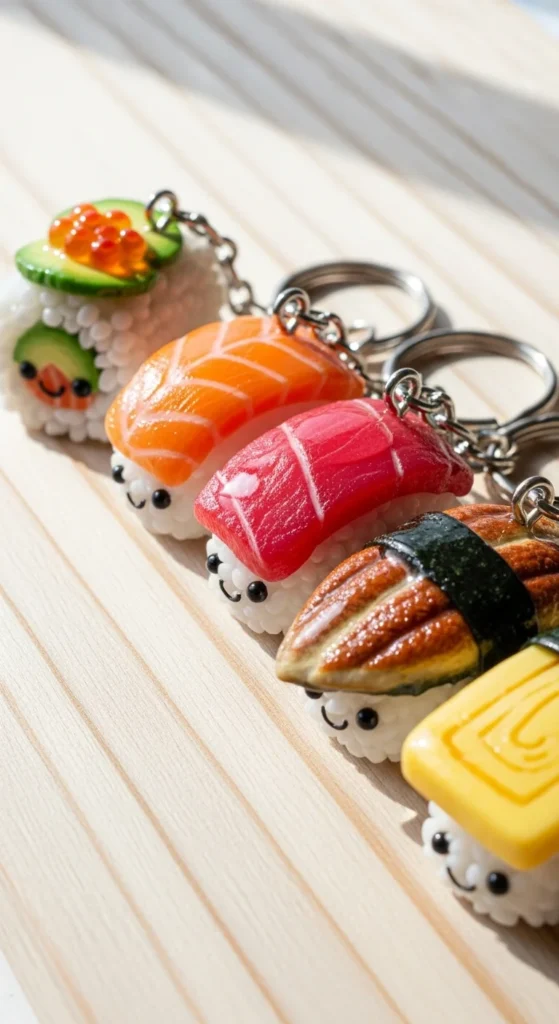
Clay sushi keychains are a fun pick because they combine food art with cute character style. Start by shaping a small rectangle of off-white clay for the rice base. Add tiny texture marks with a toothpick so it looks less flat. Then place a thin strip of colored clay on top for the sushi topping. Salmon, egg, shrimp, and tuna shades all work well. A very thin black band around the middle can mimic seaweed and make the design stand out more. Once the piece is dry or baked, paint on a tiny face if you want the charm to lean more kawaii. These are great for using up extra clay because each piece is so small. You can even make a full matching set in one sitting. If you want a stronger finish, glaze them after painting so the colors look brighter and the surface feels smoother. Sushi keychains are great for teens, foodie gifts, and handmade bundles because they are cute, compact, and full of personality without taking much time.
5. Cookie and Biscuit Charms
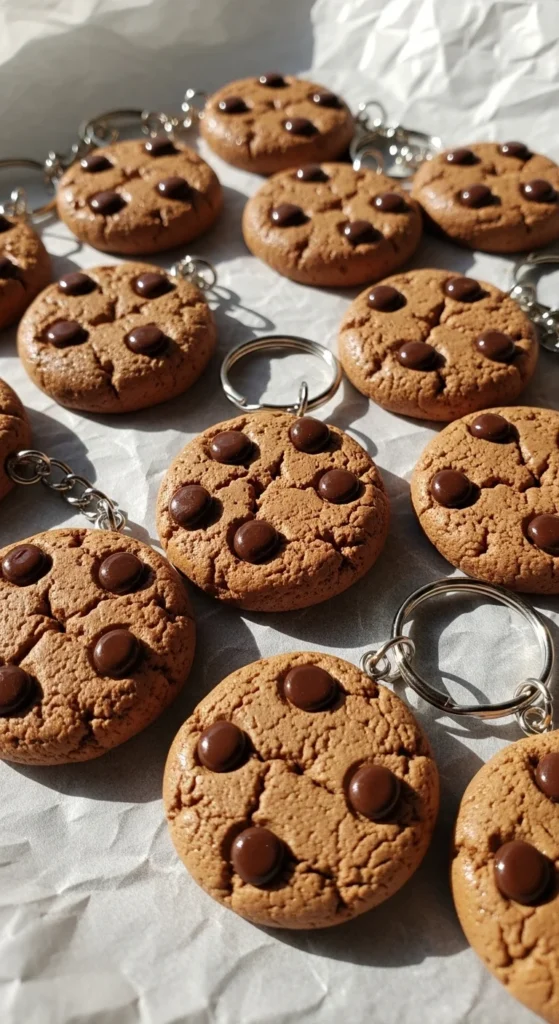
Cookie and biscuit charms are one of the easiest mini food styles to make because the shape is forgiving. Roll the clay into a small disk, flatten it lightly, and pinch the edge in a few places so it looks more natural. Add tiny dark clay dots or painted spots for chocolate chips. You can also make sandwich cookies by stacking two thin disks with a white or cream filling in the center. If you want a more realistic look, shade the edges with a little brown pastel dust or soft paint after drying. For a lower-cost version, keep the cookie flat and skip extra layers. That still looks cute and uses less clay. Cookie keychains are perfect for beginners because they do not rely on tiny sculpted parts that can break off. A gloss or satin sealer can make them look polished, while a matte top coat keeps them looking like real baked treats. These charms are fun for gift bags, market tables, and small batches because they come together quickly and appeal to almost everyone.
6. Red Mushroom Keychains
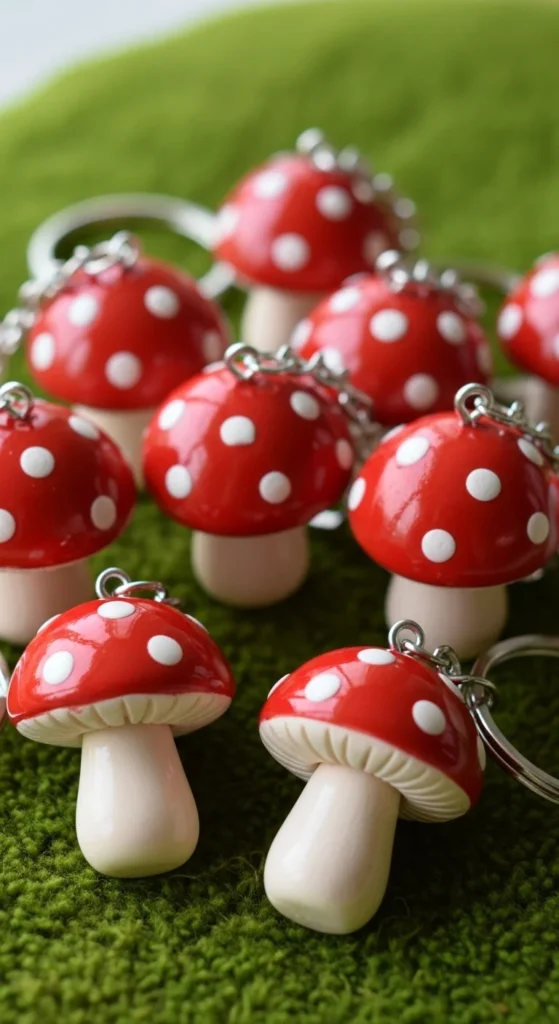
Mushroom keychains are a strong choice if you want something simple with a cottage-style feel. Start with a cream stem and a rounded cap in red, brown, or dusty pink. Add tiny white dots on top after the clay dries, or use small clay pieces if you want more dimension. The best part of this idea is how many directions it can go. A realistic mushroom looks earthy and calm, while a smiling mushroom feels playful and giftable. If you are working with air dry clay, let the stem firm up before attaching the cap so it does not slump. If you want the charm to last longer on a backpack or key ring, keep the design a little thicker around the stem. A clear sealer helps protect painted dots and keeps the surface from looking chalky. These are easy to pair with leaf beads, neutral tassels, or little wooden accents. Mushroom charms are especially nice for craft sellers because they fit current cute nature trends and do not take much clay to make.
7. Daisy Flower Keychains
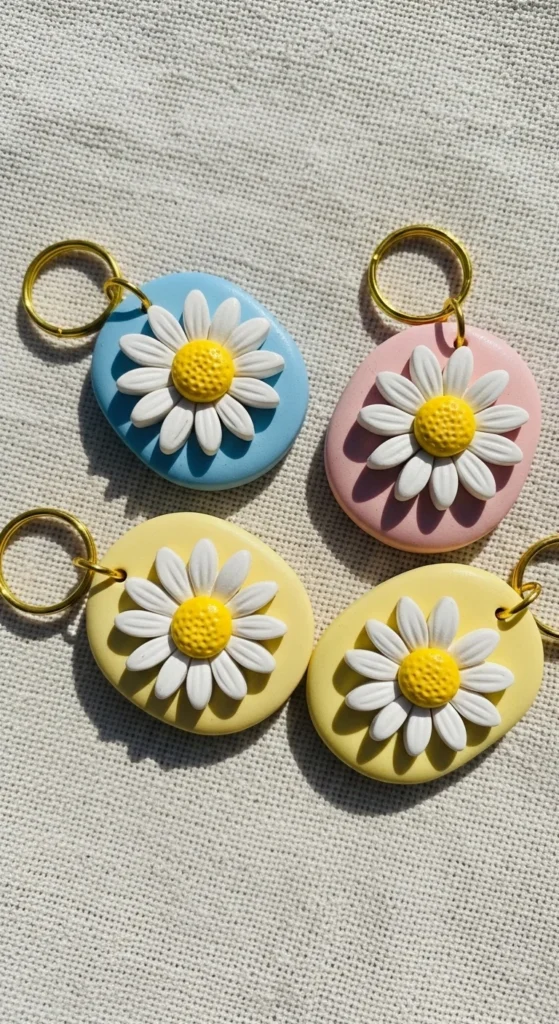
Daisy flower keychains are cheerful and beginner-friendly because the petal shape does not have to be perfect. Start with a small round center, then add short teardrop petals around it. Keep the charm flat if you want it lightweight and easier to dry. You can use white petals and a yellow center for a classic look, or switch to soft pink, lilac, or blue for something sweeter. If you have leftover clay from other projects, this is a smart way to use small scraps because each petal takes very little material. A flower keychain also works well as a layered design. Place the daisy on a circle, heart, or arch backing for extra color without much more effort. Once dry or baked, seal it so the petals stay cleaner over time. These are lovely for spring gifts, friendship sets, or charm bundles. They also pair well with pearl beads or ribbon loops if you want the keychain to feel a little more decorative without getting too bulky.
8. Leaf Imprint Charms
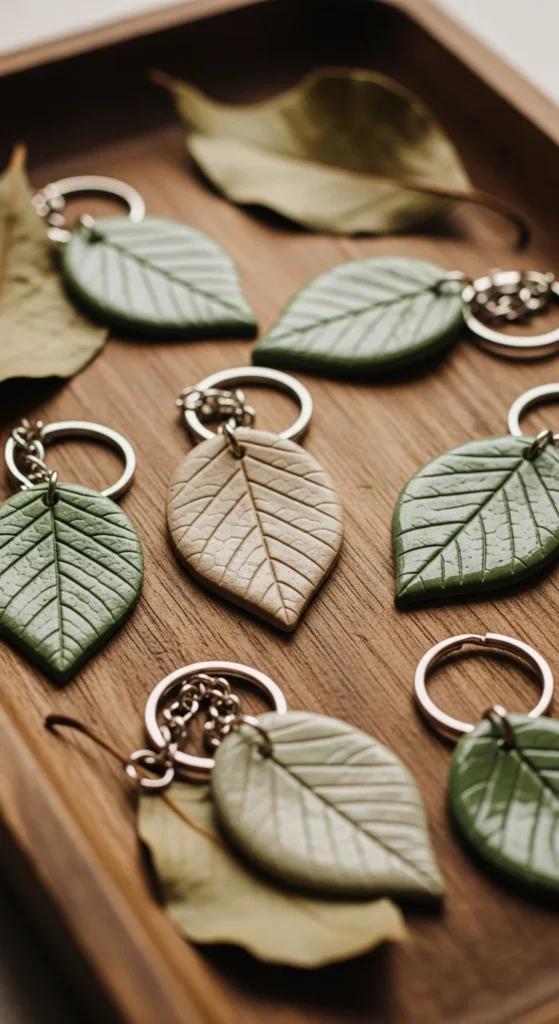
Leaf imprint charms are ideal if you like nature-inspired crafts that still feel simple. Roll out your clay and cut a leaf shape with a craft knife, cookie cutter, or paper template. Then press a real leaf onto the surface to transfer a natural vein texture. This saves time because the pattern is made for you and gives the piece a more organic look. Earthy shades like sage, olive, cream, and terracotta work especially well here. If you want more detail, brush a little paint into the grooves after drying, then wipe the surface lightly so the texture stands out. That trick gives a handmade piece more depth without adding complex sculpting. Use a small straw or skewer to make a clean hole for the ring before drying. Leaf charms can stay plain and elegant or be paired with beads and tassels. They are affordable, light, and easy to make in sets, which makes them a good choice for gifts, seasonal crafts, or simple online shop listings.
9. Monogram Letter Keychains

Monogram letter keychains are popular because they feel personal without taking much time to make. Roll out clay to an even thickness, cut your base into a circle, arch, tag, or rectangle, and add one raised or pressed letter in the center. You can form the letter by hand, use tiny cutters, or press in a stamp if you have one. Even simple hand-shaped initials can look great once painted and sealed. This is a very budget-friendly idea because you can make many keychains from one rolled sheet of clay. Stick to a small color palette like cream, blush, sage, or black for a cleaner look. If you want a nicer finish, sand rough edges gently after drying, then paint or seal the surface. A metallic accent around the letter can make the design pop without much extra work. These charms are easy to gift, easy to customize, and perfect for birthdays, bridesmaid sets, or simple handmade stock for local craft markets.
10. Heart Charms with Marbled Color
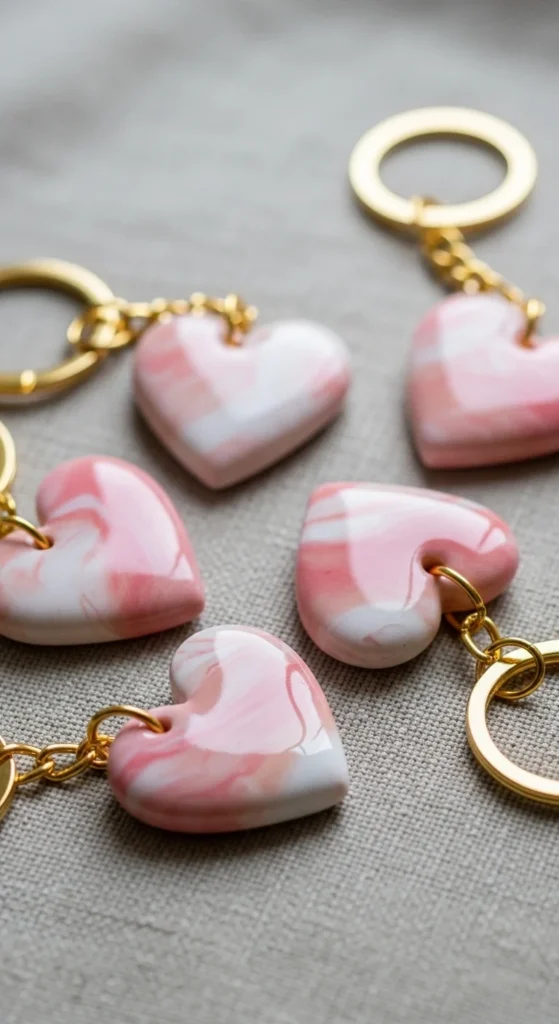
Marbled heart charms feel polished but are actually very simple to make. Take two or three clay colors, twist them together lightly, and flatten them just enough to keep the swirl pattern visible. Then cut out heart shapes using a small cutter or a hand-drawn template. The result looks artistic without requiring painting or tiny details. This is a good option if you want something fast but still eye-catching. Soft shades like pink, white, lilac, beige, or dusty blue work especially well for a calm handmade look. If you want stronger contrast, add a thin line of gold paint after drying around the edge or through the center swirl. Keep the charm slightly thick so it does not feel flimsy once attached to keys. A gloss sealer can make the marbling stand out more, while a matte finish gives it a soft stone-like look. Heart charms are easy to sell, easy to gift, and easy to batch because the process is quick from start to finish.
11. Smiley Cloud Keychains
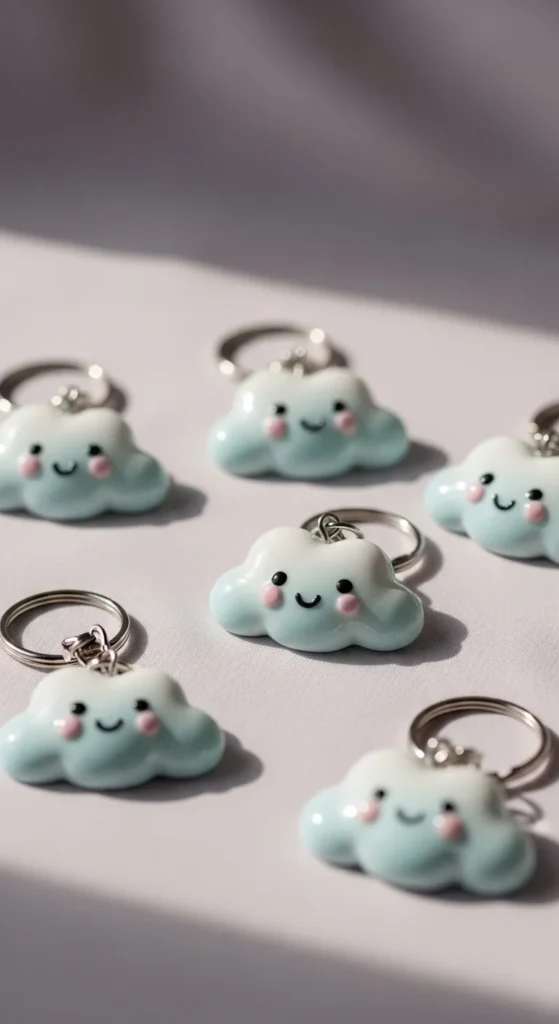
Smiley cloud keychains are great if you want a design that feels light, cute, and easy to shape. Start with a rounded cloud outline instead of trying to sculpt every puff separately. Once the base looks smooth, add a tiny painted face after drying or baking. You can keep it plain white or use pastel sky shades like baby blue, lavender, or pale pink for extra softness. This style is perfect for beginners because the charm does not need tiny add-on parts that might break. If you want more detail, attach a tiny raindrop, star, or moon beside the cloud before it dries. A silver key ring usually suits this design better than warmer metal tones, but either works. The cost stays low because the shape is flat and the clay use is minimal. These keychains make sweet gifts for students, friends, or anyone who likes cute desk and bag accessories. They also photograph well, which makes them a good option if you plan to post or sell your handmade work.
12. Bead Stack Clay Keychains

Bead stack clay keychains are a good pick when you want texture without detailed sculpting. Instead of making one big charm, roll several clay beads in different sizes and string them together once dry or baked. You can use round, oval, flat, or tube shapes for a more mixed look. Soft pastel tones are great for a playful style, while earthy shades feel more mature. If you want extra detail, press dots, lines, or tiny patterns into the bead surfaces before drying. This helps the keychain feel handmade without requiring paint on every part. Mix in one or two metal or wooden beads if you want to stretch your clay further and keep the cost down. Add a tassel or short ribbon for movement. These keychains are easy to customize and lighter than many sculpted designs. They also work well as quick gifts or add-ons for market tables because you can create many color combinations from the same simple bead shapes. The result feels modern, cute, and practical.
13. Leopard Print Tag Charms
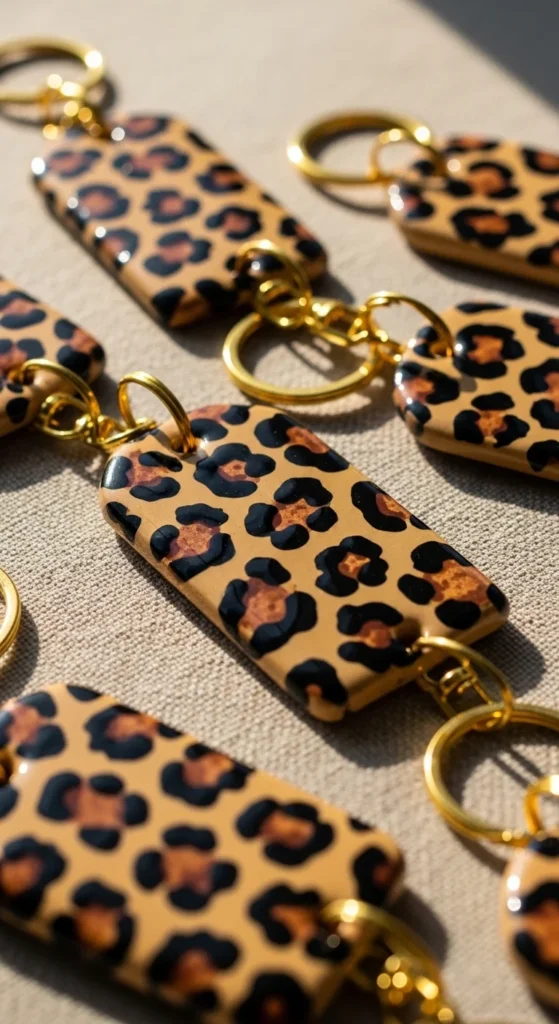
Leopard print tag charms are a fun option if you want a clay keychain that looks trendy without being too childish. Cut the clay into a simple tag, arch, or rounded rectangle, then add painted or layered spots in brown and black. Keep the base color warm, like tan, beige, cream, or dusty caramel, so the print stands out clearly. A flat tag shape is ideal here because the pattern becomes the main feature. If you want to save time, use a dotting tool or the back of a small brush to paint the marks instead of layering more clay pieces. A little gloss sealer makes the print look sharper and helps protect the surface. You can also add one letter or a tiny gold accent for extra style. These charms work well for older teens and adults who like handmade accessories that still feel polished. They are simple to batch, easy to personalize, and a good choice when you want something more fashion-inspired than cute animal or food designs.
14. Mini Flower Pot Keychains
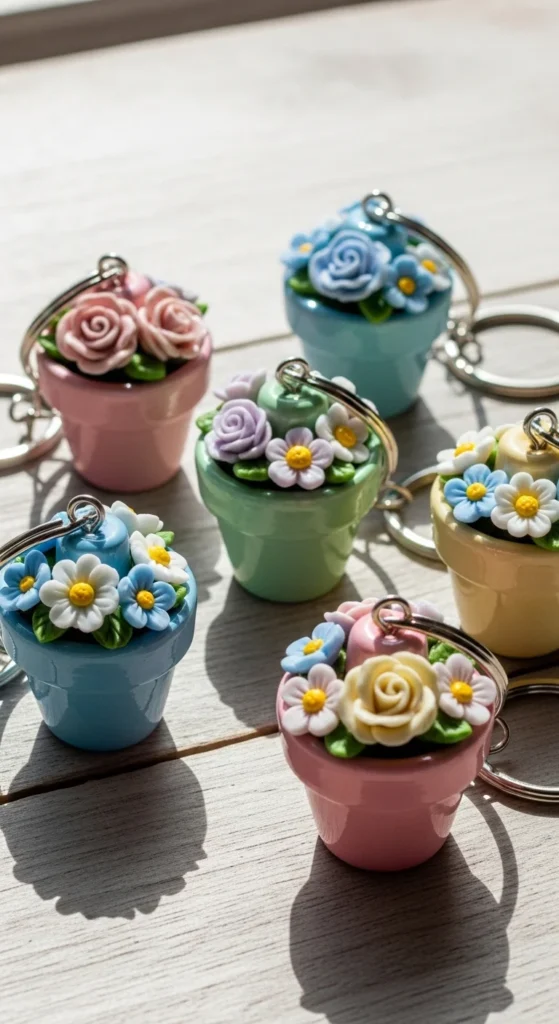
Mini flower pot keychains are adorable and give you room to play with color. Shape a tiny pot base in terracotta, cream, or pastel clay, then add a small flower or leaf detail on top. Keep the design mostly flat so the top pieces do not get too fragile. A simple daisy, tulip, or cactus shape works especially well. If you are using air dry clay, let the base firm up slightly before attaching the top details. If you want to save material, flatten the pot and build the flower as a relief design rather than a full sculpture. Painted highlights can add more contrast without requiring extra clay. A matte pot with a glossy flower also gives a nice mixed finish. These charms make sweet gifts for plant lovers and are easy to package as sets. They feel personal, cheerful, and handmade in a way that is easy to love. They also suit spring craft fairs and gift bundles really well.
15. Thumbprint Keepsake Charms
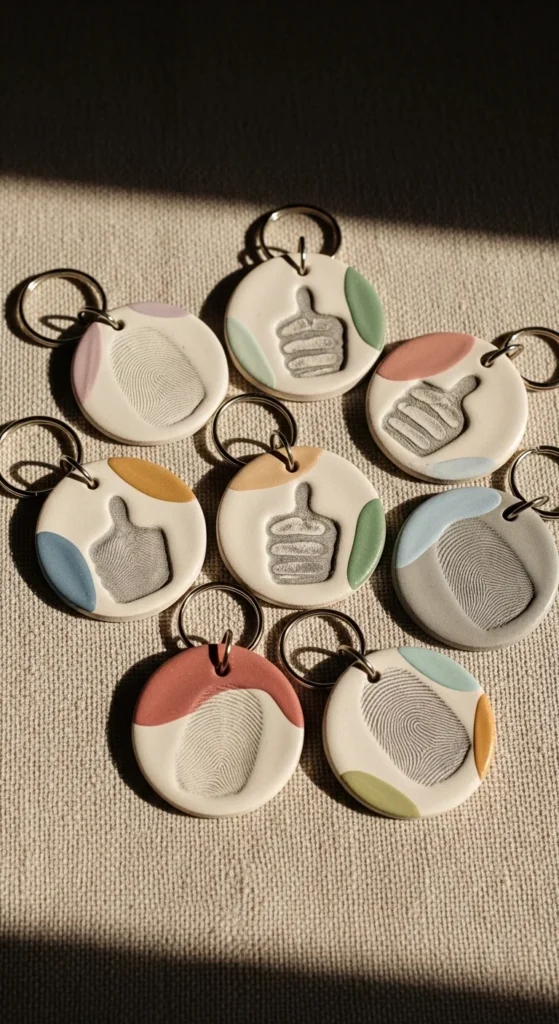
Thumbprint keepsake charms are simple but full of meaning. Press a thumb gently into soft clay to create the center detail, then shape the piece into a heart, oval, circle, or tag around it. This makes a lovely handmade gift for parents, grandparents, or close friends because the charm feels truly personal. You can leave the print plain for a minimal look or add paint inside the impression after drying so the texture shows more clearly. If you want it to feel softer and sweeter, attach a tiny heart, flower, or initial nearby. Air dry clay works well for this kind of project because the charm can stay flat and lightweight. Just remember to let it dry fully before sealing. A satin or gloss sealer helps protect the surface and makes the fingerprint area easier to wipe clean over time. These are affordable, meaningful, and easy enough for kids to help with, which makes them great for family crafts, school gifts, or memory projects.
16. Ghost Cookie Keychains
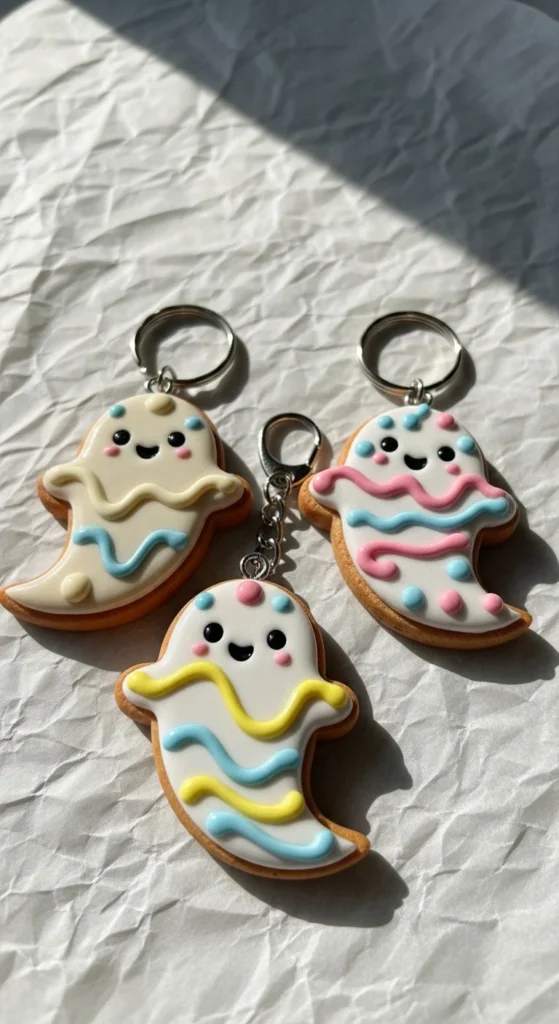
Ghost cookie keychains combine two favorite styles at once: spooky shapes and mini treats. Start with a rounded cookie base in a warm beige or brown tone, then add a simple white ghost shape on top like icing. Paint or press tiny eyes and a mouth once the charm is ready. This design works really well for autumn crafts, but it is cute enough to use all year if you keep the colors soft. The layered cookie base makes the piece feel a little more special without being hard to make. If you want a quick version, skip the second layer and paint the ghost on top instead. A few fake sprinkle dots or tiny blush marks can add extra charm. These are especially fun for themed gift sets, party favors, or seasonal market tables. The cost stays low because the shapes are small and the color palette is limited. They also stand out because they feel playful, creative, and just a little quirky.
17. Pop-Style Character Charms
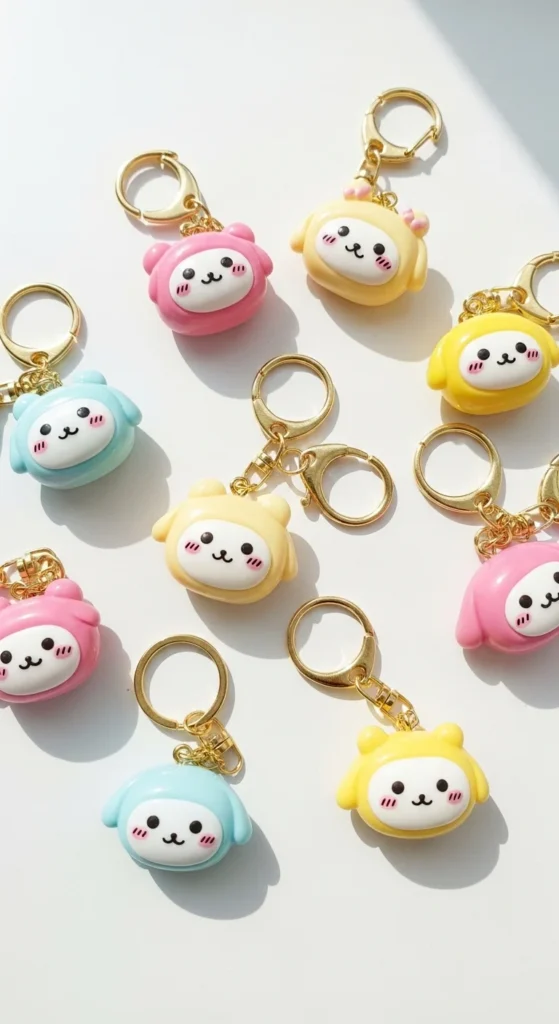
Pop-style character charms are great if you want a cute design that hints at familiar cartoon energy without copying any exact character. Focus on rounded faces, sleepy eyes, rosy cheeks, tiny ears, and soft color palettes. Bears, bunnies, chicks, and little ghost shapes all work well here. Keep the build simple by using a flat base with a few raised details. That helps the charm stay durable and keeps your clay use lower. If you want to make a set, use one face shape and change the ears, colors, or expressions. This speeds things up and still gives variety. Paint details only after the charm is fully dry so the lines stay sharper. A clear top coat can help the face details last longer, especially on bag charms that get handled often. These keychains are especially popular with teens and collectors of cute desk and bag accessories. They feel giftable, easy to customize, and fun to photograph for handmade shop listings or social posts.
18. Sparkly Star Keychains
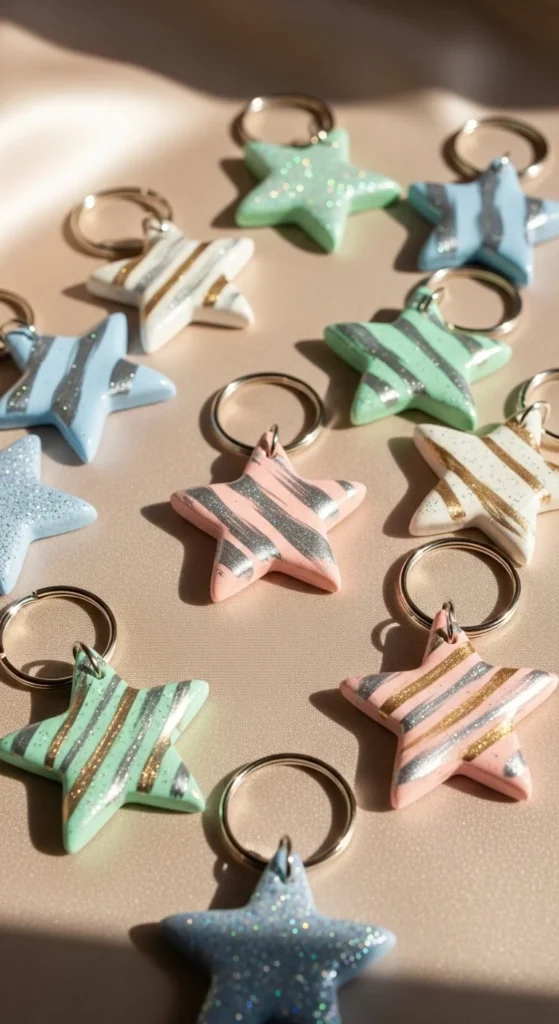
Sparkly star keychains are simple to cut and easy to dress up. Use a star cutter or paper template to shape the clay, then smooth the edges and add small details like dots, tiny moons, or painted outlines. The fun part is the finish. You can press glitter lightly into the clay before drying, brush on metallic paint after it sets, or add a glossy top coat that makes the whole surface shine more. If you want to keep costs down, skip resin and use a clear craft varnish instead. It still gives a nice polished look. Stars work in almost any color palette, from pastel pink and lilac to navy, gold, and cream. They also pair well with beads, tassels, or mini moon charms for a fuller keychain design. This is a good idea when you want a handmade piece that feels stylish but not too detailed. Star charms are easy to batch, easy to gift, and easy to turn into sets for birthdays, party bags, or online shop bundles.
19. Hardware-Ready Arch Tags
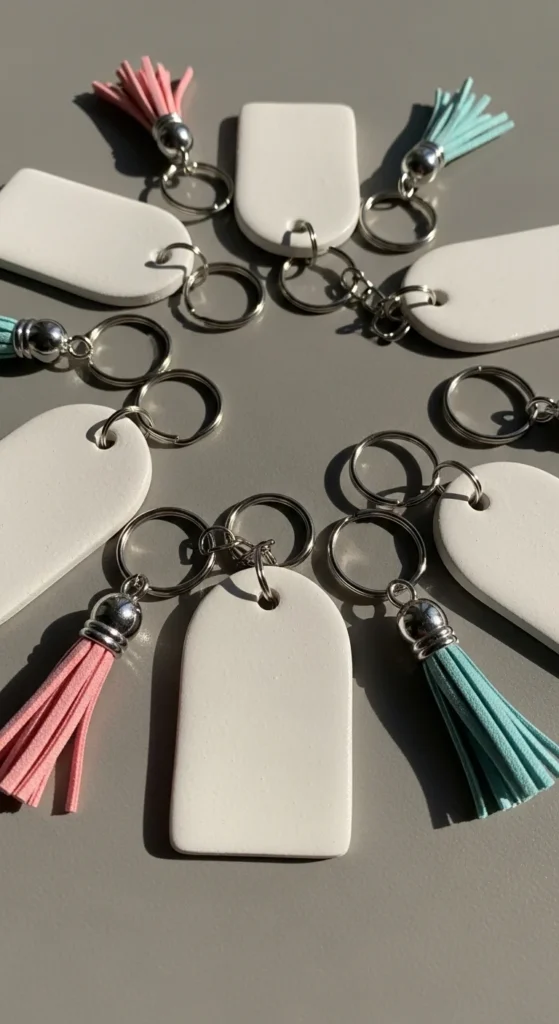
Arch tags are one of the most practical clay keychain designs because the shape is clean, modern, and easy to decorate. Roll the clay evenly, cut an arch shape, and poke a neat hole near the top before drying. This avoids one of the biggest clay keychain problems: cracking from drilling later. You can leave the arch plain and let the color do the work, or add painted patterns, initials, tiny flowers, or abstract lines. The flat surface makes it easy to customize without difficult sculpting. If you want the keychain to look more complete, attach a tassel, short cord, or bead next to the main piece. That gives it movement and makes the final item feel more finished. This is also a good design for beginners because the shape is stable and does not have fragile parts sticking out. Arch tags are great for gifts, school bags, and small shops because they are modern, practical, and simple to make in many different color combinations.
20. Glossy Mixed Charm Sets
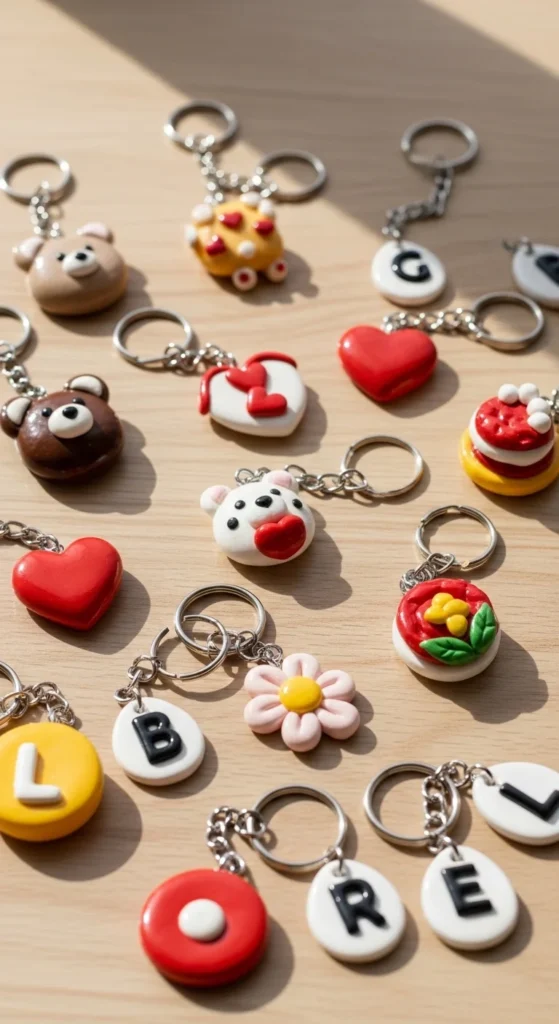
A mixed charm set is a smart way to use leftover clay and turn small ideas into one polished group. Instead of making one design over and over, create a mini collection with hearts, mushrooms, stars, flowers, animals, or food pieces in a matching color palette. This works well for gifts because the set feels thoughtful and varied. It also helps if you sell handmade items, since people often like choosing from a small coordinated batch. To make the set look consistent, use the same metal ring color and similar finish on every charm. A glossy seal is especially useful here because it ties different shapes together visually and gives the whole group a cleaner look. If you are working on a budget, this is also one of the best ways to use tiny leftover clay pieces that would otherwise go to waste. Mixed charm sets feel fun, giftable, and full of personality. They are a great final project once you have tried a few single-shape designs and want something that looks more complete.
Conclusion
Clay keychains are popular for a reason. They are affordable, cute, easy to personalize, and simple enough for beginners to make at home. You can keep things basic with flat hearts, tags, flowers, and letters, or go playful with frogs, cows, sushi, cookies, and tiny mushrooms. Air dry clay is great when you want a no-oven project, while polymer clay works well for charms that need a firmer finish. Small details like smooth edges, clean hole placement, painted accents, and a clear sealer can make even a very simple design look more polished. Pick one idea from this list, use the clay and tools you already have, and make a few test charms first. Once you find a style you like, it gets much easier to build a full set everyone will want.

Lily Summers is a digital artist and creative storyteller who loves bringing colorful characters to life. With a passion for cartoons, fan art, and playful sketches, she inspires others to explore their imagination through art. When she’s not sketching, you’ll find her dreaming up new ideas for CraftedWizard.com to spark creativity in every artist. 🌈✨