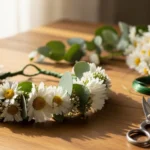
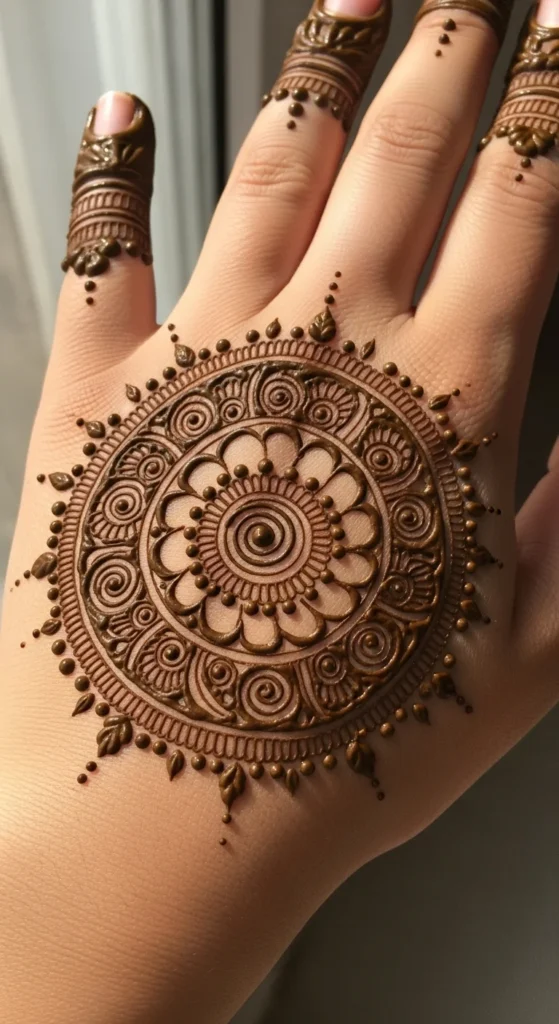
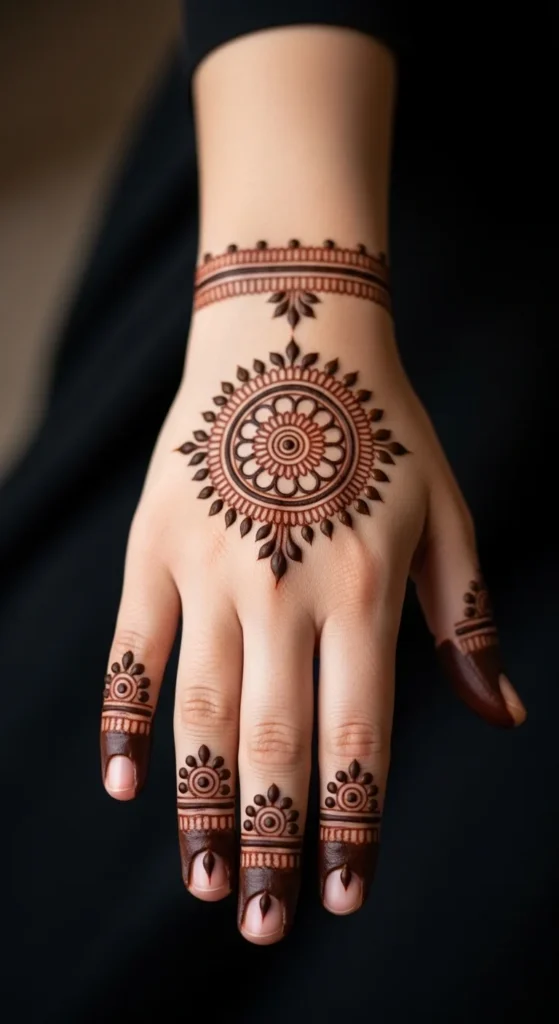
Circle mehndi designs are loved for one simple reason: they instantly draw the eye. A round motif in the center of the palm or back hand creates a clear focal point, then smaller details can spread outward in a way that feels balanced and easy to wear. This makes circle mehndi a great choice for beginners, for festive days, and for anyone who wants a design that looks polished without covering the entire hand. From bold mandala-style centers to airy dotted rings and floral halos, these ideas help you build a beautiful mehndi look around one strong shape that keeps the whole pattern grounded.
1. Classic Center Circle
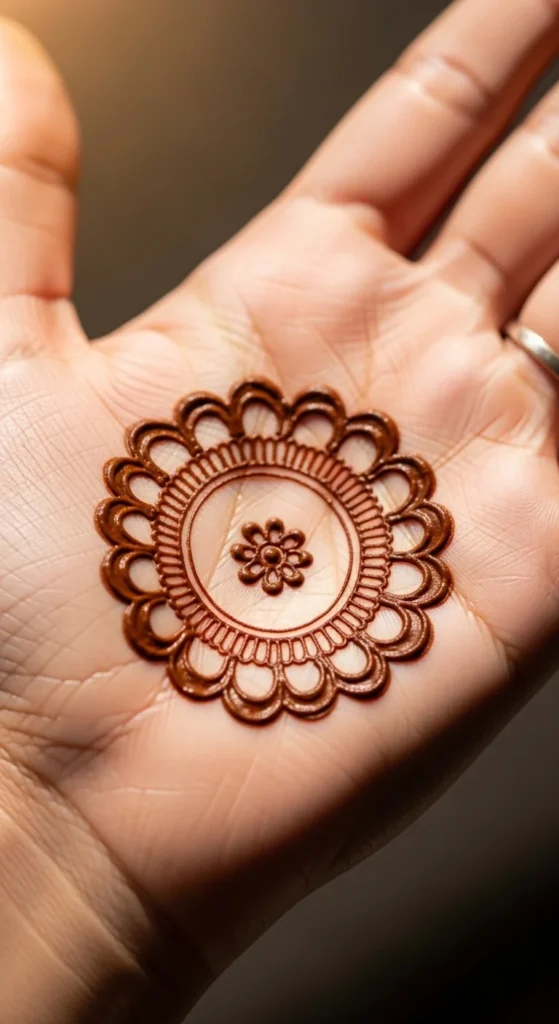
A classic center circle is one of the easiest mehndi ideas to start with because the shape does most of the visual work for you. Begin by drawing one round shape right in the middle of the palm or back hand. Once that is placed well, the rest of the design becomes much easier to build. You can leave the circle plain, fill it with dots, or add one ring around it for more definition. This style is perfect for beginners because it gives the hand structure without asking for a lot of detail.
A smart trick is to use a small object like a cap or coin as a visual guide before applying the mehndi. You do not need to trace it directly, but it helps you judge the size. Keep the outer line smooth and even. If your circle looks slightly off, add a second ring around it and the shape often appears much more balanced.
This design works beautifully on its own or as the base for a fuller pattern. It is quick, clean, and very easy to pair with fingers, wrist bands, or simple dots.
2. Double Ring Mandala
A double ring mandala gives you a stronger focal point without making the design difficult. Start with one medium circle, then add a second round border around it. That second ring makes the center look fuller right away and helps frame any small details you want to add inside. You can fill the middle with a tiny flower, a dot cluster, or a few short petal shapes. The ring outside can stay plain or be lined with tiny dots.
This is a great design for people who want a festive feel but still want the mehndi to stay simple. The double outline adds depth and makes the center stand out in photos. If your first ring is not perfectly round, the second ring can help correct the overall look.
For practice, draw circles on paper first using slow hand movement instead of quick turns. That helps train your wrist. On the other hand, keep the spacing between the two circles even so the design feels neat. This style works especially well on the back hand because the round center looks elegant and leaves enough room around it for airy finger details.
3. Dot Halo Circle
A dot halo circle is perfect when you want a design that feels soft and graceful. Begin with one simple center circle, then place tiny dots around it in an even ring. These dots act like a halo and make the circle look more decorative without adding heavy detail. The result feels balanced, light, and very wearable for casual events or quick festive looks.
This design is especially helpful for beginners because dots are much easier to control than tiny petals or tight swirls. If the center circle looks a little plain, the halo gives it a finished look fast. You can keep one dot ring or add two if you want a slightly fuller pattern.
A useful tip is to place four guide dots first at the top, bottom, left, and right. Then fill in the spaces between them. This helps the halo stay balanced. If one side starts looking wider, use slightly smaller dots on the opposite side to even it out visually.
This style is lovely on both palms and back hands. It also pairs well with a short finger trail or a tiny wrist chain if you want the design to reach farther without losing the circular focus.
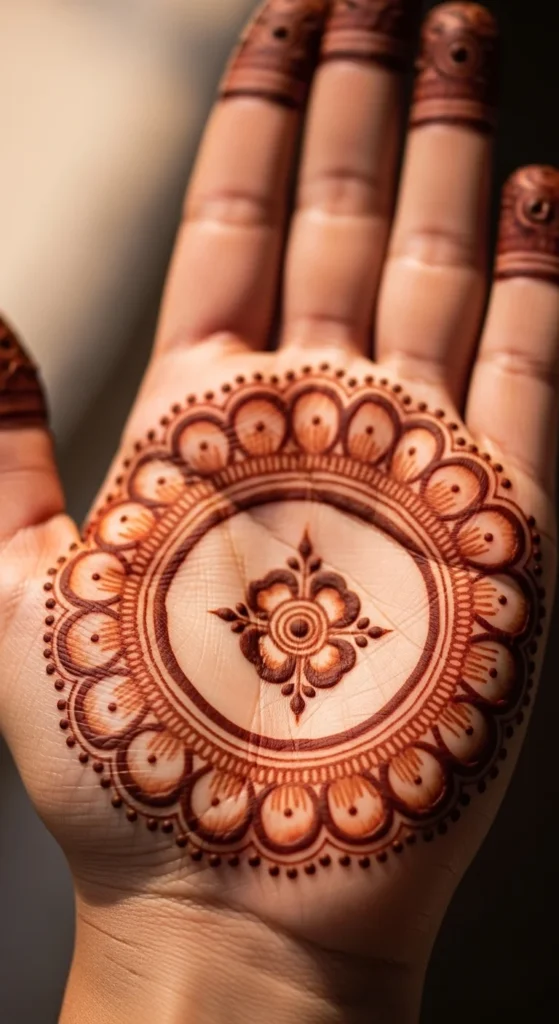
4. Floral Core Circle
A floral core circle combines two very popular mehndi elements in one simple layout. Start with a circle in the center of the hand, then place a tiny flower inside it. The flower can be as basic as a dot with five petals around it. That is enough to make the circle feel decorative and feminine without becoming difficult.
This design works well because the round border keeps the floral shape contained. That makes the whole pattern look tidy. If you want more detail, add a second thin ring around the flower before the outer circle. This gives the center more layers but still keeps the style manageable.
A floral circle is a nice choice for small festive events, Eid gatherings, or simple bridal side patterns. It looks pretty even when the rest of the hand stays mostly open. To keep the flower neat, draw the middle dot first, then place petals one by one around it instead of rushing through all of them.
If one petal comes out uneven, small dots around the flower can soften the difference. This is an easy way to get a pretty mandala feel without needing a large or dense design.
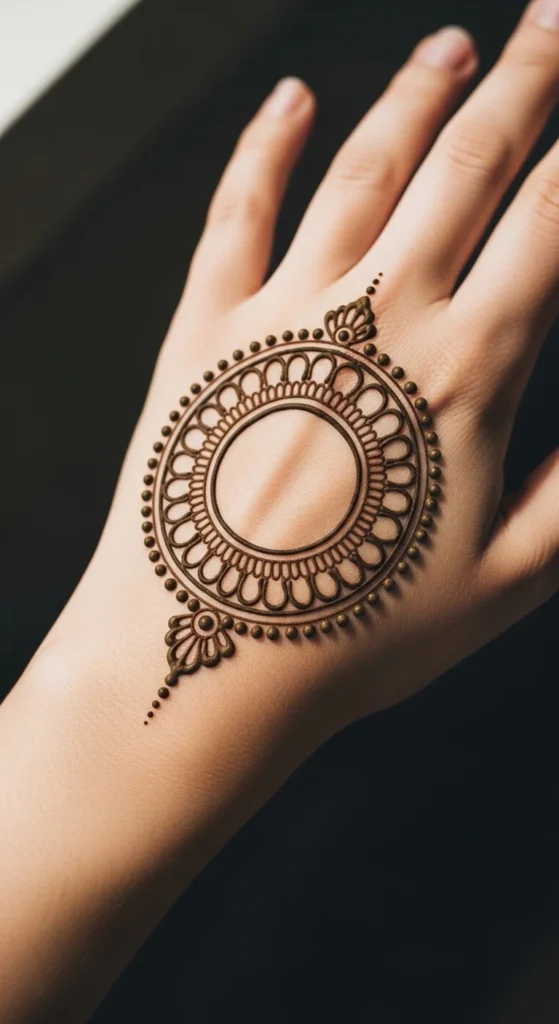
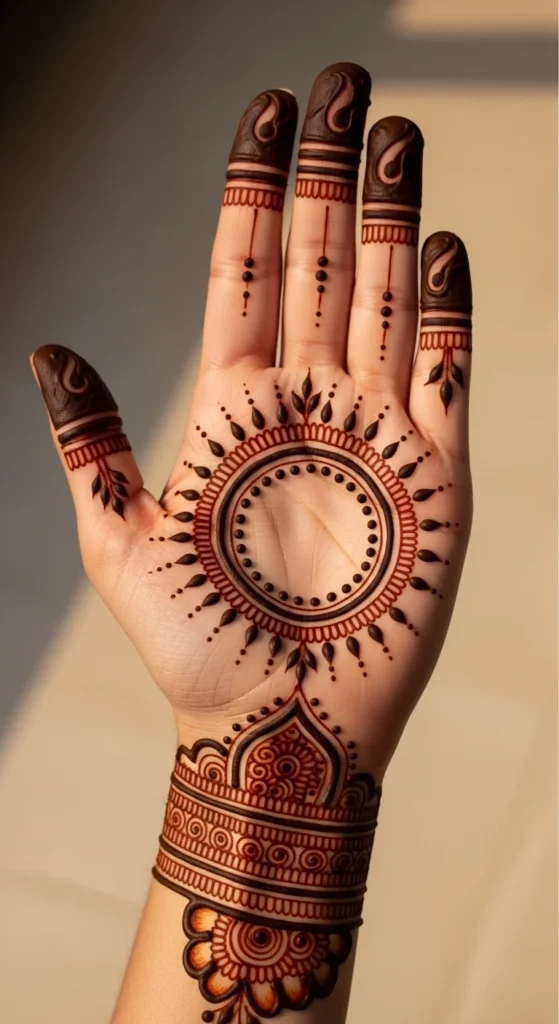
5. Empty Center Ring
An empty center ring looks striking because it uses space so well. Instead of filling the middle, draw one bold circular border and leave the center blank. This creates a modern mehndi look that feels clean and stylish. It is especially nice for the back hand, where minimal designs often stand out more clearly.
This style is useful if you like bold patterns but do not want to spend time on tiny details. The focus stays on the shape and the contrast between the ring and the open skin. You can make the border thick for a stronger look or keep it medium and add dots outside the ring for softness.
A helpful beginner trick is to draw the inner curve first, then the outer curve around it. That makes it easier to control the ring thickness. If the line looks shaky, smooth it by slightly widening the border where needed.
This design pairs beautifully with finger bands, leaf trails, or a simple wrist cuff. Because the center stays open, the hand does not look overcrowded. It is a very smart choice when you want a focal-point mehndi design that feels polished, current, and easy to execute.
6. Petal Burst Circle
A petal burst circle begins with a strong round center and then grows outward with small petal shapes around the edge. This makes the design feel lively and decorative while keeping the circle as the main focus. Start with one center circle, then add short rounded petals all around the outer border. Keep the petals similar in size so the ring looks balanced.
This style is a great step up from a plain circle because it adds visual interest without becoming too hard. The petals can stay open or be lightly filled with lines or dots. If you want a softer look, add tiny dots between the petals instead of adding more layers right away.
For beginners, it helps to divide the circle mentally into sections before drawing the petals. Place one at the top, bottom, left, and right first, then fill the rest in between. This keeps the design from leaning too heavily to one side.
A petal burst circle works beautifully on the palm, where the round shape feels centered and bold. It also looks nice as the only main motif with just a few finger details added later.
7. Side Palm Circle Focus
A side palm circle is a nice alternative when you do not want the focal point placed exactly in the middle. Draw the circle closer to the thumb base or side of the palm, then let a few curved lines or dots move outward from it. This creates an off-center look that still feels balanced and stylish.
This kind of layout works well for people who like Arabic-inspired flow but still want a strong circular anchor. Because the motif sits to one side, the rest of the hand remains open and airy. That makes the design feel lighter and more modern. It is also useful if you plan to add a finger trail later, since the off-center circle naturally leads the eye in one direction.
If you are a beginner, start with a medium-size circle and keep the surrounding details very simple. A few dots, one small leaf curve, or a tiny line chain is enough. Do not overfill the empty area unless the hand truly needs it.
This style is especially flattering on smaller hands because it adds shape without making the whole palm look covered. It is elegant, easy, and different from the usual center mandala.
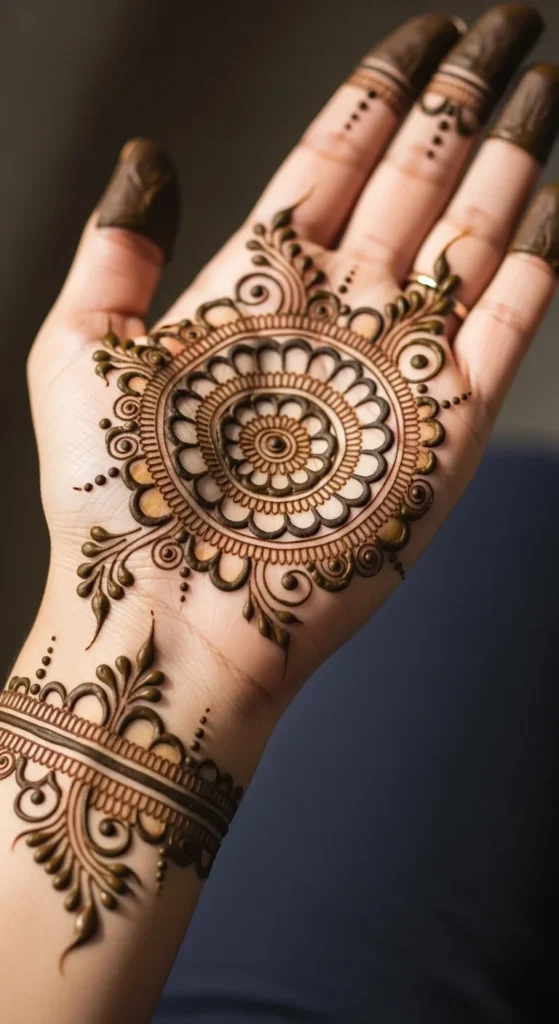
8. Wrist-to-Circle Trail
A wrist-to-circle trail gives your mehndi design flow while keeping the round motif as the star. Start with a circle on the center or lower half of the palm or back hand. Then connect it to the wrist with a slim trail made from dots, short curves, or tiny leaf shapes. This makes the design feel more complete without taking attention away from the main focal point.
This is a good layout if you want something more than a single center motif but still want to avoid a heavy full-hand design. The trail acts like a path leading into the circle, which looks very graceful. It also helps the hand appear longer.
A beginner-friendly version uses only dots and one curved line from the wrist upward. If you want a richer look, add tiny leaves or half-petals along the trail. Keep the trail narrow so it does not compete with the circle itself.
This design is great for festive wear, family events, and anyone who likes mehndi that feels dressed up but still simple. The circle stays strong, and the wrist detail gives it movement and a finished look.
9. Finger Frame Circle

A finger frame circle uses the fingers to support the center design. Start with one clear circular motif on the back hand, then add very light finger details above it. These can be tiny bands, dots, short lines, or mini leaf shapes. The idea is not to decorate every finger fully. It is just to frame the circle and help the whole design feel more balanced.
This layout works well because the fingers guide the eye back toward the center. It is also useful if the round motif feels too isolated on its own. Even a few finger accents can make the design look much more intentional. Keep the finger work light so the circle remains the main focal point.
A good beginner move is to decorate only two fingers, like the middle and ring finger. That usually gives enough balance without too much effort. If you add details to all fingers, keep them very thin and spaced.
This style is lovely for back-hand mehndi because it photographs beautifully. It gives you a polished final look without forcing you to create a full dense pattern. The circle stays central, and the fingers quietly support it.
10. Tiny Circle Chain
A tiny circle chain builds around one larger focal circle by adding a few smaller linked circles nearby. Start with the main motif first, then place two or three smaller circles leading toward the wrist or a finger. These smaller rings can stay plain or be filled with dots. The result feels connected and decorative without becoming too heavy.
This style is helpful if you like geometric mehndi or want something a little more playful than a basic mandala. The circle chain creates movement across the hand while still keeping the biggest motif as the center of attention. You can use tiny dots or curved lines between each circle to make the spacing feel smoother.
For beginners, keep the smaller circles simple and evenly spaced. If they are too close, the pattern can look crowded. If they are too far apart, the chain effect disappears. A medium gap with tiny connecting dots usually works best.
This design is great for back hands, side palms, and even wrist layouts. It feels modern, neat, and easy to customize. A simple chain can make one circle design feel much more complete.
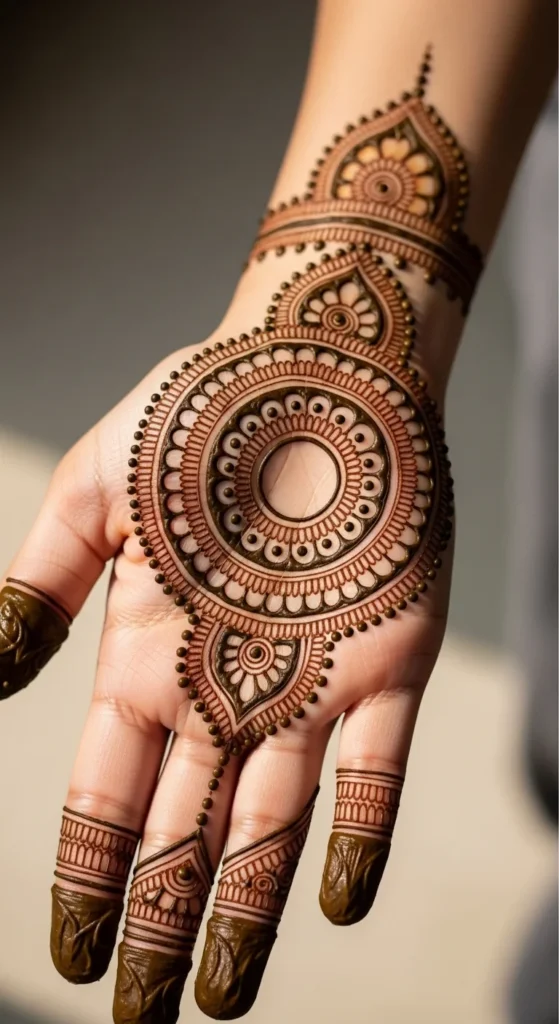
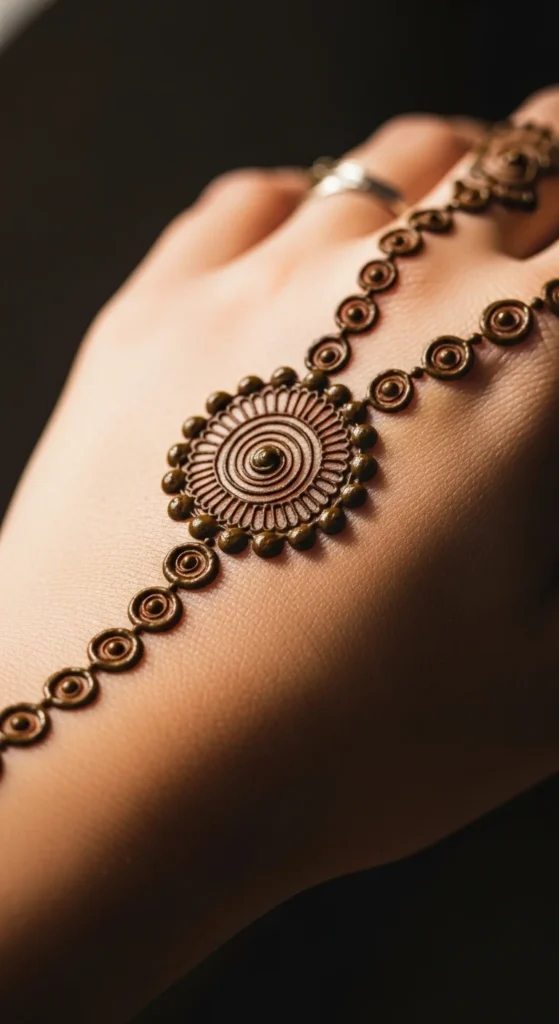
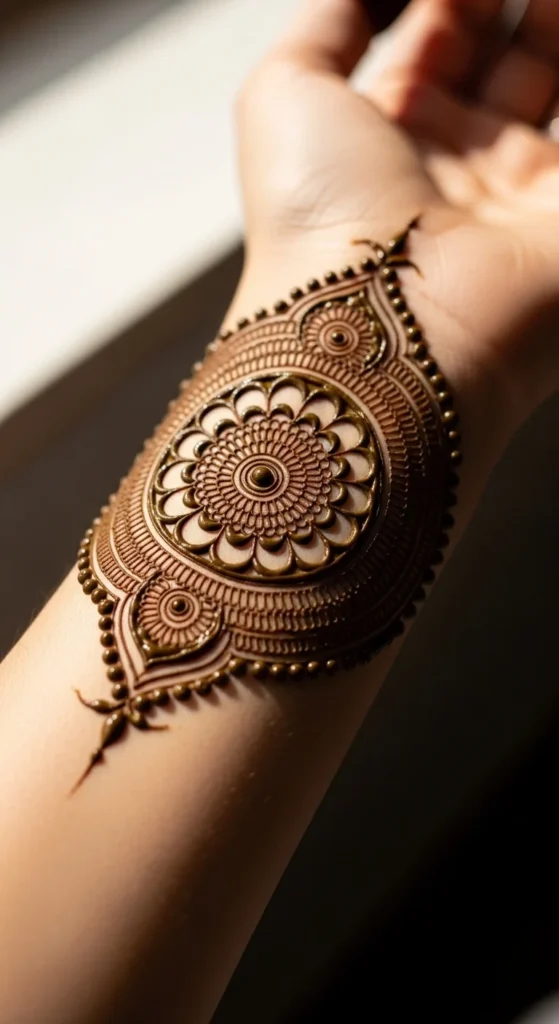
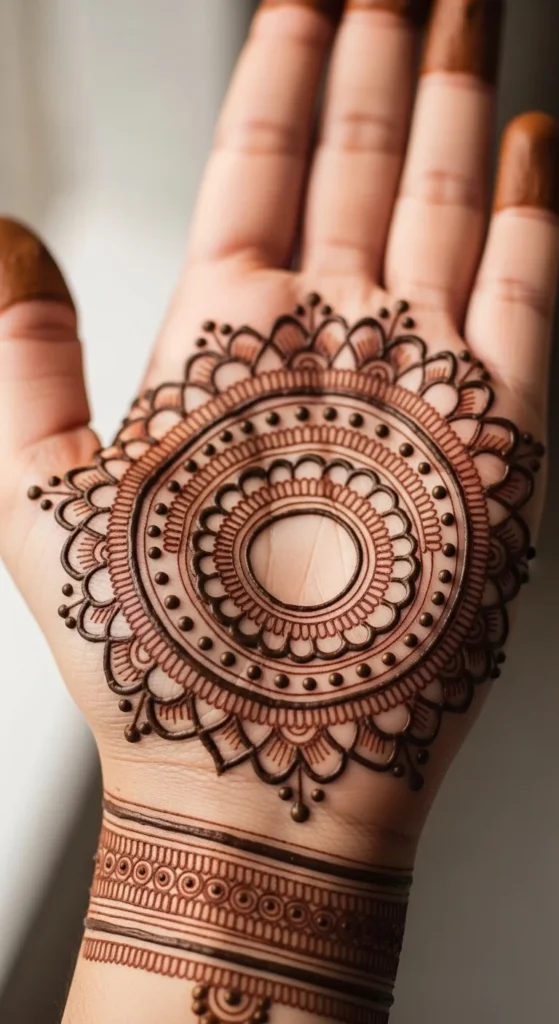
11. Bold Center Medallion
A bold center medallion is perfect when you want the round motif to stand out right away. Draw one larger circle in the center of the palm and use thicker outlines than usual. Inside, keep the details simple so the shape does not become too busy. A dot, a flower, or a few petal lines are enough.
This kind of design works well because the bold outer edge creates a strong frame. It also helps the mehndi show up clearly once it darkens. If you have medium skill with cone control, this is a nice style because you can focus on clean outlines instead of many fine details. Thick borders can also hide slight shakiness better than very thin lines.
To keep the medallion balanced, draw the inner detail first and then frame it with the outer ring. If the ring looks too plain, add tiny dots around it instead of trying to fill every space. That keeps the design bold but not flat.
This is a strong choice for festive wear, wedding guest looks, or anyone who wants a clear focal point without covering the whole hand. It is simple, confident, and visually strong.
12. Half-Filled Circle Motif
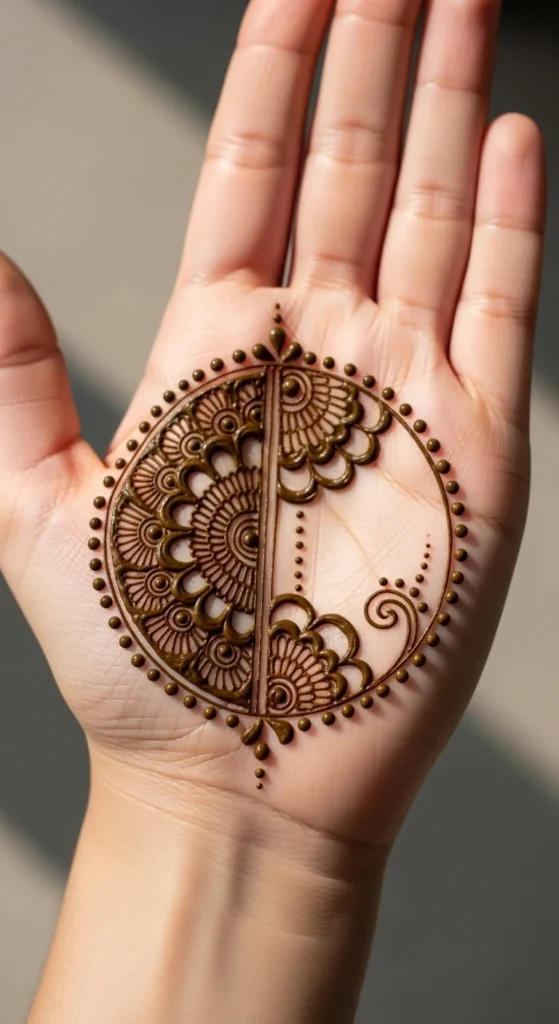
A half-filled circle motif gives you an artistic look while staying easy to manage. Start with a round outline, then decorate only one half of the circle with petals, dots, or curved lines. Leave the other half plain or lightly shaded. This creates contrast and makes the focal point feel more interesting without requiring a lot of extra work.
This style is a good option if you want something a little different from fully symmetrical mandalas. The uneven fill gives the circle more personality. It also works well for modern mehndi styles, especially on the back hand where minimal patterns stand out nicely.
A good beginner tip is to choose the lower half or one side of the circle and stick to that plan. Fill it with one simple repeated element, like small petals or dot rows. Do not mix too many motifs inside the same half. Keeping the fill pattern consistent makes the design look more polished.
This motif pairs beautifully with a finger trail, a side vine, or a short wrist line. The main circle still holds the design together, while the half-filled detail adds something more playful and stylish.
13. Net Detail Circle
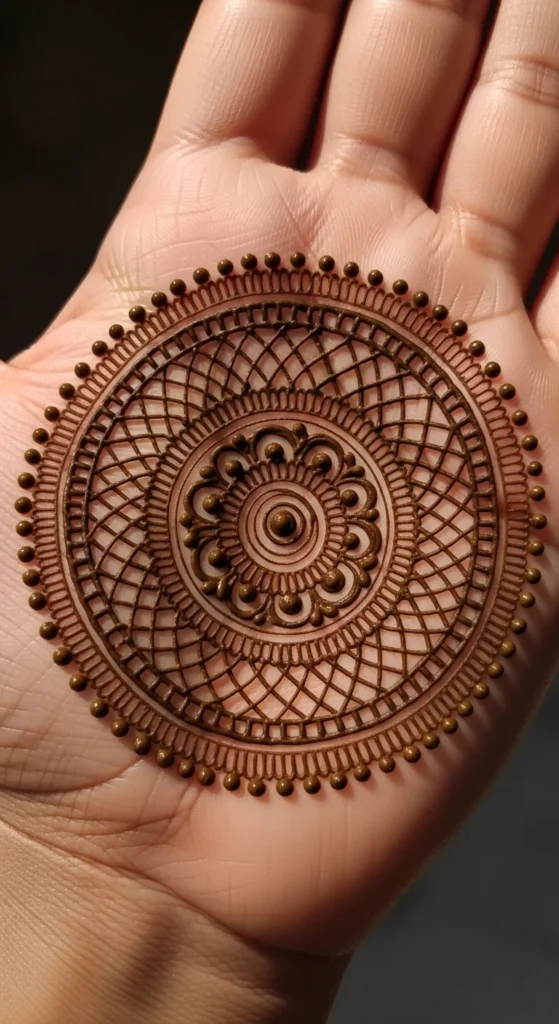
A net detail circle adds texture inside the focal point without changing the overall shape. Start with a clear round border, then fill the inside with a simple crisscross net pattern. This can be very light and open. After that, add tiny dots around the border or inside the net intersections if you want a fuller look.
This design is a smart choice when you want detail but do not want to draw many flowers or leaves. The repeated net lines are easier to control once you get into the rhythm. If the net feels too sharp on its own, the dots soften it and make the circle feel more mehndi-like rather than purely geometric.
For beginners, keep the net wide instead of very tight. Small cramped lines can get messy quickly. Use even spacing and stop as soon as the circle looks full enough. There is no need to overwork it.
This style works especially well for center-palm designs and can look lovely with plain fingers or a simple wrist band. It creates a detailed focal point while still keeping the overall mehndi layout neat and structured.
14. Leaf Halo Circle
A leaf halo circle is perfect if you want a round focal point that still feels soft and natural. Begin with a medium-size circle, then place tiny leaves all around the outer edge like a wreath. Add a few dots between the leaves if you want a fuller finish. This gives the design a botanical feel while keeping the circle as the center.
This style works beautifully for people who like leafy mehndi but also want a clear round focal point. The leaf ring softens the strict shape of the circle and makes it feel more organic. It is especially nice on the back hand, where the design looks airy and elegant.
For a beginner-friendly version, use the same small leaf shape all around. Do not try to vary too much at first. Keep the leaves angled outward so the halo feels open rather than crowded inward. If the outer ring looks too wide, use dots to fill tiny gaps instead of adding more leaves.
This design is lovely for casual festive wear, soft bridal side patterns, and anyone who likes natural-looking mehndi details. It is gentle, balanced, and very easy to personalize.
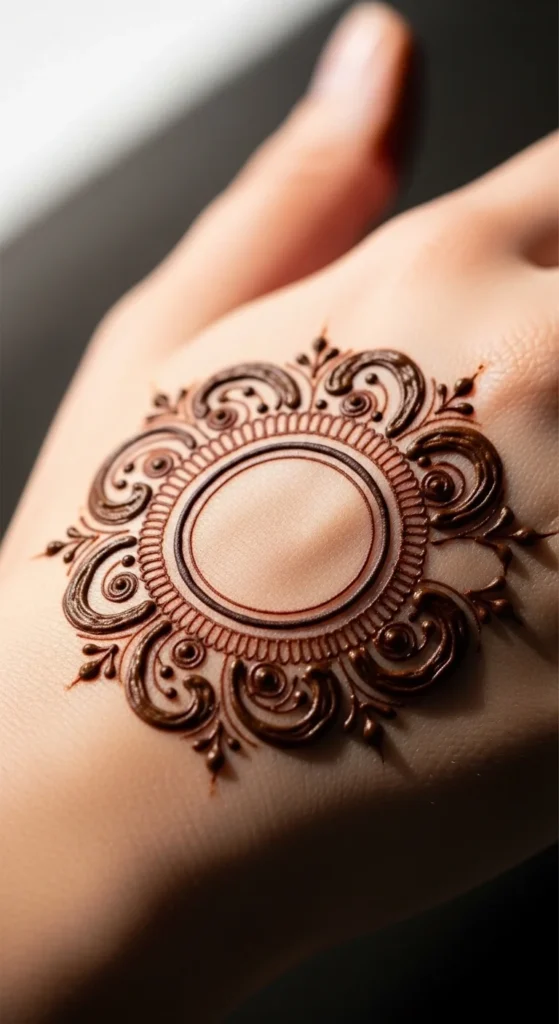
15. Circle with Side Swirls
A circle with side swirls keeps the round motif central while adding movement around it. Start with one circle in the middle or slightly off-center. Then draw one or two swirls extending from the side, usually toward the thumb or wrist direction. Add dots near the swirls for softness. This creates a graceful frame around the circle without overpowering it.
This design is ideal if you like Arabic-style flow but want a stronger center than a simple vine provides. The swirls give the hand motion, while the circle keeps everything grounded. That balance is what makes this style so attractive.
If you are a beginner, keep the swirls broad and simple. Tiny tight curls are harder to control. A single curved line with a few dot accents can be enough. If you want a little more detail, add one leaf or teardrop shape at the end of the swirl.
This layout works well for both palm and back-hand mehndi. It feels elegant, a little more decorative than a plain circle, and still easy enough to do at home with one cone and a simple practice sketch.
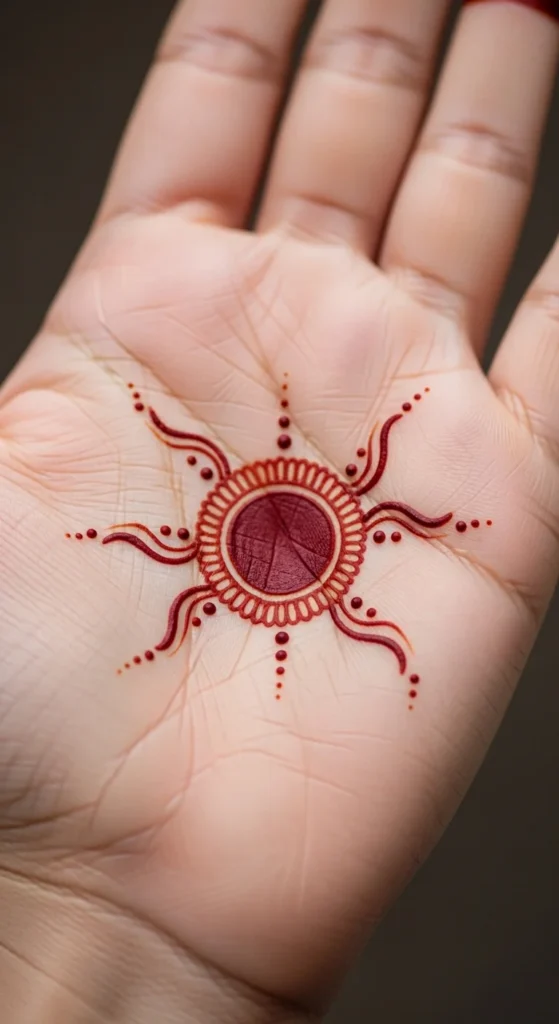
16. Palm Center Sun Circle
A palm center sun circle takes the round motif and gives it a radiant look. Start with a clean circle in the middle of the palm. Then add short lines, petal rays, or teardrop strokes moving outward around it. This creates a sun-like effect that looks cheerful and decorative while staying simple to execute.
This style works well because the center remains strong and the outer rays add energy without making the design complicated. It is a good option for festive mehndi, especially if you want something eye-catching but not overly dense. You can keep the rays straight, curved, or petal-shaped depending on the look you prefer.
A beginner tip is to add the rays after spacing them mentally. Start with four main directions first, then fill in the gaps between them. This keeps the circle balanced. If the design feels too plain, add a ring of dots outside the rays for a softer finish.
This is a fun and practical focal-point design because it stands well on its own. It looks especially nice when paired with minimal finger bands or left entirely solo in the center of the palm.
17. Wrist Medallion Circle
A wrist medallion circle shifts the focal point away from the palm and turns it into a bracelet-style design. Draw one medium or large circle right above the wrist bone, then decorate around it with small bands, dots, or short petal shapes. This makes the mehndi feel like jewelry and works beautifully when the hand itself is mostly left open.
This style is great for anyone who wants a focal point but does not want a center-palm design. It is also practical if you plan to wear rings or want the back hand to stay light. The wrist medallion can stand alone or connect to a very slim trail moving toward the hand.
If you are a beginner, keep the bracelet details simple. One band above the circle and one below it is often enough. The circle should remain the strongest element. If the wrist is narrow, choose a smaller medallion so the design looks balanced.
This is a lovely option for festive days, casual gatherings, and minimal bridal side looks. It feels decorative, neat, and slightly different from more common circle placements.
18. Finger Base Circle Accents
Finger base circle accents work beautifully when you want the main circle to feel supported but still stay central. Start with a larger circle on the back hand, then place tiny matching circles near the base of one or two fingers. These smaller motifs echo the main shape and make the design feel more connected across the hand.
This is a great idea if your main focal point seems too alone. The repeated circles tie everything together without making the design heavy. You can leave the finger circles plain, fill them with dots, or give them tiny petals if you want just a bit more detail. Keep them much smaller than the center motif so they stay supportive and not competitive.
A beginner-friendly tip is to use only two finger base circles, usually under the middle and ring finger. That often looks more balanced than trying to decorate every finger. If the space between them feels empty, a few dots can help.
This style is elegant, easy to customize, and especially nice for back-hand mehndi. It makes the whole design feel intentional while keeping the strong center circle as the main focal point.
19. Shaded Ring Circle
A shaded ring circle adds softness and detail without losing the clean round shape. Start with a basic circle, then add one or two rings around it. Instead of leaving all the rings plain, lightly shade one section with tiny lines, dots, or mini strokes. This gives the circle more depth and makes it feel richer without forcing you into a very dense pattern.
This style is useful when you want a more finished festive look but still want the design to stay manageable. The shading can be very light. Even a single half-ring of tiny strokes can make the whole motif feel more decorative. Keep the rest of the circle clean so the focal point does not become too busy.
For beginners, shade only one ring rather than the whole design. Use even small strokes and stop once the section looks full enough. Overworking the same area can make it muddy. If needed, add a dot border outside the shaded ring for extra polish.
This design works well on both palms and back hands. It looks graceful, slightly dressier than plain circles, and still simple enough to practice at home.
20. Circle and Chain Bracelet
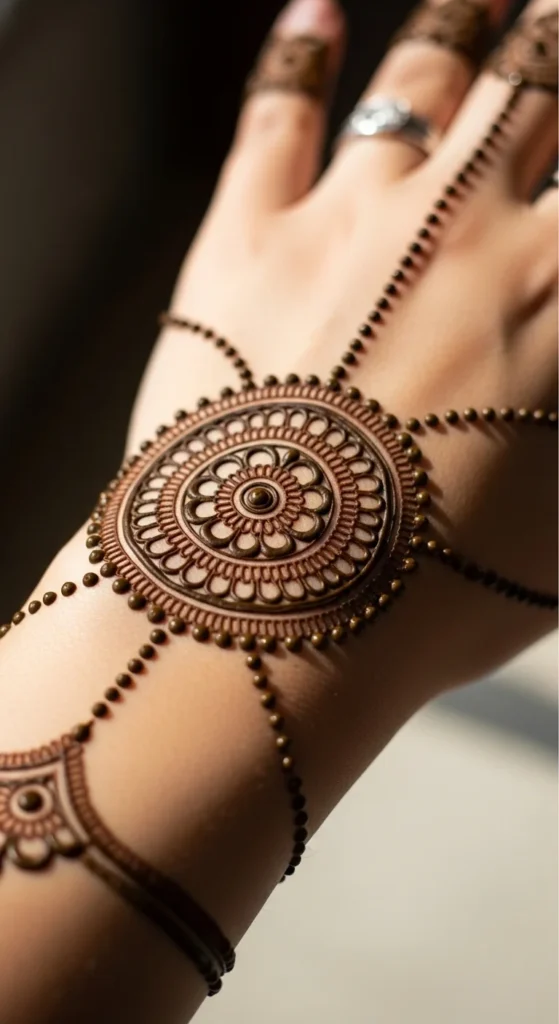
A circle and chain bracelet combines the beauty of a focal motif with the charm of jewelry-style mehndi. Start with one round medallion on the back hand or wrist, then extend tiny dotted chains from it toward the fingers or around the wrist. These chain lines can be made from dots, tiny loops, or very short curved links.
This style looks elegant because it feels like hand jewelry made from mehndi. It is also very practical for beginners, since the chain effect is easier than full floral or netted fills. The circle remains the anchor while the delicate chains spread the design outward.
A good tip is to keep the chain thin and flexible-looking. If it becomes too thick, the design can lose that light bracelet feel. One or two chain paths are enough. You do not need many. A tiny dot or petal at the end of each chain can make the whole layout feel more finished.
This design is lovely for festive events, engagement gatherings, or anyone who likes accessory-style mehndi. It is stylish, graceful, and keeps the focal circle clearly in charge of the composition.
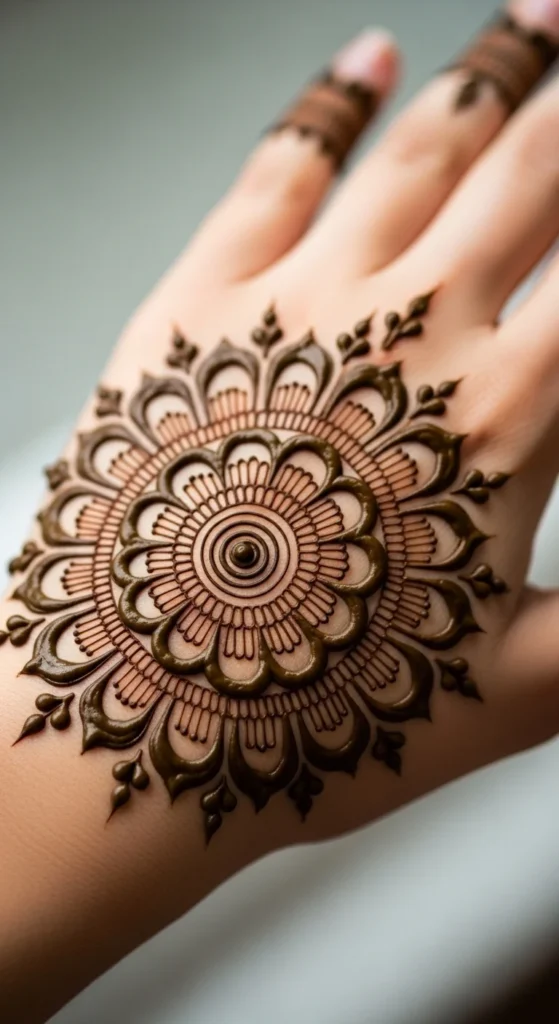
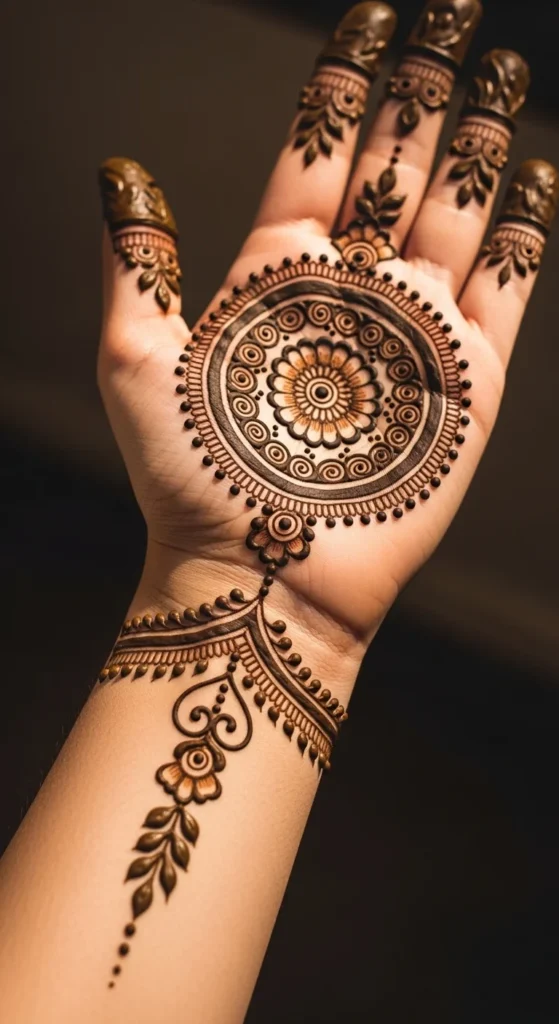
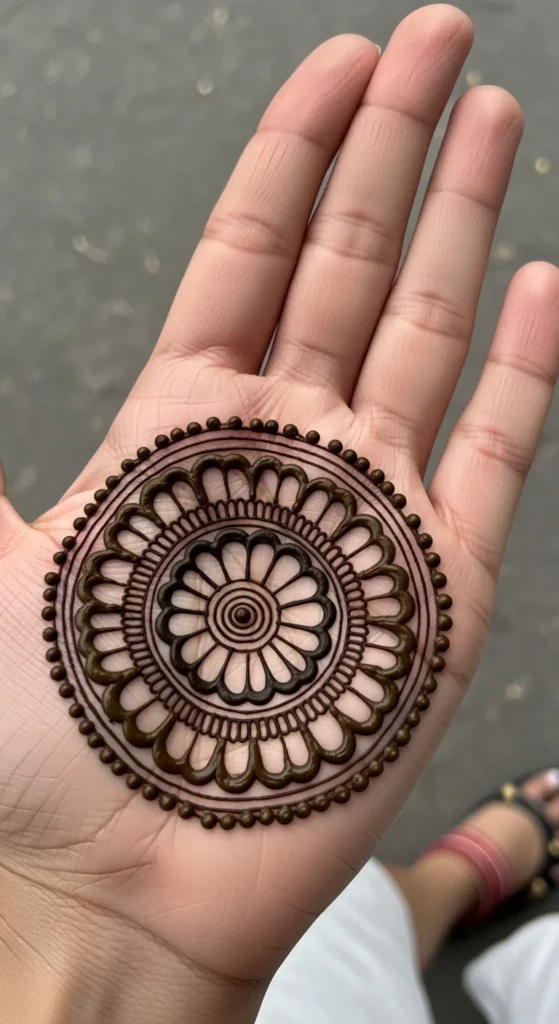
21. Full Focal Mandala Circle
A full focal mandala circle is the most complete version of a circle mehndi design. It starts with a center dot or flower, then grows outward in neat rings of petals, dots, curves, and borders. The reason it works so well is that everything expands from one central point. That keeps the design balanced even when it becomes more detailed.
This is a strong choice if you want the circle to be the entire star of the hand. You do not need many extra trails or side elements. The mandala itself can carry the look. To keep it beginner-friendly, build one ring at a time. Do not think about the full design all at once. Finish the center, then add the next layer, then the next.
A useful trick is to stop before the design becomes overcrowded. A beautiful mandala does not need endless detail. Clear spacing between layers often makes it look better. If you want a more festive finish, add a few finger accents after the mandala is complete.
This style is timeless, elegant, and ideal when you want a perfect focal point that feels intentional from every angle.
Conclusion
Circle mehndi designs work beautifully because they give the eye one clear place to land. A strong round motif can make even a simple design look polished, balanced, and festive. You can keep it minimal with a plain ring and dots, or build it into a fuller mandala with petals, chains, leaves, and soft shading. The best part is that one circle can work on the palm, back hand, or wrist and still create a lovely focal point. Start with one clean round shape, practice the spacing around it, and let the rest of the design grow from that center.

Lily Summers is a digital artist and creative storyteller who loves bringing colorful characters to life. With a passion for cartoons, fan art, and playful sketches, she inspires others to explore their imagination through art. When she’s not sketching, you’ll find her dreaming up new ideas for CraftedWizard.com to spark creativity in every artist. 🌈✨