Bridal mehndi doesn’t have to be heavy or full-hand to look bridal. Simple, elegant designs can feel softer, photograph beautifully, and still look special from nikah to rukhsati. If you want something graceful, easy to sit through, and simpler to maintain while you’re busy with events, these ideas will help you choose a style that matches your outfit, your jewelry, and your comfort level. You’ll also find small DIY-friendly details you can ask your artist for, even on a budget.
1) Minimal Finger Trails
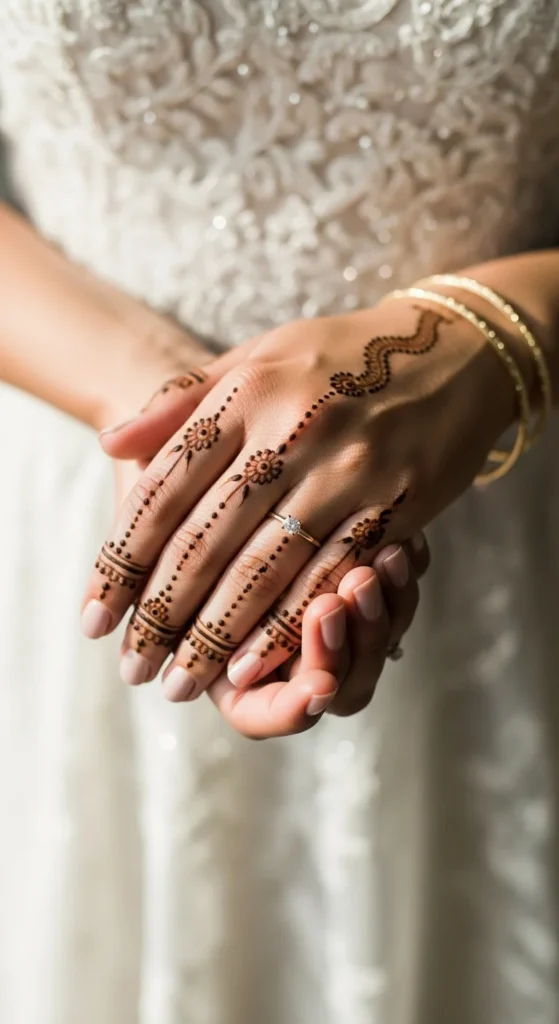
If you love a clean look, finger trails are the easiest way to get bridal vibes without covering your hands. Ask for thin lines that start at the fingertips and fade into tiny dot clusters near the base of the fingers, and add one small motif on the middle finger for balance. This style looks gorgeous with statement rings because the mehndi doesn’t compete, and it dries faster which is a real win on busy event days. Budget tip: finger work takes less time, so it often costs less than full-hand designs, and if you’re doing it at home, practice on paper first with a gel cone then try just two fingers on each hand. DIY idea: match the tiny shapes to your jewelry—if you’re wearing stacked bangles, ask for a dotted rhythm that feels like a bracelet line.
2) Classic Palm Mandala
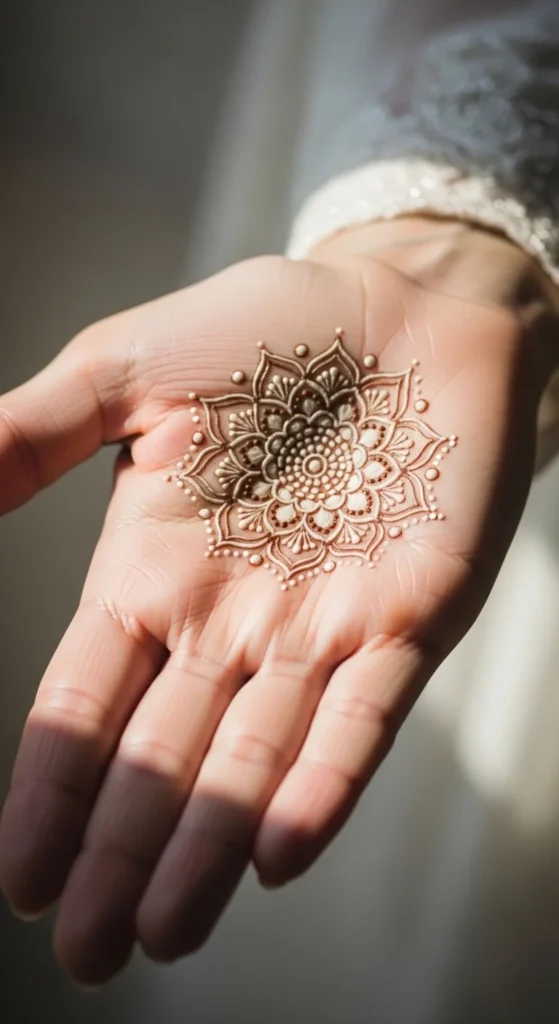
A single palm mandala gives instant bridal elegance while keeping the overall design light. Request a neat circle in the center with 2–3 layers of petals, then keep the edges airy with dots and tiny leaves instead of heavy fills. It photographs beautifully in ring shots and dua poses because the focus stays on the center. Budget tip: ask your artist to repeat the same mandala on both hands to save design planning time, and keep the outer details minimal so application stays quick. DIY idea: if you’re practicing at home, use a round object like a small lid to lightly guide your circle placement, then build petals slowly and keep your lines thin. Pair it with slim bangles or a single kada so the hand looks soft, not crowded.
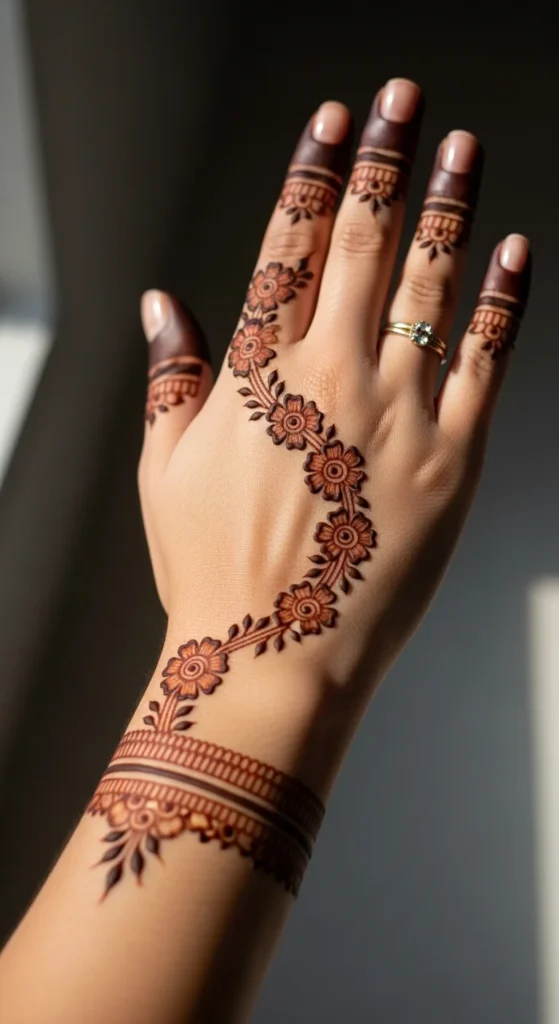
3) Half-Hand Floral Curve
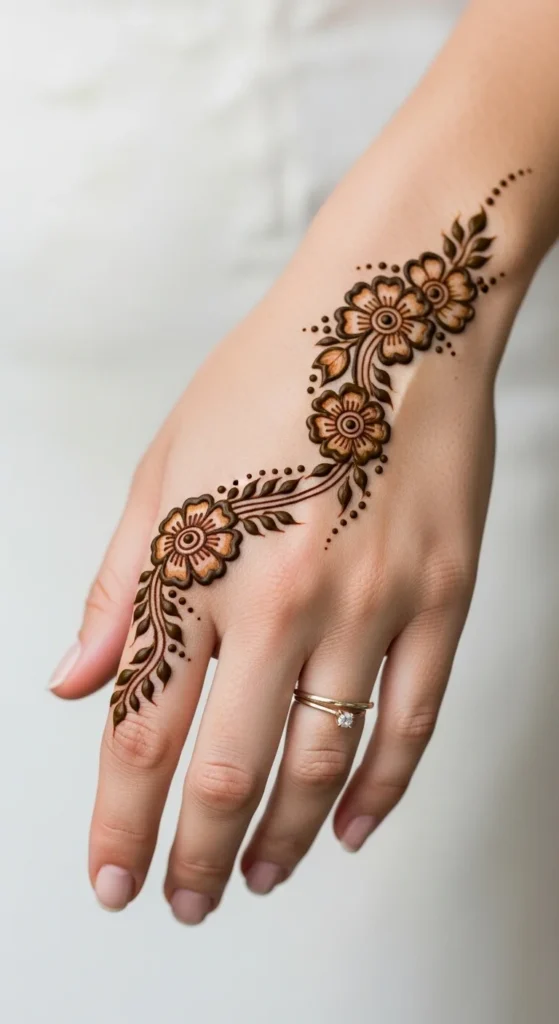
Half-hand florals give a graceful “designed” look while leaving plenty of bare skin for that clean bridal finish. Ask for one flowing flower trail that starts near the index finger and curves down toward the wrist, with two small blooms and light leaves. Keep the fill light so it stains evenly and doesn’t look patchy when it fades. Budget tip: this is a smart option if you’re paying per hand because it uses less coverage but still looks complete in photos. DIY idea: sketch the curve with a very thin line first, then place flowers along it like a necklace chain, and finish with tiny dots to soften any uneven spacing. This style looks amazing with a wristwatch-style bracelet or a thin pearl bracelet on the other hand for balance.
4) Ring Style Centerpiece
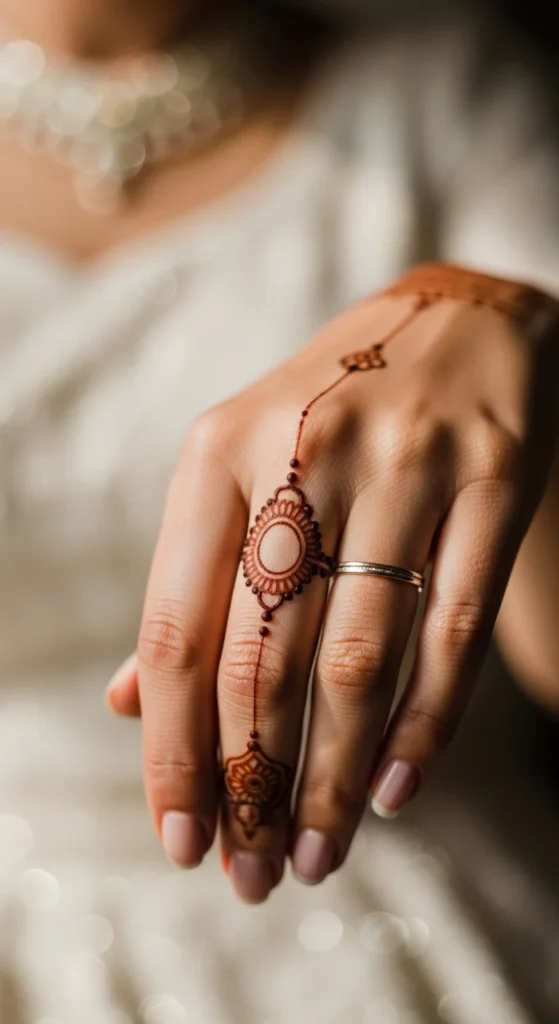
If you want something modern and bridal at the same time, a ring-style centerpiece is perfect. Ask for a delicate “mehndi ring” around the base of your ring finger, then connect it with a thin chain line to a tiny palm motif like a mini flower or small circle. It looks especially pretty in engagement-style photos because it frames your ring instead of hiding it. Budget tip: choose one hand for the ring motif and keep the other hand simpler with finger dots, so you get variety without paying for two detailed hands. DIY idea: practice the ring band first—make it thin, smooth, and even—then add tiny scallops or dots on the edges. If you’re wearing a big stone ring, keep the mehndi ring even lighter so both details don’t fight.
5) Bracelet Band Mehndi
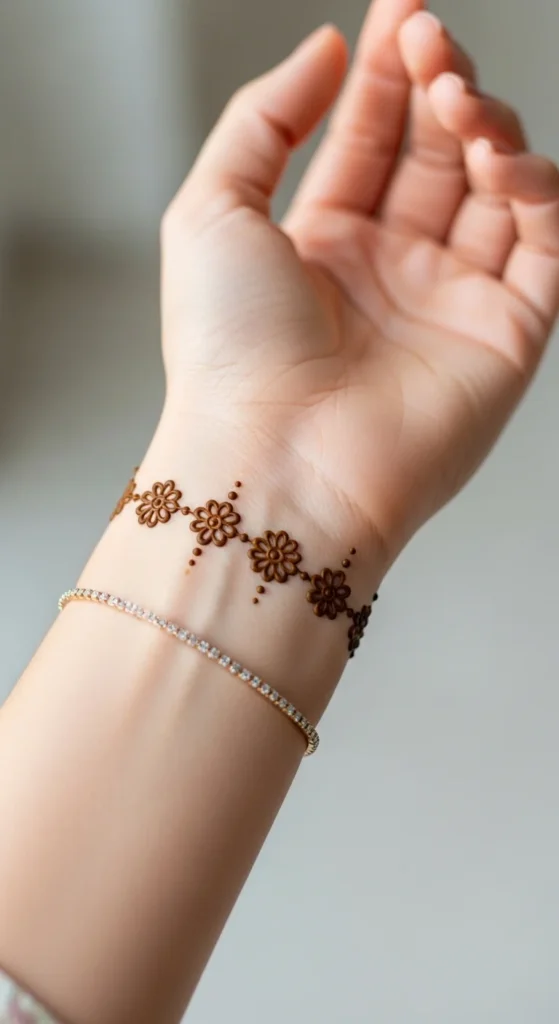
A bracelet band design gives that bridal feel without covering the whole hand. Ask for a neat band around the wrist, then add small linked flowers or leaf shapes like a chain, and keep the hand itself mostly bare with just a small finger detail. This works beautifully if your outfit sleeves are simple and you want the wrist area to look dressed up. Budget tip: this is often faster than full-hand work, so it can be more affordable, and it pairs well with real bangles so you can do less mehndi and still look complete. DIY idea: mark two faint guide lines around your wrist using a very light dot trail, then fill between them with tiny repeating shapes. If you’re wearing heavy bangles, place the band slightly above where the bangles sit so it still shows in photos.
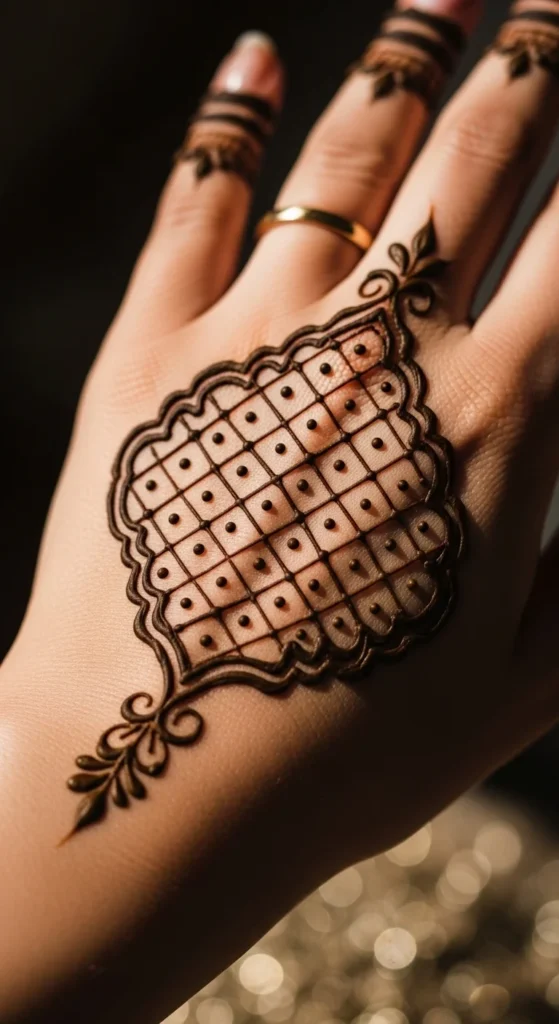
6) Bare Space Geometry
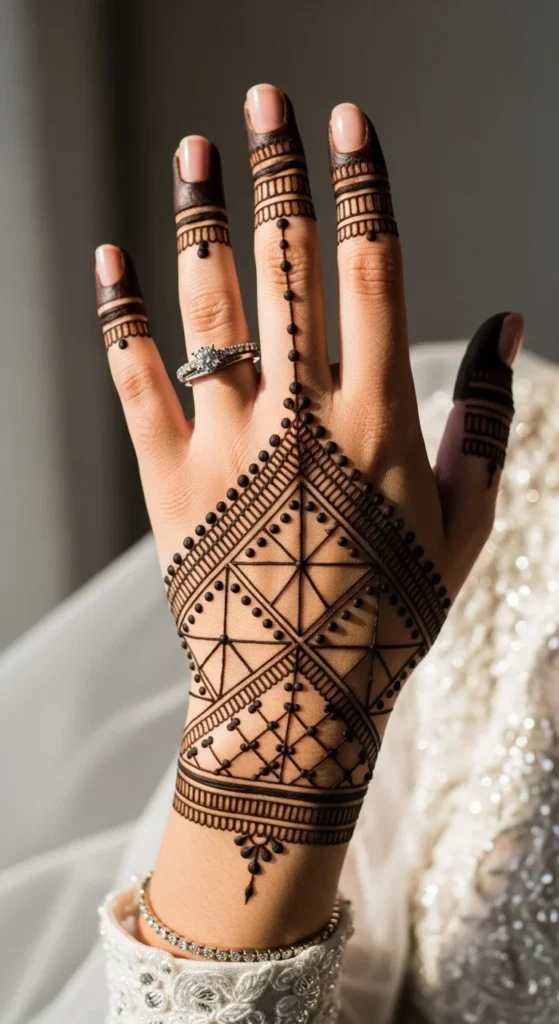
Negative space geometry looks clean, expensive, and very “put together,” even when the design is simple. Ask for thin geometric lines—small triangles, diamonds, or a light grid—then leave clear skin gaps so the design looks airy. This style suits minimalist brides and looks stunning with modern outfits, like straight-cut shararas or sleek maxi dresses. Budget tip: geometric lines are quick for an experienced artist, and you can keep it to the backhand only to reduce time. DIY idea: use a very steady grip and make the first few lines slow, because clean geometry depends on straightness; if you’re nervous, choose diamonds and dots instead of a full grid. Keep your jewelry simple—one statement ring or a thin bracelet—so the pattern stays the hero.
7) Vine to Wrist
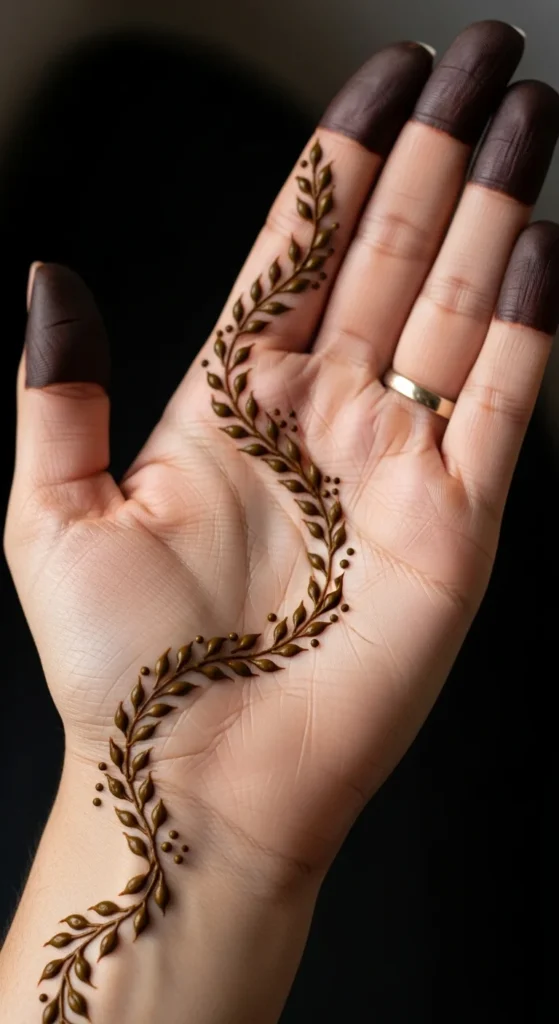
A single vine trailing to the wrist feels soft and traditional without being heavy. Ask for a thin leafy vine that starts near the thumb base and flows down to the wrist, with tiny buds and dot accents. It’s a great choice if you want something that looks pretty even when the stain lightens after a few days. Budget tip: one main vine is faster than full floral fills, and you can repeat the same vine on both hands for a matched look without extra planning. DIY idea: draw the vine line first, then add leaves in pairs, and finish with scattered dots to hide small wobbles. If your bangles are bold, keep the wrist end of the vine lighter so it doesn’t look crowded.
8) Tiny Paisley Cluster
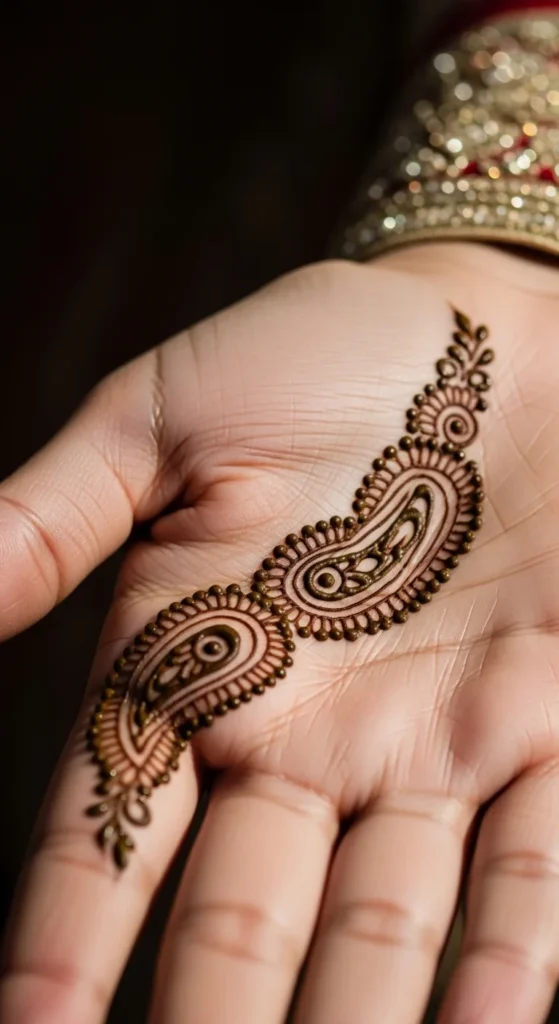
Tiny paisleys are a classic bridal motif, and a small cluster can look very elegant when done cleanly. Ask for 3–5 small paisleys grouped near the base of the fingers or along one side of the palm, then add a few dots and tiny leaves to soften the edges. This gives tradition without the heavy coverage. Budget tip: smaller motifs take less time and less product, and you can choose one “feature” area like the palm corner to keep the cost down. DIY idea: practice paisley shapes on paper until your curve feels smooth, then keep each paisley similar in size for a neat look. This style pairs nicely with a simple nail color like nude or soft pink because the design stays delicate.
9) Arabic Side Sweep
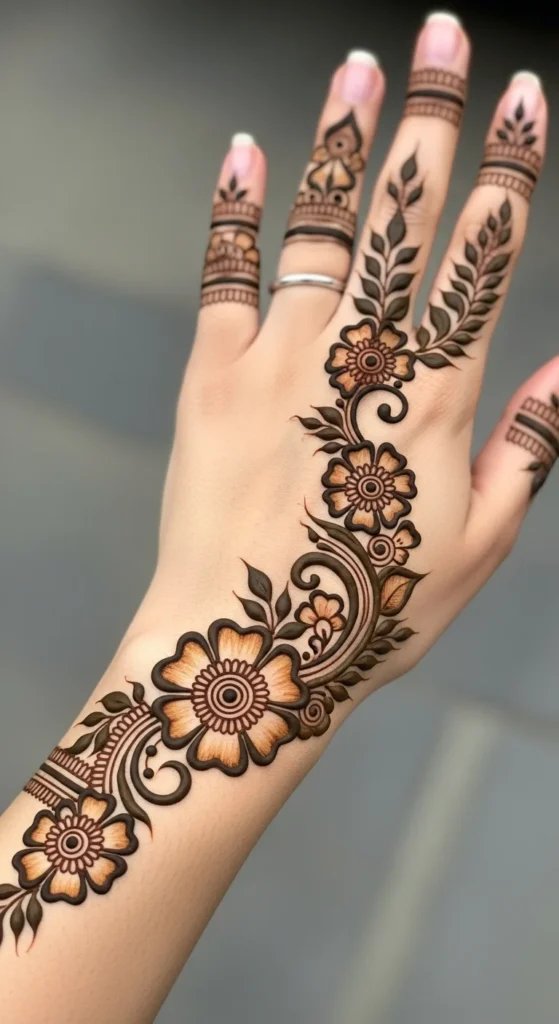
Arabic side-sweep designs are perfect when you want coverage that still feels light. Ask for a diagonal flow from the pinky side down toward the wrist, with spaced flowers and leaves, and keep the center of the hand more open. It looks flattering on almost every hand shape because it creates a long, slim line. Budget tip: this design can be done quickly if you keep the flowers larger and the fills light, which helps with both time and cost. DIY idea: choose two main flowers, place them first, then connect them with a thin leafy trail, and add dots at the end for a soft finish. If your outfit is heavily embroidered, keep your mehndi airy so your look stays balanced.
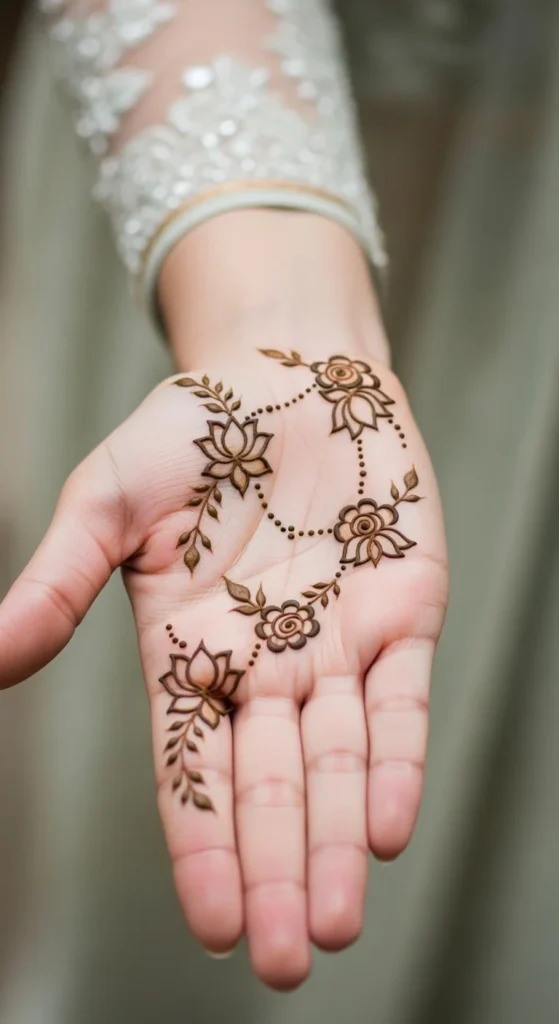
10) Lotus + Dots Minimal
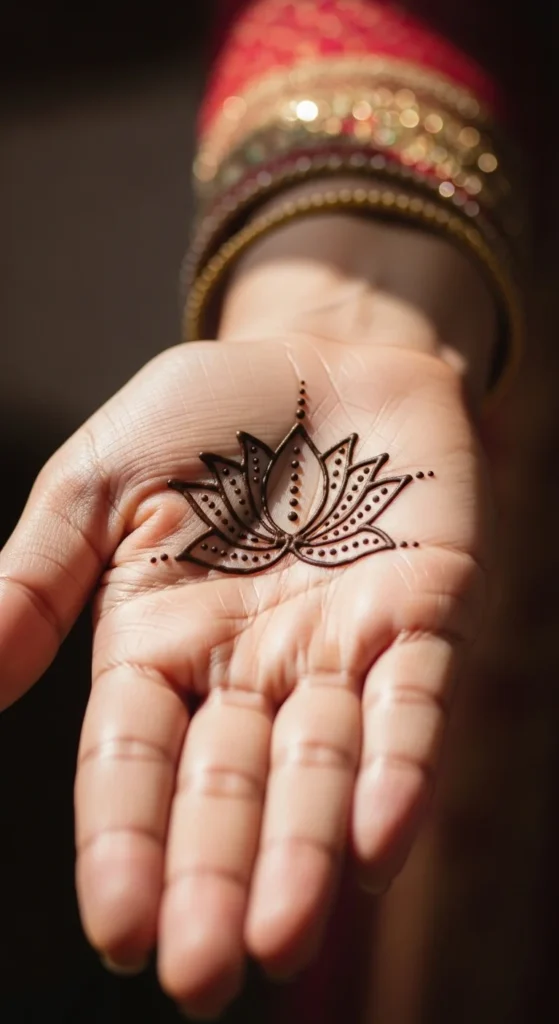
A lotus motif looks graceful and bridal, even when it’s small. Ask for a single lotus on the palm or backhand, outlined cleanly with very light shading, then surround it with dot clusters instead of dense fill. This is a beautiful choice for nikah or a smaller function when you want your hands to look dressed but not heavy. Budget tip: one clean lotus on each hand can cost less than complex patterns, and it stains evenly when the lines are not overloaded. DIY idea: start with the center petals, then build outward, keeping each petal similar in size; finish with dots to cover tiny uneven edges. Pair it with slim bangles or a single bracelet so the lotus stays the main detail.
11) Symmetry Palm Frame
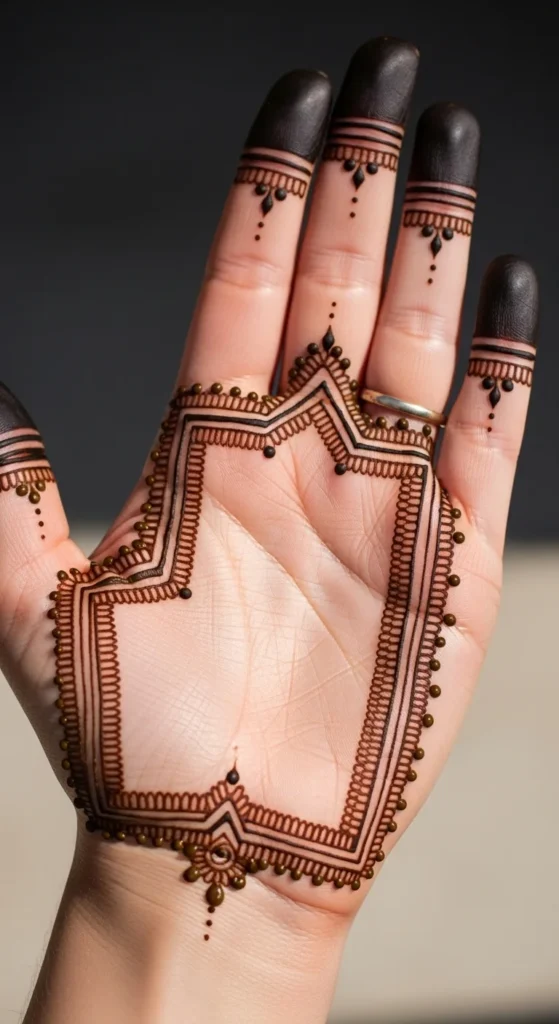
A palm frame design feels bridal because it looks intentional, but it also stays light because the center is mostly open. Ask for thin border lines along the palm edges with small scallops, dots, and tiny leaves, then keep the middle clean or add one tiny center dot cluster. This is perfect if you want your ring shots and hand photos to look neat and not too busy. Budget tip: framing takes less work than full fills, and it still looks complete in pictures. DIY idea: lightly plan the border path first, then repeat the same small shape pattern around the edges; if you mess up a spot, dot clusters are your best fix. This style looks great with darker nail polish too, because the open center keeps everything readable.
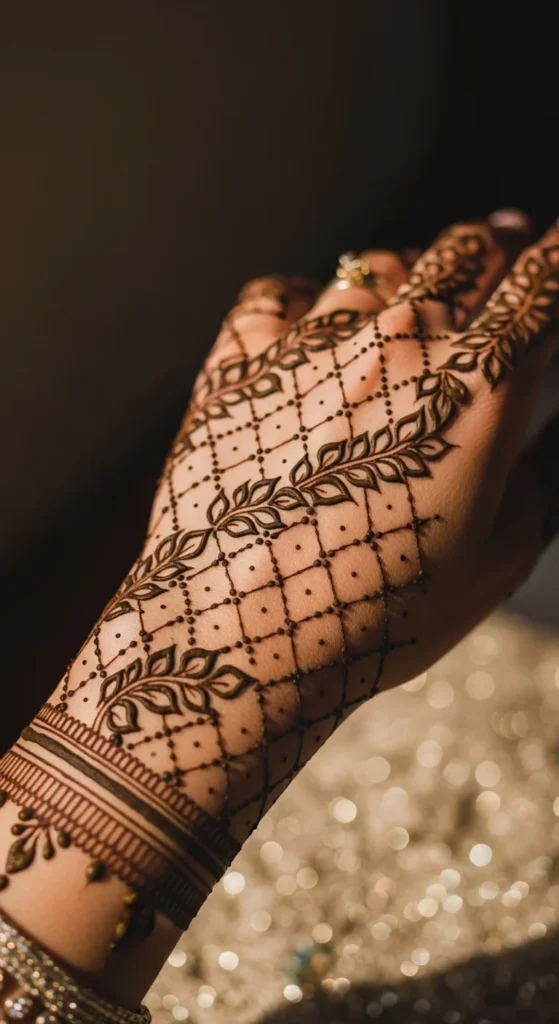
12) Light Jaal Net Accent
A light jaal gives a traditional look without full coverage, as long as it’s kept airy. Ask for a thin net pattern across the backhand, with tiny dots where lines meet, and place one small flower at a corner for softness. The key is keeping the net spacing slightly wide so it doesn’t turn into a dark block after staining. Budget tip: a small jaal panel is faster than full-hand detail work, and it can look very bridal if paired with bangles. DIY idea: draw a few diagonal lines first, then cross them gently, and add dots at each intersection to hide small line wobbles. Keep your jewelry light so the net pattern remains visible in photos.
13) Mehndi French Tips
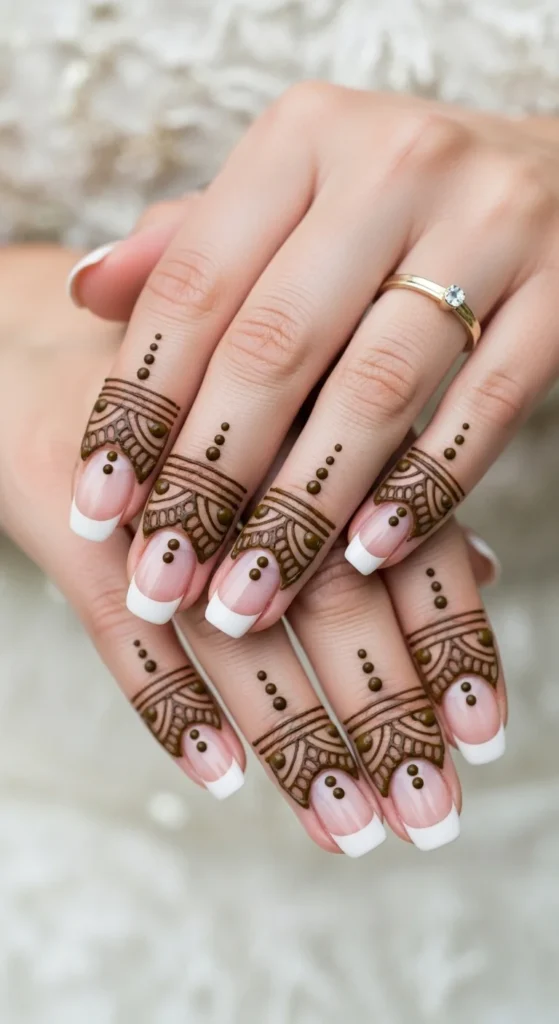
Mehndi French tips are a fun option for brides who want something different but still elegant. Ask for thin scallops, tiny dots, or small leaf shapes right on the fingertip edges, like a delicate nail border, then keep the rest of the hand simple with a tiny palm dot or small motif. This looks extra cute in close-up shots of rings and flowers. Budget tip: fingertip work is quick, so you can do it even if you’re short on time or money. DIY idea: steady your hand on a table, apply tiny dots first, then connect them into small scallops; keep it light so it stains cleanly and doesn’t smudge. Pair it with a soft nude manicure so the fingertip detail pops without looking loud.
14) Backhand Mini Mandala
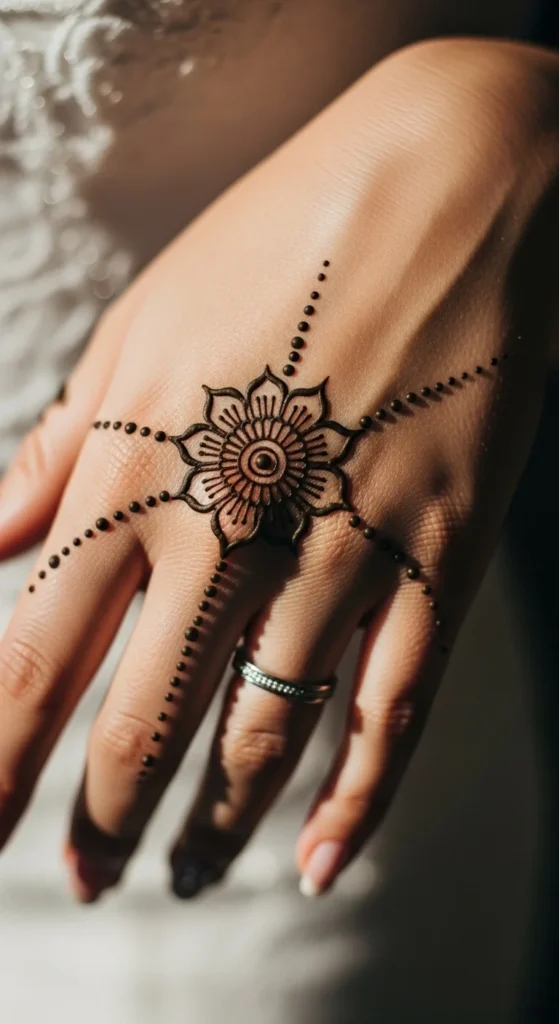
A mini mandala on the backhand is one of the most photo-friendly simple bridal designs. Ask for a small mandala in the center of the hand, then add thin dotted trails toward the fingers, leaving plenty of skin visible. It looks tidy, modern, and still bridal. Budget tip: this is usually faster than full backhand florals, and you can keep the second hand even simpler for a balanced pair. DIY idea: start with a small circle, build petals slowly, then add dots in a fading pattern so the design looks soft, not heavy. If you’re wearing a hand chain (hathphool), keep the mandala slightly smaller so both details fit nicely.
15) One-Line Floral Spine
A one-line floral spine is perfect if you want a sleek, graceful design that makes the hand look longer. Ask for a thin line starting near the middle finger base going down to the wrist, with tiny flowers placed along it, and keep the sides mostly bare. This style looks very neat from a distance and still holds detail in close-ups. Budget tip: a single spine line takes less time than wider patterns, and it’s easy to repeat on both hands. DIY idea: place the line first, then add small flowers like beads on a string, and finish with leaf pairs; dot clusters help if any spacing looks uneven. It pairs beautifully with slim bangles and a simple ring set.
16) Anklet Mehndi for Feet
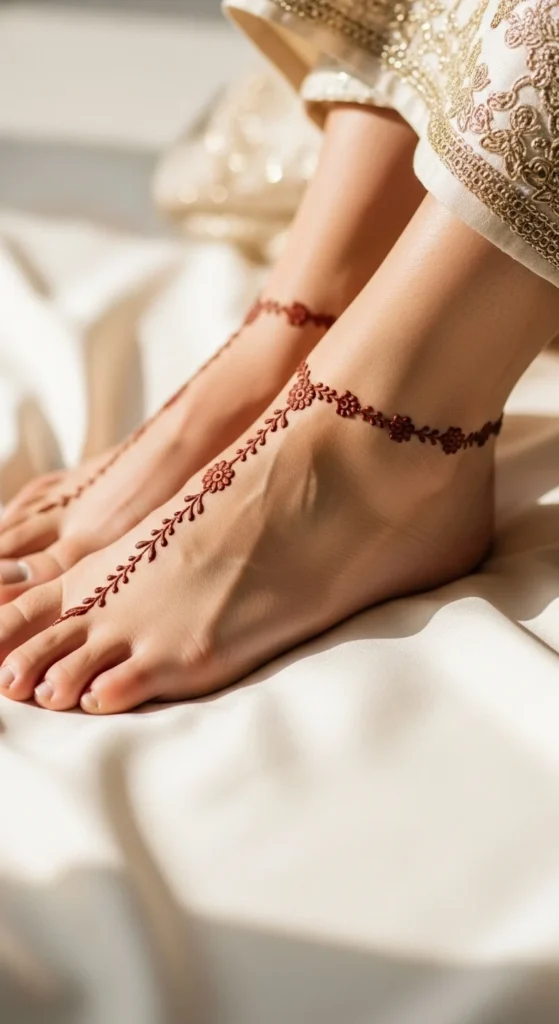
If you want your feet to look bridal without heavy fills, an anklet design is a great pick. Ask for a thin band around the ankle with small linked flowers and dots, and keep the top of the foot mostly clear with just a tiny motif near the toes. It looks pretty in sandal shots and works well for brides who want comfort. Budget tip: ankle bands are quicker than full feet coverage, and they still look “done” in photos. DIY idea: use two guide lines around the ankle, then fill with repeating small shapes; keep the dots small so it stains evenly and doesn’t blur. This style goes well with simple khussas or strappy heels.
17) Toe Cap Details
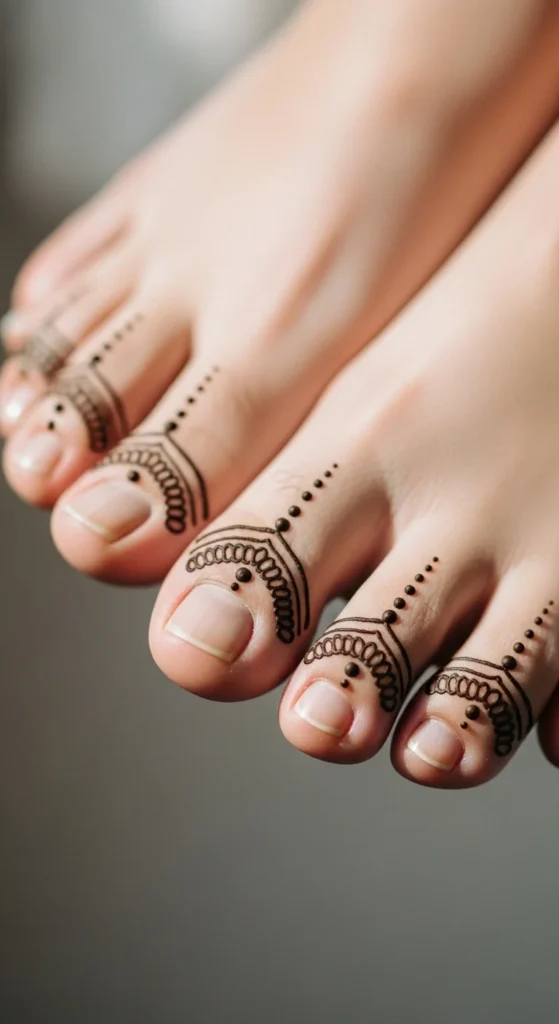
Toe cap details are tiny but very bridal when you’re wearing open shoes. Ask for small scallops, dots, or mini leaves on the toe tips, and add one thin line along the top of the foot if you want a bit more structure. This keeps the look clean and still photo-friendly. Budget tip: toe details are fast, so you can add them even if you’re doing mehndi late or you’re keeping the package small. DIY idea: do dots first on each toe, then connect with tiny curves; keep it symmetrical so it looks neat. Pair it with a simple pedicure color like nude, dusty pink, or soft peach for a calm finish.
18) Hidden Initial Detail
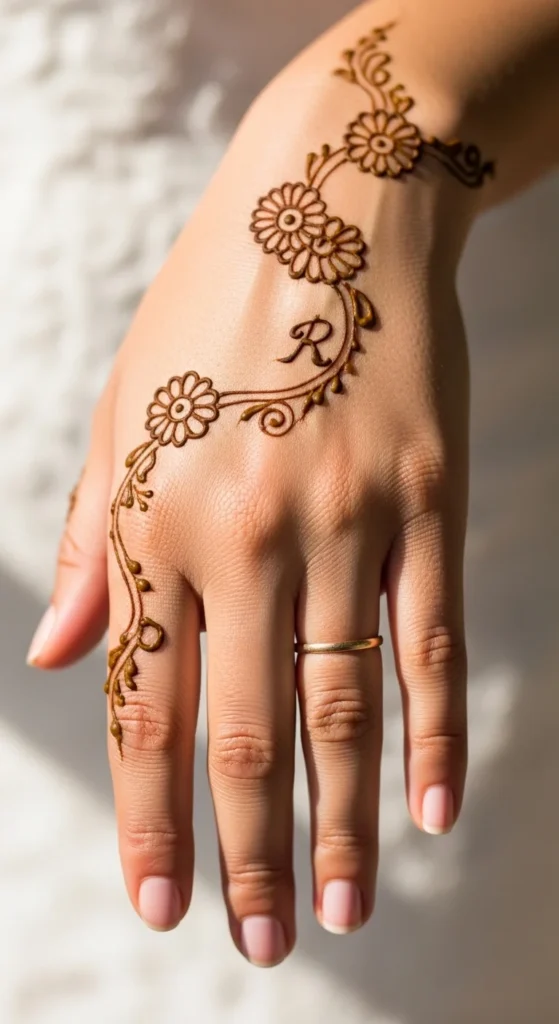
A hidden initial is a sweet bridal detail that doesn’t make the design heavy. Ask your artist to hide one letter inside a small floral loop or leaf cluster, then keep the rest of the hand simple with a small mandala or finger dots. It becomes a cute little “find it” moment for photos and family. Budget tip: adding one small hidden letter doesn’t add much time, and it makes a simple design feel personal. DIY idea: keep the letter tiny and rounded so it blends into the pattern; place it near the wrist or palm corner so it won’t look too obvious. If you don’t want letters at all, you can still do a “secret symbol” like a tiny heart petal shape inside a flower.
19) Mughal Arch Motif
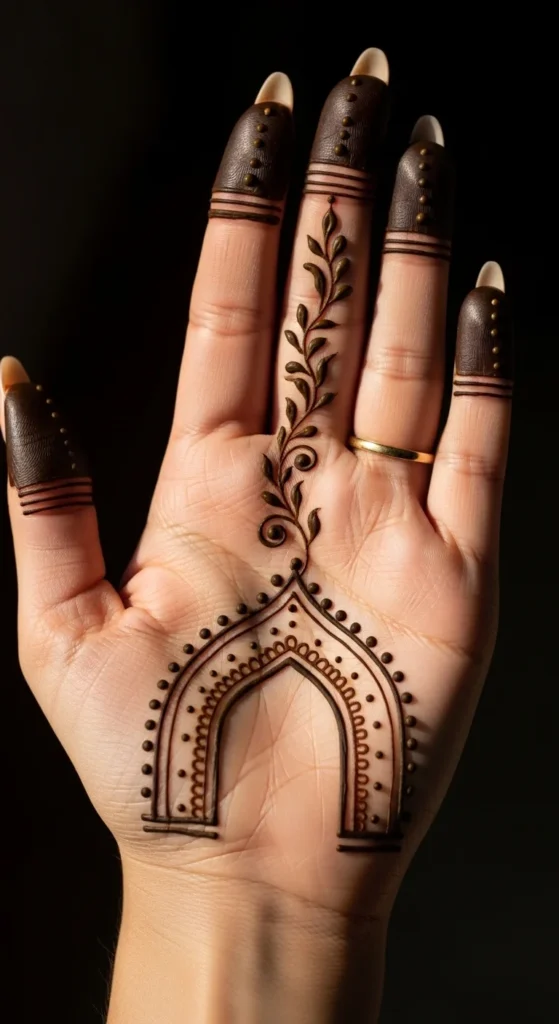
A Mughal arch motif looks classy and traditional without full coverage. Ask for one neat arch shape near the base of the palm, then add tiny floral dots inside the arch, and keep the rest of the palm light with a few leaves or dots. It pairs beautifully with traditional bridal outfits, especially if your dress has similar architectural embroidery. Budget tip: one statement motif is cheaper than filling the whole palm, and it still looks bridal. DIY idea: outline the arch first, then add small repeating dots or tiny petals inside; keep your lines thin so the stain stays clean. This style looks great with a single bold bangle set because the motif sits neatly above it.
20) Rose Wrist Cuff
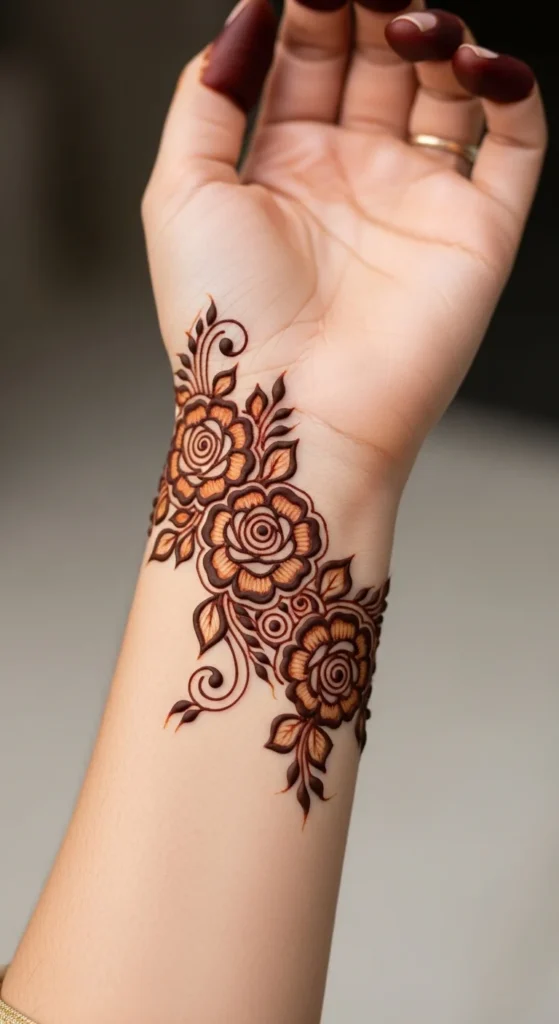
A rose wrist cuff is like wearing a floral bracelet made of mehndi. Ask for two small roses near the wrist, connected with thin leaves around the sides, and keep the hand mostly open. It’s romantic, soft, and easy to match with floral jewelry. Budget tip: cuff designs focus work in one area, so they can cost less than full-hand patterns while still looking special. DIY idea: draw the rose centers first, then add petals slowly; if petals get uneven, use dot clusters and small leaves to smooth the edges. Pair it with thin bangles or a single bracelet so the cuff detail stays visible.
21) Diagonal Leaf Lattice
A diagonal leaf lattice gives structure while staying light and bridal. Ask for diagonal lines across the backhand, then fill the gaps with small leaf pairs instead of heavy shading, and finish with dots at intersections. The diagonal flow makes the hand look longer and slimmer in photos. Budget tip: this is faster than dense florals because the shapes repeat, and you can keep it to one hand if you’re watching cost. DIY idea: space your lines evenly, then add leaves in a simple repeat pattern; keep the leaves small and consistent so it looks neat. It looks especially nice with straight bangles and a clean manicure.
22) Simple Peacock Feather Hint
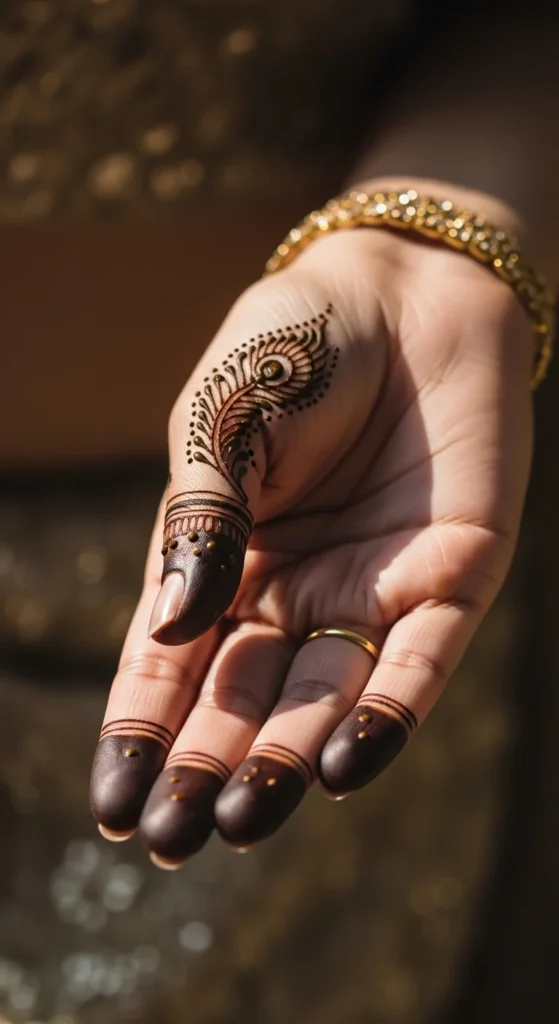
If you love the peacock look but don’t want a heavy design, ask for just a feather hint. One small feather shape near the thumb side with thin lines and a few dots can look very bridal, especially when paired with simple finger trails. It adds a traditional touch without covering the whole hand. Budget tip: one motif is quick, and it gives variety without extra time. DIY idea: keep the feather outline light, then add tiny line strokes inside; finish with dots to make it look soft and clean. Pair it with simple jewelry so the feather detail stays readable.
23) Negative Space Heart Petals
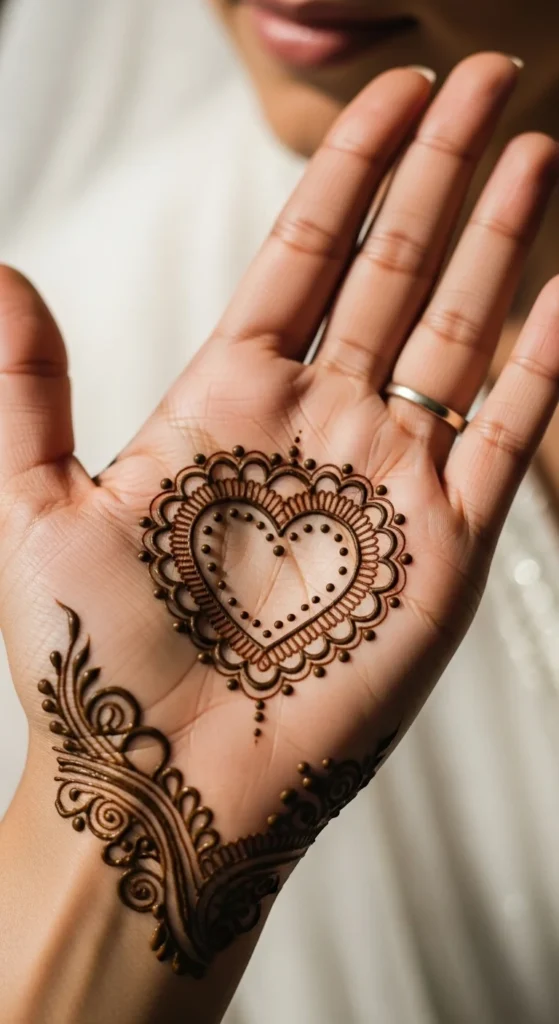
Negative space heart petals are a sweet bridal idea that still feels elegant when kept subtle. Ask your artist to form a heart using petal outlines, then leave the center clear and decorate the edges with tiny dots. Keep the rest of the hand minimal with finger dots or a tiny wrist trail. Budget tip: this is quick to do because it relies on outline work, and it looks very cute in close-up photos. DIY idea: lightly plan the heart shape first with small dots, then draw petals around it; if the heart looks uneven, add extra dots to balance both sides. Choose a soft nail color so the heart detail doesn’t look too bold.
24) Minimal Full Palm Fill Light Shade
If you want full palm coverage but still want it to look simple, go for light shade and open spacing. Ask for bigger floral shapes with thin outlines, small shaded sections only inside petals, and clear gaps between motifs so the palm doesn’t look dark. This is a smart option if you want a more traditional bridal feel but still want comfort while sitting. Budget tip: request fewer micro-details and more clean outlines; it saves time and often reduces cost. DIY idea: keep your cone pressure light, outline shapes first, then add small shading last; avoid filling large areas because that can smudge. This style pairs well with heavier bangles because the palm has enough pattern to stand out.
Conclusion
Simple bridal mehndi can look just as bridal when the placement is clean, the lines are thin, and the design matches your jewelry and outfit. Pick one “main feature” style for your favorite hand, keep the other hand lighter, and choose motifs that will still look pretty as the stain softens over the next few days. Save your reference photo, show it to your artist, and ask for the same line thickness and spacing so your final look stays graceful from every angle.

Lily Summers is a digital artist and creative storyteller who loves bringing colorful characters to life. With a passion for cartoons, fan art, and playful sketches, she inspires others to explore their imagination through art. When she’s not sketching, you’ll find her dreaming up new ideas for CraftedWizard.com to spark creativity in every artist. 🌈✨